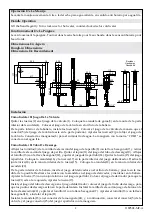
Installation
How to Install the Valve Kit
Remove the nuts(2) from the valve kit(1). Put the rubber washer(3) into the groove on the bottom of the
escutcheon(4). Fit the valve kit to the hole of the bath tub.
From underside of the bath tub, install the nuts(2). Position the valve kit so that the connector (5) of the
valve kit is on the back. Tighten the nuts(2) to secure the valve kit.
Attach the hoses(6) to water supplies. The hose with “COLD” mark connects to cold water.
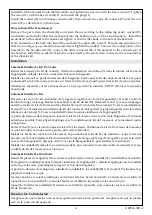
How to Install the Spout
Loosen the screws(9) of the lift rod knob kit(8) with the hex wrench(7), and remove the lift rod knob kit.
Remove the plug(11) from the spout kit(10). Loosen the screw(13) with the hex wrench(12), and remove
the diverter kit(14). Remove the nut(15) from the diverter kit. Put the washer(16) and the nut(17) to the
lower location of the diverter kit. Slide the o-ring(18) into the bottom groove of the nut(15). Put the wash-
er(19) into the bottom groove of the escutcheon(20).
From underside of the bath tub, insert the diverter kit into the hole of bath tub and put it in as much
as possible. Slide the escutcheon with the washer onto the diverter kit, and keep it against the bath tub.
Tighten the nut(15) with o-ring onto the diverter kit. Position the diverter kit so that the nut(21) is on the
left, tighten the nut(17).
Install the spout kit onto the diverter kit, positioning the spout kit so that the spout points to the front.
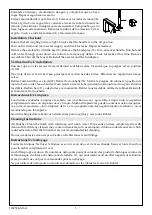
Cómo Instalar La Ducha De Mano
Quite las piezas del vástago(26) y según el siguiente orden: arandela(27), arandela(28) y la tuerca(29). De-
slice la arandela(30) en la ranura
inferior del escudete(31), instalar el escudete con la arandela de la cánula y, a continuación, apretarla, y a
continuación colocar la cánula en el orificio de la bañera.
Desde la parte inferior de la bañera, instalar la arandela(27), la arandela(28) y la tuerca(29). Colocar el es-
cudete para que los bordes de los dos arcos son simétricos hacia arriba y hacia abajo. Apretar la tuerca( 29).
Conectar el conector(A) de la manguera(32) en la ducha de mano(33); conecte el otro conector(B) de la
manguera(32) en el conector(C) de la manguera(34). Instalar las arandelas(35) en el conector(D) de la
manguera(34), y, a continuación, conectar el conector(36) aljuegodel derivador.
C
35
34
D
27
26
29
28
30
31
32
B
A
33
34
18
20
13
14
16
11
8 9
10
7
21
23
22
17
19
15
12
24
25
36
3
2
5
1
4
6
2
1180594-M2-A
3


