background image

10

TT-1686 3/16

18. Connect P24 of the conversion kit harness

GM71472 to the contactor harness, which was

disconnected from the S340 controller in step 10.

See Figure 10 and Figure 17.

19. Connect P1 of the conversion kit harness to P1 of

the Decision-Maker

r

MPAC 1500 controller. See

Figure 18.

GM71472

Figure 17

Conversion Kit Harness

1

tp6883

1. Conversion kit harness connection

Figure 18

Connection to Decision-Maker

r

MPAC

1500 Controller

Summary of Contents for GLS-1

Page 1: ...ter kit installation Keep this document with the transfer switch documentation for future reference GM99332 2 1 Decision Makerr MPAC 1500 controller assembly 2 Optional accessory module assembly not provided with controller conversion kit 1 Figure 1 Decision Makerr MPAC 1500 Controller Conversion Kit Installed TT1686 Decision Makerr MPAC 1500 S340 Figure 2 Controller Identification Tools Required ...

Page 2: ...Makerr MPAC 1500 controller Separate time delay override switches are not required See Figure 4 for accessory information S340 Decision Makerr MPAC 1500 Time Delays Integrated Test Switch Integrated Override Switches Integrated Current Meter amps Current sensing kit required see Figure 3 Plant Exerciser Integrated Voltage Frequency Meters Integrated Load Shed Contact Integrated load control functi...

Page 3: ...l K automatic transfer switch KN Model KN non automatic transfer switch KB Model KB bypass and isolation transfer switch Electrical Controls Logic Controller 1 S340 controls standard transition Number of Poles and Phases 2 2 pole 1 phase 3 3 pole 3 phase 4 3 pole 1 phase 5 3 pole 3 phase with overlapping neutral contacts Number of Wires 3 3 Wire 4 4 Wire Enclosure 0 Open unit 1 NEMA type 1 2 NEMA ...

Page 4: ...losure 1 Remove all jewelry 2 Stand on a dry approved electrically insulated mat 3 Test circuits with a voltmeter to verify that they are deenergized Servicing the transfer switch Hazardous voltage can cause severe injury or death Deenergize all power sources before servicing Turn off the main circuit breakers of all transfer switch power sources and disable all generator sets as follows 1 Move al...

Page 5: ...gure 8 7 Disconnect and remove any other optional switches See Figure 9 8 If the transfer switch is equipped with meters disconnect and remove all meters See Figure 9 Separate meters are not required with the MPAC 1500 controller Voltage frequency and current amps are shown on the controller display Note For current monitoring and display a current sensing kit is required See Figure 3 9 Disconnect...

Page 6: ...ler and the inner panel from the enclosure door 12 Modify the existing enclosure door as described below a Remove the door from the enclosure Place the door on a bench or other work surface b Use new mounting plate GM77130 as a template to mark the opening for the Decision Makerr MPAC 1500 controller onto the inside of the enclosure door See Figure 11 c Remove the mounting plate and cut out the op...

Page 7: ...TT 1686 3 16 7 Figure 11 Conversion Kit Assembly ...

Page 8: ...late as shown in Figure 11 and Figure 12 1 GM99332 1 Switch cover plate mounting hardware Figure 12 Switch Cover Plate GM77247 Note The illustrations in the following steps may not show the latest controller design See Figure 13 for the updated current sensing kit terminal block harness connection and programmed transition interface board connection 1 Current sensing terminal block with insulation...

Page 9: ... panel to the ground lug on the door Using lock washer X 22 12 connect the ground wires to the ground stud on the door Place the grounding wires between the washer and the nut Note This photo does not show the latest controller design See Figure 13 Figure 15 Ground Lead Connections 17 With the surfaces clean and dry affix conversion kit decals GM77248 and GM77249 over the old decals on the outside...

Page 10: ...from the S340 controller in step 10 See Figure 10 and Figure 17 19 Connect P1 of the conversion kit harness to P1 of the Decision Makerr MPAC 1500 controller See Figure 18 GM71472 Figure 17 Conversion Kit Harness 1 tp6883 1 Conversion kit harness connection Figure 18 Connection to Decision Makerr MPAC 1500 Controller ...

Page 11: ... NOTES HI SIDE OF CT S MUST ALWAYS FACE TOWARD THE CONTACTOR Route CT harness neatly to controller with controller contactor harness Use cable ties as necessary See wiring diagram GM47803 Figure 20 Decision Makerr 1500 Controller GM89029 FROM BOTTOM SIDE OF TERMINAL BLOCK TO PCB CONNECTOR X 6126 27 GM21583 2 GM47797 INSULATION SHOWN PHANTOMED ASSEMBLE UNDER SCREWS HOLDING BRASS STRIP TO TERMINAL B...

Page 12: ...12 TT 1686 3 16 Figure 20 Current Sensing Kit Wiring Diagram GM47803 ...

Page 13: ...or set master switch is in the OFF position 28 Reconnect the generator set engine starting battery negative lead last 29 Reconnect power to the battery charger if equipped 30 On the Decision Makerr MPAC 1500 controller program the system parameters shown in Figure 23 Refer to the transfer switch nameplate for the ATS ratings Also check time delays and and other settings that affect the ATS operati...

Page 14: ...0 1 Plate Cover Switch GM77247 1 Decal ATS S340 to MPAC1500 Conversion GM77248 1 Decal ATS S340 to MPAC1500 Conversion GM77249 1 MPAC 1500 Assembly GM85884 1 1 Lead LK 1212 1515 1 O M MPAC 1500 Controls ATS TP 6883 1 Installation Instructions TT 1686 1 Washer lock 262 ID x 743 in OD X 22 12 10 Cable tie X 468 1 2 Cable tie nylon X 468 3 14 Nut flange spiralock 1 4 20 X 6210 2 9 Nut flange whiz 8 3...

Page 15: ...1 1 1 Transformer Current GM47788 3 2 Transformer Current GM47789 3 2 Transformer Current GM47790 3 3 Transformer Current GM47791 3 2 Transformer Current GM47792 3 Transformer Current GM47793 3 Insulation Terminal Block GM47797 1 1 1 1 1 1 1 1 1 1 Bracket CT Mounting GM47800 1 Diagram Wiring CT MPAC 1500 GM47803 1 1 1 1 1 1 1 1 1 1 Drawing Assembly Current Sensing GM89028 1 1 1 1 1 1 1 1 1 1 Harne...

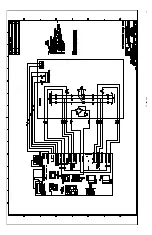
Page 16: ... this document Refer to the original documentation provided with the transfer switch for S340 drawings if necessary ATS Model Poles Amps S340 Drawing Numbers for reference only MPAC 1500 Conversion Drawings Schematic Wiring Diagram Schematic Wiring Diagram GTS 1 2 40 200 362114 362109 GM99391 GM99393 3 4 GLS 1 2 40 200 362172 362164 GM100332 GM99392 Sheet 1 3 4 2 225 400 362172 362164 GM100332 GM9...

Page 17: ...TT 1686 3 16 17 ...

Page 18: ...TT 1686 3 16 18 ...

Page 19: ...TT 1686 3 16 19 ...

Page 20: ...TT 1686 3 16 20 ...

Page 21: ...TT 1686 3 16 21 ...

Page 22: ...TT 1686 3 16 22 ...

Page 23: ...TT 1686 3 16 23 ...

Page 24: ...TT 1686 3 16 24 ...

Page 25: ...TT 1686 3 16 25 ...

Page 26: ...TT 1686 3 16 26 ...

Page 27: ...TT 1686 3 16 27 ...

Page 28: ...TT 1686 3 16 28 ...

Page 29: ...TT 1686 3 16 29 ...

Page 30: ...TT 1686 3 16 30 ...

Page 31: ...TT 1686 3 16 31 ...

Page 32: ...TT 1686 3 16 32 ...

Reviews: