background image

10

Ensure the screen doesn’t touch the aluminium plate.

ASSEMBLY

 (cont’d)

Step 7

Summary of Contents for KALKTVSTNDA

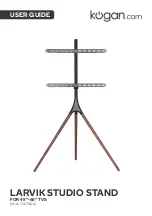
Page 1: ...USER GUIDE LARVIK STUDIO STAND FOR 45 65 TVS KALKTVSTNDA ...

Page 2: ......

Page 3: ...structions are read and completely understood before attempting installation If you are unsure of any part of this installation please contact help kogan com or a professional installer The wall or mounting surface must be capable of supporting the combined weight of the mount and the display otherwise the structure must be reinforced It is highly recommended to install with the wall anchoring kit...

Page 4: ...COMPONENTS ...

Page 5: ...fers depending on the floor surface Maximum load for glossy floors such as hardwood 25kg Maximum load for normal floors such as concrete 32kg Step 1 Step 2 Recommended 50 150mm Note Please secure the locking collar before attaching the TV screen ...

Page 6: ...6 ASSEMBLY cont d Step 3 Step 4 ...

Page 7: ...7 Step 4 continued NOTE Ensure the cable clips G are attached to the upper bracket throughout step 4 ...

Page 8: ...8 ASSEMBLY cont d Step 4 continued ...

Page 9: ...9 Step 5 Step 6 ...

Page 10: ...10 Ensure the screen doesn t touch the aluminium plate ASSEMBLY cont d Step 7 ...

Page 11: ...h this product Regularly check that anchors are securely maintained Stability of tall items may be affected by floor surface Caution For your safety when installing the anchor fixings please note Check any electrical wires or plumbing inside the wall before drilling any holes if you are unsure please seek professional advice from a qualified tradesperson ...

Page 12: ...12 DIMENSIONS Note Design and specifications are subject to change without notice ...

Page 13: ...13 NOTES ...

Page 14: ...tion We hope that this user guide has given you the assistance needed for a simple set up For the most up to date guide for your product as well as any additional assistance you may require head online to help kogan com ...

Reviews: