


First Time Setup
Press / to select First Time Setup, then press
▲ ▼
ENTER
to enter.
OAD
Press / to select OAD, then press
▲ ▼
ENTER
to enter sub-menu.
Reset
Press / to select Reset, then press
▲ ▼
ENTER
to enter sub-menu.
USB Operation
Note: Before operating the
USB
menu, plug in a USB device, then press the
INPUT
button to set the Input Source to
USB
.
Press / to select USB in the Source menu, then press
◀ ▶
ENTER
to enter.
Press / to select the option you want to adjust in the main USB menu, then
◀ ▶
press
ENTER
to enter.
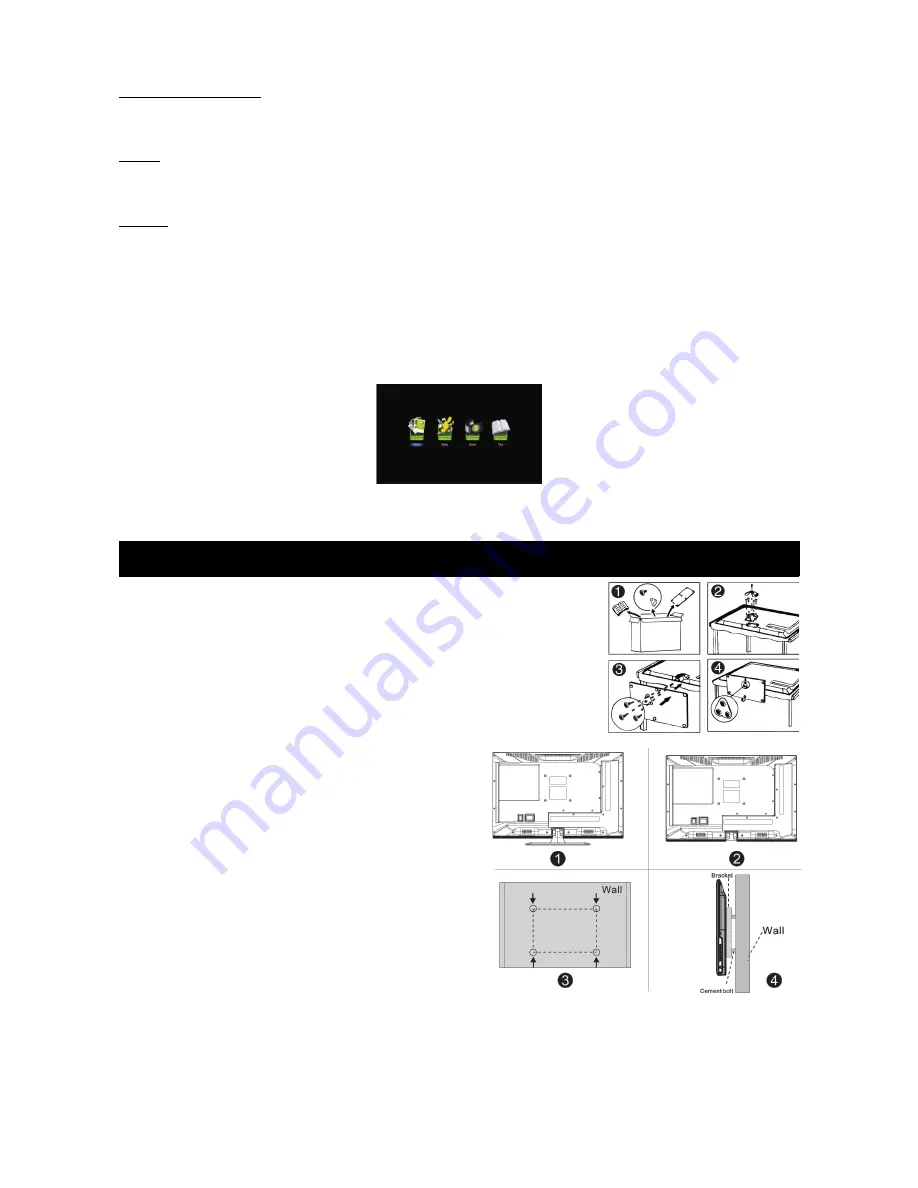
Setting Up TV Stand or Mount
TV Stand Installation
1.
Open the carton and remove the TV and all accessories.
2.
Place the TV on a table covered with towels or other soft
protective layers with the screen facing downwards. Take
care to keep the screen safe from being scratched.
3.
Screw the base to the TV as shown in the image.
4.
Installation is complete.
Mounting the TV to the wall
1.
Place the TV on a table covered with towels or other soft
protective layers with the screen facing downwards.
Take care to keep the screen safe from being scratched.
2.
Use a screwdriver to remove screws from the bottom
stand (as shown in picture 1), then remove the stand.
3.
Using the measurements between the screw holes (as
shown in picture 2), mark out the bracket points on the
wall (as shown in picture 3).
4.
Mount the TV mount to the wall as instructed in the
manual for the wall mount.
5.
Use the screwdriver to lock the screws onto the back of
the TV, so it can then be mounted (as shown in picture
4).
Note
•
The bracket and wall mounting equipment is not supplied with the TV.
•
When mounting the TV, we recommend you have it installed and mounted by a professional, as incorrect
installation may result in the mount coming away from the wall, causing structural damage to your room and
damage to the TV itself.
•
Images shown above are for reference only.
16


