background image

14 


Type 

Example 

Description 

How to use it 


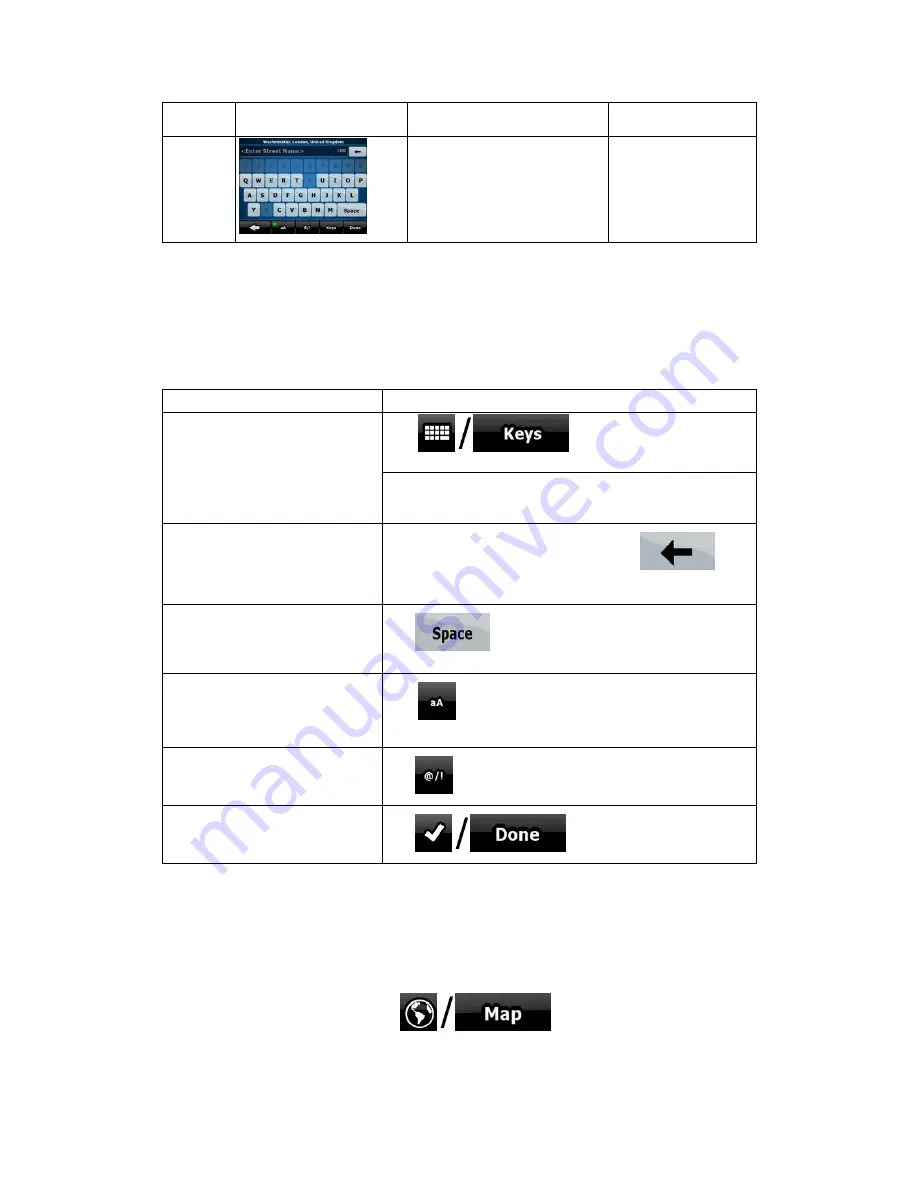
2.3.1 Using keyboards 

You only need to enter letters or numbers in Nav N Go iGO 8 when you cannot avoid it. You 
can type with your fingertips on the full-screen keyboards and you can switch between 
various keyboard layouts, for example ABC, QWERTY, or numerical. 

Task 

Details 

Tap 

, and select from the list of 

available keyboard types. 

Switching to another keyboard 
layout, for example from a Latin 
QWERTY keyboard to a Greek 
keyboard 

Nav N Go iGO 8 remembers your last keyboard choice 
and offers it the next time you need to enter data. 

Correcting your entry on the 
keyboard 

Remove the unneeded character(s): tap 

Tap and hold the button to delete the entire input string. 

Entering a space, for example 
between a first name and a family 
name or in multi-word street 
names 

Tap 

Entering small or capital letters 

Tap 

 to cycle through entering lower case letters, 

capital initials or all capitals. 

Entering symbols 

Tap 

 to switch to a keyboard of symbol characters. 

Finalising the keyboard entry 

Tap 

2.4 Using the map 

The map screen is the most frequently used screen of Nav N Go iGO 8. It can be accessed 

from the Navigation menu by tapping 

Summary of Contents for EziNAV G3

Page 1: ...EziNav G3 User Manual 4 3 Touchscreen GPS with Bluetooth ...

Page 2: ...l The following are major sections of this user manual Table of Contents Chapter 1 Introducing the EziNav G3 Product Features Safety Precautions What s in the Box Chapter 2 Basic Operations Overview of the Device Turning the Device On and Off Charging the Device Connecting the Device to your Computer Chapter 3 Menu Operations Overview GPS Music Video Photo Ebook Flash Bluetooth Games Tools Setting...

Page 3: ...36 colours 480 x 272 resolution 64MB NAND flash on board 64MB SDRAM Built in GPS module 20 channel SiRF Star III chipset very precise Built in Bluetooth 2 5mm Headphone Jack 2 5mm AV Jack Music Player mp3 wma wav Video Player divx avi wmv mpeg asf flv Photo Browser jpg bmp eBook Viewer txt SD MMC slot up to 2GB Rechargeable Lithium Ion 1600mAh Up to 3 hours life Weight 236 grams Size 122 x 81 x 16...

Page 4: ...ay be damaged Please ensure you have a backup of all your files Do not expose the Windshield mount to excessive temperatures in a car as it will become deformed Formatting the SD Card will cause the GPS Navigation software to be erased rendering the device unusable GPS Devices can be distracting to drivers please ensure you always maintain concentration on the road What s in the Box The following ...

Page 5: ... selected Use the sleep function where you want the GPS to wake from the same screen you were in Charging the Device To Charge the GPS please connect the Home Charger to the Unit using the Mini USB connector The GPS will display a Red light if it is being charged Once charged this will turn Blue You can also charge the device using the Car Charger or by connecting it to your Computer Please note t...

Page 6: ...2 MS Activesync This will allow you to synchronize your Device with the computer This is only recommended for Advanced Users When Mass Storage is the selected Option connecting the USB to the Device will prompt you to select how you would like to use the device You can either use the Computer to charge Press the Battery Icon or as a Removable Disk Press the USB icon If you select the USB icon you ...

Page 7: ...l then load the selected function Battery Indicator This will show you how much Battery Life remains GPS Information This will bring up the GPS Information screen with details including Latitude and Longitude See Page for more information Bluetooth Indicator This will bring up the Bluetooth menu See Page for more information FM Transmitter Indicator This model does not have an FM Transmitter Volum...

Page 8: ... the middle of the screen It will then load the Navigation software from the SD Card If no SD Card is inserted pressing this button will not do anything If you have correctly followed instructions the screen below will display Music Select the Music Option from the Bottom of the screen ...

Page 9: ...ur songs to the Playlist press Play You can change the position of the track which you are listening to by using the Bar at the bottom left of the screen Volume control is done by moving the bar at the bottom right of the screen You can modify the equalizer to get a better sound as you wish To continue playing music in the background press the minimize button otherwise press the power button to ex...

Page 10: ...s the Playlist button to select the movie to watch and it will load Double tap the video to go to full screen and do the same to go back You can change the position of the video which you are watching by using the Bar at the bottom left of the screen Volume control is done by moving the bar at the bottom right of the screen Press the X button to go back to the main menu ...

Page 11: ...een This will then load the Photo Viewer You can then display Photos that you have loaded onto the SD Card Press the Folder button to select photos to view The buttons from left to right are Go to previous next photo Zoom In Out Rotate Slideshow Select Files Exit ...

Page 12: ... Ebook Reader You can then read Text Files that you have loaded onto the SD Card Press the Document button to select the file to view The buttons from left to right are Select Files Previous Next Font Settings Color Settings Bookmark Bookmark Viewer To exit press the power button at the top ...

Page 13: ...ook Option from the Bottom of the screen This will then load the Ebook Reader To exit press the power button at the top Bluetooth Select the Bluetooth Option from the Bottom of the screen This will then load the Bluetooth Menu ...

Page 14: ...2 Dial Record 3 Redial 4 Pair 5 Setting 6 Pair Record 7 GPRS 8 IE The status will be displayed at the bottom of the screen To Pair your Phone press Pair It will begin counting down from 60 Whilst it is doing this search for the GPS on your Mobile Device ...

Page 15: ...hen need to select Connect on your phone to ensure the devices are paired If it is successful the GPS will display Connected Establish You can then dial a number from the GPS by following the prompts To exit press the power button at the top Games Select the Games Option from the Bottom of the screen to access your choice of 7 games ...

Page 16: ...ttings Select the Settings Option from the Bottom of the screen to access the device settings You will be able to change settings relating to Volume Backlight Language FM Transmitter This is not functional in this unit Date Time Calibration Note Run this if the Touchscreen does not seem to be functioning properly ...

Page 17: ...his will change the method of connection Factory Reset This will wipe out all your settings Nav Path Do not change this unless you are using different software Make sure you press the Disk at the top to save your settings ...

Page 18: ...pg 18 GPS Info Select the GPS Info Option from the Bottom of the screen to access statistics regarding the GPS receiver such as Location and Speed To exit press the power button at the top ...

Page 19: ...s detecting a signal If yes then make sure the Navigation is properly configured and the GPS is enabled in the software If no then press Reset and the GPS receiver will be reset If pressing the Navigation button does nothing check the contents of the SD Card and make sure all the files are still there If the SD Card has been formatted and you need a new copy of the maps please contact Kogan Suppor...

Page 20: ...User Manual Nav N Go iGO 8 Navigation software for mobile devices UK March 2008 ver 1 4 ...

Page 21: ...data is 2006 Telstra Corporation Limited and its licensors Data Source 2006 Tele Atlas N V Austria BEV GZ 1368 2003 Denmark DAV France IGN France Great Britain Ordnance Survey data with permission of Her Majesty s Stationery Office Crown Copyright Italy Geonext DeAgostini Northern Ireland Ordnance Survey of Northern Ireland Norway Norwegian Mapping Authority Public Roads Administration Mapsolution...

Page 22: ... Start Guide first and start using Nav N Go iGO 8 right away This document is the detailed description of the software You can easily discover Nav N Go iGO 8 while you are using it however we still recommend that you read this manual to understand the screens and the features of Nav N Go iGO 8 ...

Page 23: ...sition in the Cursor menu 24 2 5 3 Daytime and night colour schemes 24 2 5 4 Colour scheme in tunnels 24 2 5 5 Route calculation and recalculation 24 2 5 6 Itinerary 25 2 5 7 Track Logs 26 2 5 8 Route demonstration 26 2 5 9 POI Points of Interest 27 2 5 10 Road Safety Cameras 27 2 5 10 1 Camera types 28 2 5 10 2 Camera directions 29 2 5 11 Speed limit warning 29 2 5 12 TMC Traffic Message Channel ...

Page 24: ...ulation of the route 45 3 7 Enabling Safety Mode 46 3 8 Pausing the active route 46 3 9 Deleting the next via point from the route 46 3 10 Deleting the active route 47 3 11 Using Track Logs 47 3 12 Saving a route 48 3 13 Loading a saved route 48 4 Reference book Advanced mode 50 4 1 Map screen 50 4 1 1 Icons on the map 53 4 1 1 1 Battery GPS position quality and Vehicle type indicator 53 4 1 1 2 S...

Page 25: ...er Data Management 72 4 5 Settings menu 73 4 5 1 Map Screen settings 74 4 5 2 Sound settings 75 4 5 3 Route Planning options 75 4 5 4 Regional settings 78 4 5 5 Navigation settings 79 4 5 6 Warning settings 79 4 5 7 GPS settings 80 4 5 8 TMC settings 81 4 5 9 Menu settings 82 4 5 10 Device settings 82 4 5 11 Track Log settings 83 5 Glossary 84 6 End User Licence Agreement 86 ...

Page 26: ...ething in the route Nav N Go iGO 8 has a Safety Mode if you turn on Safety Mode you cannot change anything in Nav N Go iGO 8 while the vehicle is moving at a speed of 10 km h 6 mph or higher Unless only passengers operate Nav N Go iGO 8 we strongly encourage you to turn on Safety Mode You must obey the traffic signs and follow the road geometry If you deviate from the route that Nav N Go iGO 8 rec...

Page 27: ...p screen you can set the minimum and maximum zoom level of Smart Zoom Tap and hold any of the buttons on the Map screen you can set or reset the zoom value of the button 2D map Tap and hold any of the buttons on the Map screen you can set or reset the tilt and zoom values of the button 3D map Tap and hold on list and menu screens the Navigation menu appears Tap and hold any of the buttons on the M...

Page 28: ...ngs page 78 2 Select the language and speaker used for voice guidance messages Later you can change it in Settings page 78 3 Select whether to start the program in Simple mode or in Advanced mode Later you can switch between the two operating modes in Settings After this the Navigation menu appears and you can start using Nav N Go iGO 8 The Navigation menu in Simple mode The Navigation menu in Adv...

Page 29: ...d mode you have access to the full functionality of Nav N Go iGO 8 In portrait screen orientation To switch from Simple mode to Advanced mode on the startup screen Navigation Menu tap To switch from Advanced mode to Simple mode on the startup screen Navigation Menu tap In landscape screen orientation To switch from Simple mode to Advanced mode on the startup screen Navigation Menu tap To switch fr...

Page 30: ...e page 74 Menu settings Only background picture Yes See page 82 Sound settings Only Master volume Yes See page 75 Route Planning options Yes Yes See page 75 Regional settings Only language selection Yes See page 78 Warnings No Yes See page 79 2 2 Hardware buttons You can use Nav N Go iGO 8 mostly by tapping the touch screen The device has only a few hardware buttons You can turn mobile devices on ...

Page 31: ... Navigation Repeats the last voice guidance instruction with updated distance information If necessary re enables normal navigation Lock to Position and Track up map orientation No equivalent for announcing the voice instruction for re enabling normal navigation 2 3 Buttons and other controls on the screen When you are using Nav N Go iGO 8 you usually tap buttons on the touch screen You only need ...

Page 32: ...ions they appear in a list Turn the page with the and buttons and tap the value that you want Slider When a feature has several different unnamed values Nav N Go iGO 8 shows an indicator on a gauge that displays and sets a value from a range Drag the handle to move the slider to its new position Tap the slider where you want the handle to appear the thumb jumps there Switch When there are only two...

Page 33: ...O 8 remembers your last keyboard choice and offers it the next time you need to enter data Correcting your entry on the keyboard Remove the unneeded character s tap Tap and hold the button to delete the entire input string Entering a space for example between a first name and a family name or in multi word street names Tap Entering small or capital letters Tap to cycle through entering lower case ...

Page 34: ... details of any other location by selecting it on the map 1 Tap the map anywhere to open the map control buttons 2 Tap the desired location on the map The Cursor appears there The address of the location is displayed at the bottom of the map 3 For further details tap to open the Cursor menu 4 Tap The address the coordinate and the list of nearby POIs will be displayed It is even easier if you sele...

Page 35: ...Smart Zoom button Zooming in and out Changes how much of the map is displayed on the screen Nav N Go iGO 8 uses high quality vector maps that let you see the map at various zoom levels always with optimised content It always displays street names and other text with the same font size never upside down and you only see the streets and objects that you need Map scaling has different limits in 2D an...

Page 36: ... rotated in 3D mode automatic map rotation is also re enabled Zoom preset buttons available in Advanced mode only Tap one of the preset buttons to set the zoom level to a fix predefined value Smart Zoom is disabled These buttons are available in 2D mode Tap hold any of the buttons to set its value to the current zoom level or to reset it to its original value Tilt and zoom preset buttons available...

Page 37: ...culation is needed GPS position and an active route are available but automatic off route recalculation is switched off and you deviated from the route Tap this area to make Nav N Go iGO 8 recalculate the recommended route If the icon is animated route calculation is in progress Nav N Go iGO 8 is calculating or recalculating the route Nothing happens if you tap this area of the screen Next route e...

Page 38: ...nning simulation This icon appears during Route Fly Over Route Simulation and Track Log playback Tap this area to stop the simulation Route recalculation progress During route recalculation this field shows the recalculation progress between 0 and 100 Nothing happens if you tap this area of the screen Indicator strip sounds muted enabled Track Log recording TMC status Bluetooth status Nothing happ...

Page 39: ... route these fields show the following information current speed compass and the current time of day Icon Type More information Compass Shows the direction of your heading both when the map is automatically rotated 3D and when the map is always facing North 2D Speed information There are speed values that can be shown Current speed Speed limit on the current road Time information There are time va...

Page 40: ... at the desired location Now tap to open the Cursor menu You can perform the following actions Button Action In the active route uses the Cursor as the start point by replacing the current GPS position available in Advanced mode only In the active route uses the Cursor as the destination by replacing the previous destination In the active route uses the Cursor as a via point an intermediate destin...

Page 41: ...While driving without an active route in Nav N Go iGO 8 Smart Zoom will zoom in if you drive slowly and zoom out to the limit set here when you drive at high speed Enabling Smart Zoom Tap the map to let the map control buttons appear and then tap to enable Smart Zoom Fine tuning Smart Zoom Tap the map to let the map control buttons appear and then tap and hold to open the Smart Zoom Settings windo...

Page 42: ...ble Track up map orientation automatic map rotation Note Even if you move the map while you are driving Nav N Go iGO 8 continues navigating if there is an active route it plays the voice instructions and displays the turn preview icons according to your current GPS position 2 5 2 3 Selected location Cursor If you select a location in the Find menu or you tap the map when the map control buttons ar...

Page 43: ...s for large objects to keep the average brightness of the screen low Nav N Go iGO 8 offers different daytime and night colour schemes It can also switch automatically between the daytime and the night scheme based on the current time and GPS position a few minutes before sunrise when the sky has already turned bright and a few minutes after sunset before it becomes dark 2 5 4 Colour scheme in tunn...

Page 44: ...O 8 also recalculates the route if a TMC event concerns a part of the recommended route For further information about Route Planning options see page 75 2 5 6 Itinerary The Itinerary is the list of the route events that is the driving instructions When you are on the Map screen you can display the Itinerary in one of the following ways Tap the area between the Turn preview and the Travel data fiel...

Page 45: ... from the selected manoeuvre 2 5 7 Track Logs Nav N Go iGO 8 can log the track that you drive page 47 A Track Log is a recording of how your GPS position changed and it is independent of the route Nav N Go iGO 8 calculated Track Logs can be recorded renamed replayed shown on the map exported to a memory card in GPX format and deleted See page 69 Independently of the normal track log you can instru...

Page 46: ...at comes with the map shows the symbol of the POI category If you save your own POI you can select an icon for it independently of the POI category you have put it in Saving POI To save a POI place the Cursor at the desired location then tap the following buttons Managing POI You can select which POI groups to show and which ones to hide on the map and from which zoom levels POI icons are visible ...

Page 47: ...y Cameras Symbol Type Description Fixed Some speed cameras stand by the roadside looking in one direction measuring one or both directions of the traffic They measure your current speed For these speed cameras you can specify the controlled traffic direction and the speed limit Nav N Go iGO 8 warns you when you approach these speed cameras in the measured direction If your speed exceeds the speed ...

Page 48: ...is announced 2 5 10 2 Camera directions A speed camera can measure the speed of one direction of the traffic both directions or even several directions in an intersection when they are mounted on a rotating base The same directions apply to red light cameras Nav N Go iGO 8 warns you only if you drive in a measured or possibly measured direction The measured direction of the camera appears with the...

Page 49: ...or coverage details If public TMC data is broadcast at your location Nav N Go iGO 8 automatically takes into account the TMC data received You do not need to set anything in the program The receiver will automatically search the FM radio stations for TMC data and the decoded information will immediately be used in route planning The moment Nav N Go iGO 8 receives traffic information that may affec...

Page 50: ...mber or the names of two intersecting streets page 32 Enter an address with postal code page 39 This way you do not need to select the name of the settlement and the search for street names might be faster as well Use a coordinate page 43 Use a saved location a Favourite page 40 a POI page 41 the History of previously set destinations and waypoints page 42 Tip If you are going to use a route later...

Page 51: ...dress Europe In some countries states are not used in addressing After selecting the country the next step is to define the settlement There are four lines on the screen The procedure is explained starting from the Navigation menu 1 Tap the following buttons Simple mode or Advanced mode 2 By default Nav N Go iGO 8 proposes the country and settlement where you are If needed tap the button with the ...

Page 52: ...appears automatically 4 Pick the street from the list 5 Enter the house number 1 Tap 2 Enter the house number on the keyboard 3 Tap to finish entering the address 6 The map appears with the selected point in the middle Tap Simple mode or Advanced mode from the Cursor menu The route is then automatically calculated and you can start navigating 3 1 2 2 Entering an address North America Australia In ...

Page 53: ...ones tap the button To enter a new settlement 1 Tap the button with the name of the settlement or if you have changed the country state tap 2 Start entering the settlement name on the keyboard 3 Get to the list of search results After entering a couple of characters the names that match the string appear in a list Tap to open the list of results before it appears automatically 4 Pick the settlemen...

Page 54: ...state and settlement where you are If needed tap the button with the name of the country state and select a different one from the list 3 If needed change the settlement To select the settlement from the list of recently used ones tap the button To enter a new settlement 1 Tap the button with the name of the settlement or if you have changed the country state tap 2 Start entering the settlement na...

Page 55: ...dure is explained starting from the Navigation menu 1 Tap the following buttons Simple mode or Advanced mode 2 By default Nav N Go iGO 8 proposes the country state and settlement where you are If needed tap the button with the name of the country state and select a different one from the list 3 If needed change the settlement To select the settlement from the list of recently used ones tap the but...

Page 56: ...ulated and you can start navigating 3 1 2 5 Selecting an intersection as the destination The procedure is explained starting from the Navigation menu 1 Tap the following buttons Simple mode or Advanced mode 2 By default Nav N Go iGO 8 proposes the country state and settlement where you are If needed tap the button with the name of the country state and select a different one from the list 3 If nee...

Page 57: ...ting street in the list 7 The map appears with the selected point in the middle Tap Simple mode or Advanced mode from the Cursor menu The route is then automatically calculated and you can start navigating 3 1 2 6 Selecting a city centre as the destination The City Centre is not the geometric centre of the settlement but an arbitrary point the map creators have chosen In towns and villages it is u...

Page 58: ...ies can be performed with entering the postal code instead of the settlement name Find below an example with a full address The procedure is explained starting from the Navigation menu 1 Tap the following buttons Simple mode or Advanced mode 2 By default Nav N Go iGO 8 proposes the country state and settlement where you are If needed tap the button with the name of the country state and select a d...

Page 59: ... couple of letters Nav N Go iGO 8 lists the items that contain the character set You can speed up finding an intersection Search first for the street with a less common or less usual name fewer letters are enough to find it If one of the streets is shorter search for that one first You can then find the second one faster You can search for both the type and the name of a road If the same word appe...

Page 60: ... POI will be searched around a given address The map appears with the Cursor in the middle Modify the location of the Cursor if necessary then tap The POI will be searched around the given location The POI will be searched around the current GPS position The POI will be searched around the destination of the active route The POI will be searched not around a given point but by the size of the deto...

Page 61: ...lly calculated and you can start navigating 3 1 5 Selecting the destination with a saved POI search criteria POI search criteria can be saved in the POI section of the Manage menu but Nav N Go iGO 8 is already shipped with some saved criteria you can use instantly when searching for a POI The procedure is explained starting from the Navigation menu 1 Tap the following buttons Simple mode or Advanc...

Page 62: ...to change the coordinate 4 Enter the coordinate values in WGS84 format on the keyboard the latitude N or S and the longitude E or W 5 Tap 6 The map appears with the selected point in the middle Tap Simple mode or Advanced mode from the Cursor menu The route is then automatically calculated and you can start navigating 3 2 Creating a multi point route inserting a via point Multi point routes are cr...

Page 63: ...efore The route is optimised The start point and the destination remain at their position but the via points are reordered to make the shortest possible route The selected point is removed from the route The route remains as it was before adding the new point Every time a new point is added the route is recalculated automatically and you can start navigating right away 3 3 Creating a multi point r...

Page 64: ...the destination becomes the start point and all via points are to be reached in the opposite order than before The route is optimised The start point and the destination remain at their position but the via points are reordered to make the shortest possible route The selected point is removed from the route As soon as you leave this screen the route is recalculated automatically and you can start ...

Page 65: ... km h 6 mph to keep your attention on the road While driving you will not be able to set a new destination or to change settings The only screen control that remains enabled is the gesture that puts you back on the Map screen The procedure is explained starting from the Map screen Tap the following buttons 3 8 Pausing the active route You do not need to pause the active route when you start drivin...

Page 66: ...ck Logs Nav N Go iGO 8 can record the track how your GPS position changed that you drive Tip You do not need to select a destination and create a route for this you can also record your driving path while cruising This feature is available in Advanced mode only The procedure is explained starting from the Map screen Recording the travelled path creating a Track Log 1 Start driving 2 Tap the follow...

Page 67: ... 8 not only saves the route points but the whole itinerary The saved route might have been influenced by TMC information When you later use the route it appears as it was saved but if it needs to be recalculated the current TMC information will be used in the new route If you updated your map since you first saved the route Nav N Go iGO 8 recognises the change and recalculates the driving instruct...

Page 68: ...need to confirm whether you want to stop navigating from the current GPS position to use the start point of the loaded route If you choose this option the automatic off route recalculation will be disabled If you choose to keep the current GPS position as the start point the route will be recalculated starting from your current position 4 The map appears and you can start navigating ...

Page 69: ...e phone number of a POI Route Managing the active route obtaining information about it changing or deleting it or parts of it or planning a route without GPS reception Manage Managing user data such as saved locations POIs Favourites Pins and History items Saved Routes and Track Logs Settings Managing the behaviour of Nav N Go iGO 8 for example the map layout during navigation the used languages o...

Page 70: ...ond upcoming route event Opens the Itinerary Trip data Opens the Trip Information screen Battery status Opens the Quick menu GPS position quality Opens the Quick menu Vehicle used in route calculation Opens the Quick menu Top row Next street n a Bottom row Current street and house numbers on left and right n a Map view modes Switches between 2D and 3D map modes Menu Opens the Navigation menu Detou...

Page 71: ...up tilt down Tilts the 3D map Zoom in zoom out Scales the map Return to GPS position appears when GPS position is available and you have moved the map Tap this button to move the map back to the current GPS position If the map has been rotated in 3D mode automatic map rotation is also re enabled Enable Smart Zoom replaces the previous button if there is no GPS position or the map has not been move...

Page 72: ...ale 2D map only n a 4 1 1 Icons on the map There are several status icons on the map Most of them also function as a button The information they provide is as follows GPS position quality Battery status Vehicle type used for route calculation Sound status muted or enabled Track log recording status TMC reception and processing status Bluetooth connection and communication status 4 1 1 1 Battery GP...

Page 73: ... weak and the receiver cannot determine the GPS position GPS navigation is not possible Only a few satellites are received Position information is available but elevation altitude cannot be calculated GPS navigation is possible but the position error may be significant Altitude information is available the position is a 3D position GPS navigation is possible The remaining part of the field shows t...

Page 74: ...but no telephone is connected There is an error in the Bluetooth connection Nav N Go iGO 8 is connected to a telephone as a handsfree set via Bluetooth A phone call is in progress over the Bluetooth connection 4 1 1 3 Next two route events Turn Preview fields There are two fields reserved on the Map screen to display the next two manoeuvres route events that are listed in the Itinerary Both the ty...

Page 75: ... 1 2 1 Streets and roads Nav N Go iGO 8 shows the streets in a way that is similar to how the paper road maps show them Their width and colours correspond to their importance you can easily tell a motorway from a small street Tip If you prefer not to see street names during navigation turn them off page 74 4 1 2 2 3D object types To enable or disable 3D visualisation on the map tap the following b...

Page 76: ...ow is put on the nearest road Cursor selected map location The location selected in the Find menu or a map point selected by tapping the map Start point The first point of the route Normally if GPS position is available it is the start point of the route If there is no valid GPS position Nav N Go iGO 8 uses the last known GPS position as the start point When you are using a saved route Nav N Go iG...

Page 77: ...tain road types page 75 However when Nav N Go iGO 8 cannot avoid such roads the route will include them and it will show them in a colour that is different from the route colour 4 1 3 Detour menu This screen contains quick detour possibilities during navigation It can be opened directly from the Map screen by tapping You have the following options On the main part of the screen you can see the fir...

Page 78: ... If the Cursor is at or near the destination this button replaces the previous one and deletes the current destination from the route The last via point is promoted as destination or if there are no via points the route is deleted The Cursor is added to the active route as an intermediate route point a point to be reached before the destination If there is already a via point in the route the Edit...

Page 79: ... can set the type of the camera the direction of the measured traffic and the speed limit checked if applicable If the Cursor is at or near a Road Safety Camera this button replaces the previous one and opens a new screen where you can edit the details of the camera The location of the Cursor is added to the list of frequently visited destinations the so called Favourites You can give a name for t...

Page 80: ... traffic jams and other possible delays Tap this field to change the content of all data fields to via point information Distance Left Shows the distance you need to travel on the route before reaching your final destination Tap this field to change the content of all data fields to via point information Time Left Shows the time needed to reach the final destination of the route based on informati...

Page 81: ...een by tapping the Trip Data field The fields on this screen are continuously updated while you keep the screen open When you open the screen all route data fields contain information about reaching your final destination Tap and the fields concerning your route display data for the next via point Tap the button repeatedly to toggle between the two possibilities You have the following data and fun...

Page 82: ...p Data fields GPS Time Shows the current time corrected with time zone offset The accurate time comes from the GPS satellites and the time zone information comes from the map or it can be set manually in Regional settings Tap this field to show it on the map screen in one of the Trip Data fields Altitude Shows the elevation if it is provided by the GPS receiver Tap this field to show it on the map...

Page 83: ...eset their data You have the following functions on this screen Name Description Pauses the trip currently shown on the screen Values on the screen stop changing This button replaces the previous one if it has been activated Tap it to resume collecting trip data Resets all counters of the currently shown trip Collecting trip data is restarted only when Nav N Go iGO 8 receives a position from the G...

Page 84: ...o suppress them temporarily Opens 3D Settings Tap this button and select the Vehicle type to be used for route calculation Otherwise it is selected in Route Planning options in Settings page 75 Changing the Vehicle type triggers an automatic route recalculation Opens Route Planning options Turns track log recording on or off otherwise controlled on the Manage Track Logs screen Opens Manage Track L...

Page 85: ...S position quality indicator Nav N Go iGO 8 has no connection to the GPS receiver Green blinking Nav N Go iGO 8 is connected to the GPS receiver Yellow blinking Nav N Go iGO 8 has no connection to the GPS receiver but it is still trying to establish a connection Red blinking GPS connection quality indicator Nav N Go iGO 8 has no connection to the GPS receiver and does not try to establish a connec...

Page 86: ...Go iGO 8 or from the ones you have previously created page 41 The destinations that you have already entered in Nav N Go iGO 8 are available in the History list page 42 You can select your destination by entering its coordinates page 43 You can select as your destination a location that you have already saved as a Favourite page 40 Opens a special 2D map screen optimised for route planning Only th...

Page 87: ... for route calculation or the route calculation method page 75 You can run a demonstration of the route at high speed page 26 You can run a demonstration of the route at normal speed page 1 4 4 Manage menu You can manage the content that Nav N Go iGO 8 stores Tap the following buttons Button Description Reference Renaming or deleting saved routes page 69 Deleting History items page 69 Recording si...

Page 88: ...Deletes the selected item in the History Deletes the entire History Turns the page for additional list items 4 4 3 Manage Track Logs You can record Track Logs then play them back display them on the map and see their details Tap the following buttons Button Description Starts recording the track that you drive You can also start recording a track log in the Quick menu Stops the ongoing Track Log r...

Page 89: ...k Log on the inserted memory card in GPX format 4 4 4 Manage Favourites You can manage the list of your Favourites Tap the following buttons Button Description Button with the name of the Favourite Opens the selected Favourite for editing Deletes the selected item in the list of Favourites Clears the list of Favourites Turns the page for additional list items 4 4 5 Manage POIs You can manage your ...

Page 90: ...wn on the map The distance buttons set the zoom level from which the items in the POI group will be shown on the map Subgroups under the edited POI group will inherit its visibility settings Button with the icon of the POI group Tap this button to select a new icon for the POI group Deletes the edited POI group You are only allowed to remove POI groups that you have created When a POI item is open...

Page 91: ...s and the settings you have made in the program Tap the following buttons Button Description Remove Pins Map locations can be marked with Pins using the button in the Cursor menu Tap this button to remove all your Pins from the map Backup User Data All user data and the current settings will be saved on the inserted memory card There is always one backup file If you perform a backup later the prev...

Page 92: ...ese settings allow you to adjust the application to your local language measurement units time and date and their formats as well as choose the voice guidance profile you prefer page 78 You can control how Nav N Go iGO 8 behaves during navigation page 79 You can enable some handy warnings and disable the touch screen in a moving vehicle with Safety Mode page 79 You can set up the connection to the...

Page 93: ...marks are 3D artistic or block representations of prominent or well known objects 3D landmarks are only available in selected cities and countries Elevated Roads Complex intersections and vertically isolated roads such as overpasses or underground tunnels are displayed in 3D Building Visibility Full 3D city building data that represents actual building size and position on the map Building data is...

Page 94: ... the volume level The loudness of Nav N Go iGO 8 is independent of your device settings When you exit the program the device default settings return Voice Guidance Volume The slider adjusts the loudness of voice prompts In its leftmost position the voice guidance is suppressed in its rightmost position the master volume applies Key Sounds Key sounds are audible confirmation of either pressing hard...

Page 95: ...atching your preference will be displayed in a different colour on the map Route Calculation Method You can choose from different route types The routing method can also be chosen while creating the route when the destination is selected tap in the Cursor menu Use Traffic Information When TMC messages are received this setting tells Nav N Go iGO 8 whether to use that information in route planning ...

Page 96: ...rily contain information about the accessibility of temporary ferries You might also need to pay a fare on ferries Cross border planning In some cases the route calculated according to your other navigation and route preferences would lead through another country If you wish to always stay within the same country turn this option off Carpool lanes This control appears only when navigating in the U...

Page 97: ...n voice guidance language a warning message will appear Set Date Time Format You can set the date and time format Various international formats are available Time and Time Zone Settings You can access time and time zone settings Nav N Go iGO 8 helps you with correcting the device time to the ever accurate GPS time Nav N Go iGO 8 can also help you set the time zone based on your current GPS positio...

Page 98: ...ation this feature moves the map back to your current GPS position and re enables automatic map rotation after the given period of inactivity Automatic Overview This feature switches the map view to Overview mode when the next route event is at a distance Overview is a zoomed out 2D view to let you see the surrounding area You have the following controls for Automatic Overview Turn Distance for Ov...

Page 99: ...you are approaching one of these cameras Warn if Too Fast for a Pedestrian Enable this warning to be alert if pedestrian mode is activated and you drive fast You are asked if you want to change to car navigation mode This way you can be sure you will not be routed via one way roads in the wrong direction as a pedestrian could for example Safety Mode Safety Mode disables the touch screen above 10 k...

Page 100: ... the TMC receiver and the application Port The communication port used between the TMC receiver and the application Baud Rate The communication speed used between the TMC receiver and the application Autodetect Tap this button and let Nav N Go iGO 8 find and connect the TMC receiver With a TMC receiver already connected the content of the screen is different Button Description Use Auto tuner If Au...

Page 101: ...d for a while You have the following options Backlight Always On The screen is continuously lit Use Device Settings The backlight settings of the device will be applied in Nav N Go iGO 8 Smart When running on battery Smart Powersave will light up the screen only when you press a button tap the screen or if there is something to show you After a few seconds the light level decreases and after anoth...

Page 102: ...ff manually Nav N Go iGO 8 will automatically start recording the track log as soon as GPS position is available Track Log Database Size This figure shows how much memory is used by the automatically saved track logs Track Logs Max Size You can set the maximum database size for the automatically saved track logs When the limit is reached the oldest automatically saved track logs will be deleted Cr...

Page 103: ...rger cities it is an important intersection GPS accuracy Several factors have impact on the deviation between your real position and the one given by the GPS device For example signal delay in the ionosphere or reflecting objects near the GPS device have a different and varying impact on how accurately the GPS device can calculate your position Map Nav N Go iGO 8 works with digital maps which are ...

Page 104: ...different colour schemes for the map for daytime or night use Schemes are custom graphic settings for the map and they can have different colours for streets blocks or surface waters in 2D and 3D modes and they display shades or shadows in different ways in 3D mode One daytime scheme and one night scheme is always selected Nav N Go iGO 8 uses them when it switches from day to night and back Track ...

Page 105: ...aw 3 1 In issues not regulated by present Agreement the jurisdiction of the Republic of Hungary shall be applicable with specific reference to the Act No 4 of 1959 on the Civil Code CC and to Act No 76 of 1999 on Copyrights CA 3 2 Present agreement is issued in English and in Hungarian In case of dispute the Hungarian text shall prevail 4 The object of the Agreement 4 1 The object of present Agree...

Page 106: ...o operation with other products 7 1 6 apart from using the computer program to obtain information from the map database included in the software product to decompile the map database to use copy modify extend transform the map database in whole or in part or the group of data stored therein or to install it in other products utilise it in other products not even with the aim of achieving a co oper...

Page 107: ...y way of publicity to the expense of the person under breach 9 1 4 claim the return of the increase of assets due to the breach 9 1 5 claim ceasing the breaching situation the restitution of the state before the breach to the expense of the person in breach and may claim the destruction of instruments and materials used for the breach and that of the objects created by the breach 9 1 6 claim damag...

Reviews: