background image

 
Changing flossing modes 

The water flosser features four different flossing modes: Normal, Soft 1, Soft 2 and Pulse.  
Press the Power button during operation to cycle between the modes. 


Normal:

 For the normal cleaning of teeth. 


Soft 1:

 For the users with sensitive teeth. 


Soft 2:

 For the users with sensitive teeth.  This setting is recommended for first time 

users. 


Pulse:

 This mode is used for massaging gums which to help promote blood 

circulation and strengthen the teeth. 


Emptying the water tank 

After usage, the water tank should always be completely emptied. 

1.


Holding the water flosser horizontally, open the water tank lid and allow the water 
to drain out (Figure 5). 

2.


Press the Power button to ensure no residual water is left in the water tank. 

3.


Close the water tank lid and wipe the flosser with a dry cloth. 


Figure 5 


Note: 

It is recommended to use the “Soft 2” mode for at least week.


Note: 

When not in use the water flosser should be free of residual water to avoid 
bacterial infection.  If it is not used for an extended period of time, ensure to 
clean the water flosser well, then dry and store it.


Summary of Contents for Cordless Portable Travel Water Flosser

Page 1: ...CORDLESS PORTABLE TRAVEL WATER FLOSSER KACLPRWTFLA...

Page 2: ......

Page 3: ...ropped into water Cease use immediately and contact Kogan com for support Do not expose this appliance or it s power cord to fire and other sources of heat Caution Do not apply excessive force to your...

Page 4: ...ith the mouth wash as this may cause corrosion This appliance can be used by children and persons with reduced physical sensory or mental capabilities or lack of experience and knowledge if they have...

Page 5: ...OVERVIEW Power button LED indicators Top cover Nozzle release button Nozzle Body Charging port Water tank Water tank lid...

Page 6: ...proximately 4 hours to fully charge 4 When the water flosser is fully charged the indicator light will be stop blinking and remain on Nozzle 1 Ensure the appliance is turned off 2 Insert the nozzle in...

Page 7: ...our mouth aiming the flow of water at your gums or teeth 3 Ensure the nozzle is kept parallel to your teeth and gums Do not aim the nozzle directly into the periodontal pocket Figure 3 4 Keep your mou...

Page 8: ...rengthen the teeth Emptying the water tank After usage the water tank should always be completely emptied 1 Holding the water flosser horizontally open the water tank lid and allow the water to drain...

Page 9: ...ank with a dry or damp cloth The water tank can be detached and rinsed with water Ensure the water tank is clean and completely dry if it is not being used for an extended period Cleaning the nozzle W...

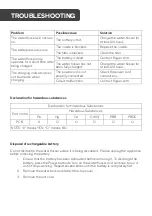
Page 10: ...ted Check the power cord connections Circuit malfunction Contact Kogan com Declaration for hazardous substances Declaration for Hazardous Substances Part name Hazardous Substances Pb Hg Cd Cr VI PBB P...

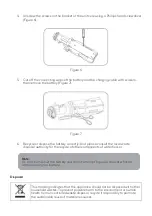
Page 11: ...e consult the local waste disposal authority for the recycle of other components of water flosser Disposal This marking indicates that this appliance should not be disposed with other household wastes...

Page 12: ...ion We hope that this user guide has given you the assistance needed for a simple set up For the most up to date guide for your product as well as any additional assistance you may require head online...

Reviews: