Using your printer dock with a computer
www.kodak.com/go/support
26
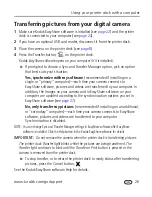
Transferring pictures from your digital camera
1
Make sure Kodak EasyShare software is installed (see
page 22
) and the printer
dock is connected to your computer (see
page 24
).
2
If you have an optional USB card reader, disconnect it from the printer dock.
3
Place the camera on the printer dock (see
page 8
).
4
Press the Transfer button,
, on the printer dock.
Kodak EasyShare software opens on your computer (if it is installed).
■
If prompted to choose a Sync and Transfer Manager option, pick an option
that best suits your situation:
Yes, synchronize with my software
(recommended if installing on a
single or "primary" computer)—each time your camera connects to
EasyShare software, pictures and videos are transferred to your computer. In
addition, the images on your camera and in EasyShare software on your
computer are updated according to the synchronization options you set in
EasyShare software (see
page 27
).
No, only transfer my pictures
(recommended if installing on an additional,
or "secondary" computer)—each time your camera connects to EasyShare
software, pictures and videos are transferred to your computer.
Synchronization is disabled.
NOTE: You can change Sync and Transfer Manager settings in EasyShare software after EasyShare
software is installed. Click the Help button in the Kodak EasyShare software for details.
IMPORTANT:
Do not remove the camera when the printer dock is transferring pictures.
The printer dock Transfer light blinks while the pictures are being transferred. The
Transfer light continues to blink until the Transfer or Print button is pressed or the
camera is removed from the printer dock.
■
To stop transfer, or to return the printer dock to ready status after transferring
pictures, press the Cancel button,
.
See the Kodak EasyShare software Help for details.

