background image

8

65


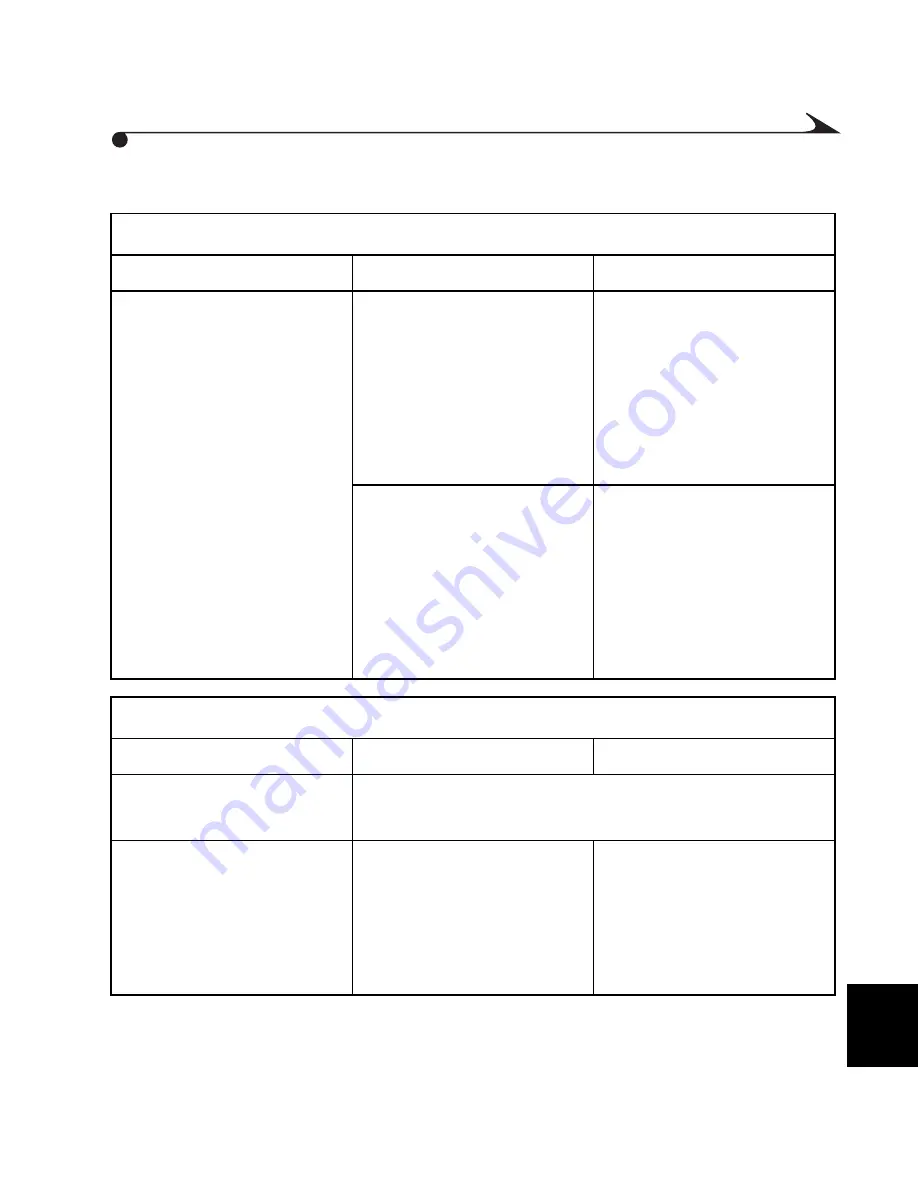
mc3 Device Communications

Problem

Cause

Solution

An error message states 
that the computer cannot 
find the mc3 device.

The device is not 
connected to the USB 
cable, or the cable is not 
connected to the 
computer USB port.


Connect the cable to the 
device and the computer 
port. See “Connecting to 
a Computer, Television, 
or Stereo” on page 48.

Some laptops turn off 
ports to conserve energy.

See the Power 
Management section of 
the laptop’s 
documentation to disable 
this feature.

Computer or Monitor

Problem

Cause

Solution

A video clip skips during 
playback on a computer.

Playback quality is determined by a computer’s 
processor, hard drive, memory, and video card. 

The image on your 
monitor is jagged or 
inappropriately colored.

The monitor may not be 
set correctly.

Adjust the monitor 
display settings. Refer to 
the computer’s 
documentation for more 
information.

MediaCam.book  Page 65  Wednesday, March 7, 2001  8:48 AM

Summary of Contents for 135-6872 - MC3 Digital Camera

Page 1: ...can m Play MP3 files m Take video clips with audio m Take digital still pictures m Use the color LCD to preview videos and pictures before you take them and to review videos and pictures after you take them m Add pictures and videos to a document or Web page m E mail your pictures and videos to friends Visit Kodak on the World Wide Web at www kodak com ...

Page 2: ...Eastman Kodak Company 343 State Street Rochester N Y 14650 ãEastman Kodak Company 2000 Kodak is a trademark of Eastman Kodak Company P N 6B5410 QuickTime is a trademark of Apple Computer ...

Page 3: ...ure Card 4 Turning the mc3 Device On and Off 5 Low Battery Icon 6 Sleep Mode 6 Customizing the mc3 Device 7 Setting the Sound Preferences 8 Setting the Date and Time 9 Setting Video Out 10 Setting the Language 11 Formatting a Picture Card 12 About the mc3 Device 13 2 Playing Internet Music 15 Obtaining MP3 Music Files 16 Playing Music 17 Adjusting Playback Options 18 ...

Page 4: ...ckView 25 Reviewing a Video After QuickView Ends 25 Changing Video Quality Settings 26 4 Taking Pictures 27 Taking a Picture 28 Using QuickView With Still Pictures 29 Deleting a Picture During QuickView 29 Reviewing a Picture After QuickView Ends 30 Using the Self Timer 31 5 Reviewing Pictures and Videos 33 Deleting Pictures and Videos 34 Setting Up a Slide Show 36 ...

Page 5: ... 7 Working With Music Video and Picture Files 47 Connecting to a Computer Television or Stereo 48 Transferring Files to a WINDOWS Based Computer 49 Using a Picture Card Reader 50 Using the WINDOWS Open Browser 51 Using a Third Party Application 52 Transferring Files to a MACINTOSH Computer 53 Using a Picture Card Reader 54 Using a Third Party Application 55 Locating Files on a Picture Card 56 How ...

Page 6: ... 69 Limitations 70 Your Rights 71 Outside the United States 71 Software Application Support 71 How to Obtain Service 71 Regulatory Information 72 11 Appendix 75 Specifications 75 General Maintenance and Safety 76 Using Headphones Safely 76 Using Batteries Safely 76 Maintaining the mc3 Device 78 ...

Page 7: ...ou need to m Attach the wrist strap m Load the batteries m Insert a KODAK Picture Card Attaching the Wrist Strap Attach the wrist strap to carry the mc3 device 1 Thread the short loop of the wrist strap through the recessed post 2 Thread the long end of the wrist strap through the short loop Pull until secure ...

Page 8: ...tteries available as an accessory through a dealer of KODAK products or from our Web site at http www kodak com go accessories For guidelines on safe battery usage see Using Batteries Safely on page 76 1 Slide the battery door located on the bottom of the device so it flips open 2 Insert the batteries as indicated inside the battery compartment The single battery is inserted end first the two othe...

Page 9: ...o accessories 1 After ensuring that the mc3 device power is off open the Picture Card door 2 Hold the Picture Card by the end that has a raised lip that you can feel with your fingers This lip should face the back of the device The opposite end of the Picture Card with tiny holes should face into the card slot CAUTION The Picture Card can only be inserted one way forcing it may damage the card or ...

Page 10: ...me remaining is blinking on the LCD you could lose your video 1 Open the Picture Card door 2 Flip the eject button up then firmly press it with your fingertip The Picture Card partially slides out 3 With your fingernail under the lip pull the Picture Card from the card slot Then close the door ...

Page 11: ...ure Card turn the device on 1 Press the Power button The Power Indicator LED lights up The LCD displays an image or other information 2 To turn the mc3 device off press the Power button again The device completes any tasks it is performing before it shuts off Power Indicator Power Button ...

Page 12: ...eep mode press the Shutter button halfway down If the device is allowed to remain in Sleep mode it will eventually turn off Press the Power button to turn the device back on Indicator Meaning No icon is displayed on the LCD OK Batteries are charged and ready for use Low Batteries may need to be replaced or recharged soon but there is sufficient power to use the device Power LED is flashing Exhaust...

Page 13: ...eries become exhausted you may need to reapply a setting m Choose sound preferences m Set date and time m Set video out m Choose a language m Format a Picture Card m View information about the mc3 device To Adjust Settings Specific To Such As See Chapter m Equalizer m Repeat m Shuffle Playing Internet Music on page 15 m Video quality Good and Best settings Taking Videos on page 21 m Self Timer Tak...

Page 14: ...id button is pressed except the Power button All Off No sounds 1 The Mode selector may be in any position Press the Menu button The settings for that mode are displayed 2 Press the buttons to highlight the Settings submenu Then press the Select button 3 Press the buttons to highlight the Sound icon then press the Select button The Sound settings are displayed 4 Press the buttons to highlight the d...

Page 15: ...gs for that mode are displayed 2 Press the buttons to highlight the Settings submenu Then press the Select button 3 Press the buttons to highlight the Date and Time icon then press the Select button The date and time settings are displayed 4 Press the buttons to adjust the year then press the button 5 Repeat Step 4 for the month day and time 6 When finished press the Select button to save the sett...

Page 16: ...opean countries Accessories are available through a dealer of KODAK products or from our Web site at http www kodak com go accessories 1 The Mode selector may be in any position Press the Menu button The settings for that mode are displayed 2 Press the buttons to highlight the Settings submenu Then press the Select button 3 Press the buttons to highlight the Video Out icon then press the Select bu...

Page 17: ...ode are displayed 2 Press the buttons to highlight the Settings submenu Then press the Select button 3 Press the buttons to highlight the Language icon then press the Select button The Language settings are displayed 4 Press the buttons to highlight the desired setting Press the Select button to save the setting The Settings submenu is displayed ...

Page 18: ...ure that a Picture Card is in the device The Mode selector may be in any position Press the Menu button The settings for that mode are displayed 2 Press the buttons to highlight the Settings submenu Then press the Select button 3 Press the buttons to highlight the Format Picture Card icon then press the Select button The Format Picture Card menu is displayed 4 Highlight Continue Format then press ...

Page 19: ...aken 1 The Mode selector may be in any position Press the Menu button The settings for that mode are displayed 2 Press the buttons to highlight the Settings submenu Then press the Select button 3 Press the buttons to highlight the About icon then press the Select button The About screen is displayed 4 When finished press the Menu button A screen similar to this is displayed ...

Page 20: ......

Page 21: ...dy own or download music from the Internet m Create edit and delete playlists m Play music through headphones or through a computer m Play music through a home portable or car stereo using an optional stereo cable or cassette adapter Accessories are available through a dealer of KODAK products or from our Web site at http www kodak com go accessories For important MP3 information See Disclaimer on...

Page 22: ...hods Platform Method Details WINDOWS WINDOWS Explorer Use standard WINDOWS functionality See Using the WINDOWS Open Browser on page 51 RealJukebox Software See Installing Software for the KODAK mc3 on page 42 A device such as a card reader See Using a Picture Card Reader on page 50 MACINTOSH Copy To method Choose MC3 Copy To MC3 A device such as a card reader See Using a Picture Card Reader on pag...

Page 23: ...vision or Stereo on page 48 To Action Scroll through songs Press one of the buttons Scan information on songs Press and hold one of the buttons Play or pause Press the button Stop Press the button Restartthe current song or to skip to the next Press and release one of the buttons Fast forward or rewind a song Press and hold one of the buttons Adjust the volume Press the or buttons Listen privately...

Page 24: ...r Adjusts low mid and high range frequencies to give best playback for these types of music m Pop m Rock m Jazz m Classical m Voice Repeat Repeats entire playlist until the Stop button is pressed or until the Mode selector is changed to another mode Shuffle Plays MP3 files within a playlist in random order ...

Page 25: ...he Mode selector to the Music icon 2 Press the Menu button 3 Press the buttons to highlight the Equalizer Repeat or Shuffle setting then press the Select button 4 Press the buttons to adjust the setting then press Select to apply the new setting ...

Page 26: ......

Page 27: ...to take great videos You can m Use the color LCD as a live viewfinder m Use the QuickView feature to review a video you just took then choose to keep or delete it m Adjust the video quality setting for desired results m Attach a tripod You can take approximately Seconds of Video Per Using This Setting 4 1 MB of Picture Card storage Best 20 Good ideal for e mail ...

Page 28: ...o position The LCD displays a live image 2 Press the Shutter button all the way down then release the button The LCD displays REC and the recording time remaining on the Picture Card To stop taking a video press the Shutter button again U N E M T C E L E S Mode Selector ...

Page 29: ...ty setting 320 x 240 pixels 20 frames per second m No icon Indicates Good quality setting 320 x 240 pixels 10 frames per second 10 15 The video time remaining is displayed in minutes and seconds NOTE Because actual resolution and compression may vary according to subject time remaining may decrease in a nonuniform manner 00 There is no room left on the Picture Card Battery See Low Battery Icon on ...

Page 30: ... the video is saved on the Picture Card Reviewing a Video During QuickView To Action Play or pause a video Press the button Stop a video Press the button Fast forward or rewind Press and hold one of the buttons Restart the video Press and release the button Adjust the volume Press the and buttons on top of the device Listen privately Plug in headphones U N E M T C E L E S Headphone Jack Volume Con...

Page 31: ...ect button The LCD displays the Delete screen 2 Press the buttons to highlight YES 3 Press the Select button to apply the selection The device returns to Video Capture mode 1 Press the button The LCD displays the last frame of the most recent video and the trash can icon 2 Review or delete the video or wait until the QuickView ends ...

Page 32: ...the Best setting will take up more space on the Picture Card To change the Quality setting 1 With the Mode selector in the Video position press the Menu button The LCD displays the Video menu 2 Highlight the Video Quality icon then press the Select button 3 Press the buttons to highlight a Quality selection Press the Select button to apply the setting To return to Video Capture mode press the Menu...

Page 33: ...to capturing great pictures You can m Use the color LCD to frame your subject before you take a picture m Use the QuickView feature to review a picture you just took then choose to keep or delete it m Set the Self Timer to put yourself in a picture m Use the tripod mount to attach to a tripod You can take approximately 10 pictures for each MB of Picture Card storage ...

Page 34: ... selector to the Pictures position The LCD displays a live image and approximate number of pictures remaining The Self Timer icon appears if the Self Timer is turned on The battery icon appears if battery power is low 2 Compose the picture using the LCD 3 Press the Shutter button all the way down The picture is stored on the Picture Card 4 Wait approximately 5 seconds before taking another picture...

Page 35: ...rash can icon for five seconds If you want to keep the picture take no further action the picture is saved on the Picture Card Deleting a Picture During QuickView 1 While the trash can icon is displayed press the Select button The LCD displays the Delete screen 2 Press the buttons to highlight YES 3 Press the Select button to delete the picture The device returns to Picture mode ...

Page 36: ...30 Reviewing a Picture After QuickView Ends 1 Press the button The LCD displays the most recent picture and the trash can icon 2 Delete the picture or wait until the QuickView ends ...

Page 37: ...Press the buttons to highlight ON then press the Select button The new Self Timer setting is shown next to the Self Timer icon 4 Press the Menu button The Self Timer icon appears at the top of the LCD 5 Place the device on a tripod or firm support Compose the picture using the LCD Press the Shutter button all the way down and then move into the picture The Self Timer icon blinks until the picture ...

Page 38: ... taken To cancel the Self Timer selection before a picture is taken do any of the following m Turn off the mc3 device m Slide the Mode selector to change to a different mode m Press the Shutter button a second time A picture will not be taken but the device remains in Self Timer mode ...

Page 39: ...st recent picture or video is displayed Pictures and videos are numbered Videos are designated by the Video Camera icon 2 Use the buttons to scroll through pictures and videos To play or pause a video press the button To stop press the button To restart the current video or skip to the next video press and release one of the buttons To fast forward or rewind a video press and hold one of the butto...

Page 40: ...mode the first is much like during a QuickView 1 Slide the Mode selector to the Review position The most recent picture or video is displayed Pictures and videos are numbered and videos are designated by the Video Camera icon 2 Use the buttons to locate the picture or video you wish to delete The trash can icon is displayed for 5 seconds 3 To delete the video press the Select button while the tras...

Page 41: ...e Review position press the Menu button The Review menu is displayed 2 Use the buttons to highlight the trash can icon then press the Select button The Delete menu is displayed 3 Use the buttons to highlight one of these choices m This Picture m Exit without deleting anything m All Images 4 Press the Select button to apply the selection ...

Page 42: ... KODAK AV Cable 1 With the Mode selector in the Review position press the Menu button The Review menu is displayed 2 Highlight the Slide Show icon then press the Select button The Slide Show Interval menu is displayed 3 Press the buttons to designate the number of seconds to display each picture Videos are not affected by this setting 4 Press the Select button to apply the setting The slide show b...

Page 43: ...how Use these buttons to control the slide show Action Button Effect Press Pause or resume the slide show Press Display the previous or next picture or video Press and hold Fast forward or rewind a video Press End the slide show ...

Page 44: ......

Page 45: ...re Package Function KODAK mc3 Connection Software Provides mc3 drivers and the mc3 Connection application APPLE QUICKTIME 4 for WINDOWS Plays mc3 videos RealJukebox Plays and records digital music RealJukebox Plug in and Skin Downloads MP3 files and the mc3 RealJukebox Skin Software Package Function KODAK mc3 MACINTOSH Software Provides mc3 drivers and the mc3 Connection application APPLE QUICKTIM...

Page 46: ...online help supplied with each software application Software Package Function ADOBE ACROBAT Reader For displaying PDF files ARCSOFT VIDEOIMPRESSION Software For creating animating and editing desktop videos using video audio and image files ARCSOFT PHOTOIMPRESSION Software For viewing and editing pictures ...

Page 47: ... with PENTIUM 90 MHz microprocessor minimum 266 MHz is recommended and CD ROM drive m Color display monitor with 256 color High Color 16 bit or True Color 24 bit recommended m 32 MB or more of available RAM 64 MB or more is recommended m A minimum of 70 MB of hard disk space available m Available USB port or CompactFlash card reader ...

Page 48: ...d type setup exe For example d setup exe 3 Follow the on screen instructions to install all software Install the RealJukebox plug in after you install RealJukebox Also see Installing the mc3 as a Device for RealJukebox on page 43 NOTE During installation take a moment to fill out and send the product registration card This entitles you to information on software updates and registers some of the b...

Page 49: ...ck OK The Preferences dialog box shows KODAK mc3 in the Installed Devices list To further configure transfer options optional m Select Kodak mc3 from the Installed Devices list m Click Configure on the Devices Storage card of the Preferences dialog box m In the Configure KODAK mc3 dialog box select the desired file transfer and quality options and click OK 4 In the Preferences dialog box click OK ...

Page 50: ...rPC based MACINTOSH computer with CD ROM drive m Color display monitor with minimum resolution of 640 by 480 1024 by 768 preferred and 256 colors Thousands or Millions recommended m 32 MB or more of available RAM 64 MB is recommended m A minimum of 70 MB of hard disk space m Available USB port or CompactFlash card reader ...

Page 51: ...g installation take a moment to fill out and send the product registration card This entitles you to information on software updates and registers some of the bundled products You may also use the online registration form 2 If prompted restart the computer when the software installation is complete Software Package Function KODAK mc3 MACINTOSH Software Provides mc3 drivers and the mc3 Connection a...

Page 52: ......

Page 53: ...3 device to a computer by using the USB cable supplied You will want to transfer your media files from the mc3 device to your computer to m Enjoy best video playback performance m View pictures m Play music files on you favorite MP3 player m Keep files secure on your hard disk m Free up space on your Picture Card You can also transfer files from your Picture Card to a computer using an optional ca...

Page 54: ... icon appears in the My Computer or Explorer window The mc3 Connection Software launches 1 Plug the appropriate end of the TV Cable into the video out port on the bottom of the device 2 TV VCR Connect the RCA audio plugs red and white and the video plug yellow to the audio and video in jacks on the TV or VCR Stereo Connect the RCA audio plugs to the audio in left and right channels jacks on the st...

Page 55: ... pictures music and videos to your computer m Deleting music videos and pictures m E mailing pictures and videos m Printing your pictures m Launching other music and editing applications You can also use the application window to view the contents of the C Kodak Pictures mc3 Inbox folder which was created when the software was installed and stores the pictures videos and music files you transfer t...

Page 56: ...card reader icon or the PCMCIA drive icon and choose Open or Explore from the context menu 2 If you are using the Open browser open the folder on your hard disk where you want to transfer the media files and then position the folder so you can see the Open window 3 Do either of the following m Music files Double click the MUSIC folder m Still pictures or video clips Double click the DCIM folder an...

Page 57: ... pictures or video clips Double click the DCIM folder and then double click 100__MC3 folder 3 Select the files you want and drag them to the folder opened in step 1 To listen to a music file play a video clip or view a still picture in the destination folder double click the file The file is opened in the default application registered to open files of that format In mc3 Inbox view you can drag a ...

Page 58: ...le in a Third party Application 1 Transfer files from the mc3 device to your computer using mc3 Connections Software or WINDOWS Explorer 2 Using the Third Party media application such as ARCSOFT VIDEOIMPRESSION choose File Open 3 Navigate to the folder where the transferred file resides and select the file NOTE For best on screen viewing of your media files set your monitor display to High Color 1...

Page 59: ...m Free up space on your Picture Card When you connect the mc3 device to your computer the device appears as an icon on your desktop 1 Double click the mc3 icon 2 Double click the appropriate folder m Music files Double click the MUSIC folder m Still pictures and video clips Double click the DCIM folder then double click the 100__MC3 folder 3 Drag and drop the desired files to the desired location ...

Page 60: ...nize your files To make it easier to access the Kodak Pictures folder you can view it as a pop up window 2 On the desktop double click the KODAK mc3 icon 3 Do either of the following m Music files Double click the MUSIC folder m Still pictures and video clips Double click the DCIM folder and then double click the 100__MC3 folder 4 Select the files you want and drag them to the folder opened in ste...

Page 61: ...d party Application 1 Make sure the KODAK mc3 icon is on the desktop If the icon is not on the desktop turn off the mc3 device and then turn it on 2 Using a third party media application such as ARCSOFT VIDEOIMPRESSION choose File Open 3 In the Open dialog box click Desktop and then select KODAK mc3 4 Navigate to the folder where the desired file resides Select the file then click Open For more in...

Page 62: ...ture Card is inserted in the mc3 device m System folder A root level folder where the mc3 firmware resides prior to an update m MUSIC folder Contains music files m DCIM folder A root level folder containing the 100__MC3 folder Each time you turn the mc3 device on or insert a different Picture Card any empty folders within the DCIM folder are removed m 100__MC3 Stores pictures and videos taken with...

Page 63: ...der in which they are taken For example the first picture in the DCIM 100__MC3 folder is PIC_0001 JPG The mc3 device maintains a count of the number of pictures taken which is used to determine the number of the next picture taken m Even if you transfer pictures or videos to the computer or delete these files from the Picture Card the mc3 device uses consecutive numbers for all subsequent pictures...

Page 64: ...ure Card in a camera or device other than the KODAK mc3 and that manufacturer adheres to this file structure standard the DCIM folder will contain a folder named by that camera or device Any pictures taken with that camera or device are stored in the folder using the naming conventions established by the manufacturer For more information refer to the documentation that accompanied that camera or d...

Page 65: ...it is more than 8 3 characters either let WINDOWS software rename the file or rename the file yourself IMPORTANT Do not rename media files stored on the Picture Card Names must follow DOS format and can contain up to eight characters A through Z and numbers 0 through 9 followed by the three character extension You cannot use spaces or the following symbols m Period m Slash m Brackets m Semicolon m...

Page 66: ...u can use in the filename Before you transfer a file to the device rename the file Filenames can contain up to eight characters A through Z and numbers 0 through 9 You cannot use spaces or the following symbols m Period m Slash m Brackets m Semicolon m Equal sign m Quotation marks m Backslash m Colon m Vertical bar m Comma ...

Page 67: ...pactFlash certified Purchase a certified CompactFlash Card The card may be corrupt or formatted for use in other digital devices Format the card See Formatting a Picture Card on page 12 A card is not properly inserted in the mc3 device Insert a Picture Card ensuring it is firmly seated in the mc3 device See Inserting a Picture Card on page 3 Cannot erase an MP3 file from a Picture Card The file ma...

Page 68: ... LED flashes Battery power is too low for the mc3 device to function Replace or recharge the batteries See Loading the Batteries on page 2 A Battery icon appears on the LCD Battery power is low The mc3 device may still be used until the batteries are exhausted Keep a fresh set of batteries or a KODAK specified battery charger on hand When taking or deleting pictures the number of pictures remainin...

Page 69: ...from a KODAK or other digital camera may be on the Picture Card The device displays only those file formats that it recognizes A video clip skips during playback on mc3 device Over time a Picture Card may become fragmented Transfer desired music video and picture files to a computer Then reformat the Picture Card See page 12 The LCD is hard to read There is insufficient light Sufficient light is n...

Page 70: ...w mode and delete unwanted pictures or videos m Switch to Music mode and delete unwanted music files m If trying to take a video clip change to a lower Quality Setting Insert Picture Card There is no Picture Card in the mc3 device Insert a Picture Card into the device Picture Card Unreadable The mc3 device cannot access the Picture Card Either format see Formatting a Picture Card on page 12 or rep...

Page 71: ...reo on page 48 Some laptops turn off ports to conserve energy See the Power Management section of the laptop s documentation to disable this feature Computer or Monitor Problem Cause Solution A video clip skips during playback on a computer Playback quality is determined by a computer s processor hard drive memory and video card The image on your monitor is jagged or inappropriately colored The mo...

Page 72: ......

Page 73: ...ess KODAK mc3 online help m MACINTOSH Choose MC3 MC3 Help m WINDOWS Within the KODAK mc3 Connection application choose Help KODAK mc3 Software Help Online Services Get information from Kodak via m America Online keyword KODAK m CompuServe GO KODAK m World Wide Web http www kodak com click the Service and Support link m Chapter 8 Tips and Troubleshooting m Place of purchase m Software manufacturer ...

Page 74: ...68 Faxed Information Kodak offers automated support by fax m U S and Canada 1 800 508 1531 m Europe 44 0 131 458 6962 m U K 44 0 131 458 6962 ...

Page 75: ... is required for warranty coverage Warranty Replacement Coverage This warranty will be honored within the geographical location that the product was purchased Kodak will REPLACE the KODAK mc3 Portable Multimedia Device if it fails to function properly during the warranty period subject to any conditions and or limitations stated herein Such replacement is the sole remedy under this warranty If it ...

Page 76: ...E DURATION OF THIS WARRANTY Kodak makes no other express or implied warranty for this product In the event that the exclusion of any implied warranty is ineffective under the law the duration of the implied warranty will be one year from the purchase date The option of replacement is Kodak s only obligation Kodak will not be responsible for any special consequential or incidental damages resulting...

Page 77: ...er in writing by a Kodak company no warranty or liability exists beyond any minimum requirements imposed by law even though defect damage or loss may be by negligence or other act Software Application Support For application specific support contact your reseller systems integrator software manufacturer or dealer How to Obtain Service Visit us on the Internet at http www kodak com Please refer to ...

Page 78: ...alled or used in accordance with the instructions may cause harmful interference to radio communications However there is no guarantee that interference will not occur in a particular installation If this equipment does cause harmful interference to radio or television reception which can be determined by turning the equipment off and on the user is encouraged to try to correct the interference by...

Page 79: ...oélectriques dépassant les limites applicables aux appareils numériques de la Classe B prescrites dans les règlements sur le brouillage redioélectrique édictés par le Ministère des Communications du Canada Disclaimer The KODAK mc3 Portable Multimedia Device is intended for personal use and enjoyment by individual users only It is the responsibility of the user to secure the right or permission to ...

Page 80: ......

Page 81: ...i MH Capture Modes Still image still image Self Timer motion audio Output Still Image File format EXIF 2 1 Resolution 640 x 480 24 bit color Thumbnail 160 x 120 24 bit color Motion audio Resolution 320 x 240 10 or 20 FPS Compression MPEG4 Audio Mono 8 kHz File format QUICKTIME mov Audio Player File Format MP3 compatible Output Stereo through headphones or stereo line audio out from AV jack using o...

Page 82: ...this can create a safety hazard and is illegal in some areas Even though some headphones are designed to let you hear outside sounds they still present a safety hazard Using Batteries Safely m Keep batteries away from children m Discard used batteries according to applicable local and national regulations Utilize established community battery recycling programs where available m Kodak recommends K...

Page 83: ...cantly on age usage conditions type brand and device Not all batteries perform well under these challenging conditions In Kodak lab tests Ni MH rechargeable batteries delivered outstanding results in a variety of conditions Ni MH batteries are designed for high demand devices such as digital devices and do not exhibit the memory effects seen with other rechargeable technologies m In the unlikely e...

Page 84: ...n to come in contact with the surface of the device Cleaning the Lens and LCD Screen Do not use cleaning solutions unless they are designed specifically for camera lenses Do not wipe the lens or LCD screen with chemically treated eyeglass lens tissue as it may scratch the lens 1 Blow gently on the lens or LCD screen to remove dust and dirt 2 Moisten the lens or LCD screen by breathing lightly on i...

Page 85: ...ng 76 C Canadian DOC Statement 73 Cleaning 78 CompactFlash Card Formatting 12 Full 64 Inserting 3 Not recognized 61 Removing 4 Unreadable 64 CompuServe 67 Connecting To a computer 48 To a TV or stereo 48 D Date and time 9 Deleting All Pictures and Videos 35 Picture after QuickView 30 Picture during QuickView 29 Picture in Review Mode 34 Video after QuickView 25 Video during QuickView 25 Video in R...

Page 86: ...mation 68 Online Services 67 Software 67 Where to get 67 I Icon Steady battery 62 Inserting a Picture Card 3 Installing software 39 L Language 11 Locating Pictures 56 M MACINTOSH System Requirements 44 Maintenance and safety 76 Memory Card Formatting 12 Full 64 Inserting 3 Not recognized 61 Removing 4 Unreadable 64 Monitor 65 MP3 Disclaimer 73 Obtaining files 16 Player 15 Playing music files 17 N ...

Page 87: ...t 18 Shuffle 18 Q Quality video 26 QuickView With still pictures 29 With videos 24 R ReadMe 61 RealJukebox 16 REC 22 Rechargeable 2 Regulatory information 69 Repeat playlist 18 Reviewing Pictures Videos 33 S Safety 76 Self Timer 31 Service 71 Settings Changing 7 Date and time 9 Language 11 Playback 18 Sound 10 Video out 10 Video quality 26 Shuffle playlist 18 Sleep mode 6 Slide Show 36 ...

Page 88: ...st 1 T Taking Pictures 27 Videos 21 Timer 31 Tripod 31 Troubleshooting 61 U Unreadable Card 64 Unrecognized file format 63 USB Cable 48 Using batteries 76 V Video File 63 Out 10 Quality settings 26 Status icons 23 Taking 21 VIDEOIMPRESSION 40 W Warranty 69 WINDOWS System Requirements 41 Wrist strap 1 ...

Reviews: