background image

14

15

Wiring diagram [cable requirement]

■ Upto 100M : CAT5 cable

■ Upto 50M : TIV 0.65㎟cable

■ Upto 100M : Over TIV 0.8㎟cable

■ Upto 150M : TIV 0.8㎟cable + RG-59 / U

RG-59 / U (Coaxial cable) for Video signal

(Connect core to Video & shield to GND)

※ Based on distance from a camera to the monitor

※ CAT5 wire configuration

※ In case of more than 50m of CAT5 cable length, the screen and voice quality can get lower. 

But the sympthom is not a kind of fault. So less than 50m is recommended. 

※ According to outside environment, you may view the images somewhat unclear.

However, they do not result from any defect or trouble of the product.

Orange
W / Orange

Green
W / Green

Blue
W / Blue

Brown
W / Brown

① VCC

double up

② GND

double up

③ Audio

double up

④ Video

double up

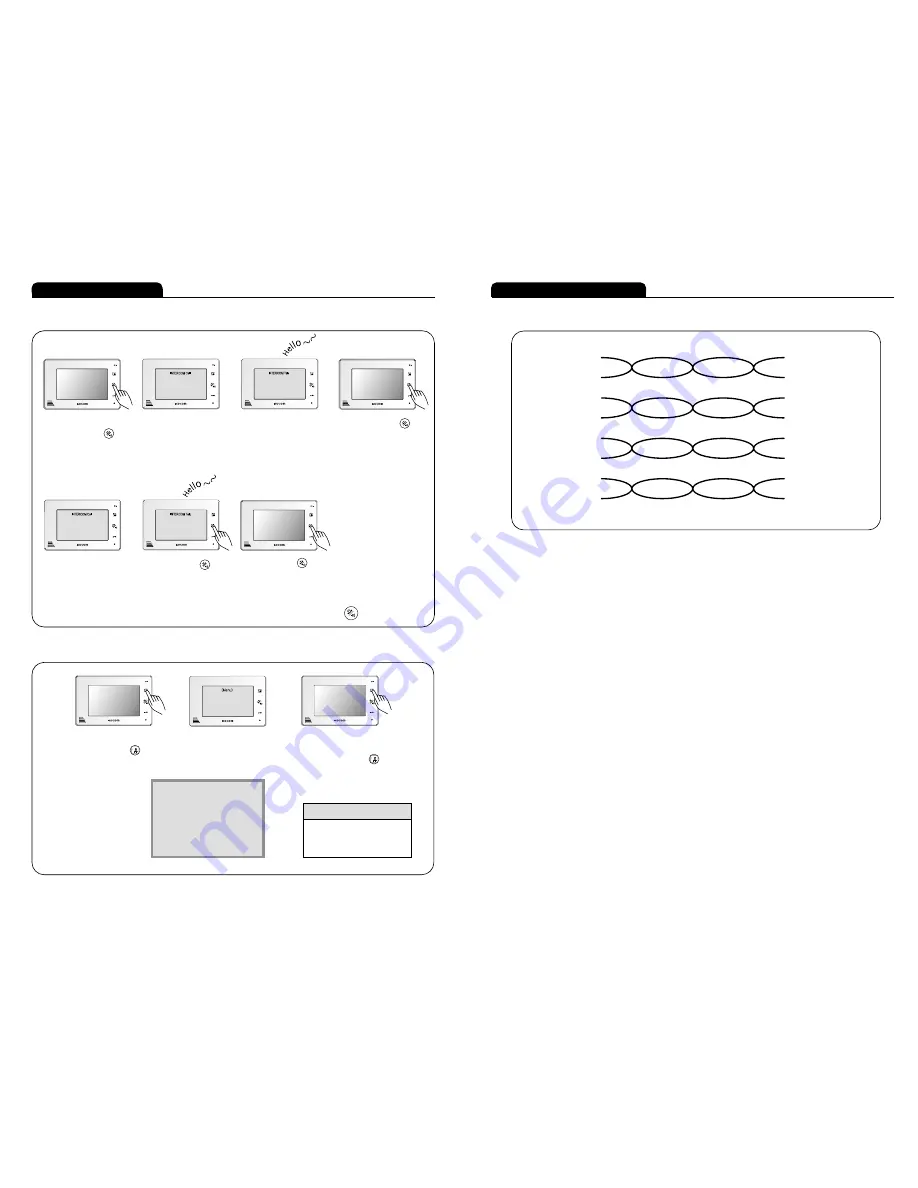
Instructions for operation

■ Extension call & communication

■ Special function selection

While the screen is off,
push the call button 
for 1.5 second. 

The screen turns on and

‘INTERCOM Call' is written 

on OSD. 
(INTERCOM Call Standby time
: 1 minute)

When connected to the sub-
monitor and sub-audiophone, the
main monitor will show 'INTERCOM
Talk' on OSD and the
communication turns on. 
(INTERCOM Talk time : 3 minutes)

Push the call button 
and stop INTERCOM Call. 

When the screen off, push
the monitor button 
for 4 seconds. 

When the screen on, Menu
Mode OSD appears with the
cursor. 

Menu Mode will disappear
automatically in 30 seconds.
Push the monitor button 
for 4 seconds and Menu
Mode will turns off. 

Menu for Special Function

□ Internal Call Receiving Mode

When receiving a call from Sub-
monitor and sub-audiophone, the
main monitor shows 'INTERCOM
Call' on OSD. 
(INTERCOM Call Standby time 
: 1 minute)

※ Caution : Push the call button       for 1.5 second. 

Push the call button 
and INTERCOM Talk starts.

Push the call button       again 
and stop INTERCOM Talk. 

<MENU>

��CAM1 : Bell 1 / 2 / 3 / 4 / 5

CAM2 : Bell 1 / 2 / 3 / 4 / 5
SUB : Bell 1 / 2 / 3 / 4 / 5
CAM1 View Time : 1MIN /
CAM2 View Time : 1MIN /

Cursor Guide

∙UP : Push the monitor button
∙Selection : Push the call button
∙Down : Push the door open button

□ Internal call sending mode

Summary of Contents for KCV-A374

Page 1: ...pection procedures 2 If this product breaks down during proper use as a result of product defect KOCOM will repair it within one year from date of purchase free of charge 3 The following cases will be subject to charge even during warranty period a Breakdown during transport or through careless treatment by consumer b Breakdown cause by unauthorized repair or system modification c Breakdown caused...

Page 2: ...ponents of product Name and functions of each part Specifications Camera installation Installation location Product connection diagram Instructions for operation Wiring diagram cable requirement Contents 4 6 6 7 8 10 10 13 15 ...

Page 3: ...camera over 5cm away Also avoid installing at a place with too much noise because too much noise around camera causes phone call inferiority Do not place an object within 20cm in front of monitor It causes phone call inferiority especially because microphone is installed at the top of monitor If strong light such as sunlight flows into camera module screen saturation or strange mark and image shak...

Page 4: ...oor switch terminal Connects Camera2 DC door switch Door1 AC DC door switch terminal Connects Camera1 AC DC door switch Power input section Input AC power and fix power cord Name and Functions of each part The front side Camera KC MC24 The back side Components of product Components of product Name and Functions of each part Monitor components 4 Pin cable for camera 8 Pin cable for monitor extensio...

Page 5: ...Camera installation Camera installation B Vcc Y GND R Audio W Video B DC 12V Y GND R Voice W Video 8 9 ...

Page 6: ... with insulating tape while cutting off power cord and connecting with power wire so electric wire metal does not expose Contact between exposed electric wires cause fire or electric shock accident 3 Such electric work requires connection after interception of supplied power 1 Remove wall hanger bracket metal behind monitor 2 Install wall hanger bracket metal on 1 type box or wall with attached Vi...

Page 7: ...e communication Camera monitoring Push the monitor button when there is no image on monitor screen Camera image appears on screen Monitoring time 1 minute Push the monitoring button 2 times and the image of camera 2 appears Push the monitoring button again and stop the communication Opening door automatically While communicating with a camera Press the door open button and open automatically the d...

Page 8: ...nd INTERCOM Call is written on OSD INTERCOM Call Standby time 1 minute When connected to the sub monitor and sub audiophone the main monitor will show INTERCOM Talk on OSD and the communication turns on INTERCOM Talk time 3 minutes Push the call button and stop INTERCOM Call When the screen off push the monitor button for 4 seconds When the screen on Menu Mode OSD appears with the cursor Menu Mode...

Reviews: