background image

2

ENGLISH

GENERAL SPECIFICATIONS

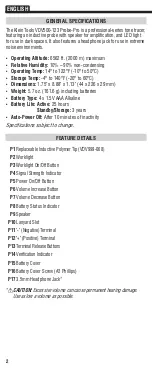
The Klein Tools VDV500-123 Probe-Pro is a professional-series tone tracer, 

featuring an inductive probe with speaker for amplification, and LED light 

for use in dark spaces. It also features a headphone jack for use in extreme 

noise environments.   

• 

Operating Altitude: 

6562 ft. (2000 m) maximum

• 

Relative Humidity: 

10% – 90% non-condensing

• 

Operating Temp: 

14° to 122°F (-10° to 50°C)

• 

Storage Temp: 

-4° to 140°F (-20° to 60°C)

• 

Dimensions: 

1.75" x 8.88" x 1.13" (44 x 226 x 29 mm)

• 

Weight: 

5.7 oz. (161.6 g) including batteries

• 

Battery Type: 

4 x 1.5V AAA Alkaline

• 

Battery Life: Active: 

25 hours   


Standby/Storage:

 3 years

• 

Auto-Power Off: 

After 10 minutes of inactivity

Specifications subject to change.

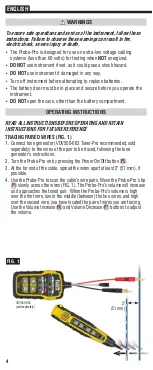
P1

Replaceable Inductive Polymer Tip (VDV999-068)

P2

Worklight

P3

Worklight On/Off Button

P4

Signal Strength Indicator

P5

Power On/Off Button

P6

Volume Increase Button

P7

Volume Decrease Button

P8

Battery Status Indicator

P9

Speaker

P10

Lanyard Slot

P11

"-" (Negative) Terminal

P12

"+" (Positive) Terminal

P13

Terminal Release Buttons

P14

Verification Indicator

P15

Battery Cover

P16

Battery Cover Screw (#2 Phillips)

P17

3.5mm Headphone Jack*

*

CAUTION:

 Excessive volume can cause permanent hearing damage. 

Use as low a volume as possible.

FEATURE DETAILS

Summary of Contents for Probe-Pro

Page 1: ...RUCTION MANUAL ENGLISH VDV500 123 Probe Pro Tracing Probe FRANÇAIS p 17 ESPAÑOL pág 9 TRACE INDIVIDUAL OR PAIRED WIRES EASY TO UNDERSTAND STATUS LEDs REPLACEABLE PROBE TIP When used with VDV500 063 Toner Pro ...

Page 2: ...batteries Battery Type 4 x 1 5V AAA Alkaline Battery Life Active 25 hours Standby Storage 3 years Auto Power Off After 10 minutes of inactivity Specifications subject to change P1 Replaceable Inductive Polymer Tip VDV999 068 P2 Worklight P3 Worklight On Off Button P4 Signal Strength Indicator P5 Power On Off Button P6 Volume Increase Button P7 Volume Decrease Button P8 Battery Status Indicator P9 ...

Page 3: ...3 P2 P17 P13 P3 P4 P5 P6 P7 P9 P10 P8 P15 P16 P1 P11 P12 P14 FEATURE DETAILS ...

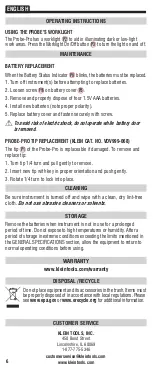
Page 4: ...ORE OPERATING AND RETAIN INSTRUCTIONS FOR FUTURE REFERENCE TRACING PAIRED WIRES FIG 1 1 Connect tone generator VDV500 063 Toner Pro recommended sold seperately to the wires of the pair to be traced following the tone generator s instructions 2 Turn the Probe Pro on by pressing the Power On Off button P5 3 At the far end of the cable spread the wires apart at least 2 51 mm if possible 4 Use the Pro...

Page 5: ...cess the terminals press their respective Terminal Release buttons P13 insert the wire s and release FIG 2 The Verification Indicator P14 will illuminate when the correct pair is inserted TRACING NON PAIRED WIRES FIG 3 1 Connect tone generator VDV500 063 Toner Pro recommended sold seperately to the wires to be traced following the tone generator s instructions 2 Turn the Probe Pro on by pressing t...

Page 6: ...s before using WARRANTY www kleintools com warranty DISPOSAL RECYCLE Do not place equipment and its accessories in the trash Items must be properly disposed of in accordance with local regulations Please see www epa gov or www erecycle org for additional information MAINTENANCE BATTERY REPLACEMENT When the Battery Status Indicator P8 blinks the batteries must be replaced 1 Turn off instrument s be...

Page 7: ...UAL DE INSTRUCCIONES VDV500 123 Sonda para trazado probe pro TRAZA ALAMBRES INDIVIDUALES Y DE PAR LED DE ESTADO FÁCILES DE ENTENDER PUNTA DE SONDA REEMPLAZABLE Cuando se usa con VDV500 063 Toner Pro ESPAÑOL ...

Page 8: ...acenamiento 3 años Función de apagado automático después de 10 minutos de inactividad Especificaciones sujetas a cambios P1 Punta de polímero inductiva reemplazable VDV999 068 P2 Luz de trabajo P3 Botón de encendido y apagado de luz de trabajo P4 Indicador de intensidad de la señal P5 Botón de encendido y apagado P6 Botón de aumento de volumen P7 Botón de disminución de volumen P8 Indicador del es...

Page 9: ...9 DETALLES DE LAS CARACTERÍSTICAS P2 P17 P13 P3 P4 P5 P6 P7 P9 P10 P8 P15 P16 P1 P11 P12 P14 ...

Page 10: ...DE UTILIZAR LOS DISPOSITIVOS Y CONSÉRVELAS PARA CONSULTARLAS EN EL FUTURO TRAZADO DE PARES DE ALAMBRES FIG 1 1 Conecte el generador de tono se recomienda el Toner Pro VDV500 063 se vende por separado a los alambres del par que va a trazarse siguiendo las instrucciones del generador de tono 2 Encienda el Probe Pro presionando el botón de encendido y apagado P5 3 De ser posible cree en el extremo de...

Page 11: ...one los botones correspondientes de liberación de termina P13 inserte el o los alambres y efectúe la liberación FIG 2 El indicador de verificación P14 se iluminará cuando se inserte el par correcto TRAZADO DE ALAMBRES SIN PAR FIG 3 1 Conecte el generador de tono se recomienda el Toner Pro VDV500 063 se vende por separado a los alambres que van a trazarse siguiendo las instrucciones del generador d...

Page 12: ...Visite www epa gov o www erecycle org para obtener más información MANTENIMIENTO REEMPLAZO DE LA BATERÍA Cuando el indicador del estado de batería P8 se parpadea se deben reemplazar las baterías 1 Apague el los instrumento instrumentos antes de intentar reemplazar las baterías 2 Afloje el tornillo P16 de la cubierta del compartimiento de las baterías P15 3 Retire y deseche correctamente las cuatro...

Page 13: ...23 FRANÇAIS MANUEL D UTILISATION Sonde de tonalité probe pro DÉTECTE LES FILS INDIVIDUELS OU APPARIÉS VOYANTS DEL FACILES À COMPRENDRE POINTE DE LA SONDE REMPLAÇABLE En cas d utilisation avec VDV500 063 Toner Pro ...

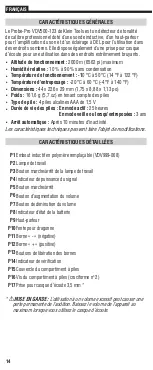
Page 14: ...de actif 25 heures En mode veille ou lorsqu entreposées 3 ans Arrêt automatique Après 10 minutes d inactivité Les caractéristiques techniques peuvent faire l objet de modifications P1 Embout inductif en polymère remplaçable VDV999 068 P2 Lampe de travail P3 Bouton marche arrêt de la lampe de travail P4 Indicateur de puissance du signal P5 Bouton marche arrêt P6 Bouton d augmentation du volume P7 B...

Page 15: ...15 P2 P17 P13 P3 P4 P5 P6 P7 P9 P10 P8 P15 P16 P1 P11 P12 P14 ...

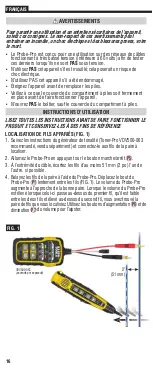
Page 16: ...dessus du second fil vous avez trouvé la paire de fils que vous localisiez Utilisez les boutons d augmentation P6 et de diminution P7 du volume pour l ajuster AVERTISSEMENTS Pour garantir une utilisation et un entretien sécuritaires de l appareil suivez ces consignes Le non respect de ces avertissements peut entraîner un incendie un choc électrique et des blessures graves voire la mort Le Probe Pr...

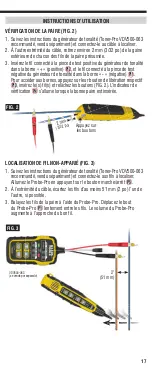
Page 17: ...ez sur leur bouton de libération respectif P13 insérez le s fil s et relâchez les boutons FIG 2 L indicateur de vérification P14 s allume lorsque la bonne paire est insérée LOCALISATION DE FIL NON APPARIÉ FIG 3 1 Suivez les instructions du générateur de tonalité Toner Pro VDV500 063 recommandé vendu séparément et connectez le aux fils à localiser Allumez le Probe Pro en appuyant sur le bouton marc...

Page 18: ...CLAGE Ne mettez pas l appareil et ses accessoires au rebut Ces articles doivent être éliminés conformément aux règlements locaux Pour de plus amples renseignements consultez les sites www epa gov ou www erecycle org ENTRETIEN REMPLACEMENT DES PILES Lorsque l indicateur d état de la batterie P8 clignote remplacez les piles 1 Éteignez l instrument avant de remplacer les piles 2 Desserrez la vis P16 ...

Page 19: ...NOTES NOTAS REMARQUES ...

Page 20: ...KLEIN TOOLS INC 450 Bond Street Lincolnshire IL 60069 1 877 775 5346 customerservice kleintools com www kleintools com 1390303 Rev 06 19 B NOTES NOTAS REMARQUES ...
Reviews: