


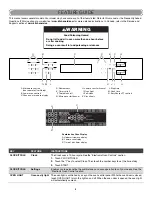


13
Convection Broil (on some models)
During convection broiling, the broil element will cycle on and off in
intervals to maintain oven temperature, while the fan circulates the
hot air.
The temperature is preset at 550°F (288°C), but can be changed
to a different temperature. Cooking times will vary depending on
the rack position and temperature, and may need to be adjusted.
If the oven door is opened during convection broiling, the fan turns
off immediately and turns on as soon as the door is closed. Broil
elements will turn off approximately 30 seconds after the door is
opened. They will turn on again approximately 30 seconds after
the door is closed.
NOTE: It is normal for the convection fan to run during non-
convection cycles as well as during preheat.
To Convection Broil:
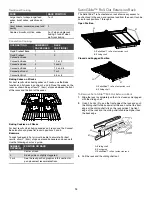
Allow the oven to preheat for 5 minutes. Position food on the
unheated grid on the broiler pan, and then place it in the center of
the oven rack with the longest side parallel to the door.
Proofing Bread
Proofing bread prepares dough for baking by activating the yeast.
Proofing twice is recommended unless the recipe directs
otherwise.
To Proof:
Before first proofing, place dough in a lightly greased bowl and
cover loosely with waxed paper or plastic wrap coated with
shortening. Place on rack guide 2. See “Rack and Bakeware
Positions” for diagram. Close door.
1. Touch Lower Oven PROOF. Display will show 100°F (38°C).
2. Touch START.
Let dough rise until nearly doubled in size. Check at 20 to
25 minutes. Proofing time may vary depending on dough type
and quantity.
3. Touch CANCEL when finished proofing.
Before second proofing, shape dough, place in baking pan(s) and
cover loosely. Follow same placement, and control steps above.
Before baking, remove waxed paper or plastic wrap.
Temperature Probe (single, upper, and on
some models, lower oven)
The temperature probe accurately measures the internal
temperature of meat, poultry and casseroles with liquid and should
be used in determining the doneness of meat and poultry. The
temperature probe should only be used with Bake, Convect Bake
or Convect Roast.
Always unplug and remove the temperature probe from the oven
when removing food.
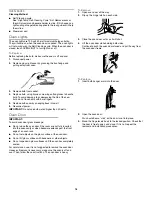
To Use:
Before using, insert the probe into the food item. (For meats, the
probe tip should be located in the center of the thickest part of the
meat and not into the fat or touching a bone). Place food in oven
and connect the temperature probe to the jack. Keep probe as far
away from heat source as possible. Close oven door.
NOTE: The temperature probe must be inserted into the food item
before the mode is selected.
1. Touch the number keys to enter a probe temperature. The
probe temperature is the desired internal temperature of the
food when it is done. The temperature can be set between
110°F and 200°F (43°C and 93°C).
2. Touch BAKE, CONVECT BAKE or CONVECT ROAST.
Touch number keys to enter an oven temperature other than
the one displayed. The oven temperature is the temperature
given in the recipe.
3. Touch START.
The set oven temperature will appear on the oven display
throughout cooking.
“Lo°” will appear as the probe temperature until the internal
temperature of the food reaches 45°F (7°C). Then the display
will show the temperature increasing.
When the set probe temperature is reached, the oven will shut
off automatically and “Cooking Complete” will appear on the
oven display.
If enabled, end-of-cycle tones will sound, and then reminder
tones will sound every minute.
4. Touch CANCEL for the selected oven, or open the oven door
to clear the display and/or stop reminder tones.
5. Always unplug and remove the temperature probe from the
oven when removing food. The probe symbol will remain lit in
the display until the probe is unplugged.
To Change Probe Temperature During a Cooking Cycle:
1. Touch a probe-enabled cooking mode (Bake, Convect Bake,
or Convect Roast).
2. Follow steps 1 through 5 in the “To Use” section.
Timed Cooking
Timed Cooking allows the oven(s) to be set to turn on at a certain
time of day, cook for a set length of time, and/or shut off
automatically. Delay start should not be used for food such as
breads and cakes because they may not bake properly.
To Set a Cook Time:
1. Select a cooking function.
Touch the number keys to enter a temperature other than the
one displayed.
Timed Cooking may also be used with the Bread Proof
function, but the temperature is not adjustable.
2. Touch COOK TIME.
3. Touch number keys to enter the length of time to cook.
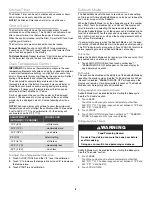
WARNING
Food Poisoning Hazard
Do not let food sit in oven more than one hour before
or after cooking.
Doing so can result in food poisoning or sickness.