ADJUSTMENTS & OPERATIONS
TILTING TABLE
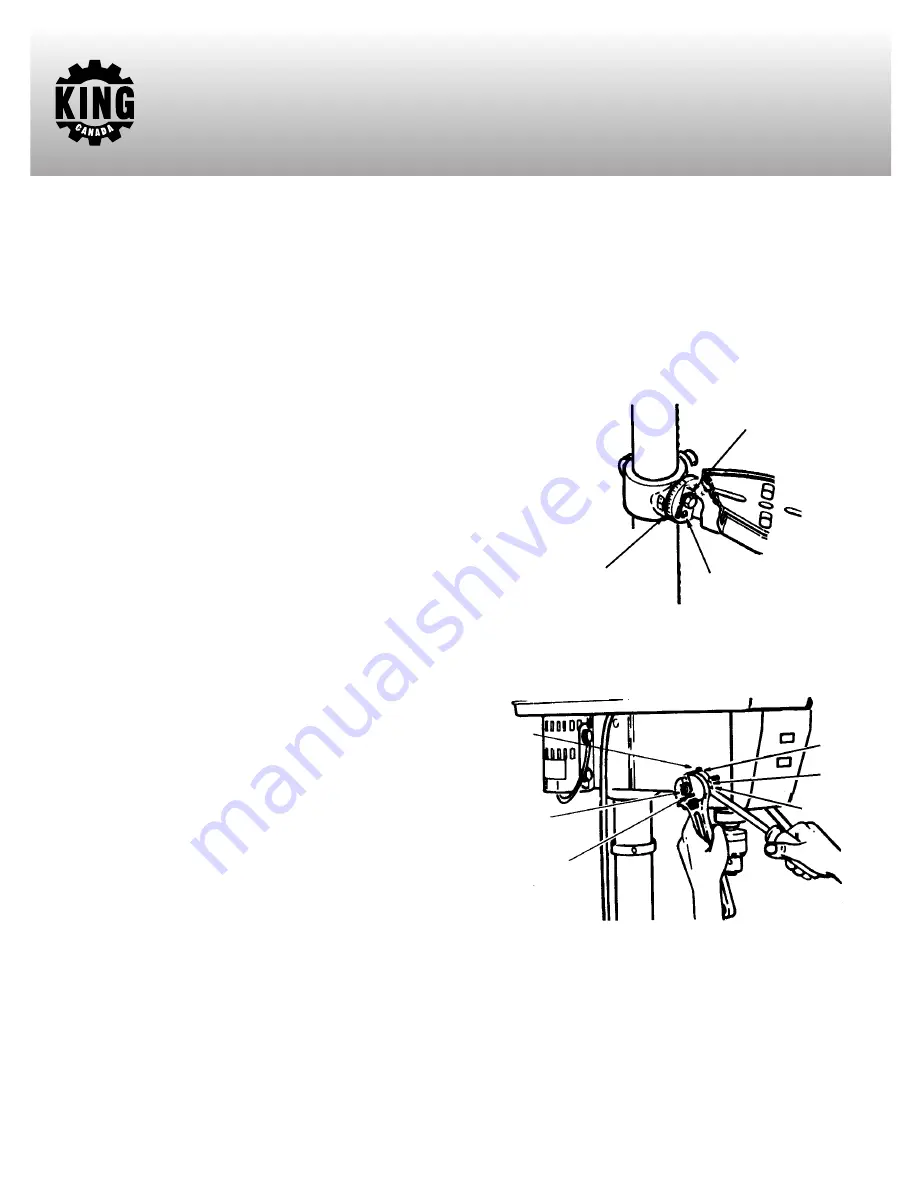
To use the table in a bevel (tilted) position (Fig.26), loosen the set
screw under the table bevel lock with a 3mm hex. key. Loosen bevel
lock using open end wrench included. Tilt the table to the desired
angle by reading the bevel scale. Retighten bevel lock and set screw.
WARNING
: To reduce the risk of injury from spinning work or
tool breakage, always clamp workpiece and backup material
securely to the table before operating the drill press with the table
tilted.
To return the table to its original position, loosen the set screw and
bevel lock, tilt the table back to zero on the bevel scale and
retighten set screw, then retighten the bevel lock.
HOLE LOCATION
Make a dent in the workpiece where you want the hole to be, using
a center punch or a nail. Before turning the switch on, bring the
drill down to the workpiece and line up with the dent in the
workpiece and clamp into place.
FEEDING
Pull down on the feed handles with only enough effort to allow the
drill to cut. Feeding too slowly might cause the drill to burn.
Feeding too rapidly might stop the motor, cause the belt or drill to
slip, tear the workpiece loose or break the drill bit. When drilling
metal, it may be necessary to lubricate the tip of the drill bit with
cutting oil or motor oil to prevent burning of the drill tip.
ADJUSTING THE QUILL RETURN SPRING
NOTE
: The return spring tension is set at the factory and should
not require further adjustment.
1. With the chuck at its highest possible position, turn the depth
scale clockwise until it stops and tighten the depth scale lock.
This will prevent the quill from dropping while tensioning the
spring.
2. Lower the table for additional clearance.
3. Work from the left side of the drill press.
4. Place screwdriver in the lower front notch of the spring cap, and
hold it in place while loosening and removing the outer nut
(only).
5. With screwdriver remaining in the notch, loosen inner nut
(approx. 1/8”) until the notch disengages from the boss on the
head. Do not remove this nut.
6. Carefully turn screwdriver counterclockwise and engage the
next notch in the boss. Do not remove screwdriver.
7. Tighten standard nut with wrench only enough to engage boss.
Do not over tighten as this will restrict quill movement.
8. Move stop nuts and depth pointer to upper most position and
check tension while turning feed handles.
9. If there is not enough tension on the spring, repeat steps 4-8
moving only one notch each time and checking tension after
each repetition.
10. Proper tension is achieved when the quill returns gently to the
full up position when released from 3/4” depth.
11. When there is enough tension after checking, replace outer nut
and tighten inner nut. Do not over tighten against the inner nut.
12. Check quill while feeding to have smooth and unrestricted
movement. If movement is too tight, loosen outer nut and
slightly loosen inner nut until unrestricted. Retighten outer nut.
FIGURE 26
Set screw
Bevel lock
Bevel scale
FIGURE 27
Notch
Boss
Spring
cap
Notch
Nut
(outer)
Nut
(inner)


