26
6. Configuration via the graphical user interface (GUI)
The free configuration software for download can be found on our dealer portal (for resellers only):
http://shop.kindermann.de/erp/webshop/navigationPath/7447000500.html
Please connect your PC to the QuickSelect 3.0+ System by RS232 (for pin assignment for GUI, see p. 35).
If your PC has no RS232 connection, please use a RS232/USB adapter.
After connecting the QuickSelect 3.0+ to the PC, start the above software on it.
6.1 Basic configuration
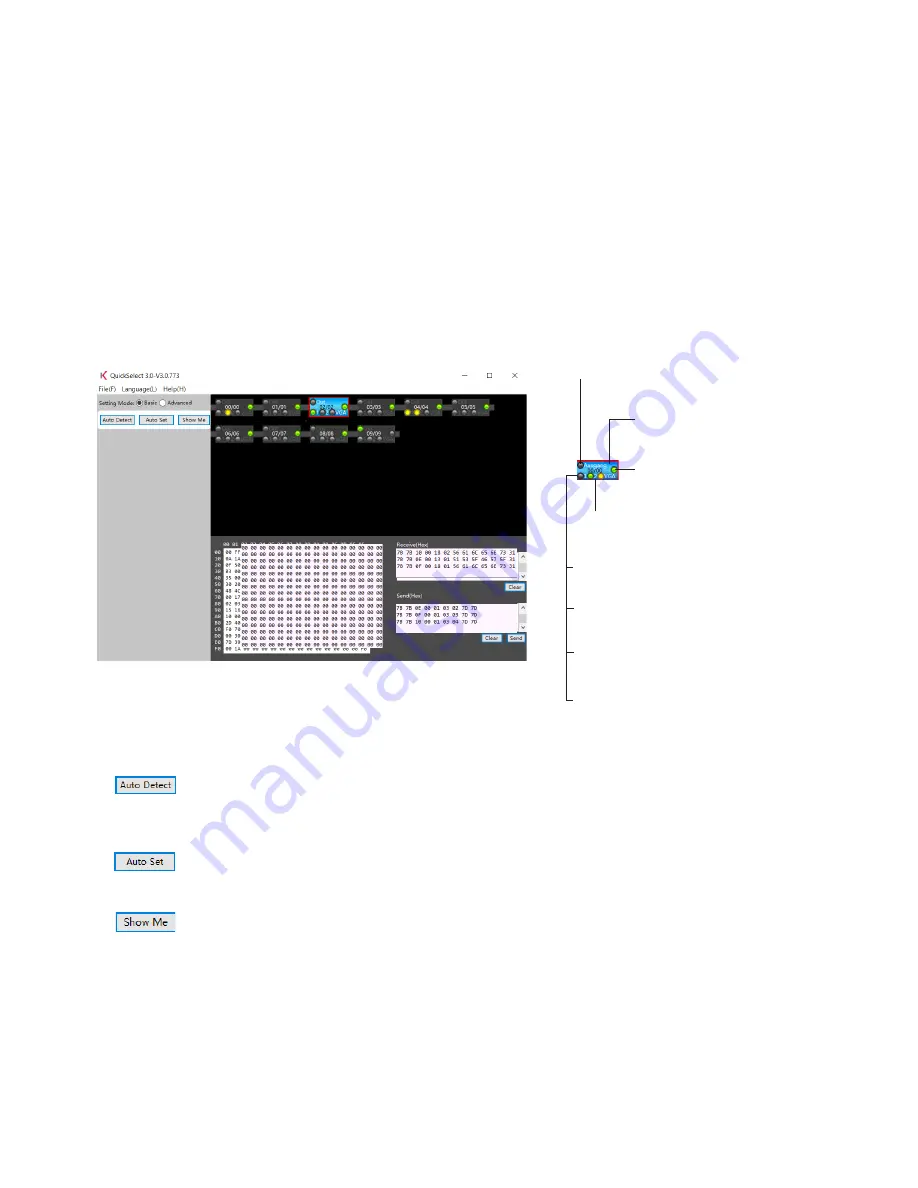
The software starts in the basic view. You can make all important basic settings here that can also be
made by using a switch-key or using the Quick-setup jumper (see 5):
Here, the QuickSelect 3.0+ transmitters combined in this chain and correctly
connected are found and recognised. The left one of the two numbers means
the internal ID (not relevant for the user) and the second number the currently
assigned address.
Here, the addresses are awarded automatically (only applies to the devices with
BCD switches set to 99), and the EDID of the last display device connected via
HDMI or HDBT Link-out is transmitted to all HDMI inputs.
Selecting the desired device with the mouse and then clicking this button
corresponds to pushing the Show Me button of the respective selected device
(recognisable by the red frame).
1.
2.
3.
Shows whether a device is connected
to the HDMI-out (active = green).
Highlighted blue:
This Quickselect was
activated by ShowMe.
Green: HDBT Link-out is
connected
Black: No source connected.
Yellow: Source connected
but not selected.
Orange: VGA not connected on
selected unit. Scrensaver is shown.
Green: Source connected
and selected.
Red frame: This device has been
selected with the mouse.


