15L WET & DRY SHED VAC
7
OPERATION (CONT.)
VACUUMING WET MATERIALS
NOTE: Always check that you have the correct filter type in your vacuum prior to commencing
vacuuming.
1.
Ensure that the power cord is removed from the wall socket and remove the motor head
(12)
from the vacuum tank
(11)
by releasing the tank retention clips
(10)
on the side
of the vacuum.
2.
Check to ensure that the cloth filter
(17)
is
NOT
located on the upper top ring of vacuum
tank
(11)
and that the foam filter
(16)
is located on filter basket
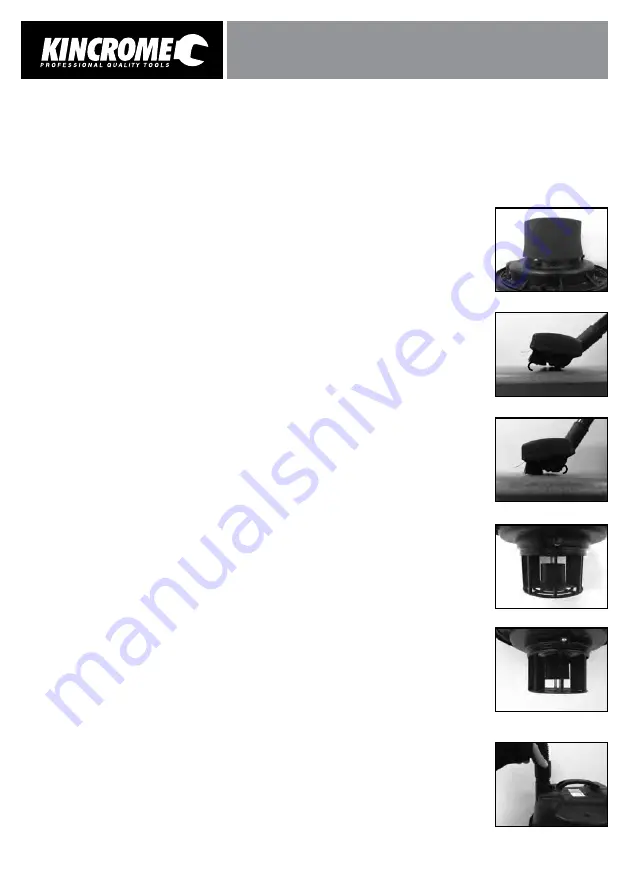
(15) (fig 10).
3.
Once you have the foam filter
(4)
installed into your vacuum re-assemble the motor head
(12)
back
onto of the vacuum tank
(11)
.
Locate and secure the tank retention clips
(10)
onto the motor head
(12)
.
4.
Plug the vacuum into your wall socket and turn the wall socket on.
You can now commence vacuuming.
NOTE:
When vacuuming wet materials it may be required to open the front or rear face of the wet &
dry floor tool
(8)
to allow the larger debris (wet sand or excessive water etc.) to be sucked into the
vacuum. This can be achieved by tilting the wet & dry floor tool
(8)
up or down approximately 5
-10˚ to create an opening between the wet & dry floor tool
(8)
front brush and the floor.
When pushing the wet & dry floor tool
(8)
forward push the 3pce extension wand
(2)
towards the
ground slightly to open the front face of the wet & dry floor tool
(8)
and allow the debris to enter
the vacuum
(fig 11).
When retracting the wet & dry floor tool
(8)
backwards lift the 3pce extension wand
(2)
towards
the sky slightly to open the rear face of the wet & dry floor tool
(8)
and allow the debris to enter
the vacuum
(fig12)
.
VACUUM SAFETY FLOAT VALVE
NOTE:
Your Wet & Dry vacuum is installed with a safety float valve
(14)
located within the filter
basket
(15)
.
A.
This float safety valve
(14)
is designed to stop any water from entering the motor head
(12)
if
the vacuum tank
(11)
becomes full of a liquid.
B.
This safety float valve
(14)
will also activate if the vacuum falls over or overturns. Refer
to the
(fig. 13 & 14)
to identify yourself with the position of the safety float valve
(15)
in the event is
has activated.
• Safety float valve in normal operation position
(fig 13).
• Safety float valve in “activated” position
(fig14).
The vacuum will not operate in the activated position until it has been reset.
To reset the safety float valve
(14)
A.
turn off the vacuum & empty the vacuum tank
(11)
or
B.
upright the vacuum and turn it off and wait for 3-5 seconds.
This should reset the safety float valve
(14)
and the vacuum can now be used again.
BLOWER PORT FUNCTION
Your vacuum is fitted with a blower port
(13)
. The blower port
(13)
enables you to connect your
vacuum hose
(3)
into the blower port
(13)
creating a low pressure air blower. This air blower can be
used for clearing off work benches, blowing out under shelving or moving light debris around your
work area ready to vacuum up.
Connect the lower vacuum hose
(3)
connector into the blower port
(13)
and secure the hose by
twisting the vacuum hose
(3)
connector a ¼ turn in a clockwise direction
(fig 15).
(Fig 10)
(Fig 15)
(Fig 13)
OPEN/NORMAL FLOAT
(Fig 14)
CLOSED/ACTIVATED FLOAT
(Fig 11)
5-10º
(Fig 12)
5-10º


