background image

FORTE


F E A T U R E S   &   F U N C T I O N S   G U I D E

42

*IF EQUIPPED                     †LEGAL DISCLAIMERS ON BACK INSIDE COVER

OTHER KEY FEATURES

OTHER KEY FEATURES

Driver Attention Warning (DAW)

*

†7

The DAW system is designed to detect certain inattentive driving practices and, in certain situations,  
can give a warning signal to the driver to take a break from driving . 
The DAW System is set to OFF by default . To turn the DAW System ON, turn the ignition on and then  
select User Settings in the LCD Display on the Instrument Cluster . Then go to Driving Assist and select  
Driver Attention Warning . Set the DAW System to Normal or High Sensitivity .

Driver Attention Warning (DAW) System modes:
OFF:

 The Driver Attention Warning system is deactivated 

A

Normal Sensitivity: 

The Driver Attention Warning system alerts the driver of inattentive driving practices .

High Sensitivity: 

The Driver Attention Warning system alerts the driver of inattentive driving practices  

faster than Normal mode .

If the DAW System is activated, the DAW information will appear on the LCD Display 

B

 when you select  

the ASSIST mode 

 .

A message, “Consider taking a break,” appears on the LCD display and a warning sounds to suggest the  
driver to take a break when the driver’s attention level is below one bar 

C

 .

REMINDERS:


The set-up of the DAW System will be maintained, as selected, when the ignition is cycled


 When activated, the DAW System does not display the “Consider taking a break” message when the total trip driving time is less than 10 minutes


 The DAW System will enter a standby mode if the camera does not detect the lanes and/or the driving speed remains under 40 mph

Attention Alert

System Off

Level Time    ——:——

Attention Level

LOW

HIGH

Level Time    05:27

Attention Level

LOW

HIGH

Level Time    05:27

Consider taking a break

22.4 

°C

4025

km

Attention Alert

System Off

Level Time    ——:——

Attention Level

LOW

HIGH

Level Time    05:27

Attention Level

LOW

HIGH

Level Time    05:27

Consider taking a break

22.4 

°C

4025

km

Attention Alert

System Off

Level Time    ——:——

Attention Level

LOW

HIGH

Level Time    05:27

Attention Level

LOW

HIGH

Level Time    05:27

Consider taking a break

22.4 

°C

4025

km

B

C

A

Driver Attention Warning is not a substitute for safe driving and may not detect all instances of inattentive driving practices. Failure to pay attention 

to travel conditions and vehicle operation could result in loss of vehicle control. Always drive safely and use caution.

For illustrative purposes only. Your actual display, buttons and/or features may vary.

Summary of Contents for Forte 2020

Page 1: ......

Page 2: ...ety information it provides is not a substitute for your Owner s Manual In the interest of your safety and that of the vehicle s occupants and to help you avoid risks that may result in death or serious injury Kia reminds you to carefully read your Owner s Manual in order to fully familiarize yourself with the important information and safety warnings it contains While Kia endeavors to ensure that...

Page 3: ...ing Rear Seats 35 OTHER KEY FEATURES Map Room Lamps 36 Sunroof Operation 36 Smart Key 37 Remote Keyless Entry Folding Key 38 Double Turn Lock Unlock All 38 Tire Mobility Kit 38 Smart Trunk 39 Hood Release Lever and Latch 40 Sunvisor 40 Trunk Release Lever and Button 40 Fuel Filler Lid Release Lever 40 Rear View Monitor 41 Fuel Cap Malfunction Indicator Check Engine Light 41 Parking Distance Warnin...

Page 4: ...ice to view the selected Kia Features Functions Video How to snap a QR Code 1 With your mobile device download a QR Code Reader App With many devices you can do this through an app store or marketplace 2 Open the QR Code Reader App on your mobile device 3 The app will utilize your device s camera Center the code in the camera viewing area With some apps as soon as the app recognizes the code it wi...

Page 5: ...CD Screen Odometer Tripmeter E Gear Shift Position Indicator F Fuel Gauge G Engine Coolant Temperature Gauge Your vehicle s instrument cluster indicator light locations may differ from those in the illustrations For more information on the instrument cluster the LCD Warning Messages and the function of all indicator and warning lights please refer to the Owner s Manual This illustration is for dem...

Page 6: ...r Indicator Electronic Stability Control Indicator Malfunction Indicator Light on Indicator KEY OUT Indicator Electronic Power Steering EPS Warning Indicator Front Fog Lights Indicator Engine Oil Pressure Warning Indicator Safety Belt Warning Indicator Door Ajar Warning Indicator Airbag Warning Indicator Charging System Warning Indicator High Beam Indicator Low Fuel Level Warning Indicator Cruise ...

Page 7: ...modes press the Mode button A To display the Tripmeter press the Mode button A and select Trip Computer Then press the Move button B up down to scroll to Drive Info screen and press OK button C to enter Then scroll to Tripmeter and press OK button again Press and hold the OK button C to reset the Tripmeter to zero REMINDERS Appearance of Tripmeter display may differ as equipped All stored driving ...

Page 8: ...tings Service Interval Setting To set the service interval when in User Settings mode Press the Move button B up down and scroll to Service Interval Press the OK button C to enter Press the Move button B and toggle to ON then press the Select Reset button C Then press the Move button B up down to scroll and select the desired miles or months for your next service Press the Select Reset button C to...

Page 9: ...s to turn off the Low Tire Pressure Light using an accurate tire pressure gauge See front driver s door jamb for PSI specification When there is a problem with the TPMS the TPMS Malfunction Indicator will blink for approximately one minute and then illuminate See dealer for service Even with TPMS tire pressure should be checked manually at least once a month Only adjust tire pressure on cold tires...

Page 10: ...tivate press the DRIVE MODE button B again to change the selection to another setting Drive Mode Integrated Control System Video To view a video on your mobile device snap this QR Code or visit the listed website Refer to page 2 for more information www youtube com KiaFeatureVideos QR CODE DRIVE MODE R N D D M P R N D S Drive Mode Integrated Control System Located on Center Panel next to Gear Shif...

Page 11: ...ily whenever ESC is active Instrument Cluster Control With parking lights headlights ON press button B or to adjust the brightness of the instrument panel illumination Hill start Assist Control HAC 8 HAC is designed to help prevent the vehicle from rolling backwards when accelerating from a stop while on a steep incline The HAC automatically activates whether the ESC is OFF or ON but does NOT acti...

Page 12: ... signal a flashing yellow indicator will illuminate on the outside rearview mirrors and the system will sound an alert REMINDERS The RCCW feature can be turned OFF ON in User Settings and will remain in OFF ON as selected When vehicle power is cycled the RCCW will remain in the previous state When a vehicle is approaching within the sensing range and traveling between 2 5 and 22 mph the RCCW syste...

Page 13: ...nt to the steering trying to prevent the vehicle from moving outside its lane Standard LKA is the operating mode by default when the button is depressed to ON To switch between modes Standard LKA Active LKA and Lane Departure go to User Settings in the Instrument Cluster All systems will operate under the following conditions The vehicle speed is above 40 mph The LKA system recognizes both sides o...

Page 14: ...rned ON in the User Settings menu on the Instrument Cluster display The FCA Ped FCW will become active when the Engine Start Stop button is ON Vehicle is traveling more than 6 mph Electronic Stability Control ESC is ON REMINDERS The FCA Ped FCW systems will be activated by default when the ignition is cycled ON even when previous setting to OFF If the FCA Ped FCW systems are operating and the ESC ...

Page 15: ...e to turn the engine off and to the ACC position by pressing the ENGINE START STOP button for more than 2 seconds or 3 times successively within 3 seconds If Smart Key fob battery is dead you can still start the engine by pressing the ENGINE START STOP button with the Lock button end of the Smart Key The Smart Key must contact the ENGINE START STOP button directly at a right angle For illustrative...

Page 16: ...Window Defroster is turned ON OFF The Rear Window Defroster button is located on climate control system panel Automatic Door Lock Unlock When the gear shift is moved into or out of P PARK all doors will Lock Unlock Refer to the User Settings on how to turn Auto Door Lock Unlock ON OFF For illustrative purposes only Your actual display buttons and or features may vary Driver s Door Button configura...

Page 17: ...Kia dealer for service Daytime Running Lights DRL DRL may help others to see the front of your vehicle during the day The lights will be on automatically when the ignition or Engine Start Stop button is ON and the headlight switch is in the AUTO position unless one of the following occurs Headlights are on Parking brake is applied Engine is turned off Switch is in the DRL OFF position High Beam As...

Page 18: ...Rotate INT switch to adjust Intermittent Wipe Speed Pull lever to spray and wipe To inspect or replace the windshield wiper blades to prevent damaging the hood the blades need to be moved to the service position A With the ignition ON then turning the engine OFF within 20 seconds move the wiper switch to the MIST position B and hold the switch for more than two seconds until the wiper blade is in ...

Page 19: ...djust the Steering Wheel push down the Lock Release Lever A and adjust to desired angle B and distance C When finished pull up the Lock Release Lever A to lock Steering Wheel in place It may be helpful to pull push bottom of the Steering Wheel towards away from you to adjust desired distance QUICK TIP For illustrative purposes only your steering wheel may differ STEERING WHEEL CONTROLS ...

Page 20: ...ancel Cruise Control do one of the following Press the brake pedal Press the CANCEL button Press and hold the Audio Mode button to turn the Audio Mode ON or OFF QUICK TIP Driving while distracted is dangerous and should be avoided Drivers should remain attentive to driving and always exercise caution when using the steering wheel mounted controls while driving For illustrative purposes only Your a...

Page 21: ... turn SCC system OFF Press the CRUISE button A The CRUISE indicator on the instrument cluster will turn OFF To change the Cruise Control mode from SCC to standard Cruise Control press and hold button D Repeat to switch modes again The SCC system must not be activated to change modes For the SCC System to operate the vehicle must be traveling at a minimum speed of 20 mph When following a vehicle th...

Page 22: ...reject an incoming call or cancel a function Phonebook transfer upload time varies by phone model and with number of phonebook entries Because of differences in phone quality service providers and Bluetooth Wireless Technology chip programming functionality may differ from one phone to another QUICK TIPS Driving while distracted is dangerous and should be avoided Drivers should remain attentive to...

Page 23: ...nued Pairing a Phone For instructions on how to pair a phone refer to the audio system s user s guide or your vehicle s Quick Start Guide How to Place a Call When using the voice command feature waiting for the system BEEP before speaking the command Option 1 Press the Receive Place Call button C displays the call history Option 2 Press the Talk button B Then say the command Call name or Dial numb...

Page 24: ...on the mobile device How to start Android Auto 1 Press the SETUP key on your audio system s control panel 2 Press the PHONE PROJECTION button or DEVICE CONNECTION button select Android Auto then select ENABLE ANDROID AUTO Review all terms conditions and requests on the head unit and phone and if you agree accept them in order to use Android Auto 3 Connect the Android device with the vehicle s USB ...

Page 25: ...e page with your verification code and press I have entered my PIN A link will be provided to download the Kia Access with UVO link app from your app store After installing the app log in and enjoy 4 Follow these steps if using your email to receive your verification code a Check your email The email will be from reset notifications myuvo com b Open link inside email A page will open requesting th...

Page 26: ...EMINDER Driving while distracted is dangerous and should be avoided Drivers should remain attentive to driving and always exercise caution when using the audio system controls while driving To help minimize driver distraction some audio system functionalities have been modified while the vehicle is in Drive Reverse or moved out of Park Navigation may be available when connected to Android Auto or ...

Page 27: ...You can listen to FM AM and SiriusXM radio and save frequently used stations How to Save a Preset Press and hold the desired slot This saves the current station in the selected slot SiriusXM Smart Favorites For the first ten favorite SiriusXM channels you may play live or repeat from the beginning of a song or a program segment During song or program play tap the Skip Backward icon to start from t...

Page 28: ... one of the available features you would like the Custom button to open REMINDER Driving while distracted is dangerous and should be avoided Drivers should remain attentive to driving and always exercise caution when using the audio system controls while driving To help minimize driver distraction some audio system functionalities have been modified while the vehicle is in Drive Reverse or moved o...

Page 29: ...ress the Front Defrost button FRONT Auto Defogging System Auto Defogging is set ON by default To cancel Auto Defogging press the Front Defrost button FRONT for three seconds when the ignition is in on ADS OFF icon will illuminate To turn Auto Defogging on again press the Front Defrost button FRONT for three seconds REMINDERS Warm air may flow in through vents if Recirculated Air button is not pres...

Page 30: ...REMINDER Warm air may flow in through vents if Recirculated Air button is not pressed ON LED lit Manual Climate Control Defrost Outside Windshield 1 Set Fan Speed to the highest position 2 Set Temperature to Hot 3 Press the Front Defrost button Defog Inside Windshield 1 Set Fan Speed to desired position 2 Set desired Temperature 3 Press the Front Defrost button Your Manual Climate Control system m...

Page 31: ...gal disclaimers Inductive charging systems are less efficient than conventional charging through a cable As a result higher device operating temperatures may be experienced during use Charging Performance Device position on the wireless charging system can affect charging performance Other factors that may affect the charging rate include foreign objects such as coins or pens and phone case thickn...

Page 32: ... enabled in the Clock Settings screen To access the manual date and time setting turn GPS Time OFF in the Clock Settings UVO link with Navigation function only QUICK TIPS REMINDERS Using the power outlets accessory plugs for prolonged periods of time with the Engine Start Stop button in the ACC position Engine OFF may cause the battery to discharge Use only the charging cables that your device man...

Page 33: ...e downshifts are made automatically when the vehicle slows down When the vehicle stops 1st gear is automatically selected QUICK TIPS To view these videos on your mobile device snap these QR Codes or visit the listed website Refer to page 2 for more information Sportmatic Shifting Video Paddle Shifters Video www youtube com KiaFeatureVideos QR CODE Paddle Shifters Paddle Shifters are operable when ...

Page 34: ...Brake Pedals B 3 Shift into Neutral C 4 Turn Ignition to Start ON Shifting into Reverse 1 Fully depress Clutch and Brake Pedals B 2 Shift into Neutral C 3 Press Shift Lever button D in 4 Shift into Reverse E When shifting into gears 1 6 the Shift Lever can be moved without pulling the Shift Lever button QUICK TIP For illustrative purposes only Your actual display buttons and or features may vary C...

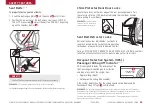
Page 35: ...licks or locks into place before driving the vehicle QUICK TIP Seat Warmers 19 Ventilated Seats Seat Warmers button Press the button once for high setting 3 LEDs lit Press the button twice for medium setting 2 LEDs lit Press the button a third time for low setting 1 LED lit and again to turn OFF Hold button to turn off Seat Warmer Seat Warmers Ventilated Seats button Press top bottom of button onc...

Page 36: ...forward backward Seat Cushion height Seatback recline and Lumbar support forward backward Front Seat Headrest Adjustment 10 To raise Headrest Pull Headrest up To lower Headrest Press lock then press the Headrest down REMINDER Do not operate the vehicle with the headrests removed Headrests can provide critical neck and head support in an accident Do not attempt to adjust the seat while the vehicle ...

Page 37: ...to release Rear Seatback Lever located in trunk 3 Fold Seatback B down 4 To return seat back push back to its original position and ensure it latches For illustrative purposes only Your actual display buttons and or features may vary It may be necessary to remove the headrests and or adjust the front seatbacks to fully lower rear seats QUICK TIP REMINDER Always make sure the Seatback is locked in ...

Page 38: ...mps stay on continuously OFF In the OFF position the lamp is off even if the door is opened Room Lamp switch D Press the switch to turn Room Lamp ON OFF If vehicle is not equipped with Map Lamp the Room Lamp will operate as follows The lamp turns ON when any door is opened and turns OFF after 30 seconds The lamp turns ON when doors are unlocked with a key fob or Smart Key The lamp stays ON continu...

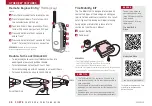
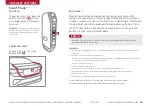
Page 39: ...e options QUICK TIPS Mechanical Key G Use to unlock Driver s Door To remove keyhole cover insert Mechanical Key into dent under cover and pull door handle Use to turn the Child Protector Rear Door Locks on or off REMINDER When reinserting the mechanical key make sure it is pushed all the way in until there is a click sound Smart Key 9 If the Smart Key battery is weak or not working properly hold t...

Page 40: ...st service center As a result not all types of tire damage will require towing For operational information please refer to section 6 of your Owner s Manual G Sealant Bottle H Compressor REMINDERS The Tire Mobility Kit requires the use of the 12V 15A 180W Power Outlet which is located on the right side of the outlet aux port area After the tire is properly sealed drive cautiously keeping vehicle sp...

Page 41: ...f by default To enable the Smart Trunk go to User Settings in the LCD Instrument Cluster modes REMINDERS The trunk can be opened with no touch activation after about 15 seconds of all doors being closed and locked The Smart Trunk feature will not operate when The doors are recently closed and locked and the Smart Key is still detected near the vehicle after 15 seconds or within 60 inches of the do...

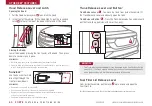
Page 42: ...e front or side windows REMINDERS Sunvisor may not shield all direct light Do not operate the vehicle if Sunvisor is impairing your visibility Be aware of seating position when adjusting or swinging Sunvisor around to or from the front or side windows Sunvisor may impair visibility if not adjusted properly Trunk Release Lever C To unlock the trunk from inside the vehicle lift the Trunk Release Lev...

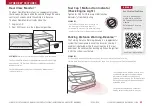
Page 43: ...hind the vehicle through the audio control unit screens while the vehicle is in Reverse The Rear View Monitor activates when the 1 Engine is ON 2 Gear Shift Lever is in the R Reverse position REMINDER Always drive carefully and use caution when backing up The Rear View Monitor is not a substitute for proper and safe backing up procedures The Rear View Monitor may not display every object behind th...

Page 44: ...play and a warning sounds to suggest the driver to take a break when the driver s attention level is below one bar C REMINDERS The set up of the DAW System will be maintained as selected when the ignition is cycled When activated the DAW System does not display the Consider taking a break message when the total trip driving time is less than 10 minutes The DAW System will enter a standby mode if t...

Page 45: ... Seat Belts 1 Insert the belt tongue plate A into the buckle B until it clicks 2 Position the lap portion of the belt across your lap as LOW ON THE HIPS as possible C Adjust the belt to a SNUG FIT by pulling up on the shoulder portion D The Seat Belt warning chime operates for the driver s seat only QUICK TIP REMINDER For maximum protection always wear your seatbelt Seat Belt Retractor Locks Retra...

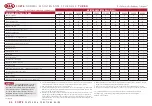
Page 46: ...hedule These are approximate estimated intervals Refer to vehicle mileage for maintenance item schedule B And if necessary adjust correct clean or replace C If TOP TIER detergent gasoline is not available one bottle of additive is recommended Additives are available from your authorized Kia dealer along with information on how to use them Do not mix other additives D Both the fuel filter fuel tank...

Page 47: ...stances of inattentive driving practices Failure to pay attention to travel conditions and vehicle operation could result in loss of vehicle control Always drive safely and use caution 8 Electronic Stability Control ESC Traction Control System TCS Hill start Assist Control HAC No system no matter how advanced can compensate for all driver error and or driving conditions Always drive safely 9 Engin...

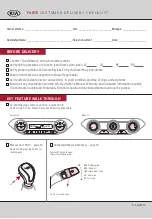
Page 48: ...s Manager _________________________________________________________________Date _____________________ Customer ______________________________________________________________________Date _____________________ Cruise Control page 18 Demonstrate operation UVO link with Navigation page 26 For further operational information refer to the Car Infotainment System User s Manual Bluetooth Wireless Technolo...

Page 49: ...driver s door label LF LR RF RR Verify proper operation of Remote Keyless Entry and Smart Key lock unlock Ensure floor mats are snapped into place if applicable Verify vehicle is clean interior and exterior in good condition and free of chips and scratches Ensure all key documents are in the vehicle Owner s Manual Warranty and Consumer Information booklet Tire Warranty booklet and Features Functio...

Page 50: ...hicle mileage for maintenance item schedule B And if necessary adjust correct clean or replace C If TOP TIER detergent gasoline is not available one bottle of additive is recommended Additives are available from your authorized Kia dealer along with information on how to use them Do not mix other additives D Both the fuel filter fuel tank air filter are generally considered to be maintenance free ...

Reviews: