background image


12

30.


<Headless

System>


Once


you


find


out


your


KSNAS


network


device


name


or


its


assigned


IP


address


write


it


down,


for


the


rest


of


this


document


we


assume


your


KSNAS


network


device


name


is


“ksnas1”


31.


<Headless

System>


On


any


PC


on


your


network


open


the


Firefox


Internet


browser


(if


needed


install


it)


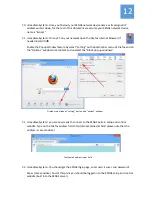
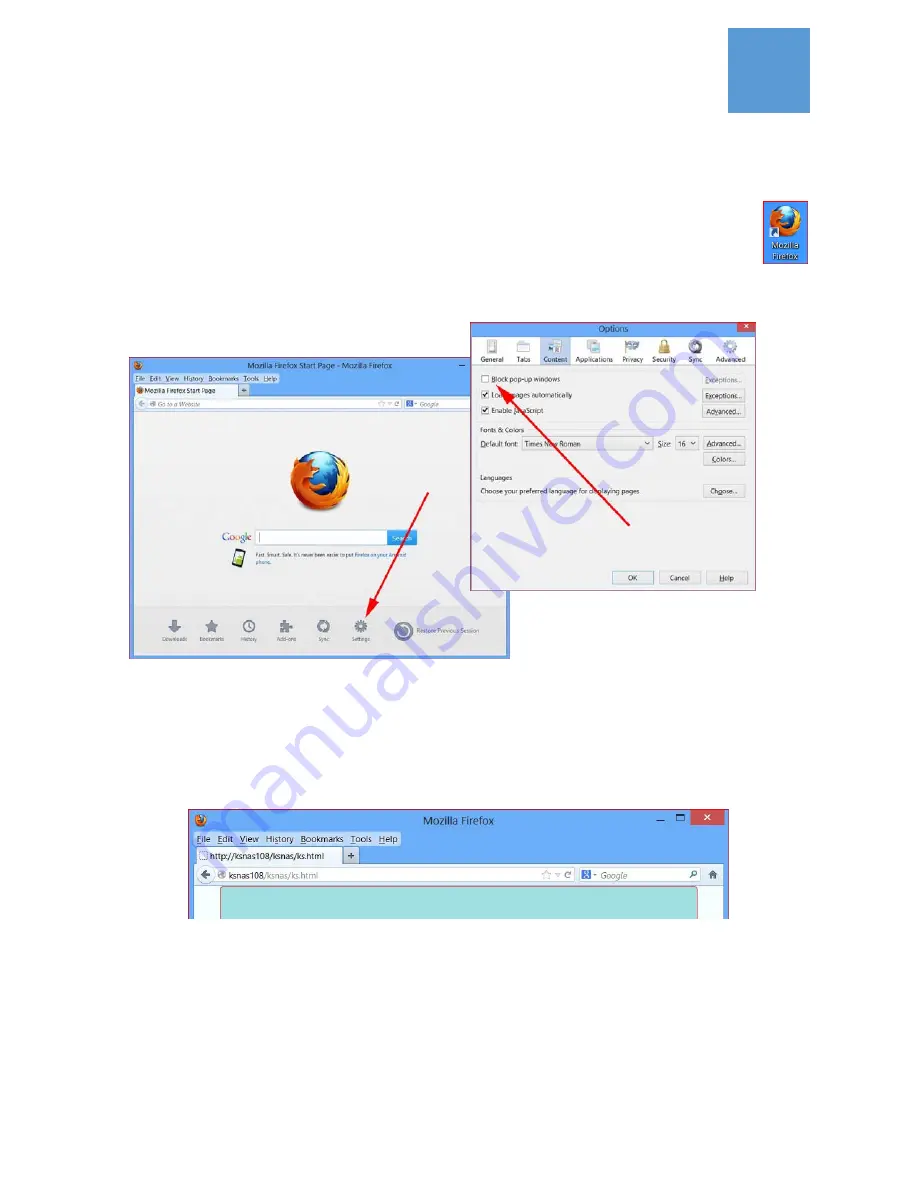
Enable


the


Popup


Window


feature


by


select


“setting”


on


the


bottom


bar


menu


of


Firefox


and


on


the


“Options”


window


click


content


and


unselect


the


“Block


pop

up


windows”


Firefox


main


window,


“setting”


button


and


“options”


window


32.


<Headless

System>


you


are


now


ready


to


connect


to


the


KSNAS


built

in


setup


and


control


website.


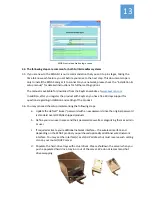
Type


on


the


Firefox


address


field

‐ 

http://ksnas1/ksnas/ks.html


please


note


that


the


address


is


case


sensitive!


Firefox


web


address


input


field


33.


<Headless

System>


You


should


get


the


KSNAS


login


page,


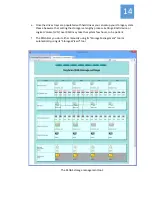
enter


user=


ksuser


and


password=


kspw


(case


sensitive).


And


at


this


point


you


should


be


logged


in


to


the


KSNAS


setup


and


control


website


(built


into


the


KSNAS


server).


Summary of Contents for KS-NAS-120 A1

Page 1: ...1 KS NAS 120 Quick installation guide KeyScan Inc 2013 KeyScan Inc All rights reserved www keyscan com...

Page 2: ...or free 30 days product installation and instruction support Please keep the product purchasing payment receipt since it will be required to claim your warranty and support options Box content This Qu...

Page 3: ...KSNAS 120 A1 an AMD C60 Dual Core processor based system with 4GB DRAM 1 RJ45 Wired GB networks 1 Wireless network 1 VGA 1 DVI connection 3 Audio 1 PS 2 KB Mouse 6 USB2 1 1 KSNAS 120 I7 an Intel i7 Q...

Page 4: ...4 KSNAS 120 I7 product back panel KSNAS120 I7 KSNAS 120 A1 product back panel KSNAS120 A1...

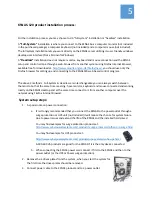
Page 5: ...the same time meaning have monitor keyboard and mouse connected and working locally on the KSNAS desktop and at the same time connect to it from another computer over the network using Firefox Interne...

Page 6: ...o the following steps 8 Full System Connect a computer monitor not included to either HDMI or DVI connection on the KSNAS box back panel and make sure that the monitor mode on your monitor is set to e...

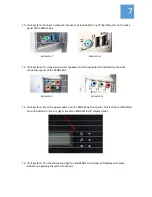
Page 7: ...crophone not included to the back connection panel of the KSNAS box KSNAS120 I7 KSNAS120 A1 12 Full System Press the power button on the KSNAS box front panel This is the top left button out of 6 butt...

Page 8: ...time login may take 10 30 seconds and you should get the KSNAS desktop for user ksuser 18 Full System The KSNAS is set by default to connect automatically to your network and get initial network dynam...

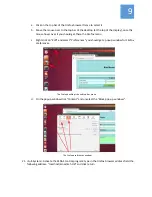
Page 9: ...menu c Right click on Edit and select Preferences you should get a popup window for Firefox preferences The Firefox desktop icon and top bar menu d On the popup window click Content and unselect the...

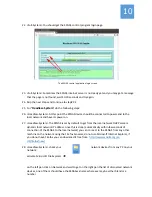
Page 10: ...s set by default to get from the local network DHCP server a dynamic local network IP address once this is done automatically within few seconds of connection of the KSNAS to the local network you can...

Page 11: ...xxx device from the file Explorer try to check it directly on your DHCP server on small network it may be integrated as part of your network modem router and you need to login to your router to check...

Page 12: ...d on the Options window click content and unselect the Block pop up windows Firefox main window setting button and options window 32 Headless System you are now ready to connect to the KSNAS built in...

Page 13: ...for questions regarding installation and setting of the product 36 You may proceed the setup implementing the following steps a Update the default ksuser password with a new password since the origin...

Page 14: ...are that setting the storage is a lengthy process Setting a RAID device or Logical Volume LVM over RAID may take the system few hours so be patient f The KSNAS let you do it either manually using its...

Page 15: ...age system if you set it manually to 4 partitions per each hard drive and then arrange the partitions with or without RAID as physical devices for the Logical Volume storage layer in such arrangement...

Page 16: ...upport team is there to help you with the KSNAS product but they are not a replacement for network maintenance your network should be setup properly so the KSNAS can connect to it 39 To activate the K...

Reviews: