Installation and Operations Manual
KE-350
Keyless Entry
Access Control System
Page 1: ...Installation and Operations Manual KE 350 Keyless Entry Access Control System...
Page 2: ...cument is subject to change without notice Essex Electronics Inc reserves the right to modify this documentation and to make improvements or changes to the product s contained in this documentation at...
Page 3: ...ROGRAMMING OVERVIEW 7 SUGGESTED INITIAL PROGRAMMING STEPS 7 SYSTEM DEFAULTS 7 SYSTEM OPTIONS 8 SYSTEM PROGRAMMING COMMANDS FEEDBACK 10 NORMAL OPERATION 10 USER COMMANDS 10 SYSTEM PROGRAMMING 11 PROGRA...
Page 4: ...ol module Input Requirements The KE 350 accepts 12 to 24 volts AC DC An optional battery charging module and rechargeable Gel Cells are available to keep the system operational for up to 24 hours duri...
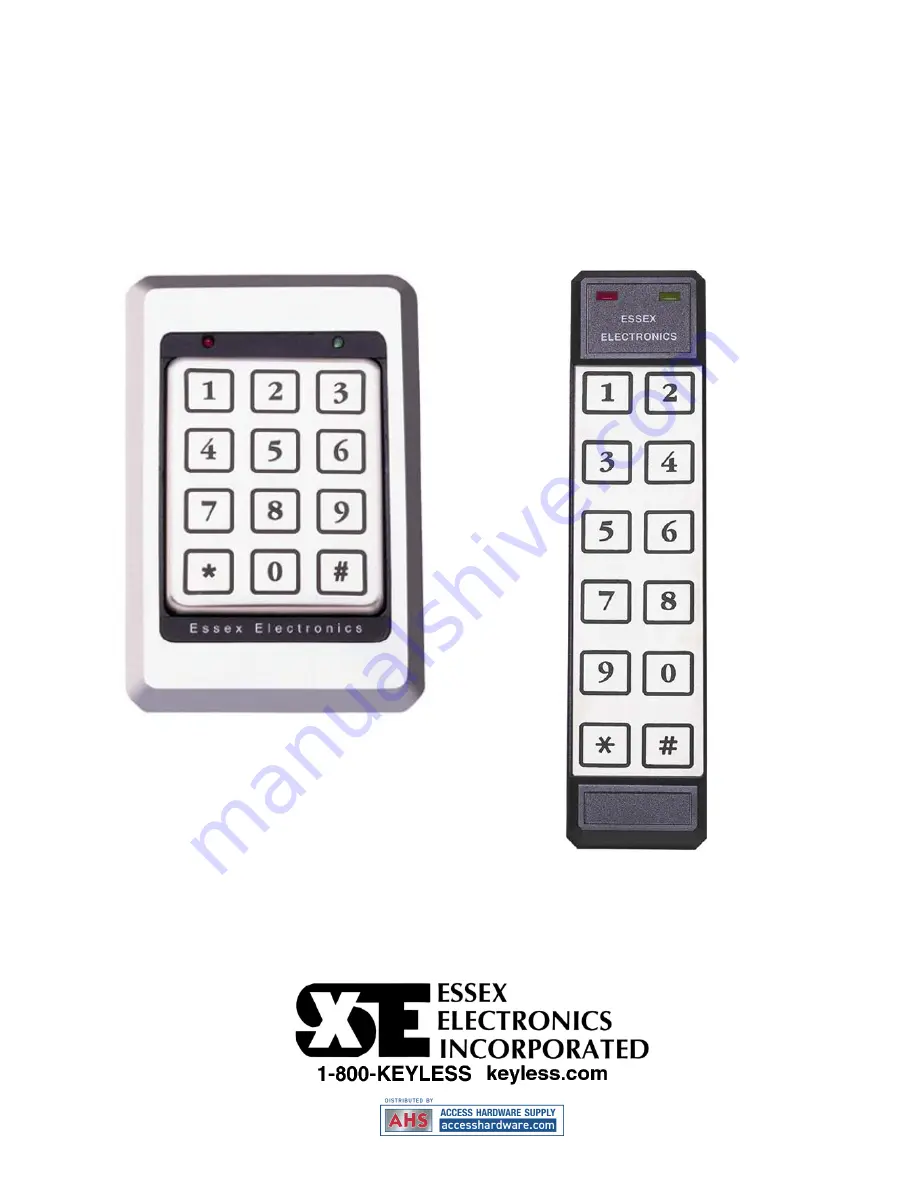
Page 5: ...nge from 40 C to 70 C 40 F to 160 F The KE 350 is compatible with any one of the following Keypad styles configurations Part Number Matrix Finish Style Part Number Matrix Finish Style KP 353 S 3x4 Sta...
Page 6: ...ed area where the temperature remains between 40 C and 49 C 40 F and 125 F 3 The Wiring Cable connects the keypad to the control module It is important not to locate the cable adjacent to any wiring t...
Page 7: ...e marked A using a 1 25mm drill bit 4 Place the connector on the back of the keypad in the large hole to verify that the keypad mounting holes are aligned with marked holes B and C Make adjustments if...
Page 8: ...o connect the keypad to the control module You will also need a three conductor cable not included to connect the control module to the electric strike or other locking device Install the Strike or El...
Page 9: ...itor Switch The Door Monitor requires a normally closed switch This may be the switch output of a latch monitor strike a monitor maglock or an alarm switch that senses door movement When this switch o...
Page 10: ...t User Groups Worksheet 26 8 Modify User Groups as needed Print to Verify 20 9 Construct a list of Individual Users Codes and User Groups 25 10 Program Individual Users Print to Verify 11 System Defau...
Page 11: ...d periods of time Latching Authorization is determined in each User Group 1 Off Set as the default this prevents any latching at all 2 Manual This allows any authorized user to manually latch the door...
Page 12: ...vate the relay Note Do not precede the with any other keystrokes 2 Controller for a Closed Circuit TV CCTV or External Light By default the 3rd Relay is configured to activate at the first touch of th...
Page 13: ...User Group they have been assigned to and the current time date programmed into the KE 350 s time clock Notes When entering an Individual User Code to gain access it must be followed by If access is...
Page 14: ...6 followed by e To program an additional User return to step b f If no more Users are to be added enter and return to Step 3 Notes on Adding New Users You should hear a triple beep after completing st...
Page 15: ...ecific User enter the User ID Step Beep Red LED Green LED a Double Slow Flash Slow Flash b Triple Slow Flash Slow Flash Step Beep Red LED Green LED a Double Slow Flash Slow Flash b Triple Slow Flash S...
Page 16: ...M SW on the Control Module for 3 seconds make sure the 5 dip switches are OFF This will take you to Step 3 of system setup programming See page 8 for additional information Setting the Door Open Time...
Page 17: ...the desired configuration External Alarm I Enter 1 II Enter the desired Shunt Output Time 01 99 seconds followed by Internal Alarm I Enter 2 II Enter the desired Door Ajar Time in two digits 01 99 sec...
Page 18: ...Line Feed ALF Default ON a Enter 7 b Enter 0 to turn OFF ALF or Enter 1 to turn ON ALF c Return to Step 3 Notes on Automatic Line Feed The printer line feed setting should only be adjusted if you enc...
Page 19: ...ew Holiday enter 1 b Enter the date month day in four digits followed by c To add an additional holiday return to step b otherwise enter Example 1 0 1 0 1 0 7 0 4 Adds January 1st and July 4th as prog...
Page 20: ...nt minutes in four digits 24 hour clock followed by c Return to Step 3 Examples 1 1 0 0 0 10 00 a m 1 1 5 1 5 3 15 p m To program the date a Enter 2 b Enter the current month current day and current y...
Page 21: ...y No User Code Critical Transactions include Tamper Door Ajar Duress and Break in 4 User Selection Print Option Default ALL Users Select Audit Transactions for a Specific User a Enter 7 b Enter User I...
Page 22: ...me typical authorization options User Group authorizations can be modified to fit your particular needs See Appendix C page 26 for a User Group Programming Worksheet Preprogrammed User Groups Group Da...
Page 23: ...ime followed by d Enter stop time hours and minutes in four digits 24 hour time followed by e To program additional days return to step a Otherwise return to Step 4 Examples 1 1 5 0 8 3 0 1 7 0 0 Mond...
Page 24: ...temporary users 2nd Relay Authorization a Enter 7 0 to prevent 2nd Relay Operation or Enter 7 1 to authorize 2nd Relay Operation b Return to Step 4 3rd Relay Authorization a Enter 8 0 to prevent 3rd...
Page 25: ...another User Group return to a Example 9 0 1 To Print Authorizations and all Users assigned to User Group 1 9 0 0 To Print Authorizations Only of all 16 User Groups Notes on Printing User Group s Whe...
Page 26: ...KE 350 Installation and Operations Manual Appendix A Typical Wiring Diagrams Figure A 23...
Page 27: ...KE 350 Installation and Operations Manual Typical Wiring Diagrams Figure B 24...
Page 28: ...KE 350 Installation and Operations Manual Appendix B Individual User Programming Worksheet User ID 1 499 User Name User Code PIN 3 to 8 Digits User Group 01 16 25...
Page 29: ...s No Yes No Yes No Yes No Yes No Yes No 06 Yes No Yes No Yes No Yes No Yes No Yes No Yes No 07 Yes No Yes No Yes No Yes No Yes No Yes No Yes No 08 Yes No Yes No Yes No Yes No Yes No Yes No Yes No 09 Y...