background image

English


|


13

DTA Front/DTA Rear
DTA Subwoofer

0 — 610 (cm)

Position Setting

Front-Left/ Front-Right/ 
Front/ ALL

•  When the "2ZONE" of <Audio Setup> (page 11) is 

"ON", the following setups are ignored.
- "X'Over" 
- "DTA" 
- "POSI" 
- "Preset" 

6

  Exit Sound Field Control mode

Turn the [VOL] knob to select "Return".
Press the [VOL] knob.

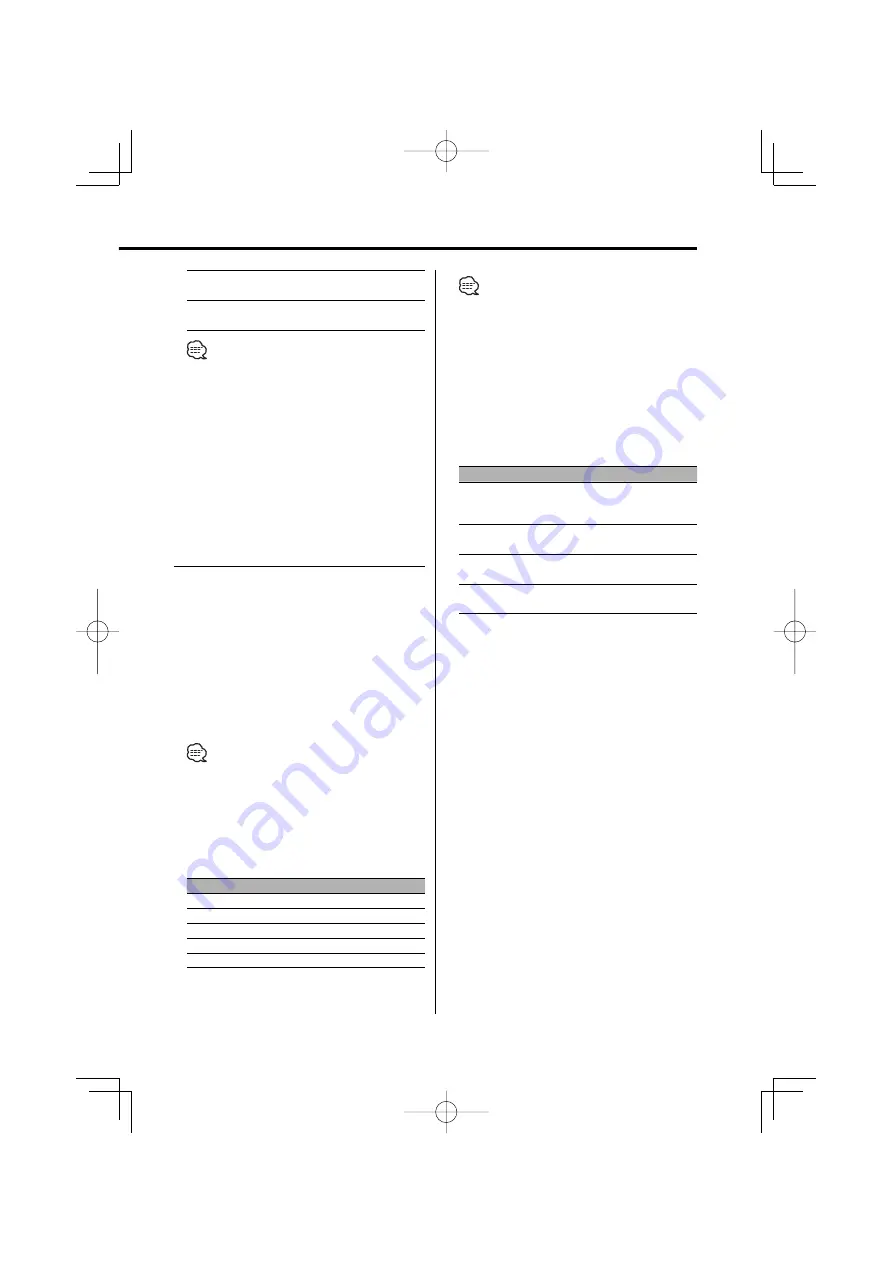
Sound Management system

1

  Select the source to adjust

Press the [SRC] button.

2

  Show the Multi-function display

Press the [NEXT] button repeatedly until 
"S.M.S" appears.

Refer to <Notes on Multi-function System> (page 
9).

3

  Enter Sound Management mode

Turn the [VOL] knob to select "S.M.S".
Press the [VOL] knob.

•   When "2ZONE" of <Audio Setup> (page 11) is ON, you 

cannot select "S.M.S".

4

  Select the Sound Management item to 

adjust

Turn the [VOL] knob to select the item you 
want to select.
Press the [VOL] knob.

Multi-function item

Sound Management Item

"Cabin"

Cabin Setting

"Front"

Speaker Select Front

"Rear"

Speaker Select Rear

"Sub-W"

Speaker Select Subwoofer

"Preset"

Preset value storage/recalling

•  "Preset":  You can store an adjusted sound control 

value by selecting "Memory". Refer to 
<Memory mode> (page 16). Also, you 
can recall it by selecting "Recall". Refer to 
<Memory Recall mode> (page 16).

5

  Adjust the Sound Management item

Push the Control knob towards [

4

] or 

[

¢

].

Each time you push the knob, the setting 
alternates between the settings shown in the 
table below.

Sound Managemnt Item

Range

Cabin Setting

OFF/ Compact/ Sedan/ Wagon1/ 
Wagon2/ Minivan1/ Minivan2/ 
SUV/ Passenger Van

Speaker Select Front

16cm/ 17cm/ 18cm/ 4x6/ 5x7/ 6x8/ 
6x9/ 7x10/ O.E.M./ 10cm/ 13cm

Speaker Select Rear

16cm/ 17cm/ 18cm/ 4x6/ 5x7/ 6x8/ 
6x9/ 7x10/ None/ O.E.M./ 10cm/ 13cm

Speaker Select Subwoofer

25cm/ 30cm/ 38cm over/ None/ 
16cm/ 20cm

6

  Exit Sound Managemnt mode

Turn the [VOL] knob to select "Return".
Press the [VOL] knob.

B64-3091-00̲E̲English.Indd   13

B64-3091-00̲E̲English.Indd   13

05.4.5   1:12:57 PM

05.4.5   1:12:57 PM

Summary of Contents for KDC-PSW9531

Page 1: ...CD RECEIVER KDC PSW9531 INSTRUCTION MANUAL B64 3091 00 00 EW E2W B64 3091 00 E English Indd 1 B64 3091 00 E English Indd 1 05 4 5 1 12 49 PM 05 4 5 1 12 49 PM ...

Page 2: ... Tuning Direct Access Tuning Station Preset Memory Auto Memory Entry Preset Tuning RDS features 30 Traffic Information Radio Text Scroll PTY Program Type Program Type preset Changing Language for PTY Function CD Audio file External disc control features 33 Playing CD Audio file Playing External Disc Fast Forwarding and Reversing Track File Search Disc Search Folder Search Direct Track File Search ...

Page 3: ...MP Control News Bulletin with Timeout Setting Local Seek Tuning Mode AF Alternative Frequency Restricting RDS Region Region Restrict Function Auto TP Seek Monaural Reception Auxiliary Input Display Setting Disc Naming Text Scroll Built in Auxiliary input Setting Power OFF Timer CD Read Setting Picture downloading Voice Index ACDrive firmware version display Unique ID display Demonstration mode Set...

Page 4: ... or metal tools inside the unit 2CAUTION To prevent damage to the machine take the following precautions Make sure to ground the unit to a negative 12V DC power supply Do not install the unit in a spot exposed to direct sunlight or excessive heat or humidity Also avoid places with too much dust or the possibility of water splashing Do not place the faceplate or the faceplate case in areas exposed ...

Page 5: ...e unit may affect its mechanical parts Wiping the faceplate with a hard cloth or using a volatile liquid such as thinner or alcohol may scratch the surface or erases characters Cleaning the Faceplate Terminals If the terminals on the unit or faceplate get dirty wipe them with a dry soft cloth Before using this unit for the first time This unit is initially set on the Demonstration mode When using ...

Page 6: ...r jp Contact Kenwood for the function and operation of the Media Manager Media Manager is a product of PhatNoise The marking of products using lasers Except for some areas CLASS 1 LASER PRODUCT The label is attached to the chassis case and says that the component uses laser beams that have been classified as Class 1 It means that the unit is utilizing laser beams that are of a weaker class There i...

Page 7: ... About CDs Removing CDs When removing CDs from this unit pull them out horizontally CDs that can t be used CDs that aren t round can t be used CDs with coloring on the recording surface or that are dirty can t be used This unit can only play the CDs with It may not correctly play discs which do not have the mark A CD R or CD RW that hasn t been finalized can t be played For the finalization proces...

Page 8: ...capacity at once the writing software is set to Disc at once Playable disc format ISO 9660 Level 1 2 Joliet Romeo Long file name The maximum number of characters for display File Folder name 128 characters MP3 ID3 Tag WMA Contents property 30 characters AAC song information 60 characters File Folder name is the number of the characters including the extensions AAC ID3 Tag cannot be displayed Limit...

Page 9: ...nd 3 are described as follows Turn the VOL knob to select the item you want to select Press the VOL knob During Multi function System mode the VOL knob or Control knob flashes to indicate that it is available for multi function setting Returning to the Previous Display Select Return on the Multi function display or press the NEXT button Real operational example of the Multi function System Example...

Page 10: ...nation only mode STANDBY This unit automatically turns full power OFF after 20 minutes lapses in Standby mode in order to save the vehicle s battery The time until full power OFF can be set in Power OFF Timer page 48 Volume Increasing Volume Turn the VOL knob clockwise Decreasing Volume Turn the VOL knob counterclockwise Attenuator Turning the volume down quickly Press the ATT button Each time you...

Page 11: ... second 3 Select the Audio Setup item to adjust Press the VOL knob Each time you press the knob the item to be adjusted alternates between the items shown in the table below 4 Setup the Audio item Turn the VOL knob Adjustment Item Display Range Volume offset VOLUME OFFSET 8 0 Dual Zone System 2ZONE ON OFF Volume offset Sets each source s volume as a difference from the basic volume Dual Zone Syste...

Page 12: ...LP Phase Subwoofer Low Pass Filter Frequency Subwoofer Low Pass Filter Slope Subwoofer Low Pass Filter Phase DTA DTA Front DTA Front DTA Rear DTA Rear DTA SubWoofer DTA Subwoofer POSI Position Setting Preset Preset value storage recalling Preset You can store an adjusted sound control value by selecting Memory Refer to Memory mode page 16 Also you can recall it by selecting Recall Refer to Memory ...

Page 13: ...gement Item Cabin Cabin Setting Front Speaker Select Front Rear Speaker Select Rear Sub W Speaker Select Subwoofer Preset Preset value storage recalling Preset You can store an adjusted sound control value by selecting Memory Refer to Memory mode page 16 Also you can recall it by selecting Recall Refer to Memory Recall mode page 16 5 Adjust the Sound Management item Push the Control knob towards 4...

Page 14: ...asy Top 40 Top40 Jazz Jazz User memory The values set on the Equalizer Front Setting Equalizer Rear Setting Change each setting value with the Sound Management system page 13 First select the speaker type with the Speaker setting Equalizer Front Setting Equalizer Rear Setting 1 Select a frequency band you wish to adjust Press the Control knob Each time you press the button is pressed the band alte...

Page 15: ...You can control this item when Speaker Select Rear of Sound Management system page 13 is set to any item other than None 5 Adjust the WOW control item Push the Control knob towards 4 or Each time you push the knob the setting alternates between the settings shown in the table below WOW Control Item Range Effect Middle High User Through Low FOCUS OFF 1 9 TruBass Front OFF 1 4 TruBass Rear OFF 1 4 S...

Page 16: ...lect Memory Press the VOL knob 4 Put in the memory Turn the VOL knob to select Memory1 or Memory2 Press the VOL knob for at least 2 seconds The MEMORY display blinks 1 time 5 Exit Memory mode Turn the VOL knob to select Return Press the VOL knob Memory1 When you press the Reset all the sources will be the setting value which is registered The following items cannot be registered Rear Volume Balanc...

Page 17: ...by shocks or jolts For that reason keep the faceplate in its special storage case while detached Do not expose the faceplate or its storage case to direct sunlight or excessive heat or humidity Also avoid places with too much dust or the possibility of water splashing Reattaching the Faceplate 1 Align the shaft on the unit with the depression on the faceplate 2 Push the faceplate in until it click...

Page 18: ...ode Turn the VOL knob to select Return Press the VOL knob Change the information by the Display Type Refer to the page on the following table for the methods to alternate by the Display Type Display Type A B C D 1st text 1 22 22 2nd text 2 22 22 3rd text 3 22 22 4th text 4 22 22 Icon 6 26 Text 7 20 Graphic 8 18 18 Display Type A Display Type B Graphic part Spectrum Analyzer Display Switching Chang...

Page 19: ...er to display when Display Type is set to Display Type A Display Type B 1 Select the wallpaper display Refer to Graphic part Spectrum Analyzer Display Switching page 18 2 Select the wallpaper Display the wallpapers one after another Press the Control knob Each time you press the knob the Wallpaper scan is turned ON and OFF When scan is ON SCAN is displayed When scan is ON each wallpaper is display...

Page 20: ...External disc source Information Display Disc title DiscTitle Track title TrackTitle Track number Play time P Time Disc Name DNPS Clock Clock Date Date In Audio file source Information Display Song title Artist name Title Artist Album name Artist name Album Artist Folder name Folder Name File name File Name File number Play time P Time Clock Clock Date Date In DAB source Information Display Servic...

Page 21: ...not be displayed No Name is displayed If the contents of the information cannot be displayed No Text None Obscure Audio is displayed When LX AMP is connected the item setup by the Display mode of LX AMP is displayed Track number at Audio file displays the last 3 digits when the track number exceeds 1000 songs B64 3091 00 E English Indd 21 B64 3091 00 E English Indd 21 05 4 5 1 13 01 PM 05 4 5 1 13...

Page 22: ...rt 3 3rd text display part 4 4th text display part 5 Indicator display part 6 Icon display part Select the row Push the Control knob towards FM or AM The cursor Ü moves to the selected text display part Select the text Push the Control knob towards 4 or Refer to the table described later for setting items 7 Exit Display Control mode Turn the VOL knob to select Return Press the VOL knob Same inform...

Page 23: ...tist name Title Artist Album name Artist name Album Artist Folder name Folder Name File name File Name Spectrum Analyzer Clock Speana Clock Date Date No display Blank In Standby Information 12 Source name Information 34 Display Clock Clock Date Date No display Blank In Auxiliary input source Information 12 Source name Information 34 Display Spectrum Analyzer Clock Speana Clock Date Date No display...

Page 24: ...1234 Folder name Folder Name 1234 File name File Name 1234 File number Play time P Time 1 Indicator Indicator 1234 Spectrum Analyzer Clock Speana Clock 1234 Date Date 1234 No display Blank 234 In Standby Information Display Condition Standby Standby 1 Indicator Indicator 1234 Clock Clock 1234 Date Date 1234 No display Blank 234 In Auxiliary input source Information Display Condition Auxiliary inpu...

Page 25: ...e Artist Album name Artist name Album Artist Folder name Folder Name File name File Name In DAB source Information Display Dynamic label Dynamic Label If whole information cannot be displayed within four rows hold down on FM of the Control knob for at least 1 second to display the remaining portion of the information External disc source can be selected when a unit supporting the text display func...

Page 26: ...f Album art display is selected during playback of an ACDrive disc on which no album art is recorded a source icon is displayed During album art downloading Down loading is displayed Downloading requires a maximum of 30 seconds Display Type B Display Type C Display Type D Font Color Select Selecting the display font color 1 Show the Multi function display Press the NEXT button repeatedly until Dis...

Page 27: ...ode Turn the VOL knob to select Display Press the VOL knob 3 Enter External display select mode Turn the VOL knob to select OEMDISP Press the VOL knob OEM Display Out is displayed 4 Select the display Push the Control knob towards 4 or 5 Exit display control mode Turn the VOL knob to select Return Press the VOL knob TEL Mute The audio system automatically mutes when a call comes in When a call com...

Page 28: ...ring the frequency and tuning 1 Select the band Press the FM or AM button 2 Enter Direct Access Tuning mode Press the DIRECT button on the remote control is displayed 3 Enter the frequency Press the number buttons on the remote control Example Desired frequency Press button 92 1 MHz FM 0 9 2 1 810 kHz AM 0 8 1 0 Cancelling Direct Access Tuning Press the DIRECT button on the remote control 1 2 3 4 ...

Page 29: ... towards FM or AM 2 Open Auto Memory Entry Press the AME button for at least 2 seconds When 6 stations that can be received are put in the memory Auto Memory Entry closes When the AF Alternative Frequency page 46 is ON only RDS stations are put in the memory When Auto Memory Entry is done in the FM2 band the RDS stations preset in the FM1 band are not put in the memory Likewise when Auto Memory En...

Page 30: ...ormation the adjusted volume is automatically remembered and the next time the audio changes to traffic information the volume automatically becomes the remembered volume Receiving other traffic information stations Push the Control knob towards 4 or Traffic information can be switched when it is on the Tuner Source However you cannot switch the Traffic information during reception of the Traffic ...

Page 31: ...etr 19 Finance Finance 20 Children s programs Children s Prog 21 Social Affairs Social Affairs 22 Religion Religion 23 Phone In Phone In 24 Travel Travel Touring 25 Leisure Leisure Hobby 26 Jazz Music Jazz Music 27 Country Music Country Music 28 National Music National Music 29 Oldies Music Oldies Music 30 Folk Music Folk Music 31 Documentary Documentary Speech and Music include the Program type s...

Page 32: ...uguese Portuguese Swedish Swedish German German 4 Exit Changing Language mode Press the TI button Program Type preset Putting the Program Type in the Preset button memory and quick recall Presetting the Program Type 1 Select the Program Type to preset Refer to PTY Program Type page 31 2 Select a preset number Turn the VOL knob 3 Preset the Program Type Press the VOL knob for at least 2 seconds Rec...

Page 33: ...y Media Manager by the same operation You can cancel the announcement when selecting the folder by Voice Index page 49 during the play of the ACDrive When a disc is inserted the IN indicator is ON During AAC MP3 WMA file playback the AAC MP3 and WMA indicators are lit When a disc is inserted Press the SRC button Select the Compact Disc display Pause and play Press the Control knob Each time you pr...

Page 34: ...orwarding and Reversing depending on AAC file format Track File Search Searching for a song on the disc or in the Audio file folder Push the Control knob towards 4 or Function of disc changer Audio file Disc Search Folder Search Selecting the disc set in the Disc changer or the folder recorded on the Audio file media Push the Control knob towards FM or AM Function of remote control Direct Track Fi...

Page 35: ...knob Scan ON Track Scan ON is displayed 3 Release the button when the song you want to hear is played Press the Control knob Random Play Play all the songs on the disc or Audio file folder in random order 1 Show the Multi function display Press the NEXT button repeatedly until Random appears Refer to Notes on Multi function System page 9 2 Turn ON OFF the Random Play Turn the VOL knob to select Ra...

Page 36: ...lect mode the folder information is displayed as shown below Folder number display Displays the number in the folder belonging to the currently selected folder Folder 2 Folder name display Displays the current folder name 3 Select the folder level Push the Control knob towards FM or AM With the AM button you move 1 level down and with the FM button 1 level up Selecting a folder in the same level P...

Page 37: ...the song you want to play by selecting the initial of Genre name Artist name or Album name 1 Show the Multi function display Press the NEXT button repeatedly until S Mode appears Refer to Notes on Multi function System page 9 2 Enter the Letter Seek mode Turn the VOL knob to select S Mode Press the VOL knob for at least 1 second This operation does not function when Disc Random Play page 36 is ON ...

Page 38: ...Numbers and symbols 1 Special characters Accent characters ë 7 Select the characters Push the Control knob towards FM or AM You can enter characters by using a remote control with a number button Example If you are entering DANCE Character Button Times pressed D 3 1 A 2 1 N 6 2 C 2 3 E 3 2 8 Repeat steps 5 through 7 and enter the name 9 Exit Menu mode Press the MENU button When operation stops for...

Page 39: ... the button the preset band switches between DB1 DB2 and DB3 2 Receive the service to be preset 3 Show the Multi function display Press the NEXT button repeatedly until 1 6 appears Refer to Notes on Multi function System page 9 4 Select a preset number Turn the VOL knob 5 Put the service in the memory Press the VOL knob for at least 2 seconds The preset number display blinks 1 time On each band 1 ...

Page 40: ...want to search for other service push 4 or of the Control knob again If the selected program type is not found the message No PTY etc is displayed When searching for a service of another program type repeat procedures 2 and 3 Switching to Another Service Repeat procedure 3 Another service of the same program type will be searched Cancelling Search In the Middle Press the Control knob Searching by ...

Page 41: ...age 40 2 Select a preset number Turn the VOL knob 3 Preset the Program Type Press the VOL knob for at least 2 seconds Recalling the preset Program Type 1 Enter PTY mode Refer to Program Type PTY Function page 40 2 Select a preset number Turn the VOL knob 3 Recall the Program Type Press the VOL knob B64 3091 00 E English Indd 41 B64 3091 00 E English Indd 41 05 4 5 1 13 11 PM 05 4 5 1 13 11 PM ...

Page 42: ...ting You can continue by returning to step 2 and setting other items 4 Exit Menu mode Press the MENU button When other items those applicable to the basic operation method above are displayed their setting content chart is entered Normally the setting listed at the top of the chart is the original setting Also the explanation for items that are not applicable Manual Clock Adjustment etc are entere...

Page 43: ...ess the Reset button when the audio unit is removed from the battery power source 1 Turn the power ON 2 Do the step 4 through 7 step operation and reenter the security code Approved is displayed You can begin using the unit If an incorrect code is entered Waiting is displayed and the input prohibition periods shown in the table below is generated After the input prohibition time lapses CODE is dis...

Page 44: ...utton In Standby mode Synchronize Clock Synchronizing the RDS station time data and this unit s clock Display Setting SYNC ON Synchronizes the time SYNC OFF Adjust the time manually It takes 3 to 4 minutes to synchronize the clock In Standby mode DSI Disabled System Indicator A red indicator will blink on the unit after the faceplate is removed warning potential thieves Display Setting DSI ON LED ...

Page 45: ...channel sound in the Dual Zone System Display Setting Zone2 Rear Sub source Auxiliary input source is to be rear channel Zone2 Front Sub source Auxiliary input source is to be front channel Other than Standby mode B M S Bass Management System Adjust the bass boost level of the external amplifier using the main unit Display Setting AMP Bass Flat Bass boost level is flat AMP Bass 6 Bass boost level ...

Page 46: ...ll not be received for 20 minutes once the first news bulletin is received The news bulletin volume is the same level that was set for Traffic Information page 30 This news bulletin function is only available if the desired station sends PTY code for news bulletin or belongs to Enhanced Other Network Network sending PTY code for news bulletin When the News Bulletin Interrupt function is ON the tun...

Page 47: ... broadcasts are received as monaural Display Setting MONO OFF The monaural reception is OFF MONO ON The monaural reception is ON Auxiliary Input Display Setting Disc Naming Selecting the display when alternating to Auxiliary input source For the Disc Naming refer to the Disc Naming DNPS page 38 1 Select Auxiliary input source Press the SRC button Select the AUX AUX EXT display 2 Enter Menu mode Pr...

Page 48: ...Standby mode CD Read Setting When there is a problem with playing a CD with special format this setting plays the CD by force Display Setting CD Read 1 Play CD and Audio file CD Read 2 Play CD by force Setting CD Read 2 cannot play Audio file Some music CDs may not play even in the CD Read 2 mode In Standby mode Picture downloading Downloading wallpapers You can use downloaded pictures for the dis...

Page 49: ...N Guide is announced Voice Index OFF Not be announced In CD mode ACDrive firmware version display Displaying the firmware version with the ACDrive function 1 Select the firmware version display mode Push the Control knob towards 4 or Select the ACD F W Version display 2 Display the ACDrive firmware version Push the Control knob towards FM or AM In CD mode Unique ID display Displaying the serial nu...

Page 50: ...omatic Switching DAB priority DRC Dynamic Range Control DRC Regional ASW Regional Announcement Function ASW Select Announcement select mode PTYWatch PTYWatch Select Mode Language Search Language Filter Search Mode For details on menu items refer to the instruction manual of the DAB tuner B64 3091 00 E English Indd 50 B64 3091 00 E English Indd 50 05 4 5 1 13 16 PM 05 4 5 1 13 16 PM ...

Page 51: ...is accidentally swallowed Do not set the remote control in hot places such as above the dashboard Basic operations VOL buttons Adjusts the volume SRC button Each time you press the button the source alternates For the source alternating order refer to Selecting the Source page 10 ATT button Turns the volume down quickly When the button is pressed again the volume returns to the previous level butt...

Page 52: ...ton Enters and cancels the Direct Access Tuning page 28 mode 38 button Enters and cancels the PTY Program Type page 31 mode In Disc source 4 buttons Going forwards and backwards between track files buttons Going forwards and backwards between disc folders 38 button Each time you press the button the song pauses or plays 0 9 buttons When in Direct Track File Search page 34 and Direct Disc Search pa...

Page 53: ...ntil they lock completely If your vehicle s ignition does not have an ACC position or if the ignition wire is connected to a power source with constant voltage such as a battery wire the power will not be linked with the ignition i e it will not turn on and off along with the ignition If you want to link the unit s power with the ignition connect the ignition wire to a power source that can be tur...

Page 54: ...r the telephone rings or during conversation A 7 Pin Red A 4 Pin Yellow Connector A Connector B Fuse 10A To External Display Steering remote See next page To connect the KENWOOD navigation system consult your navigation manual External amplifier control wire Pink Black To EXT AMP CONT terminal of the amplifier having the external amp control function Front left output White Front right output Red ...

Page 55: ...vehicle s ISO connector is linked with the ignition and the A 4 pin yellow is connected to the constant power supply Unit Vehicle A 7 Pin Red A 4 Pin Yellow Ignition cable Red Battery cable Yellow 2The A 7 pin red of the vehicle s ISO connector is connected to the constant power supply and the A 4 pin yellow is linked to the ignition Unit Vehicle A 7 Pin Red A 4 Pin Yellow Ignition cable Red Batte...

Page 56: ...g sleeve with a screwdriver or similar utensil and attach it in place Screwing the Faceplate on the Unit If you want to fasten the faceplate to the main unit so that it does not fall off screw in the provided screws in the holes shown below Accessory4 Bottom panel Never insert the screw in any other screw hole than the one specified If you screw them in another hole it will contact and may cause d...

Page 57: ...ame page 57 and then remove the hard rubber frame 2 Remove the screw M4 8 on the back panel 3 Insert the two removal tools deeply into the slots on each side as shown 4 Lower the removal tool toward the bottom and pull out the unit halfway while pressing towards the inside Be careful to avoid injury from the catch pins on the removal tool 5 Pull the unit all the way out with your hands being caref...

Page 58: ...e side Center the fader and balance settings The input output wires or wiring harness are connected incorrectly Reconnect the input output wires or the wiring harness correctly See the section on Connecting Wires to Terminals The values of Volume offset are low Turn up the Volume offset referring to the section on Audio Control page 11 The Built in Amp Setting page 45 is OFF Turn it ON The sound q...

Page 59: ...s as soon as it is loaded The CD is quite dirty Clean the CD referring to the CD cleaning of the section on About CDs page 7 Can t remove disc The cause is that more than 10 minutes has elapsed since the vehicle ACC switch was turned OFF The disc can only be removed within 10 minutes of the ACC switch being turned OFF If more than 10 minutes has elapsed turn the ACC switch ON again and press the E...

Page 60: ...e automatic disc changer exceeds 60 C 140 F stopping all operation Cool down the unit by opening the windows or turning on the air conditioner As the temperature falls below 60 C 140 F the disc will start playing again Waiting Receiving radio text data Text for the DAB tuner source is being received Load Exchanging discs in the Disc changer Reading Reading the data on the disc IN Blink The CD play...

Page 61: ... Below Measurable Limit Frequency response 1 dB 10 Hz 20 kHz Total harmonic distortion 1 kHz 0 008 Signal to Noise ratio 1 kHz 110 dB Dynamic range 93 dB Channel separation 96 dB MP3 decode Compliant with MPEG 1 2 Audio Layer 3 WMA decode Compliant with Windows Media Audio AAC decode AAC LC m4a files Audio section Maximum output power 50 W x 4 Output power DIN 45324 B 14 4V 30 W x 4 Tone action Ba...

Page 62: ...B64 3091 00 E English Indd 62 B64 3091 00 E English Indd 62 05 4 5 1 13 23 PM 05 4 5 1 13 23 PM ...

Page 63: ...B64 3091 00 E English Indd 63 B64 3091 00 E English Indd 63 05 4 5 1 13 23 PM 05 4 5 1 13 23 PM ...

Page 64: ...B64 3091 00 E English Indd 64 B64 3091 00 E English Indd 64 05 4 5 1 13 23 PM 05 4 5 1 13 23 PM ...

Reviews: