background image

Quick-start guide

Please follow the guide from the beginning to the end. Before you connect the video
equipment make sure all equipment is switched off at the plug.

Stage 1. 

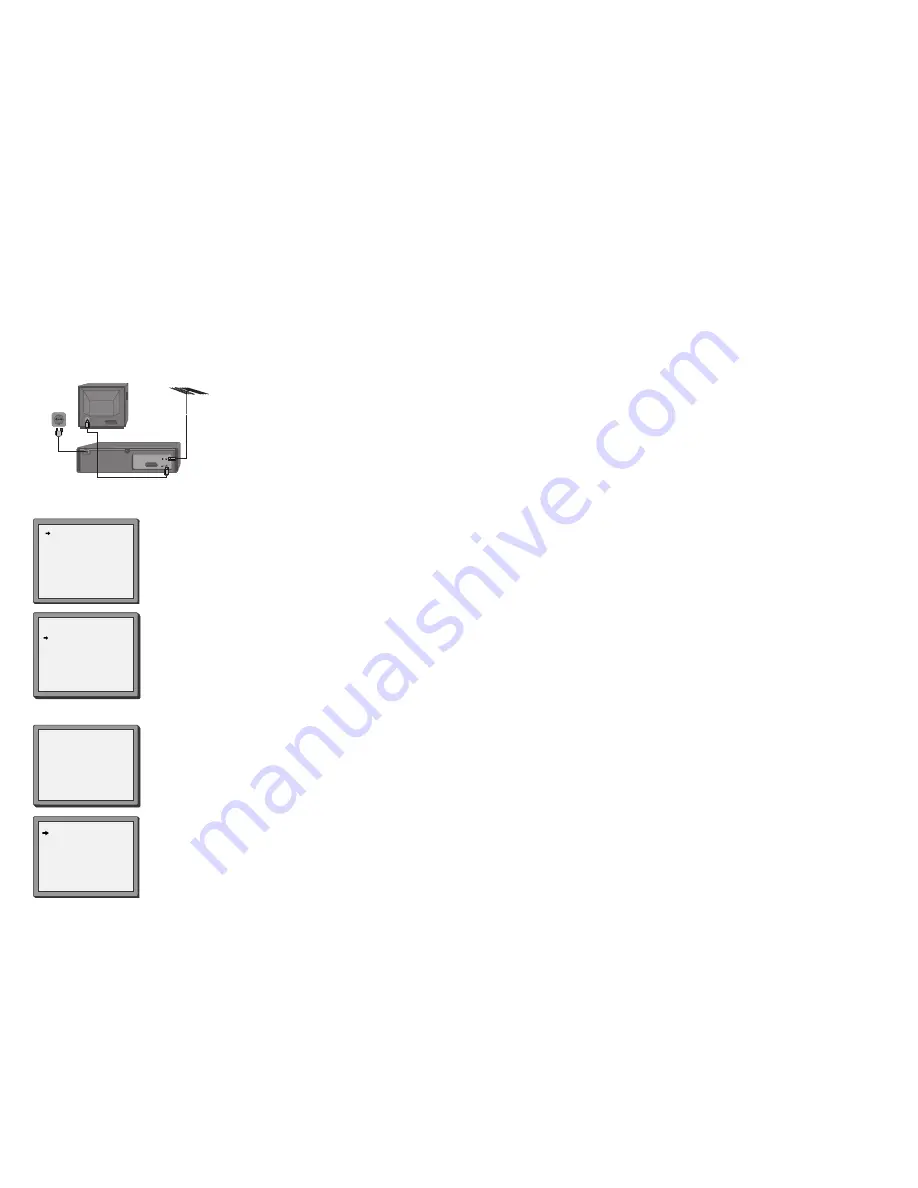
Connecting the video to your TV

Fit the batteries into the remote control. Make sure that

the (+) and (-) marks on the batteries agree with the (+) and
(-) marks inside the battery compartment.

Plug your aerial into the ANT IN socket of the video.

Connect the black aerial lead provided from the ANT

OUT socket of the video to your TV aerial socket.

Plug the video into the mains and turn it on by pressing

the POWER button. RF 52 will now be displayed on the
front of your video.

200V-240V~,

50/60 Hz

Back view of your video

There are more details, including how to connect extra equipment, on pages 2 to 4.

Stage 2. 

Tuning in your TV

Tune a spare channel of your TV until you see the blue ‘Language

Set’ screen. Select the wanted language and country with 

PR+

or 

PR-

button. Press 

OK

to confirm. 

Store this setting on your TV.

If there is any distortion (lines, flickering and so on), the video

usually recommends a new ‘RF’ number during the next stage (auto
set or auto search). Press OK to confirm the new number. Should the
video not recommend a new number, see option 2 or 3 on page 6.

LANGUAGE SET

ENGLISH
DEUTSCH
ITALIANO
ESPAÑOL
FRANÇAIS
NEDERLANDS
SVENSKA
SUOMI

PR+/-:SELECT
OK:CONFIRM         MENU:END

COUNTRY SET

B

N

D

NL

DK

S

E

SF

GR

CH

I

TR

LUX

OTHERS

PR+/-:SELECT
OK:CONFIRM         MENU:END

*For selecting the country, refer to the followings.

B: Belgium
D: Germany 
DK: Denmark
E: Spain
GR: Greece

I: Italy
LUX: Luxembourg
N: Norway
NL: Netherlands
S: Sweden

SF: Finland
CH: Switzerland
TR: Turkey

Stage 3. 

If you already set the language and country set, you can see the followings.

MENU:END

PLEASE WAIT...

CH 25

Point the remote control at the video and press 

OK

.

The video is now tuning all the television stations available in your area.

If ‘Clock Set’ appears on the TV screen, please enter the time and date.

Use the number buttons 

0

to 

9

on the remote control. Press 

OK

to confirm. 

When ‘Manual Set’ appears on the TV screen, press 

MENU

to end.

Your video is now set up. If you want to change station names or

the programmes they are stored on see pages 10 and 11.

MANUAL SET

PR01 P-01

PR08 P-08

PR02 P-02

PR09 P-09

PR03 P-03

PR10 P-10

PR04 P-04

PR11 P-11

PR05 P-05

PR12 P-12

PR06 P-06

PR13 P-13

PR07 P-07

PR14 ----

PR+/-:SELECT
OK:CONFIRM      MENU:END

Important

: If you switch your video off at the mains overnight you

do not have to retune the settings. You will lose the time and date,
these will have to be reset (see page 17). If you have had any
problems setting up your video , please read the problem-solving
guide on page 29.

Summary of Contents for ST737

Page 1: ...to the hi fi system Option 1 Connecting your video to the hi fi system Option 2 3 How to connect your video to another video How to connect your video to a camcorder 4 Tuning your video to the TV usin...

Page 2: ...ality if you connect your video with a scart lead 200V 240V 50 60 Hz 2 If you have connected your video as shown in option 2 turn to page 7 Connecting your video through extra equipment Connecting you...

Page 3: ...to page 7 Use the following method to tune your video in if you have connected it through RF cable as shown in diagram 1 on page 2 Once you have carried out the steps in Setting up your video diagram...

Page 4: ...SE CHANGE THE TV CH TO 54 IMPORTANT Press OK to confirm Press MENU to end Option 2 RF OUTPUT SET 0 9 SET UP 21 69 OK CONFIRM MENU END CH 52 If there is still picture interference repeat option2 RF OUT...

Page 5: ...s input are the same as described on page 4 Manual tuning Manual tuning allows you to tune in new stations or equipment such as a satellite receiver and so on 1 Press MENU Choose PR Preset by pressing...

Page 6: ...PR07 P 07 PR14 PR SELECT OK CONFIRM MENU END Should you wish to tune in all the channels available in your region please refer to page 5 Sorting programme locations Sorting programme locations allows...

Page 7: ...ying NTSC tapes on PAL TV If you play cassettes which have been recorded on the NTSC colour system as used in the USA you can watch the pictures on most PAL TVs On older TVs some black lines may appea...

Page 8: ...e beginning of a recording play it for about 6 seconds then wind on to the next one When you see the recording you want to watch press PLAY FF SP INDEX 01 0 11 09 16 9 Wide screen format 16 9 Wide scr...

Page 9: ...T 0 9 SETUP HOUR CORRECT OK CONFIRM MENU END CLOCK SET 0 9 SETUP HOUR CORRECT OK CONFIRM MENU END TIME DATE TIME 11 41 DATE 12 07 2004 MON Setting time and date 1 2 Once the CLOCK SET display is on th...

Page 10: ...want to change using the buttons Change the setting using the PR or PR or number buttons 0 9 If all the settings are correct press OK The on screen display will remind you to enter a cassette and tur...

Page 11: ...umber buttons 0 to 9 These buttons are used on the following two pages HOW OFTEN DO YOU WANT TO RECORD THIS PROGRAM PR SELECT OK CONFIRM MENU END ONCE WEEKLY ONCE A WEEK DAILY MON FRI DAILY MON SAT DA...

Page 12: ...ed parts of the cassette If you rewind the cassette the counter will count backwards if you rewind beyond the zero position the counter counts in negative values for example 0 01 15 This display will...

Page 13: ...onnected through RF it will switch to stand by when no station is received for more than five minutes Language Select Press MENU Select VCR SETUP by pressing PR twice then press OK Choose LANGUAGE SET...

Page 14: ...to Noise Ratio 60dB General Temperature range 5 C to 35 C Humidity range 80 Timer 8 events 1 month These technical details may change Index Aerial 2 5 Bilingual 13 25 Cassette length 23 Channel 6 7 9...

Page 15: ...VCR button on the video remote control will not work This button will only work if the TV has the appropriate internal switch and a scart lead is connecting the TV and video The television will not c...

Page 16: ...or 3 on page 6 LANGUAGE SET ENGLISH DEUTSCH ITALIANO ESPA OL FRAN AIS NEDERLANDS SVENSKA SUOMI PR SELECT OK CONFIRM MENU END COUNTRY SET B N D NL DK S E SF GR CH I TR LUX OTHERS PR SELECT OK CONFIRM...

Page 17: ......

Reviews: