background image

F96VTN and G96VTN: Installation, Start-up, Operating and Service and Maintenance Instructions

Manufacturer reserves the right to change, at any time, specifications and designs without notice and without obligations.

4

Improper  installation,  adjustment,  alteration,  service,  maintenance,  or

use can cause explosion, fire, electrical shock, or other conditions which

may  cause  death,  personal  injury,  or  property  damage.  Consult  a

qualified  installer,  service  agency,  or  your  distributor  or  branch  for

information  or  assistance.  The  qualified  installer  or  agency  must  use

factory-authorized  kits  or  accessories  when  modifying  this  product.

Refer to the individual instructions packaged with the kits or accessories

when installing.
Installing and servicing heating equipment can be hazardous due to gas

and electrical components. Only trained and qualified personnel should

install,  repair,  or  service  heating  equipment.  Untrained  personnel  can

perform basic maintenance functions such as cleaning and replacing air

filters.  All  other  operations  must  be  performed  by  trained  service

personnel. When working on heating equipment, observe precautions in

literature, on tags, and on labels attached to or shipped with furnace and

other safety precautions that may apply. 
These instructions cover minimum requirements and conform to existing

national standards and safety codes. In some instances, these instructions

exceed certain local codes and ordinances, especially those that may not

have  kept  up  with  changing  residential  construction  practices.  We

require these instructions as a minimum for a safe installation. 
Follow  all  safety  codes.  Wear  safety  glasses,  protective  clothing,  and

work gloves. Have a fire extinguisher available. Read these instructions

thoroughly and follow all warnings or cautions included in literature and

attached to the unit. 

This  is the  safety-alert  symbol 

. When  you  see  this  symbol  on  the

furnace  and  in  instructions  or  manuals,  be  alert  to  the  potential  for

personal injury. 
Understand  the  signal  words  DANGER, WARNING,  and  CAUTION.

These words are used with the safety-alert symbol. DANGER identifies

the most serious hazards which will result in severe personal injury or

death.  WARNING  signifies  a  hazard  which  could  result  in  personal

injury or death. CAUTION is used to identify hazards which may result

in  minor personal  injury  or  product  and property  damage. NOTE  and

NOTICE are used to highlight suggestions which will result in enhanced

installation, reliability, or operation.

1. Use only with type of gas approved for this furnace. Refer to the

furnace rating plate.

2. Install this furnace only in a location and position as specified in the

“Location” section of these instructions.

3. Provide  adequate  combustion  and  ventilation  air  to  the  furnace

space as specified in “Air for Combustion and Ventilation” section.

4. Combustion  products  must  be  discharged  outdoors.  Connect  this

furnace  to  an  approved  vent  system  only,  as  specified  in  the

“Venting” section of these instructions.

5. Never test for gas leaks with an open flame. Use a commercially

available soap solution made specifically for the detection of leaks

to check all connections, as specified in the “Gas Piping” section.

6. Always  install  furnace  to  operate  within  the  furnace’s  intended

temperature-rise  range  with  a  duct  system which  has  an  external

static  pressure  within  the  allowable  range,  as  specified  in  the

“Start-Up, Adjustments,  and  Safety  Check”  section.  See  furnace

rating plate.

7. When a furnace is installed so that supply ducts carry air circulated

by the furnace to areas outside the space containing the furnace, the

return  air  shall  also  be  handled  by  duct(s)  sealed  to  the  furnace

casing  and  terminating  outside  the  space  containing  the  furnace.

See “Air Ducts” section.

8. A gas-fired furnace for installation in a residential garage must be

installed as specified in the warning box in the “Location” section.

9. The furnace may be  used  for construction  heat provided  that  the

furnace  installation  and  operation  complies  with  the  first

CAUTION in the LOCATION section of these instructions.

10. These Multipoise Gas-Fired Furnaces are CSA design-certified for

use with natural and propane gases (see furnace rating plate) and for

installation  in  alcoves,  attics,  basements,  closets,  utility  rooms,

crawlspaces,  and  garages. The  furnace  is  factory-shipped  for  use

with natural gas. A CSA (A.G.A. and C.G.A.) listed accessory gas

conversion kit is required to convert furnace for use with propane

gas.

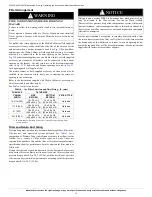
11. See 

Table 1

 for required clearances to combustible construction.

WARNING

!

FIRE, EXPLOSION, ELECTRICAL SHOCK, AND 

CARBON MONOXIDE POISONING HAZARD

Failure  to  follow  this  warning  could  result  in  dangerous  operation,

personal injury, death, or property damage. 

Furnaces shall NOT be twinned (i.e. tandem or staged operation) unless

approved in factory technical specifications literature for the furnace.

 A  factory  authorized,  field-supplied  Twinning  Kit  MUST  be  used. 

Consult  furnace  pre-sale  literature  for  specific  models  approved  for

twinning  and  the  correct  twinning  kit.   Twinned  furnaces  must  be

installed on both a common supply AND a common return duct system

as  shown  in  the  Twinning  Kit  Installation  Instructions.   Only  two

furnaces can be twinned on a common supply and return duct system

using a factory authorized twinning kit.

WARNING

!

FIRE HAZARD

Failure to follow this warning could result in personal injury, death, or

property damage.

Solvents, cements and primers are combustible. Keep away from heat,

sparks  and  open  flame.  Use  only  in  well-ventilated  areas.  Avoid

breathing in vapor or allowing contact with skin or eyes.

CAUTION

!

FURNACE RELIABILITY HAZARD

Failure to follow this caution may result in unit component damage.
Application  of  this  furnace  should  be  indoors  with  special  attention

given to vent sizing and material, gas input rate, air temperature rise,

unit leveling, and unit sizing. 

WARNING

!

FIRE, INJURY, OR DEATH HAZARD

Failure to follow this warning could result in property damage, personal

injury, or death.

Do not bypass any of the safety controls in the furnace, including but

not limited to the main limit switch, rollout or burner thermal switch,

and pressure switch/pressure transducer.

CAUTION

!

CUT HAZARD

Failure to follow this caution may result in personal injury. 
Sheet metal parts may have sharp edges or burrs. Use care and wear

appropriate  protective  clothing,  safety  glasses  and  gloves  when

handling parts, and servicing furnaces. 

Summary of Contents for F96VTN

Page 1: ...ANCE PROCEDURES 58 WINTERIZATION 65 SEQUENCE OF OPERATION 68 PARTS REPLACEMENT INFORMATION GUIDE 71 MODEL NOMENCLATURE 71 Most states in the USA and jurisdictions in Canada have laws that require the...

Page 2: ...o the exterior of the building at a minimum height of eight 8 feet above grade directly in line with the exhaust vent terminal for the horizontally vented gas fueled heating appliance or equipment The...

Page 3: ...ARNING FIRE INJURY OR DEATH HAZARD Failure to follow this warning could result in property damage personal injury or death This furnace was manufactured to operate with natural gas When fuel supply is...

Page 4: ...ion of leaks to check all connections as specified in the Gas Piping section 6 Always install furnace to operate within the furnace s intended temperature rise range with a duct system which has an ex...

Page 5: ...scomfort and or vent freezing Failure to follow these guidelines is considered faulty installation and or misapplication of the furnace and resulting failure damage or repairs may impact warranty cove...

Page 6: ...lumbing codes CANADA Current edition of CAN CSA B149 1 Parts 4 5 6 and 9 In the state of Massachusetts This product must be installed by a licensed plumber or gas fitter When flexible connectors are u...

Page 7: ...ficient air must be provided to avoid negative pressure in the equipment room or space A positive seal must be made between the furnace cabinet and the return air duct to prevent pulling air from the...

Page 8: ...ustion Air Method 1 Provide the space with sufficient air for proper combustion ventilation and dilution of flue gases using permanent horizontal or vertical duct s or opening s directly communicating...

Page 9: ...4 Unusually tight construction is defined as Construction with a Walls and ceilings exposed to the outdoors have a continuous sealed vapor barrier Openings are gasketed or sealed and b Doors and open...

Page 10: ...09 9 229 40 26087 7 178 30 19355 6 152 140 000 70 45161 10 254 47 30435 8 203 35 22581 7 178 FURNACE WATER HEATER TOTAL INPUT 100 000 30 000 130 000 divided by 4 000 32 5 Sq In for each two Vertical D...

Page 11: ...horizontal drain trap grommet is ONLY REQUIRED FOR DIRECT VENT APPLICATIONS It it NOT required for applications using single pipe or ventilated combustion air venting The condensate trap extends belo...

Page 12: ...ured per local codes Supports and clamps should be spaced to prevent the drain line from sagging or being dislocated from the furnace or termination point In the absence of local codes consult the cur...

Page 13: ...amp and insert the long end of the adapter or the 1 2 in CPVC pipe into the outlet stub on the drain tube 9 Connect additional condensate piping to a code approved drain or to a condensate pump approv...

Page 14: ...an be constructed from field supplied 1 2 in CPVC or 3 4 in PVC pipe in compliance with local building codes A factory supplied 1 2 in CPVC to 3 4 in PVC adapter is supplied in the loose parts bag for...

Page 15: ...viewed for possible openings using light assistance or a probe can be inserted for sampling the air stream The cover attachment shall prevent leaks Connect supply air duct to flanges on furnace supply...

Page 16: ...s cased evaporator coil or coil casing is used install as shown in Fig 25 NOTE It is recommended that the perforated supply air duct flanges be completely removed from furnace when installing the furn...

Page 17: ...ustible flooring subbase required 15 1 8 384 19 483 16 3 4 425 20 5 8 524 Downflow Applications on Combustible Flooring with coil assembly or coil box subbase not required 15 1 2 394 19 483 16 1 2 419...

Page 18: ...onnect supply air duct to flanges on furnace supply air outlet Bend flange upward to 90 with wide duct pliers See Fig 20 The supply air duct must be connected to ONLY the furnace supply outlet air duc...

Page 19: ...on sheet for performance data for a particular filter media or IAQ device Design the filter and associated ductwork for the best match of pressure drop versus filter size Best practice usually chooses...

Page 20: ...5 13 0 08 21 0 13 32 0 29 72 0 20 49 1000 472 0 06 16 0 11 28 0 17 43 0 27 67 1200 566 0 07 18 0 14 36 0 22 56 1400 661 0 08 21 0 18 45 0 28 70 1600 755 0 09 23 0 21 54 1800 850 0 10 25 0 26 64 20 x 2...

Page 21: ...5 See Note 4 ON ON ON 385 335 See Note 4 Heating SW1 High Heat Airflow3 800 770 730 700 665 635 605 570 540 510 Low Heat Airflow3 560 520 470 425 390 See Note 4 SW1 5 and SW2 2 set to OFF except as in...

Page 22: ...e 4 Heating SW1 High Heat Airflow3 1470 1435 1400 1365 1330 1295 1260 1225 1190 1155 Low Heat Airflow3 1150 1110 1070 1030 990 950 910 870 830 790 SW1 5 and SW2 2 set to OFF except as indicated See No...

Page 23: ...ote 4 Heating SW1 High Heat Airflow3 1810 1765 1720 1675 1625 1575 1525 1475 1425 1375 Low Heat Airflow3 1405 1350 1290 1225 1160 1100 See Note 4 SW1 5 and SW2 2 set to OFF except as indicated See Not...

Page 24: ...e dampers or other flow control must prevent chilled air from entering the furnace If the dampers are manually operated they must be equipped with means to prevent operation of either unit unless the...

Page 25: ...is used black pipe shall be installed at the furnace gas control valve and extend a minimum of 2 in 51 mm outside the furnace WARNING FIRE OR EXPLOSION HAZARD Failure to follow this warning could resu...

Page 26: ...pe must be disconnected from furnace and capped before and during supply pipe pressure test If test pressure is equal to or less than 0 5 psig 14 in w c turn off electric shutoff switch located on fur...

Page 27: ...M WIRE LENGTH FT M Length shown is as measured one way along wire path between furnace and service panel for maximum 2 percent voltage drop MAXIMUM FUSE OR CKT BKR AMPS Time delay type is recommended...

Page 28: ...piping or the indoor coil drain See Fig 30 for alternate electric entry through top panel 1 Select and remove 7 8 in 22 mm knock out on the desired side of the casing Remove the knock out from the cas...

Page 29: ...Install J Box mounting bracket to inside of furnace casing See Fig 34 2 Route BX connector through 7 8 in 22 mm diameter hole in casing and J Box bracket 3 Secure BX cable to J Box bracket with connec...

Page 30: ...HUM terminal is a 24 VAC output energized when the blower is operating during a call for heat 3 Twinning Connector The furnace can only be controlled by a single or two stage thermostat A Communicati...

Page 31: ...he venting system should be done in conjunction with planning for the ductwork drainage and furnace accessories such as air cleaners and humidifiers Begin assembling the venting system AFTER the furna...

Page 32: ...Canadien recommande l inspection par un personel qualifi et ce une fois par ann e Les autorit es ayant juridiction inspecteurs de gas inspecteurs en b timents d partement des incendies etc devraient t...

Page 33: ...moisture from entering the furnace from the combustion air inlet pipe See Fig 51 When sizing venting systems the equivalent length of the optional inlet pipe moisture trap must be taken into account W...

Page 34: ...damage plants shrubs air conditioning equipment or utility meters 3 Do not locate termination directly into prevailing winds Termination should be positioned so that it will not be affected by sustain...

Page 35: ...lvents Primers Cements PVC Pressure Pipe Schedule 40 D1785 UL 1738 D2466 or D2665 F656 D2564 DWV Schedule 40 D1785 D2665 SDR 26 N A D2241 SDR 21 N A D2241 IPEX Schedule 40 ULC S636 ULC S636 ULC S636 U...

Page 36: ...Maintain 12 in 305mm minimum clearance above highest anticipated snow level or grade whichever is greater Side wall termination with 2 elbows preferred 12 in min 305 mm from overhang or roof Maintain...

Page 37: ...air supply inlet 6 ft 1 8 M 3ft 9 M above if within 10 ft 3 M horizontally L Clearance under a veranda porch deck or balcony 12 in 305 mm Permitted only if veranda porch deck or balcony is fully open...

Page 38: ...n See Note 8 K Clearance to a mechanical air supply inlet 6 ft 1 8 M 3ft 9 M above if within 10 ft 3 M horizontally L Clearance under a veranda porch deck or balcony 12 in 305 mm Permitted only if ver...

Page 39: ...arance distances when vent termination is located more than 6 ft 2 M away from an inside corner refer to the appropriate Direct Vent or Non Direct Vent Clearance Table Clearance description when termi...

Page 40: ...to Fig 50 for terminations approved for use in Alberta and Saskatchewan Size the Vent and Combustion Air Pipes General Furnace combustion air and vent pipe connections are sized for 2 in 50 mm ND PVC...

Page 41: ...nt Termination NOTE Maximum Equivalent Vent Length MEVL includes standard and concentric vent termination and does NOT include elbows Use Table 15 Deductions from Maximum Equivalent Vent Length to det...

Page 42: ...gth Unit Size 40 000 1 60 000 2 80 000 100 000 3 120 000 Altitude feet Pipe Dia in 1 2 2 1 2 2 3 1 2 2 3 4 2 2 3 4 2 3 4 0 2000 40 155 185 20 100 175 200 15 55 130 175 200 20 80 175 200 10 75 185 2001...

Page 43: ...each pipe 2 Count the number of elbows for each pipe 3 For each pipe multiply the number of elbows by the equivalent length for the type of elbow used Record the equivalent length of all the elbows fo...

Page 44: ...be necessary to remove one knockout for the vent pipe and the other knockout for the combustion air connection See Fig 15 Use a flat blade screwdriver and tap on the knockout on opposite sides where t...

Page 45: ...1 64 76 7 6 1 6 1 6 1 6 1 15 2 13 7 6 1 18 3 15 2 6 1 9 1 9 1 7 6 6 1 22 9 19 8 18 3 6 1 25 9 22 9 19 8 18 3 0 1 5 1 5 6 1 7 6 6 1 6 1 9 1 7 6 4 6 4 6 3 0 3 0 6 1 12 2 9 1 7 6 6 1 13 7 12 2 9 1 29 1 5...

Page 46: ...w Configurations Appearance May Vary See Notes for Venting Options A11327A HORIZONTAL LEFT VERTICAL VENT CONFIGURATION 1 2 3 4 6 7 5 5 Rotate vent elbow to required position Any other unused knockout...

Page 47: ...adapter Slide clamps over the coupling 3 Slide vent pipe through adapter and coupling into vent elbow 4 Insert vent pipe into vent elbow 5 Torque all clamps 15 lb in 6 Attach combustion air pipe adapt...

Page 48: ...r with sheet metal screws DO NOT DRILL INTO POLYPROPYLENE VENT PIPES Use an optional accessory vent coupling if needed 12 Seal around the combustion air pipe with silicone or foil tape SILICONE SEALER...

Page 49: ...than 18 in 457 mm apart to help avoid vent gas recirculation into combustion air intake Termination elbows will be installed after the vent and if used combustion air pipe is installed Sidewall Termi...

Page 50: ...t restrictor 1 Remove the vent elbow from the inducer outlet 2 Align the lock tabs on the outlet restrictor with the slots on inside outlet of the inducer assembly 3 Snap the outlet restrictor in plac...

Page 51: ...te setup switches on furnace control 3 Configure the setup switches as necessary for the application 4 Replace blower door NOTE If a bypass humidifier is used setup switch SW1 4 Comfort Efficiency sho...

Page 52: ...ontinuous Fan CF Setup Switches SW2 3 4 5 The CF setup switches are used to select desired airflow when thermostat is in continuous fan mode or to select low cooling airflow for two speed cooling unit...

Page 53: ...low these warnings could result in personal injury or death Failure to use a properly configured trap or NOT water priming trap before operating furnace may allow positive pressure vent gases to enter...

Page 54: ...le to adjust the manifold pressure to obtain the proper input rate To check the inlet gas pressure 1 Make sure the gas supply is turned off to the furnace and at the electric switch on the gas valve 2...

Page 55: ...erved by the meter b Move setup switch SW1 2 to ON position This keeps furnace locked in low heat operation when only W W1 is energized c Jumper R to W W1 d Run furnace for 3 minutes in low heat opera...

Page 56: ...low in high heat 1 Remove jumpers from R and W W1 and W2 2 Wait until the blower off delay is completed 3 Turn 115 VAC power off 4 Check the position of setup switch SW1 4 When set to OFF airflow is r...

Page 57: ...42 3 4 1 4 42 3 5 1 5 42 3 6 1 5 42 3 7 1 6 2001 611 825 43 3 8 1 6 42 3 3 1 4 42 3 4 1 4 42 3 5 1 5 to 850 43 3 6 1 5 43 3 7 1 6 42 3 2 1 3 42 3 3 1 4 3000 914 875 43 3 4 1 4 43 3 5 1 5 43 3 7 1 5 43...

Page 58: ...25 144 288 720 70 51 103 257 26 138 277 692 72 50 100 250 27 133 267 667 74 48 97 243 28 129 257 643 76 47 95 237 29 124 248 621 78 46 92 231 30 120 240 600 80 45 90 225 31 116 232 581 82 44 88 220 32...

Page 59: ...r switch install blower door and refer to the SERVICE label on the blower door for more information Component Self Test Component Test can ONLY be initiated by performing the following 1 Remove blower...

Page 60: ...posable media filter replace only with a factory specified media filter of the same size 6 Slide filter into cabinet 7 Replace filter cabinet door 8 Turn on electrical supply to furnace A190094B Fig 6...

Page 61: ...mbly c Mark blower wheel orientation and cutoff plate location to ensure proper reassembly d Remove screws securing cutoff plate and remove cutoff plate from housing e Remove bolts holding motor mount...

Page 62: ...oth rollout switches 15 Slide one piece burner out of slots on sides of burner assembly 16 Remove the flame sensor from the burner assembly 17 Optional Remove the Hot Surface Igniter HSI and bracket f...

Page 63: ...the collector box opening or water will flow out of tube 4 Remove the collector box plug from the top port on the upper corner of the collector box See Fig 61 5 Attach a funnel with a flexible tube to...

Page 64: ...ich needs to be corrected such as improper adjustment of manifold pressure insufficient or poor quality combustion air improper vent termination incorrect size or damaged manifold orifice s improper g...

Page 65: ...Antifreeze should run through the inducer housing overfill condensate trap and flow to an open drain 8 Replace the rubber plug in the port on the collector box 9 Remove the middle unused rubber plug f...

Page 66: ...Y Y2 simultaneously until the heartbeat flashes When done put setup switch SW1 1 in the OFF position Was there a previous status code other than the heartbeat Go to section below for the status code...

Page 67: ...urners operate in high heat then switch to low heat check manifold pressure If OK check burner carryover and flame sensor location Clean flame sensor with fine steel wool and recheck current Nominal c...

Page 68: ...ch HPS closes and the high heat gas valve solenoid GV HI is energized The furnace control CPU begins a 15 second prepurge period after the low heat pressure switch LPS closes If the high heat pressure...

Page 69: ...ow High cooling airflow is based on the A C air conditioning selection shown in Fig 59 The electronic air cleaner terminal EAC 1 is energized with 115 vac whenever the blower motor BLWM is operating W...

Page 70: ...ack on at heating airflow When the W W1 input signal disappears the furnace control begins a normal inducer post purge period while changing the blower airflow If Y Y2 input is still energized the fur...

Page 71: ...cer Inducer assembly Inducer motor capacitor when used Inducer motor module when used TO OBTAIN INFORMATION ON PARTS Consult your installing dealer or a licensed Heating and Air Conditioning company o...

Page 72: ...02 23 Catalog No 440 01 4801 00 REV C Replaces 440 01 4801 00 REV B F96VTN and G96VTN Installation Start up Operating and Service and Maintenance Instructions Manufacturer reserves the right to chang...

Reviews: