


1-800-KEATING
|
ELECTRIC GRIDDLE - SERIES 2000
5
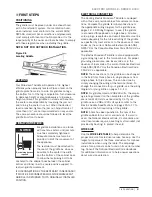
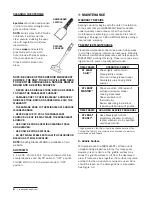
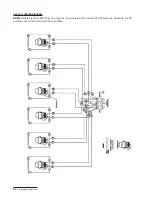
Figure 3-1
Sample confi guration of proper food placement
If you cook over the sensing bulb only, you are draw-
ing heat from that section, activating the thermostat
to call for more heat even though the area around it
is still at the temperature setting. This will result in
higher surface temperatures which will affect your
cooking and product appearance.
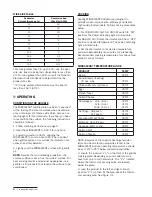
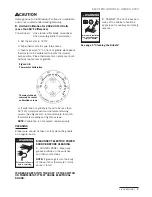
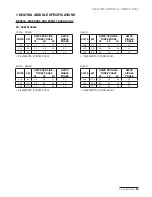
Figure 3-2
Top view placement of elements under MIRACLEAN
plate.
5. After each load, scrape the griddle surface com-
pletely clean using the 4" wide replaceable blade
scraper.
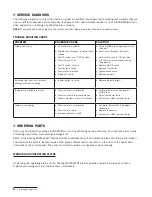
NOTE: DO NOT HACK, CHOP, HIT OR CUT ON THE
MIRACLEAN® SURFACE.
You will dent the steel plate under the trivalent
chrome. It is even possible to hack two nicks close
together and actually tear the MIRACLEAN® surface
as the chromium will not stretch. Below is a sketch
showing the side view of a griddle plate and how the
surface can be damaged. Proper use of the utensils
supplied with your MIRACLEAN® Griddle will prevent
surface damage.
Figure 3-3
NOTE:
Damage done to the MIRACLEAN® surface is
irreparable and is not covered under Keating Warranty
CLEANING THE MIRACLEAN® GRIDDLE
The surface of the MIRACLEAN® Griddle is very durable
and with proper care, following the procedures below,
will last many years.
A sample of Keating Klenzer, Keating palmetto brush
and a 4" scraper are included with each new griddle.
1. Scrape MIRACLEAN® surface with the Keating
Scraper.
2. Clean your Miraclean® Griddle while hot at
300°F to 350°F. Using a plastic pitcher, pour water
ahead of a palmetto pot brush. Then scrub the griddle
clean with the pot brush sweeping the water into
the drain trough.
3. Sprinkle with Keating Klenzer. Polish with a
soft cloth (towel). It will sparkle like new in just a few
minutes. Rinse with potable water to remove
excess Keating Klenzer. Proper care should be taken
to fully clean the griddle on a regular basis.
6
5
4
9
8
7
3
2
1
Load # 2
Load # 3
Load # 1
Thermostat Bulb Location
Summary of Contents for miraclean 2000 series
Page 14: ...keatingofchicago com 12 208 240 VOLT WIRING DIAGRAM 3 PHASE CONNECTIONS...
Page 20: ......
Page 21: ......