background image

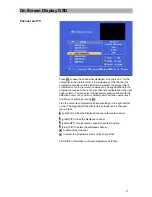
Channel List 


31 


Be careful when delet-
ing channels!


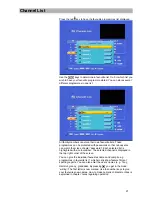
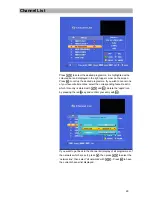
You can determine the desired channel with the  



 keys. It is high-

lighted with a coloured bar and displayed as small insert in the right 
upper corner of the screen. 

Press 

 to confirm your selection. The programme is now displayed. 

If you want to get back to the channel list (display of all programmes of 
the networks which are set), press 

, then press 



 to select the 

'network line', then select 'all networks' with 



 . Press 

 to have 

the current channel list displayed. 

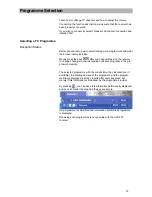
Channel sort Function  

You can sort the channels just as you want. The sorting is effected by 
shifting the entries in the channel list. 

Call up the channel list by pressing 

 . 

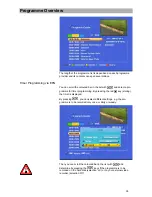
Select the channel you want to shift with 



 and 



. The bar 

indicating the current programme is highlighted in the list with a col-
oured bar and the programme is displayed as insert in the upper cor-
ner of the screen. 

Press the yellow 

 key to mark the channel which you want to shift. 

The writing in the bar is now red. Now you can shift the channel just 
as you want with 



 and 



. Press the yellow 

 key once more 

to position the channel where you want to have it stored. 

Press 

 to leave the channel. 

The new storage is confirmed and displayed on the screen for a few 
seconds. The shifted channel is shown on the screen and now stored 
on the new position in the channel list. 


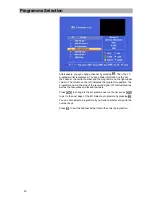
Deleting Channels

Basically, you need to follow almost the same procedure for deleting a 
channel as for sorting a channel. 

Press 

 to call up the channel list. 

Select the position of the channel you want to delete by pressing 



 and 



Now, confirm deleting the channel by pressing the blue 

 key. 

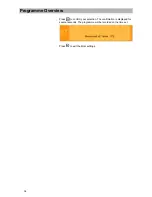
The following question is now displayed on the screen: 


Confirm the desired procedure by pressing the corresponding key 
(OK/L).


Press 

 to have the channel deleted. The changes in storage are 

confirmed and the programme of the next channel on the list is on the 
screen. 

Summary of Contents for UFD 574/S

Page 1: ...User Manual DVB T Receiver UFD 574 S With Hard Disk ...

Page 2: ...ption and wish you much pleasure with it The KATHREIN Team Important Notes However if you have against our expectations any trouble with your receiver please contact your local dealer or call our hotline Tel 49 0 80 31 18 47 00 Fax 49 0 80 31 18 46 76 Your receiver is factory set with the latest software version in each case We are anyway always keen to have the software versions meet with our cus...

Page 3: ...on 13 The first Steps 13 Initiation with BZD 30 indoor Antenna 14 On Screen Display OSD 15 Important Information displayed on the Screen 15 Help Function 15 Channel Confirmation TV 16 Problem Report 16 Channel List TV 17 Videotext Subtitles 18 Videotext 18 Subtitles 18 Programme Selection 19 Selecting a TV Programme 19 Reception Status 19 Selecting a TV Programm with the Number Keys numeric charac...

Page 4: ... 46 Installation 47 Network Configuration 47 Entering the Network Name 48 Deleting a Network 48 Antenna Alignment 49 Automatical Network Search 50 Manual Search 51 Setting the System Parameters 52 System Parameter 53 Parental Lock 53 System Information 53 Local Time Timer 53 Daylight Savings Time 53 TV Type 53 Picture Format 54 Screen 54 A V Mode 54 Factory Setting 54 DVD and Video Recorder Connec...

Page 5: ...Safety Instructions Safety Instructions ...

Page 6: ...ur entry with We recommend you had the entries now saved by the receiver Now a search is carried out and the receiver is in the basic setting The on screen display informs you on the next steps The first programme of the channel list is displayed on the screen below a bar is displayed informing on the programme provider time timer settings programme status and programme name provided that this inf...

Page 7: ...ur receiver to the basic settings by calling up factory settings in the menu Press to call up the main menu Press and for Installation and and for factory settings After you have pressed the same procedure as specified above in chapter installation starts ...

Page 8: ...nds via the remote control 3 Menu key equal to remote control 4 Green LED 5 Select key for calling up the channel list 6 Red LED Stand by 7 Cursor keys equal to remote control 8 Pressure lock for front flap slightly press on the right upper side to open it 1 Electrical Dolby Digital output AC 3 2 Scart socket TV connection 3 Scart socket VCR connection 4 Composite colour video output 5 Input for i...

Page 9: ...formation Sound on off Entry confirmation Elect programme guide Last Programme prog is made a favourite Channel locking Sound selection Volume Record Slow motion on play Changeover TV Radio Digit input for programmes timer etc programme selection up down Menu Videotext Stop record Stop play Freeze image TV Exit menu Play contents on hard disk AV mode ...

Page 10: ...sponding receiver Press the following keys on the remote control at the same time Address 1 to Address 4 red Kathrein UFD 5xx code RC 400 remote control RC 600 and RC 650 remote controls cannot be replaced Alphanumerical Assignment of Number Keys on the Remote Control Taste 1 x 2 x 3 x 4 x 5x 1 1 2 A B C 2 3 D E F 3 4 G H I 4 5 J K L 5 6 M N O 6 7 P R S 7 8 T U V 8 9 W X Y Z 0 empty 0 empty 0 Each...

Page 11: ... extent Press to call up the main menu call up the corresponding sub menu by pressing and The positions in the sub menus are called up by pressing the keys The settings in the positions are effected either with the keys or the number keys Press either or to exit the main menu and the sub menus Alphanumerical Entries Use the number keys for entering programme and network names They create figures a...

Page 12: ...uitable for 5 V supply voltage is imperative see page 17 TV VCR AUX Connection Connect the receiver TV Scart socket to the TV set with a Scart cable If you have a stereo TV set you can receive stereo sound via the Scart connection Use a Scart cable to connect either a video recorder or a DVD recorder to the VCR AUX socket Audio Connection For sound reproduction via the HiFi unit connect the audio ...

Page 13: ...let Switch on the receiver by pressing the power switch on the front panel The red LED and the figures on the front panel start flashing The receiver is now in stand by mode Press on the remote control to switch the receiver to operational mode A programme position is displayed after the receiver is switched to operational mode ...

Page 14: ...activate the voltage supply of the antenna carry out the following steps with the remote control of the receiver Press to enter the main menu Select the sub menu installation with and confirm your entry with Now select net configuration with Press to con firm your entry Press once again to call up operation Now change the selection for the supply voltage from OFF to ON by pressing see photo Now th...

Page 15: ...ndividual OSD s you will obtain detailed infor mation on the further procedure Help Function You can call up the help function for every menu item and every menu function This help function provides a brief description of the most important functions in the menu items called up Example Press to call up the main menu Now press for the help function in the menu item system parameter Find detailed de...

Page 16: ... the reception of vid eotext if so and the time are displayed The icon in the third line indicates the programme selection from the overall programme list If the favourite list is called up the apple icon is displayed instead fol lowed by the programme title and the starting time and the end of the current programme provided that this information is broadcast by the programme provider Problem Repo...

Page 17: ...lect the desired programme either with the selection cursor or by numeric character entry with the number keys Confirm your entry by pressing Find the menu item programme channel settings in the right bottom corner The programme channel factory settings can be changed there Press red FAV to make the displayed channel a favourite channel green PIP to lock the displayed channel yellow OPT to relocat...

Page 18: ... up videotext by pressing the blue key and have it displayed immediately Exit videotext by pressing the same key The individual pages can be called up with the number keys While a page is searched a blinking asterisk appears in the left upper corner Subtitles If subtitles are broadcast you can call them up with the yellow key and with Press to select the desired language of the subtitles Exit the ...

Page 19: ...after you have switched on the receiver to change channels in their ascending or descending order in the pro gramme memory The selected programme with the current time the videotext icon if available the starting and end of the programme and the program metitle are displayed in screen inserts after every keypress but merely if this information is broadcast by the programme provider By pressing you...

Page 20: ... column on the left indicates the programme position the programme name the kind of the received signal FTA scrambled as well as the favourites and locked channels Press to change to the programme next on the list press to get to the next page of the list Select a programme by pressing You can also select a programme by numeric character entry with the number keys Press to exit the channel list bu...

Page 21: ...ssively press and The receiver takes about 3 seconds to process your entry Follow the same procedure for all other programmes also for those stored on a 3 digit position Do not enter 0 as first figure as so called leading zeros are reserved for the Scart changeover Switching to Radio Channel Reception Currently no radio programmes are being broadcast on the radio channels However this may change i...

Page 22: ...ith Press to exit the timer again Incorrect time settings are rejected You can select and set the kind of programme TV radio or On Air Download the programme position with the programme name the starting time day month year hour minute the end of the programme the timer status no once daily weekly for 14 timers Leading zeros must imperatively be entered for the time settings Carry out each setting...

Page 23: ...programmed a download all succeeding timer settings are ignored after successful download VPS Signal Please note that signals of digital television do not provide the VPS signal Consequently you have to programme your external DVD or video recorder in accordance with the timer settings ...

Page 24: ...olby Digital 5 1 CH Select the menu items by pressing and make the desired settings with Press again to exit the menu If subtitles are broadcast you can select the language with in the bar subtitle track Confirm your entry by pressing AC 3 The receiver has an audio output for the AC 3 format This means you can enjoy cinema like sound quality in your living room with the appropriate equipment Conne...

Page 25: ... Press this key again The sound is now unmuted again To indicate this the volume bar is displayed for a few seconds You can change channel while the mute function is active however this function is retained until the sound is either unmuted again or until you re adjust the volume with the corresponding keys on the remote control ...

Page 26: ...at least 10 sec shown on the screen The arrows displayed accord the cursor keys Use these keys to select the respectively as signed programmes If you call up this function the flash above ap pears on the screen Favourite Programmes You can organise and sort your favourite TV and radio programmes e g all German programmes These favourites are distinguished with the apple icon shown with the key in ...

Page 27: ...atch them see chapter password Each selected list is highlighted with a coloured bar The selected channel is displayed in the top right corner of the screen You can give the individual favourites names and compile e g programmes in favourite list 1 which mostly show feature films or sporting reports You can also enter the users names e g Tony Hartmut granny granddad By pressing you get in the mode...

Page 28: ...he current programme is displayed on the screen for a few seconds Calling up a favourite programme First press then the red key Now you can select the individual favourite lists with the keys Confirm your entry with First select the apple icon line with the keys then the desired list with the keys in this example granddad The desired favourite list is displayed after pressing ...

Page 29: ...ne of your favourite list entries select the corresponding favourite list in which this entry is stored with and delete the apple icon by pressing the red key and confirm your entry with If you want to get back to the channel list display of all programmes of the networks which are set press then press to select the network line then select all networks with Press to have the current channel list ...

Page 30: ...ut a certain channel from the overall channel list Press to call up the channel list Press to call up the channel list mode Press to select the bar alphabet Find the desired letter by pressing Each letter is shown in the alphabet bar Press when you have found the desired letter Then all the channels the names of which start with this letter are listed and displayed ...

Page 31: ...d as insert in the upper cor ner of the screen Press the yellow key to mark the channel which you want to shift The writing in the bar is now red Now you can shift the channel just as you want with and Press the yellow key once more to position the channel where you want to have it stored Press to leave the channel The new storage is confirmed and displayed on the screen for a few seconds The shif...

Page 32: ...he menu item adding a channel is displayed on the screen You can make your entries for the new channel here The first line in the list is highlighted with a coloured bar Press to scroll the bar up or down to the desired position Setting the respective position that is to say the respective entry is effected with the keys and the number keys Each network received the channel the channel name can be...

Page 33: ...played on the screen for a few seconds The new channel is added to the channel list Find out the necessary PIDs in the relevant magazines and on the internet among others Learn how to make alphanumerical entries in chapter instructions on operation Never change the PID specifications without cause as they affect the recognition of the received signal ...

Page 34: ...ight In the column on the left you can scroll the cursor with the keys to the programme you want to change to with By pressing the green key current succeeding you can obtain in formation on the succeeding programme of the programmes listed By pressing the blue key extended further information on the pro gramme is displayed By pressing the yellow list you can obtain information on the programme su...

Page 35: ...d select a pro gramme for timer programming By pressing the red key storing the timer is displayed By pressing you can select different settings e g the pro gramme is to be recorded only once or daily or weekly Then you can scroll the coloured bar in the list with and determine by pressing the keys if the programme is to be recorded on the hard disk selection on or on your external video recorder ...

Page 36: ...Programme Overview 36 Press to confirm your selection The confirmation is displayed for several seconds The programme will be recorded on the time set Press to exit the timer settings ...

Page 37: ...ouch Recording You can immediately record the current programme on the hard disk with your DVB T recorder To do so merely press OTR One Touch Recording Instant recording and confirm with Recording Manually Press and to select a programme and prepare the recording with the red key Now a menu is displayed showing the channel name the programme title information if broadcast as well as the starting t...

Page 38: ...The recording can only be stopped by pressing stand by and the hard disk contents are displayed or by pressing After the time given by the timer has run out the receiver automatically switches to stand by mode Note Receiving and recording at the same time as well as receiving and the replay of another programme at the same time is not possible Stopping the Recording After the time given by the EPG...

Page 39: ... select one of the previous recordings and start the replay with The indication REC behind a programme title tells that this programme is just being recorded While you are watching an earlier recorded programme the programme selected before is kept on being recorded The recording time in EPG starts automatically stops 5 min after the end of the programme title Without EPG the recording time is aut...

Page 40: ...aining length of the re play The icon for the replay function just selected is displayed on the left next to it the current time value of the replay is displayed in current and total length The four step function slow motion cannot be called up the control panel is displayed on the screen during the replay of a recording Further functions of the control panel can be displayed during the re play of...

Page 41: ...sor keys Search Visible Search You can carry out a visible search in four steps up to four arrows are displayed in the regular replay by pressing and In audio recordings this function does not work due to the automatic mute function Time Controlled Search If the control panel is active you can carry out a time controlled search when you have a freeze image displayed on the screen by pressing and T...

Page 42: ...eceiver off nor to stand by in the meantime Stopping After pressing or automatically at the end of the recorded film the receiver switches back to the hard disk contents Press to exit the menu and get back to the programme you watched last Deleting In order to delete a recording let the hard disk contents be displayed by pressing Use the keys to select the recording you want to delete and press th...

Page 43: ...ction which certain programmes can be locked with Keep the password in safe custody so that you always have ac cess to your programmes even if you have forgotten the pass word Factory Settings The password 0000 is factory set Password Entry Press to call up the main menu Select the position system parameters by pressing and confirm with Now select position parental lock with the keys and confirm w...

Page 44: ...nfirming password Use the number keys to enter your new password once again for confirmation Personal Enter the receiver ID which the receiver reports when you switch it on This may serve as an useful help to identify it in case of theft Refer to paragraph instructions on operation to find out how to use the number keys of the remote control for numeric character entries The factory setting is UFD...

Page 45: ...the padlock icon appears in the bar You automatically get to the display of the channel next in the list Press the green key to lock a further channel or get back to the channel just locked by pressing the cursor keys The channel will be unlocked again if you press the green key once again In this case the padlock icon disappears Press to confirm your changes On calling up the locked channel this ...

Page 46: ...on the front panel The on off key and behind the flap the menu key and a select key as well as the cursor keys The latter are used just like the arrow keys on the remote control Use the on off key to switch on or off the receiver You can select all channels and menu items as well as adjust the volume with the arrow keys The select key on the front panel has the same functions as the key As there a...

Page 47: ... or select a new network Consider that your installation must be set accordingly In the next step e g scroll with the keys to a desired entry area 2 or any other After pressing or the question whether you want to add the network is displayed on the screen Confirm by pressing The following is displayed You can now use the keys and or to make the entries in the respective positions according to your...

Page 48: ...ame via active an tenna The first letter is highlighted You can now change the network name with the number keys Find out in paragraph instructions on op eration how to proceed Deleting a Network In order to delete a network call up the network configuration scroll the cursor with or and press or You are now asked whether you want to delete the network Either confirm with or dismiss with ...

Page 49: ...e servicing technician The entries with the network name and the reception channel are significant for you Here area 1 and CH 43 If you have already been receiving a signal you will be able to see to bars in the left column indicating the level and the quality of the re ceived signal You can now change the antenna location or if it is a directive an tenna slowly pivot it On doing so observe the ma...

Page 50: ...Channel list Receiver searches existent channels by means of the channel list Network Receiver searches all the channels available in the current network Press to start the automatical search The scan progress in indicated with Scanning Which channels are currently stored is indicated in the TV list and the radio list When the end of the search is indicated you simply have to store the result and ...

Page 51: ...above Correct network wrong channel wrong frequency Picture below Correct network correct channel correct frequency Signal display Good You have to enter network channel and frequency as otherwise the manual search cannot be carried out Channel input Select the respective channel with the keys or with the number keys To do so press and enter the desired channel number After pressing once more the ...

Page 52: ...ocation Merely changes in the receiving installation might require new set tings The menus submenus and positions called up as well as the parame ters to set are each highlighted in colours The menus are mainly self explanatory You can obtain supporting information on each menu called up by pressing Exit this help function by pressing once more The main menu which you always call up with includes ...

Page 53: ...nwich Meantime which is transmitted in the data stream This means that the time has to be corrected by 1 hour for Germany If necessary the daylight savings time has to be corrected so that the timers function duly You can correct it yourself with the keys by the half hour Use the keys to scroll the selection cursor to local time timer Press twice to confirm your entry The receiver stores the new s...

Page 54: ...V set is imposed on Confirm by twice pressing A V Mode Use the keys to select the type of video signal on the Scart Socket Select the signal your TV set can process Refer to the manual of your TV set Composite Colour Signal RGB Red Green Blue signal or Y C S VHS signal Luminance Chrominance Confirm the selection by twice pressing Factory Setting In this position you can reset all settings to the f...

Page 55: ...ragraph timer set tings Replay For VCR replay the satellite receiver has to be switched to stand by so that the signal path can be connected through the VCR AUX Scart socket to the TV Scart socket You have to set the Scart socket of the satellite receiver to AUX by pressing so that the TV set can automatically reproduce the pic tures of the video recorder In this setting the picture of the video r...

Page 56: ...ondition Select the main menu with Call up the sub menu installation with and Scroll the selection cursor to the position software download and select this position with The menu item software download is thus opened You can call up the individual positions with and here In position show in formation you can obtain information on the transmitted software and the channel list The positions show inf...

Page 57: ...f an error or a missing signal download failed is displayed Not on any account switch off the receiver during the update as otherwise you will delete the entire software In this case the software would have to be re installed either in a workshop or via PC and null modem cable During the download please wait is blinking Observe all screen inserts After a software update you have set the time again...

Page 58: ...lian Dutch Portuguese Spanish Turkish LED displays for operation stand by and RCU reception Videotext generation display on TV set via internal receiver 4 3 and 16 9 format recognition choice of viewing format Composite colour YC S VHS and RGB signal output programmable via Scart socket Manual input of PID data Programme search 2 Scart sockets Audio output via Cinch sockets S PDIF IEC 958 Dolby Di...

Page 59: ...io decoding MPEG 1 and MPEG 2 Layers 1 and 2 Bit rate 32 44 1 48 kb s Frequency range 40 Hz to 20 kHz Output voltage Typ 770 50 mV on 10 kΩ TV Scart and Cinch S N 65 dB Hard Disk Recorder Capacity 80 GB Recording time Up to 56 hours dependent on data rate and picture contents Power Supply Supply volt volt supply receiver 230 V 10 50 Hz 12 V Power consumption 15 W Power consumption in stand by typ ...

Page 60: ...ata signal 10 Green signal 11 X X Data signal 12 Red GND 13 X X Data GND 14 Red signal C 15 X X Blanking signal 16 X X Video GND 17 X X Blanking signal GND 18 X X Video output comp col Y 19 X X Video input 20 X Connector screening 21 X X VHS S VHS Changeover The Scart sockets can be changed over from VHS to S VHS and the other way round You can change over in menu item system parameters A V mode I...

Page 61: ...Connection Example 61 Connection Example DVB T receiver connections with an entire television and HiFi system The electrical digital audio output can be connected to a Dolby Digital unit ...

Page 62: ...ablish a clear allocation of the video and audio data transmission The PID PCR is the identification number for the synchronisation signal The PID PCR normally is identical to PID Video In multilingual programmes another language could be assigned to the TV programme via manual audio PID input After the PID input the receiver automatically selects the audio data identified by the PID from the data...

Page 63: ...Mute Mute function OSD On Screen Display PAL Analogue television standard Pay TV Pay TV e g Premiere PIN Personal Identification Number Receiver Receiver RGB Video signal generated from three individal colour signals red green blue Scart cable 21 pole connection cable Stand by Operational readiness S VHS Super Video Home System Video recorder standard Symbol rate Transmitted data rate of the trans...

Page 64: ...ein Straße 1 3 x PO Box 10 04 44 x D 83004 Rosenheim x Germany x Telephone 49 80 31 1 84 0 x Fax 49 80 31 1 84 3 06 936 2719 A 0505 ZWT Subject to technical changes Service Language Picture format Antenna supply German 4 3 Operation Stand by ON 16 9 OFF Further settings ...

Reviews: