17
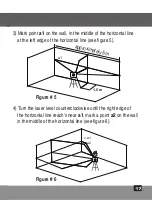
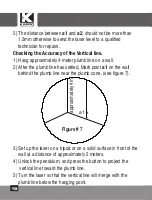
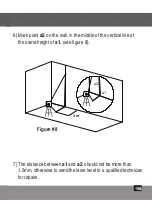
3) Mark point
a1
on the wall, in the middle of the horizontal line
at the left edge of the horizontal line (see figure 5).
4) Turn the laser level counterclockwise until the right edge of
the horizontal line reach’s near
a1
, mark a point
a2
on the wall
in the middle of the horizontal line (see figure 6).
1.5 m
a1
x
x a1
x a2
approximately
5m
Figure # 5
Figure # 6
Summary of Contents for Prolaser 852G
Page 1: ...User Manual Manual del usuario Manuel d utilisation Prolaser Cross Line Laser Model No 852G...
Page 62: ...62 Kapro 852G Prolaser Cross Line Laser 852G Prolaser Cross Line Laser GREEN RU...
Page 63: ...63 64 65 66 67 68 69 70 72 73 74 79 80 81...
Page 64: ...64 40 130 1 4...
Page 65: ...65 II EN 60825 1 25249 6 65...
Page 66: ...66 10 C 45 C...
Page 67: ...67 1 2 3 3 1 2 3 4 5 USB Type C...
Page 68: ...68 1 2 3 4 5 6 7...
Page 69: ...69 1 2 a b c 3 4 5...
Page 70: ...70 3 1 2 1 ON 3 H V 4 3 5 1 OFF...
Page 71: ...71 1 M 2 H V 3 4 M 5 1...
Page 72: ...72 40 1 2 P 3 4 P...
Page 73: ...73...
Page 74: ...74 B A a1 0 5 m x Kapro 1 5 2 0 5 3 4 a1 1 5 0 5 1...
Page 75: ...75 B A a1 b2 x b1 x x 0 5 m B A a1 b1 x x 180 5 180 B b1 2 6 0 5 B 7 b2 3 2 3 0 5...
Page 76: ...76 8 180 2 4 9 a a2 a1 b b1 b2 10 a b 3 1 1 5 5 2 4 B A a1 b1 x b2 x x a2x 180...
Page 77: ...77 1 5 m a1 x 3 a1 5 4 a1 2 6 1 5 5 5 6 x a1 x a2...
Page 78: ...78 5 a1 a2 1 5 1 4 2 a1 7 3 2 4 5 7 4 a1 x...
Page 79: ...79 2 m a1 a2 x x x 6 2 a1 8 7 a1 a2 1 5 2 8...
Page 82: ...82...
Page 83: ...83...


