Kanguru Data Bank User Manual Download Page 12


  to step 1 to proceed. 

Step4  

In the first screen of FDISK, answer the   

       Questions as follows:  

Do you want to enable large disk support ? 
[Y] 

if you want to build a partition larger than 2GB. 

[N] 

if you want to build a partition small than 2GB. 

Step5 

The next screen is

 [FDISK OPTIONS]

,  

            and type “5” to select disk. The screen 
      shown on right. 


IMPORTANT:


You must type

 [5]

 in this screen to change the current fixed disk drive to build the partition.     

The default fixed drive set by FDISK is your internal hard drive.       

If you don’t change the fixed disk drive to the KanguruDisk, the data of your internal hard drive will be 
DESTROYED and UNRECOVERABLE


Step6

 In the

 [Change Current Fixed Disk Drive]

, type the disk drive number that was 

      assigned to the KanguruDisk. 

Step7

 Back to 

[FDISK OPTIONS]

 screen, now you can create or delete the partition   

      of the KanguruDisk. 

Step9

 After you finish FDISK procedure, go back to the Windows screen, unplug and plug in   


the KanguruDisk again to activate these changes. Double click on   

      [My Computer] icon, the KanguruDisk that you already partitioned         
      will appear. 


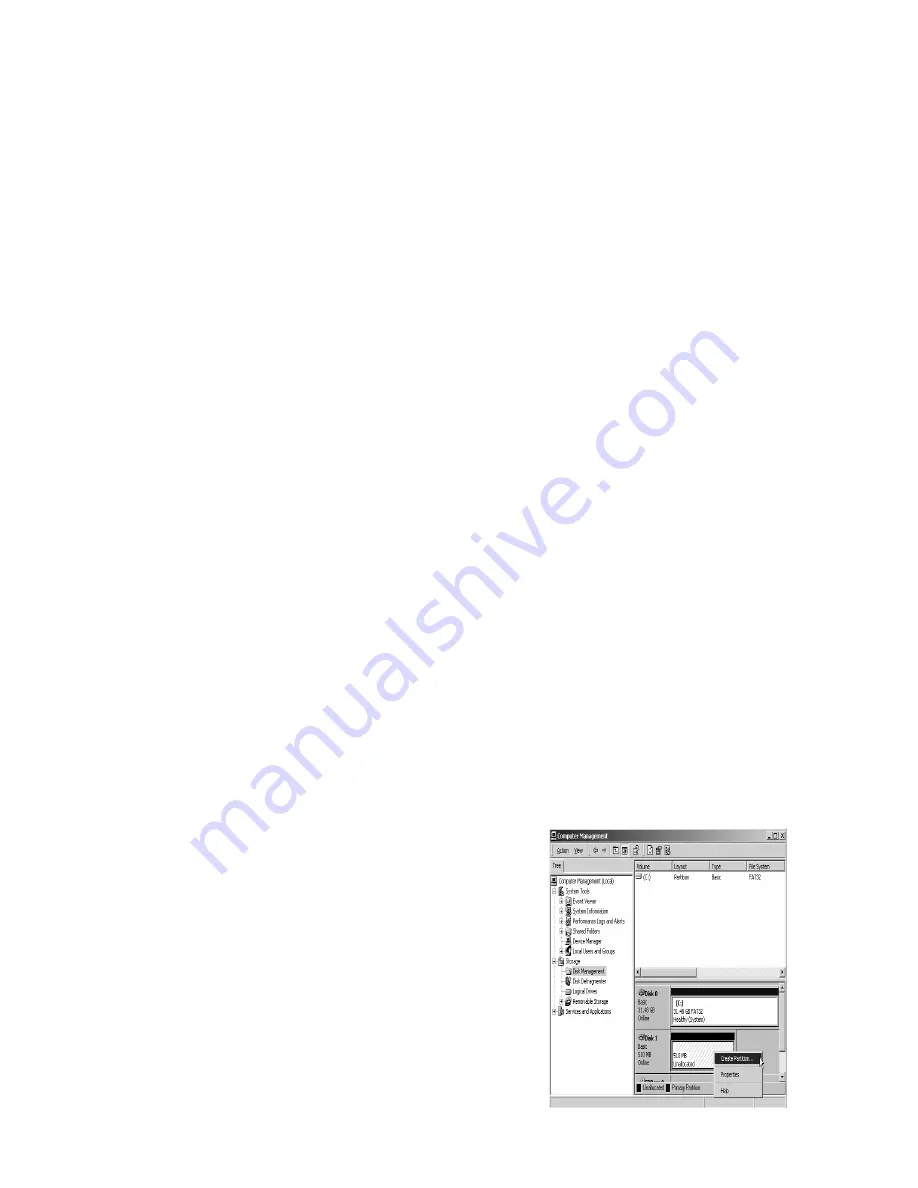
6.2 Partition under Windows 2000 


Step1

 To partition a KanguruDisk       


    under Windows 2000, please plug   


    in the disk , then click on 

[Start]

, choose 


  [Control Panel]

 in

 [Settings]

, open   


  [Administrative Tools]

 , double click   


  [Computer Management]

. A window appears (right). 


Step2 

Click on 

[Disk Management]

 on the 

            left part of this window, all the connected 
            disk drives will be listed in the right   
      part. Locate the KanguruDisk that 
      you added.  On the right of disk # is the 
            status of the partitions of this disk drive,   

Summary of Contents for Data Bank

Page 1: ...installation If this equipment does cause harmful interference to equipment off and on the user is encouraged to try to correct the interference by one or more of the following measures Reorient or re...

Page 2: ...0105 or 13 1 INTRODUCTION The KanguruData Bank is a first of its kind patent pending storage device designed to simplify network data storage Functioning as either a network attached or direct attach...

Page 3: ...ed and the Kanguru Disks will always show up as W X Y Z 2 SYSTEM REQUIREMENTS Hardware Notebook or desktop computer with USB or USB2 0 port supported Operation system Win98SE Win ME Win2000 Win XP Mac...

Page 4: ...the driver you want Click Next In the dialog that appears highlight USB Controllers Click Next Figure 3 Click on the Have Disk button as shown in figure 4 In the dialog that appears click on the Brow...

Page 5: ...buses These USB buses allow devices to run in a less congested traffic environment This helps devices such as color printers scanners video cameras and mass storage devices which require a high bandwi...

Page 6: ...MANAGEMENT From here you can right click on the drive that you want to rename then select PROPERTIES This is where you can change the name of the drive For example if you were using a Kanguru Disk as...

Page 7: ...h you unit plus any additional Kanguru Disks you have purchased A green Unplug or Eject hardware icon will appear in system tray at the bottom of your screen Double click this icon and click stop befo...

Page 8: ...OS X folder depending on you OS Double click the USB2 0 SETUP icon and double click USB installer icon Step2 Click on OK when finished Step3 Restart your computer to finish the driver installation St...

Page 9: ...isks into your DataBank To do so push the Kanguru Disks firmly into the DataBank until you feel it snap into place Also you shouldn t move the Kanguru Disks from side to side while they are in the Dat...

Page 10: ...to shutdown your DataBank You can also re connect a Kanguru Disk into any bay at any time If you have properly removed a Kanguru Disk then it can be reconnected at any time without any installation p...

Page 11: ...tting Set the Kanguru DataBank to Removable Screenshot to right Step3 After restarting the system a removable hard Drive is added to My Computer Choose the removable HDD and click right button of mous...

Page 12: ...type the disk drive number that was assigned to the KanguruDisk Step7 Back to FDISK OPTIONS screen now you can create or delete the partition of the KanguruDisk Step9 After you finish FDISK procedure...

Page 13: ...ard to partition and format your KanguruDisk Now you have built a partition in the KanguruDisk and you can write data to it Tech Support If you experience any problems installing your KanguruData Bank...

Reviews: