background image


24 

3 HOW TO KEEP YOUR COOKTOP IN SHAPE


Before  cleaning  or  performing  maintenance  on  your  appliance,  disconnect  it  from  the  electrical 
power supply. 
 

To extend the life of the cooktop, it is absolutely indispensable that it be cleaned carefully 
and thoroughly on a frequent basis, keeping in mind the following: 

  The  enameled  parts  and  the  glass  top,  if  present,  must  be  washed  with  warm  water 

without using abrasive powders or corrosive substances which could ruin them 

  The  removable  parts  of  the  burners  should  be  washed  frequently  with  warm  water  and 

soap, making sure to remove caked-on substances 

  On  cooktops  with  automatic  ignition,  the  end  of  the  electronic  ignition  device  must  be 

cleaned carefully and frequently, making sure that the gas holes are not clogged 

  Stainless  steel  can  be  stained  if  it  remains  in  contact  with  highly  calcareous  water  or 

aggressive  detergents  (containing  phosphorous)  for  an  extended  period  of  time,  it  is 
recommended that these parts be rinsed thoroughly with water and then dried well, It is 
also a good idea to clean up any spills 

  Before using the ceramic glass module, the surface must be cleaned, using a damp cloth 

to remove dust or food residues. The ceramic glass surface should be cleaned regularly 
with a solution of warm water and a non-abrasive detergent, periodically, special products 
will need to be used to clean the surface. First, remove all food buildup or grease with a 
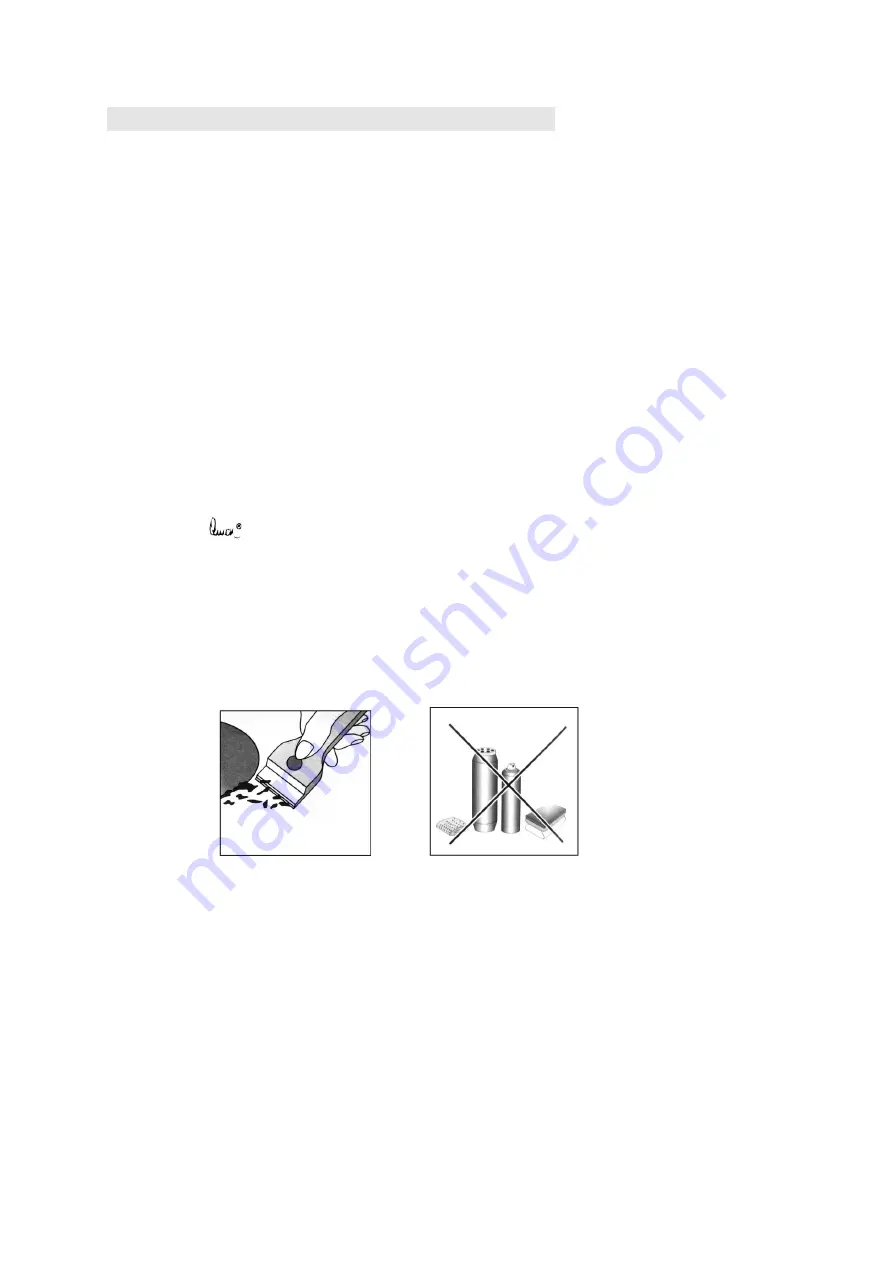
cleaning scraper, e.g.  


CERA


 (not supplied) (Fig. 1). Clean the cooking surface when it is still warm with a 

suitable  cleaning  product  and  paper  towels.  Then  rub  with  a  damp  cloth  and  dry. 
Aluminum foil, plastic items, objects made of synthetic material, sugar or foods with a high 
sugar  content  that  have  melted  onto  the  surface  must  be  removed 

immediately 

with  a 

scraper while the cooking surface is still hot. Special cleaning products for ceramic glass 
surfaces form a transparent protective layer which fights dirty buildup. This also protects 
the surface from damage caused by food with a high sugar content. Do not use abrasive 
sponges  or  cleaning  products  under  any  circumstances.  This  holds  true  for  chemically 
aggressive cleaners, like oven sprays and stain removers (Fig.2) 


Fig.1 


Fig.2 


  When cleaning the grill, it is recommended that you do so while it is still hot. To remove 

the  pan  beneath  the  grill,  it  is  a  good  idea  to wait  until  the  heating  element  has  cooled 
(roughly after 15 minutes) 
 

Greasing the Gas Valves         


Over  time,  the  gas  valves  may  stick  or  become  difficult  to  turn.  If  this  is  the  case,  the  must  be 
cleaned on the inside and the re-greased, 

This procedure must be performed by a technician authorized by the manufacturer. 


Summary of Contents for 5Z-KHG

Page 1: ...ker 5Z KHG 4Z KHG 3Z KHGW 3 70x51x10cm 60x51x10cm 70x51x10cm 5Z KHSSW 4Z KHSSW 4Z CG22 76x50x10cm 58x50x10cm 58x51x10 5cm 3Z 45 2Z KHG 2Z KHSS M 2Z KHSSW M 2Z KHGW 2Z KHGX LPG 1Z KHGW 45x51x10cm 30x51...

Page 2: ...ELLE 3 ANPASSUNG AN VERSCHIEDENE ARTEN VON GAS 16 10 TABELLE 4 GASQUELLE NATIONALE VERGLEICHSTABELLE 17 11 ZUS TZLICHE BEMERKUNGEN 18 12 GEW HRLEISTUNGSBEDINGUNGEN 19 Herzlichen Gl ckwunsch zur Wahl d...

Page 3: ...3...

Page 4: ...ttungen Zugluft usw Unterbricht die Gaszufuhr zum Brenner 7 Steuerkn pfe f r Gasbrenner und elektrische Hei platten 8 Elektro Kochzonen Die Edelstahl Schmierfette und der Gusseisen Grill der sich im...

Page 5: ...odelle sind mit einem Z ndschalter ausgestattet der in den Steuerknopf integriert ist Ist dies der Fall liegt der Z nder D vor aber nicht der Schalter E das Symbol befindet sich in der N he jedes Dreh...

Page 6: ...ernen Die keramische Glasoberfl che sollte regelm ig mit einer L sung die aus warmem Wasser und einem nicht scheuernden Reinigungsmittel besteht gereinigt werden In regelm igen Abst nden m ssen spezie...

Page 7: ...16 20 Starkbrenner 2400W 16 20 3 Flamen Wok Brenner 3400W 24 26 165mm Elektro Kochzone 1200W 16 5 200mm Elektro Kochzone 1800W 20 Um die Art des Brenners zu identifizieren verweisen wir auf die Ausf h...

Page 8: ...und Stromversorgung gibt und insbesondere dass die Gasventile f r das Netz offen sind Der Brenner leuchtet nicht oder die Flamme ist nicht um den Brenner herum einheitlich Pr fen Sie um sicherzustelle...

Page 9: ...den a Der Raum muss mit einem Bel ftungssystem ausgestattet sein welches Rauch und Gase nach au en abgibt Dies muss durch eine Haube erfolgen die bei jedem Bet tigen automatisch einschaltet In einen S...

Page 10: ...bauschr nken Die Gas Kochfelder werden mit einem Schutzgrad gegen berm iges Erw rmen von vorbereitet das Ger t kann daher neben Schr nken installiert werden sofern die H he nicht h her als die des Koc...

Page 11: ...Kochfeld nicht ber einem eingebauten Ofen installiert ist muss eine Holzplatte als Isolierung eingesetzt werden Diese Platte muss mindestens 20 mm vom Boden des Kochfeldes entfernt sein Wichtig Bei de...

Page 12: ...it die korrekte Regelung des Gasverbrauchs und die lange Lebensdauer des Ger tes ist darauf zu achten dass der Gasdruck den Angaben in Tabelle 1 D sen und Brennermerkmale entspricht Anschluss an ein n...

Page 13: ...an das Stromnetz an Im letzteren Fall muss ein einziger Polschalter zwischen dem Ger t und dem Netz angeordnet werden wobei eine minimale ffnung zwischen den Kontakten von 3 mm gem den aktuellen Sich...

Page 14: ...arkbrenner 2 40 110 2 40 118 2 40 120 2 40 138 2 40 77 72 67C 2 4 77 3 Flamen Wok Brenner 3 40 125 3 40 142 3 40 143 3 40 185 3 40 93 88 82 3 4 93 Versorgungs druck 20 mbar 25 mbar 25mbar 20mbar 13mba...

Page 15: ...sollte mit dem am Brenner AN eingestellten Steuerknopf erfolgen Entfernen Sie den Drehknopf und stellen Sie die Flamme mit einem kleinen Schraubendreher ein s Abbildung 7 Abbildung 7 berpr fen Sie di...

Page 16: ...Brenner AUS und der Sparflamme einzustellen Signifikante Energiemengen k nnen gespeichert werden wenn das Ger t korrekt verwendet wird die Parameter korrekt eingestellt sind und das entsprechende Koc...

Page 17: ...16 Normal G27 20 106 209 1 8 1548 0 60 516 Normal G2 350 13 124 238 2 1 8 1548 0 60 516 Butangas G30 30 68 130 8 1 8 1548 0 60 516 37 64 130 8 1 8 1548 0 60 516 50 59 130 8 1 8 1548 0 60 516 Butangas...

Page 18: ...nung und nachfolgende nderungen 89 336 EEC vom 03 05 89 Elektromagnetische Vertr glichkeit und nachfolgende nderungen 90 396 EEC vom 29 06 90 Gas und nachfolgende nderungen 93 68 EEC vom 22 07 93 und...

Page 19: ...pannung unzureichende Bel ftung oder andere von uns nicht zu verantwortende Gr nde entstanden sind Reparaturen und Ab nderungen die von dritter nicht autorisierter Seite vorgenommen wurden Missbr uche...

Page 20: ...BURNERS AND NOZZLE SPECIFICATIONS 29 8 TABLE 2 HOW TO CONVERT GAS SOURCE 30 9 TABLE 3 ADAPTING TO DIFFERENT TYPES OF GAS 31 10 TABLE 4 GAS SOURCE AND NATIONAL COMPARISON TABLE 33 11 NOTICE 34 Congratu...

Page 21: ...21...

Page 22: ...y goes out spills drafts etc interrupting the delivery of gas to the burner 7 Control Knobs for Gas Burners and Electric Hot Plates 8 Ceramic burner The stainless steel grease pan and the cast iron gr...

Page 23: ...f this is the case the ignitor D is present but not the E switch the symbol is located near each knob To light a burner simply press the corresponding knob all the way in and then turn it in the count...

Page 24: ...ned regularly with a solution of warm water and a non abrasive detergent periodically special products will need to be used to clean the surface First remove all food buildup or grease with a cleaning...

Page 25: ...However it is important that the bottom be perfectly flat Casseroles with thicker bottoms distribute heat more evenly Use cookware the diameter of which is at least as large as the cooking area so tha...

Page 26: ...make sure that The bottom of the cookware is perfectly flat The cookware is centered correctly on the burner or electric hot plate The support grids have not been inverted If despite all of these che...

Page 27: ...e supply of said air can be effected by means of direct influx from the outside through a duct with a inner cross section of at least 100cm which must not be able to be accidentally blocked Those appl...

Page 28: ...a kitchen a ketone diner or bed sitting room but not in a bathroom or shower room b The furniture standing next to the unit that is highe1 than the working boards must be placed at least 110mm from t...

Page 29: ...connection for gas hob The Cooker should be connected to the gas supply by a corgi registered installer During installation of this product it is essential to fit an approved gas tap to isolate the su...

Page 30: ...according to the indications on the rating plate located under the cooktop The earthing wire can be identified by its yellow green colour In the case of installation over a built in electric oven the...

Page 31: ...1 100 mm Nozzle 1 100 mm Therm al power kW Nozzle 1 100 mm Auxilia ry Small A 1 0 71 1 0 75 1 0 79 1 0 98 1 0 52 47 45 1 0 52 Semi rapid Mediu m 1 80 97 1 80 105 1 80 106 1 80 125 1 8 67 64 59 1 8 67...

Page 32: ...lace the burner Nozzle according To the guidelines in table 1 Replace the burner Nozzle according to the guidelines in table 1 Saving flame Loosen the adjustment Spindle see fig 7 below And adjust the...

Page 33: ...oking to bring the food to boiling and then the knob should be turned to the saving flame position to maintain the cooking It is also possible to adjust the flame size stepless It is prohibited to adj...

Page 34: ...0 516 Natural G27 20 106 209 1 8 1548 0 60 516 Natural G2 350 13 124 238 2 1 8 1548 0 60 516 Butane G30 30 68 130 8 1 8 1548 0 60 516 37 64 130 8 1 8 1548 0 60 516 50 59 130 8 1 8 1548 0 60 516 Butane...

Page 35: ...nomic Community directives 73 23 EEC of 19 02 73 Low Voltage and subsequent modification 89 336 EEC of 03 05 89 Electromagnetic compatibility and subsequent modifications 90 396 EEC of 29 06 90 Gas an...

Reviews: