


Master slaving units with no DMX controller
Set the master unit to the desired setting
Example: auto or sound
Set all other units to slave mode
To set slave mode press the function button until SLA is displayed then press the enter button to confirm
Only one unit must be set as a master and all other units must be set as slave
Connect each unit together via a 3pin DMX lead
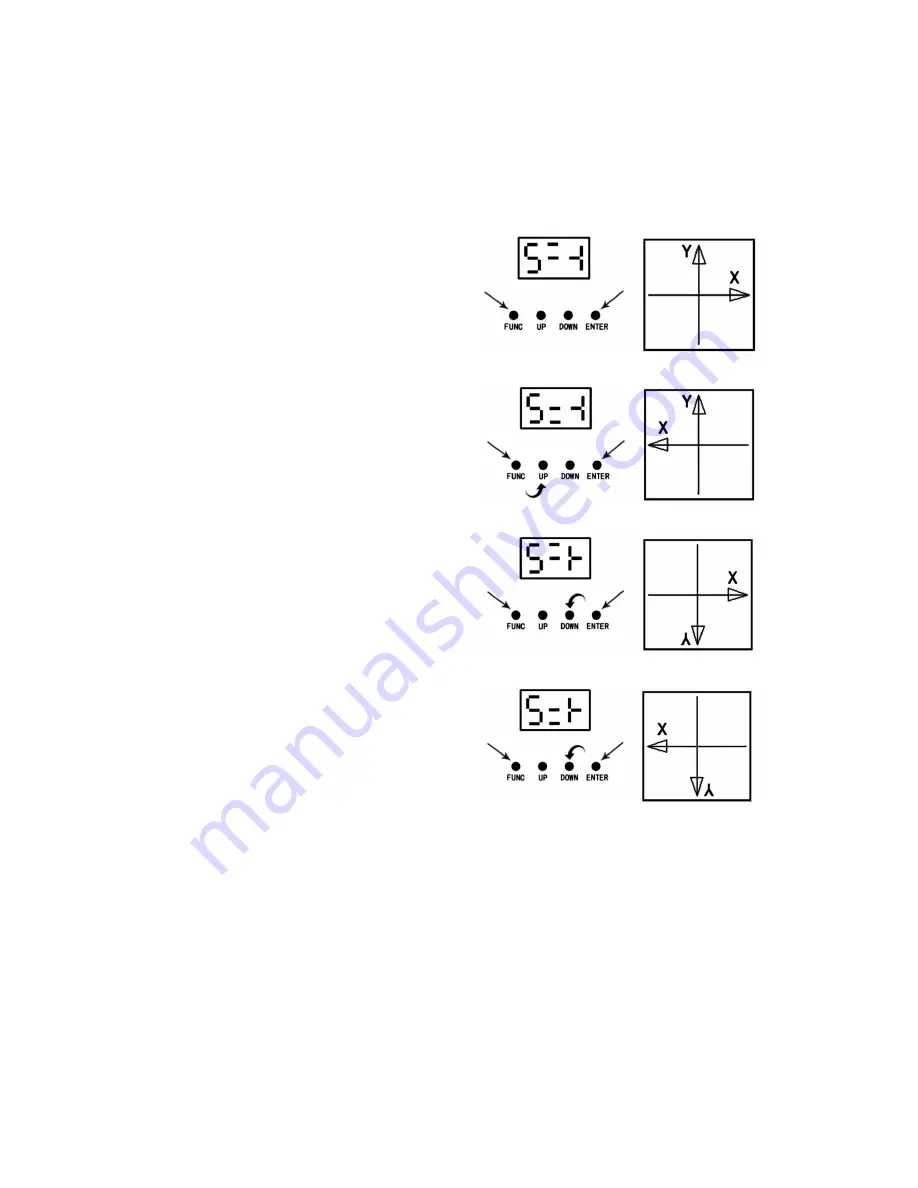
Pattern Mirror Reverse Setting
•
Press FUNC to enter the MODE selection
•
Use the up/down buttons to set the LED display to match Fig A.
•
Press ENTER to confirm the setting.
•
Using the up/down buttons set the display to match Fig. B.
This will rotate the graphic in the X direction.
•
Using the up/down buttons set the LED display to match Fig. C.
This will flip the graphic in the Y direction.
•
Using the up/down buttons set the LED display to match Fig. D.
This will flip the graphic in the X and Y directions.
ILDA Control Mode
This unit has the ILDA DB25 port, which allows control of the laser via a PC/Mac laser or lighting software. The PC must be connected to
an interface and then the ILDA cable from the interface is connected to the ILDA input socket on the rear of the laser. When connecting the
ILDA plug to the laser this will override all built in standalone functions of the laser, and can then only be controlled by the PC/Mac
software. Removing the ILDA cable will re-enable all standalone functions.
Please note: it should be possible for any ILDA controlled software to operate this laser, if your software is having problems controlling the
laser this maybe down to a cable connection issue. Some interfaces and cables may have different wiring configuration. The fourth and
seventeenth pin of the ILDA socket need to be connected. If you rectify this issue on your interface then this will cure the control issue.
Fig A.
Fig B.
Fig C.
Fig D.


