background image


Copies  of  the  I/B.  Please  reproduce  them  without  any 
changes  except  under  special  instruction  from  Team 
International USA. The pages must be reproduced and folded 
in order to obtain a booklet A5 (+/- 148.5 mm width x 210 mm 
height).  When  folding,  make  sure  you  keep  the  good 
numbering when you turn the pages of the I/B. Don’t change 
the  page  numbering.  Keep  the  language  integrity. 

Print  only 

what is inside the frame.


14 

SC 41501 - 120501


Assembly page 14/28 


Fax +1 305 430 9692 


CONSIGNES DE SECURITE 

Pour utiliser un appareil électrique, des précautions élémentaires 
sont à respecter, telles que celles énumérées ci-dessous : 
1.


LISEZ L’ENSEMBLE DES INSTRUCTIONS AVANT L’USAGE. 

2.


Avant d'utiliser l'appareil, vérifiez que la tension du réseau 
correspond bien à celle notée sur la plaque signalétique de votre 
appareil. 

3.


Ne touchez pas les surfaces chaudes. Utilisez les poignées et les 
boutons. 

4.


Utilisez uniquement sur une surface plane, horizontale, sèche et 
résistante à la chaleur. 

5.


Pour éviter les risques d’électrocution, n'immergez pas le cordon, 
la fiche, l’appareil ou le panneau de contrôle dans l'eau ou dans 
tout autre liquide. 

6.


Faites particulièrement attention lorsque l’appareil est utilisé par 
ou en présence d’enfants. 

7.


Les enfants doivent être supervisés pour s’assurer qu’ils ne jouent 
pas avec l’appareil. 

8.


Ne faites pas fonctionner l'appareil si son cordon ou sa fiche est 
endommagé ou si l'appareil a présenté un dysfonctionnement 
ou est endommagé. Retournez l’appareil au centre de service 
autorisé pour le faire vérifier ou réparer. 

9.


Débranchez l'appareil de la prise murale lorsqu’il n’est pas utilisé 
ou avant de le nettoyer. Laissez-le refroidir avant d’enlever ou 
d’ajouter des accessoires ou de le nettoyer. 

10.


L'utilisation d’accessoires non recommandés par le fabricant 
présente des risques d’incendie, d’électrocution ou de blessure. 

11.


N'utilisez pas l'appareil à l'extérieur. 

12.


Ne laissez pas le cordon pendre de la table ou du comptoir et 
évitez qu’il touche une surface chaude. 

13.


Ne placez pas l'appareil sur ou près d'un brûleur à gaz ou 
électrique ou dans un four chaud. 

14.


Prenez un maximum de précautions lorsque vous déplacez un 
appareil contenant de l’huile chaude ou tout autre liquide 
chaud. 

Summary of Contents for RC 41501

Page 1: ...a booklet A5 148 5 mm width x 210 mm height When folding make sure you keep the good numbering when you turn the pages of the I B Don t change the page numbering Keep the language integrity Print only...

Page 2: ...iance is used by or near children 7 Children should be supervised to ensure that they do not play with the appliance 8 Do not operate any appliance with a damaged cord or plug or after the appliance m...

Page 3: ...cal parts creating the risk of electrical shock 22 Do not store any materials other than manufacturer s recommended accessories in this unit when not in use 23 Do not place any of the following materi...

Page 4: ...Keep Warm feature only operates when the power cord is plugged in 7 Always place the inner pot inside the cooker before operating Turn the pot gently to the right and left to make sure that the inner...

Page 5: ...1501 120501 Assembly page 5 28 Fax 1 305 430 9692 SHORT CORD INSTRUCTIONS A short power supply cord is provided to reduce the hazards resulting from becoming entangled in or tripping over a longer cor...

Page 6: ...o soak for 10 20 minutes prior to cooking 3 Place the rinsed rice in the inner pot 4 Using the measuring cup provided or the water measurement lines located inside the inner pot add the appropriate am...

Page 7: ...e 115 125 Min 8 CUPS 13 1 2 8 16 CUPS White Rice 40 45 Min Brown Rice 115 125 Min 10 CUPS 16 1 2 10 20 CUPS White Rice 45 50 Min Brown Rice 125 130 Min Saut function The Saut function is excellent for...

Page 8: ...the table below for reference 2 Place the food to be steamed into the steam tray 3 Place the steam tray inside the rice cooker at the top of the inner pot Place the lid securely onto the inner pot 4...

Page 9: ...your choice of vegetables or meat into the steam tray Lift the lid using caution as steam escaping will be extremely hot and using oven mitts place the steam tray into the rice cooker 5 Replace the l...

Page 10: ...ly the inner pot and the lid in or under water IMPORTANT The underside of the inner pot needs to be cleaned after each use Never immerse the appliance in water or any other liquid Never fill the inner...

Page 11: ...ng Keep the language integrity Print only what is inside the frame 11 SC 41501 120501 Assembly page 11 28 Fax 1 305 430 9692 Caution Before starting to cook always make sure that the bottom of the inn...

Page 12: ...obtain warranty performance During this period if the KALORIK product upon inspection by KALORIK is proven defective it will be repaired or replaced at Kalorik s option without charge to the customer...

Page 13: ...er all Kalorik customers are responsible for the initial shipment back to the warranty center along with proof of purchase and a return authorization number indicated on the outer package given by our...

Page 14: ...ion n immergez pas le cordon la fiche l appareil ou le panneau de contr le dans l eau ou dans tout autre liquide 6 Faites particuli rement attention lorsque l appareil est utilis par ou en pr sence d...

Page 15: ...ous avant chaque usage quel l ext rieur du pot int rieur de cuisson soit bien sec S il est humide il pourrait endommager l appareil ou le faire mal fonctionner 19 N ins rez pas de la nourriture de gra...

Page 16: ...mentaires sont toujours prendre pour l utilisation de ce produit 2 Si l appareil est accidentellement plong dans l eau d branchez le cordon de la prise de courant imm diatement N essayez pas de touch...

Page 17: ...ne prise polaris e une des deux tiges m talliques est plus large que l autre Pour r duire le risque de choc lectrique cette prise ne peut tre introduite que d une seule fa on dans la fiche murale Si c...

Page 18: ...le en verre 3 Pot int rieur bol de cuisson 4 Poign es du cuiseur 5 Corps 6 Cordon r tractable 7 Base 8 Bouton Riz Brun BROWN RICE 9 Bouton Marche Arr t ON OFF 10 Bouton Riz Blanc WHITE RICE 11 Bouton...

Page 19: ...luminent Une fois la cuisson termin e the cuiseur de riz va mettre 3 signaux sonores bips et passer en mode KEEP WARM Garde au chaud Note vous pouvez annuler votre s lection tout moment en appuyant su...

Page 20: ...t de brunir des pi ces de viande 1 Ajoutez les ingr dients sauter dans le pot int rieur avec un peu d huile ou de mati res grasses 2 Pressez le bouton On Off puis le bouton Saut pour pr chauffer le cu...

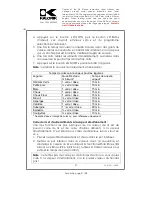
Page 21: ...uniquement si n cessaire Temps de cuisson la vapeur pour les l gumes L gume Quantit d eau minimum Temps de cuisson vapeur Haricots Verts 1 verre dose 15 min Petits pois verre dose 10 min Mais 1 verre...

Page 22: ...rez le panier vapeur dans le cuiseur 5 Remettez le couvercle en place pour reprendre la cuisson 6 Une fois les aliments cuits la vapeur pendant le temps d sir retirez le couvercle Faites attention ca...

Page 23: ...ide avec un produit nettoyant m nager doux N immergez aucune partie du corps de l appareil dans de l eau ou tout autre liquide Ne lavez que le couvercle et le pot int rieur dans l eau ou sous l eau IM...

Page 24: ...si celui ci montre des traces d clats ou bien est fendu ou extr mement ray Ne tentez pas de r parer ou de remplacer un cordon lectrique endommag Contactez le service consommateur du fabriquant ou une...

Page 25: ...ginelle Une preuve d achat est exig e pour obtenir l application de la garantie Durant cette p riode le produit KALORIK qui apr s inspection par KALORIK s av re d fectueux sera r par ou remplac au cho...

Page 26: ...notre centre de r paration Le cas ch ant ramenez le produit ou envoyez le d ment affranchi ainsi qu une preuve d achat en mentionnant le num ro d autorisation de retour indiqu par notre service clien...

Page 27: ...be reproduced and folded in order to obtain a booklet A5 148 5 mm width x 210 mm height When folding make sure you keep the good numbering when you turn the pages of the I B Don t change the page num...

Page 28: ...st be reproduced and folded in order to obtain a booklet A5 148 5 mm width x 210 mm height When folding make sure you keep the good numbering when you turn the pages of the I B Don t change the page n...

Reviews: