


4. USAGE
Kilobot User Manual
25
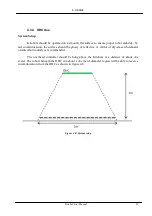
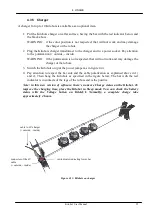
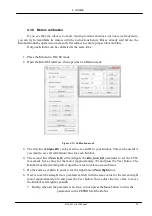
4.3.5 Charger
A charger for up to 10 Kilobots is available as an optional item.
1.
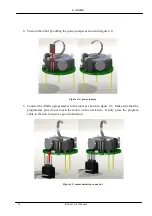
Put the Kilobots charger on a flat surface, having the bar with the red indicator below and
the black above.
WARNING: if the color position is not respected, that will not work and may damage
the charger or the robots.
2.
Plug the Kilobots charger transformer to the charger and to a power socket. Pay attention
to the polarization (+ outside, - inside
).
WARNING: if the polarization is not respected, that will not work and may damage the
charger or the robots.
3.
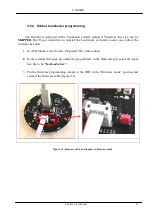
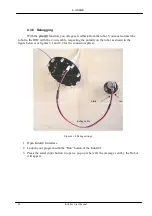
Switch the Kilobots on (put the power jumper as in figure 4.4).
4.
Pay attention to respect the bar side and the cable polarization as explained above in 1)
and 2), Then hang the Kilobots as specified in the figure below. The bar with the red
indicator is in contacts of the legs of the robots and is the positive.
Note: in this new version of software, there’s no more Charge status on the Kilobot. To
improve the charging time, place the Kilobot in Sleep mode. You can check the battery
status with the Voltage button on KiloGUI. Normally, a complete charge take
approximately 4 hours.
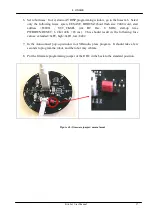
Figure 4.13: Kilobots on charger
cable to 6V charger
(+ outside, - inside)
connector of the 6V
cable
(+ outside, - inside)
red indicator indicating lower bar
Summary of Contents for KILOBOT
Page 1: ...Kilobot User manual Version 2 0 JANUARY 2016 ...
Page 4: ......
Page 42: ......
Page 43: ......
Page 44: ...K Team S A Z I Plans Praz 1337 Vallorbe Switzerland ...


