background image

RECORDER

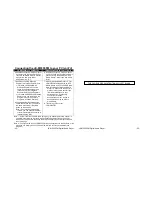
RECORD SET MENU

COMMENTS

Main Folder

The

Main Folder

entry can be ignored, because it only

confirms that you wish to place your voice recordings in the
\RECORD\VOICE folder, where all voice recordings must be
stored.

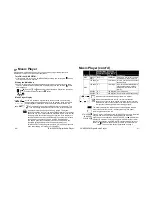
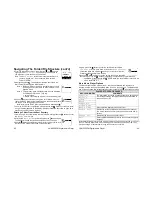
REC type

Select

REC type

to enter the

REC type

menu, where

you can choose among four recording qualities:

Fine Record: High quality recording, larger file size

Long Record: Lower quality recording, smaller file size

(the resulting file has the.ACT extension)

Fine VOR:

High quality Voice Operated Recording,
larger file size; (VOR) saves memory by
recording only when a vocal input exists
(similar to VOX)

Long VOR:

High quality Voice Operated Recording,
smaller file size; as above for VOR (the
resulting file has the .ACT extension)

Highlight the desired recording mode, and press the
button to return to the recording function.

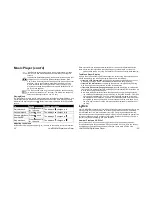
To record your voice:
1. Press the

button momentarily. The STOP symbol [

] in the lower left of the display

will become a [

] recording symbol.

2. Your recording can be paused, if necessary, by momentarily pressing the

record

button. Pausing the recording will produce the Pause [

] symbol in the lower left of

the display.

3.

An 

el

apsed 

t

i

me 

count

er


(

hh:

mm:

ss)


i

l

ocat

ed 

i

t

he 

di

spl

ay’

l

ower


r

i

ght

,


and 

wi

l

l


blink whenever the recording is paused.

Playback of voice recording is covered in the RPL (Voice Recording Playback) section
beginning on the next page.

-50-

JX-MP256FM Digital Audio Player

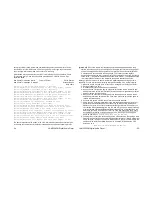
Voice Recording Playback (RPL)

All your recorded voice files are available for playback through the Playback Mode.

Turn ON the JX-MP256FM:

1. If not already ON, turn on the JX-MP256FM by pressing and

holding the

button, until the unit begins to operate.

Display the Main Menu

2. Once ON, the unit will resume its operation by returning to its

most recently used function. If the Main Menu (at the right) is NOT
displayed, press and hold the

button until the menu appears.

3. Use the

or

button to highlight the Playback (RPL) icon, and

then press and hold the

button.

4. The screen that is subsequently displayed permits listening to all voice and FM radio

recordings from one easy vantage point. Use the buttons, as indicated in the following
table, to navigate through the recorded files.

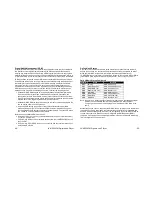
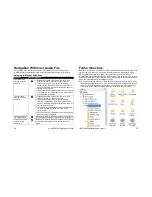
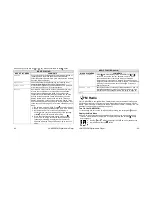
Listening to Vocal and FM Recordings

Function

Button

Method

START Playback

Press and hold down the button to begin playback of
the displayed recorded file. The PLAY symbol

will

replace the STOP symbol

and appears in the

lower left of the display.

PAUSE Playback

Press the button momentarily to PAUSE the
playback. The PAUSE symbol

replaces the PLAY

symbol

.

STOP Playback

Pressing this button for one second when the unit is
in the PLAY or PAUSE mode will cause the unit to
stop and display the STOP symbol

.

JX-MP256FM Digital Audio Player

-51-

Summary of Contents for JX-MP256FM

Page 1: ...JX MP256FM DIGITAL AUDIO PLAYER WITH FM STEREO RADIO Us e r sGu i d e ...

Page 2: ...this product may be disturbed by external electrostatic discharge interference If so simply reset the product if possible or disconnect and reconnect it to its source of power to resume normal operation USER INFORMATION Mo d i f i c a t i o n s n o t a u t h o r i z e db y t h ema n u f a c t u r e r ma y v o i dt h eu s e r s ability to operate this device Note This equipment has been tested and ...

Page 3: ...attention to potentially dangerous places e g highways building sites where using the earphones might be hazardous Avoid using the earphones at high volume for long periods of time to avoid possible hearing loss Notes on battery usage To prevent possible leakage and corrosion remove the battery from the JX MP256FM if it is not to be used for a long time If the battery should leak remove the batter...

Page 4: ...utton can also be used to exit from any menu and return to the most recent display Used to highlight the next selection on menus and the next selection among music a n dv o i c ef i l e s A l s ou s e dt o F a s t F o r w a r d a u d i od u r i n gmu s i c a n dv o i c ep l a y b a c k Used to highlight previous choice on menus and the previous selection among mu s i c a n dv o i c ef i l e s A l ...

Page 5: ...a n y o t h e r s p e c i a l f e a t u r e s t h a t y o u l l s e ea l o n gt h ew a y i n c l u d i n gt h e display of song lyrics a personalized setup menu comparison record playback as well as VOR Voice Operated Recording recording sometimes known as VOX JX MP256 Digital Audio Player 5 1 Turn the unit over and open the battery compartment cover by sliding it in the direction of the arrow The...

Page 6: ... one song Repeat songs in a folder Repeat songs in several folders Repeat all songs Random play Intro play plays first few seconds of each song 6 JX MP256FM Digital Audio Player O p e r a t i n gMo d eS u mma r y c o n t d FUNCTION FEATURES COMMENTS Tempo changes see page 44 Music stored in your JX MP256FM can be played back at different tempos either faster or slower than normal if desired for ly...

Page 7: ...ordings are available Fine REC and Fine VOR for highest voice quality Long REC and Long VOR for least use of memory 8 JX MP256FM Digital Audio Player O p e r a t i n gMo d eS u mma r y c o n t d FUNCTION FEATURES COMMENTS VOICE REPLAY Listen to all your voice recordings through the Replay mode see page 51 SYSTEM Allows you to determine how your JX MP256FM will operate within the 10 s y s t e m c a...

Page 8: ...ur unit begin on page 12 System Time Allows setting and displaying the current date and time Backlight A d j u s t s t h eb r i g h t n e s s o f t h eu n i t s L C Db a c k l i g h t Language Selects among English Chinese Japanese or Korean as the language to be u s e di nt h ed e v i c e s me n u s a n di nt h es o n gl y r i c s i t c a nd i s p l a y Power Off Timers Provides a choice of Off T...

Page 9: ...the SYS category Again use the or buttons to scroll through the selections Highlight Sys Time and briefly press 12 JX MP256FM Digital Audio Player A S y s t e m T i me c o n t d 3 T h eu n i t s d i s p l a y a t t h el e f t w i l l appears For now ignore the table below Its top row represents the date expressed in the YYYY MM DD format here the date shown is April 29 2005 Its bottom row represen...

Page 10: ...s returning to the language display of your choice Highlight your selection and press the button to confirm it D Power Off There are two Power Off schemes One is called OFF TIME the other is called SLEEP TIME If you wish to set only the Sleep Time proceed to page 16 What is OFF Time When the unit is stopped and therefore inactive in any playback or record mode it can be made to automatically shut ...

Page 11: ... r a s a n o t h e r d i s k d r i v ei n Wi n d o w s My C o mp u t e r h a v i n gad r i v el e t t e r e g E o f i t s o w n 16 JX MP256FM Digital Audio Player A s a U S BD i s k t h eJ X MP256FM is commonly used to receive MP3 and ordinary WMA files that are stored on your PC for playback by the unit It can also be used to transfer any voice files see page 49 that you create to your PC for sto...

Page 12: ...ROM containing small software programs c a l l e d d r i v e r s w h i c hma k ei t p o s s i b l ef o r y o u r p l a y e r t oc o mmu n i c a t ew i t hy o u r P C once the two units are connected Note I f y o u r P C s o p e r a t i n gs y s t e mi s Wi n d o w sX P X P S P 2 Wi n d o w s 2 0 0 0 o r Windows Me it is NOT necessary to install any drivers from the CD ROM as these operating system...

Page 13: ...pe of online device for the unit 2 If the Main Menu see page 12 does not appear press and hold the button until the Main Menu is displayed Once done select the SYS icon by pressing either the or button until the SYS icon is highlighted Then press 3 Use the to scroll to the OnlineDev menu selection and press 4 There are two choices as to how your JX MP256FM can be used to exchange digital files wit...

Page 14: ...es on the same PC Note If your songs are grouped in folders you can transfer the folder structure directly without having to isolate the song titles 7 Open Windows Media Player 10 Your JX MP256FM will appear as an MTP Media Device and not as a USB drive Note Knowledge of Windows Media Player 10 beyond the scope of this manual is required to transfer files from the Media Player to your portable dev...

Page 15: ...nd WMAs So where do you get your supply of digital music for your JX MP256FM One source is the music found on regular CDs whose tracks as previously stated are substantially reduced in size once they are converted to the MP3 or WMA file formats This is done through the use of software applications that may already be resident in your computer Such software includes a process called ripping in whic...

Page 16: ... Internet was an ideal environment for obtaining and exchanging digi t a l d a t a i t w a s n t s u r p r i s i n gt h a t an u mb e r o f e t h i c a l q u e s t i o n s w o u l d arise and that abuses would take place According to existing copyright law purchased media products like music CDs or movies on DVD can only be copied for backup purposes but whose content cannot be exchanged over the ...

Page 17: ...or portable media The license is bound to a unique ID on the portable device or media Before buying any WMA DRM files find out How many times can you copy your downloaded file from one folder to another o ny o u r P C s h a r dd r i v e On how many different PCs or portable devices like your JX MP256FM can you copy the file On how many CDs or DVDs can you copy the file and successfully listen to i...

Page 18: ...e to CD quality and should be quite suitable for all MP3 music played by your JX MP256FM The following table helps to put things in perspective when downloading or creating your own MP3s 30 JX MP256FM Digital Audio Player Mu s i cP l a y e r c o n t d Format Bit Rate Original MP3 Compression Ratio File size per audio minute Comments WAV does not apply none 1 1 10 MBytes CD quality equivalent to mu...

Page 19: ...ss the display when the song is playing Please note the following If there is no ID3 information see page 25 accompanying the selection the unit w i l l d i s p l a y t h es o n g s t i t l ea s i t r e p e a t e d l y s c r o l l s w h i l et h es o n gi s p l a y i n g If there is ID3 information accompanying the selection it will be displayed along w i t ht h es o n g s t i t l e t h r o ughout...

Page 20: ...er the song started The last lyric line shown starts just after 2 minutes and 4 seconds since the song began The format uses two digits to express elapsed minutes mm seconds ss and hundredths of a second hh Note that a colon separates minutes and seconds but a period separates seconds from hundredths of a second You must also use square brackets as shown A l t h o u g hi t c a nb et e d i o u s i ...

Page 21: ...hed the unit will not skip to the previous track The current track will be replayed from the beginning when the button is released Skipping ahead to the next audio file Momentarily pressing the button causes the unit to skip to the beginning of the next track after a brief pause Skipping backward to the previous audio file Momentarily pressing the button causes the unit to skip to the beginning of...

Page 22: ...a b l ed e v i c e i t s n o r ma l l y b e s t t o avoid placing loose files in the root directory but these were left there intentionally for purposes of illustration From the attached PC new folders can be created in the p o r t a b l ed e v i c e i n t ow h i c ha n y l o o s e o r w a y w a r d f i l e s c a nb ep l a c e d When the Oldies folder is opened by clicking on the to its left it is...

Page 23: ... o t d i r e c t o r y o r r o o t f o l d e r o f t h eJ X MP256FM c o n t a i n s 3s o n g s T op l a y t h e s es o n g s y o u r d e v i c eh a s t ob e i n t h er o o t T og e t t h e r e 1 Turn the unit ON if necessary 2 I f i t s n o t i nt h eMusic Player mode press the button for several seconds until the Main Menu appears and select the MSC Music mode 3 The last song played will appear o...

Page 24: ...s above on the right 3 Use the button to scroll down to the directory of your choice We will choose the Oldies folder shown here at the right 42 JX MP256FM Digital Audio Player 4 Again press the button to enter the list of subfolders below The Oldies folder Once done scroll down to The Platters folder and press and hold the button until the first of the two Platters songs appears in the display 5 ...

Page 25: ...ccurs press the b u t t o n T h e B w i l l g oo u t a n dt h ep a s s a g ew i l l b e g i n repeating immediately and play back in the manner specified in Replay Times and Replay Gap on the next page 44 JX MP256FM Digital Audio Player MU S I CP L A Y I N G c o n t d MUSIC PLAY MENU COMMENTS Replay times Press and enter Replay Times Use either the or buttons to choose the number between 1 and 10 ...

Page 26: ...or about one second The unit will scan the dial in the direction chosen and stop at the next stored station To change the station repeat the process until the desired station is reached 46 JX MP256FM Digital Audio Player F MR A D I O c o n t d RADIO SET MENU COMMENTS Auto Search c o n t d Stations can also be searched for manually by momentarily pressing either the or button in the direction desir...

Page 27: ...ital Audio Player Voice Record Mode Your JX MP256FM is equipped with a built in microphone see page 3 and can record personal dictations up to the capacity permitted by its unused available memory In typical use voice recordings may span anywhere from a few seconds to several minutes a n dma y d e a l w i t ha n y t h i n gf r o mp e r s o n a l r e mi n d e r s i d e a s t od o l i s t s o r e v ...

Page 28: ... the recording is paused Playback of voice recording is covered in the RPL Voice Recording Playback section beginning on the next page 50 JX MP256FM Digital Audio Player Voice Recording Playback RPL All your recorded voice files are available for playback through the Playback Mode Turn ON the JX MP256FM 1 If not already ON turn on the JX MP256FM by pressing and holding the button until the unit be...

Page 29: ...the USB mode regardless of what mode was previously in use Thus if your JX MP256FM was in the FM Radio mode it will be changed to the USB mode once the cable connect i o ni s ma d e c a n c e l i n gt h eu n i t s o p e r a t i o ni na n y previously used mode To leave the USB function and re enter another mode of operation the USB cable can be unplugged but it is not necessary With the cable in p...

Page 30: ......

Reviews: