background image

User’s Manual >>

E-43

Step 2:  Connecting the Camera to Your Computer

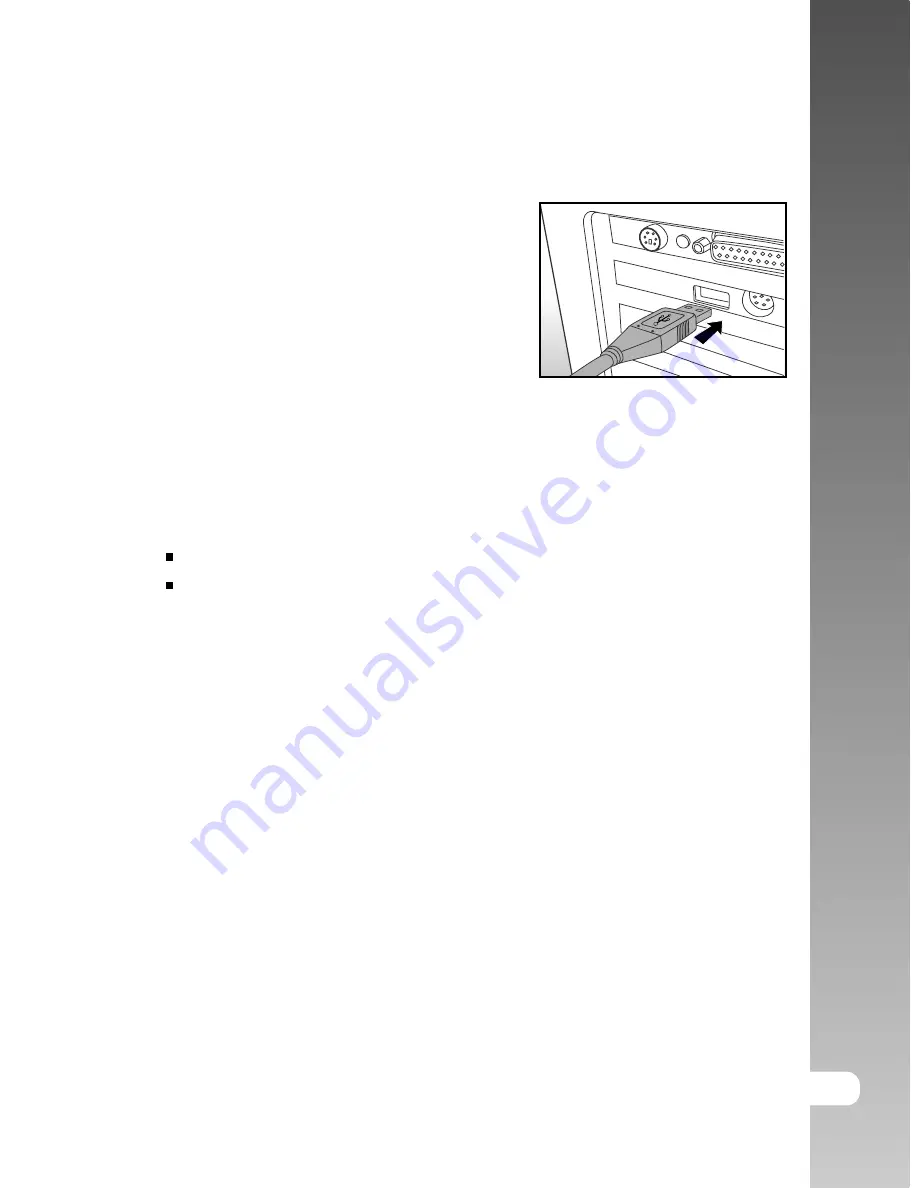
1. Connect one end of the USB cable to an

available USB port on your computer.

2. Connect the other end of the USB cable to

the USB connector on the camera.

3. Turn the camera on.
4. From the Windows desktop, double click

on “My Computer”.

5. Look for a new “removable disk” icon.  This “removable disk” is actually the

memory (or memory card) in your camera. Typically, the camera will be
assigned drive letter “e” or higher.

6. Double click on the removable disk and locate the DCIM folder.
7. Double click on the DCIM folder to open it to find more folders.

Your recorded images and video clips will be inside these folders.
Copy & Paste or Drag-N-Drop image and video files to a folder on your
computer.

Mac users:

Double-click the “untitled” disk drive icon on our desktop. iPhoto
may automatically launch. The volume label may vary depending
upon whether you use internal camera memory, or a memory
card.

Summary of Contents for JD-C3215

Page 1: ...E ENGLISH...

Page 2: ...communications However there is no guarantee that interference will not occur in a particular installation If this equipment does cause harmful interference to radio or television reception which can...

Page 3: ...ies that come with your camera may be different from those described in this manual This is due to the fact that different retailers often specify slightly different product inclusions and accessories...

Page 4: ...Do not continue to use the camera as this may cause a fire or an electrical shock Do not place the camera in an unstable location such as on a wobbly table or sloping surface where the camera may fal...

Page 5: ...ng the camera roughly may cause a malfunction Do not use batteries other than those specified for use with your camera Use of unsuitable batteries may result in the batteries splitting or leaking and...

Page 6: ...ETTING STARTED 16 Installing Batteries 17 Using an AC Power Adapter optional accessory 18 Inserting an SD Memory Card optional accessory 19 Attaching the Hand Strap 19 Turning the Power On Off 20 Lang...

Page 7: ...Logo 37 Setting the DPOF 38 Protecting Images 39 MOVIE MODE 39 Recording Video Clips 40 Viewing Video Clips 41 TRANSFERRING RECORDED IMAGES AND VIDEOS TO YOUR COMPUTER 42 Step 1 Installing the USB Dr...

Page 8: ...t the need for an additional memory card However you may wish to expand the memory capacity up to 512MB capacity by using an external memory card In addition to still images you can record short video...

Page 9: ...nsure that you have the following items Common Product Components Digital Camera USB cable Video cable Software CD ROM User s manual Camera strap Common Optional Accessories Memory card Camera pouch B...

Page 10: ...A Front View 1 Shutter button 2 Mode dial 3 POWER Power button 4 Viewfinder 5 Lens cover Lens 6 Flash 7 Self timer LED 8 Battery cover 9 Terminal cover USB VIDEO OUT terminal DC IN terminal 10 Strap e...

Page 11: ...U Menu button 16 Wide angle button 17 Telephoto button 18 Thumbnail button Macro button Arrow button up 19 Self timer button Arrow button right 20 OK OK button 21 Delete button Arrow button down 22 DI...

Page 12: ...on SET Setup mode You can make and confirm your camera s settings Movie mode You can record video clips Playback mode You can play back your movies and still images and view them on the LCD monitor Sl...

Page 13: ...e Normal 4 White balance no indication Auto Daylight Cloudy Sunset Tungsten Fluorescent 5 Flash mode Auto flash Red eye reduction Fill flash on Flash off 6 Macro mode 7 Possible number of shots at the...

Page 14: ...te balance 2 Recordable movie time available 3 Zoom state 4 Battery level 5 Memory card indicator Display icons Playback Mode 1 Frame number 2 Forward arrow 3 Battery level 4 Memory card indicator 5 R...

Page 15: ...nail button In playback mode Display recorded image on thumbnail screen Pause Resume movie playback Macro button In record mode Switch the macro mode close up shot on off Arrow button up In menu mode...

Page 16: ...s low temperatures can shorten the battery life and reduce camera performance This low temperature will also influence Alkaline battery performance therefore Ni MH rechargeable battery is highly recom...

Page 17: ...f 2 Open the terminal cover and connect one end of the AC power adapter to the jack labeled DC IN 3V 3 Connect the other end to an electrical outlet Make sure to use only the AC power adapter specifie...

Page 18: ...card printed arrow should face towards the rear side of the camera If the card cannot be inserted check the orientation 4 Close the memory card cover Be sure to format the memory card with this camera...

Page 19: ...l the strap is firmly secured Turning the Power On Off The camera is switched between On and Off as follows To turn the camera On Off 1 You can use the POWER button to power on off the camera When the...

Page 20: ...be retained when the camera is turned off The provided languages are English Fran ais Deutsch Espa ol Italiano Setting the Date and Time The Date time screen will be presented if when Camera is turned...

Page 21: ...e files sizes Therefore few images will take up a lot of memory space High resolution and quality settings are recommended for printed output and situations requiring the finest detail Lower resolutio...

Page 22: ...of battery consumption 1 Set the mode dial to 2 Compose your shot either looking through the viewfinder or on the display screen 3 Place the subject of your photo at the center and press the shutter...

Page 23: ...ographs of fast moving subjects Portrait Select this option to make people stand out with the background out of focus Pan With this Pan mode the camera s focus distance is preset to 1 meter and images...

Page 24: ...hutter button Digital Zoom Using digital zoom images appear closer Digital processing lets you zoom in the image without deterioration The digital zoom function is only available when the LCD monitor...

Page 25: ...de dial to 3 Toggle the button to select the desired self timer mode OFF 02 10 10 2 4 Press the shutter button The self timer function is activated To cancel the self timer at any time press the butto...

Page 26: ...ory memory card and charging the flash The other shot is taken 2 seconds after this preparation is completed Flash The flash is designed to function automatically when lighting conditions warrant the...

Page 27: ...sh before the main flash fires This causes the pupil in the human eye to constrict reducing the red eye phenomenon Select this mode when taking images of people and animals in low light conditions Fil...

Page 28: ...o view still images follow the steps below 1 Set the mode dial to The last still image taken is displayed For movies the first frame is displayed as a still image 2 Move to the still image you want to...

Page 29: ...tion of the enlarged image press the buttons 5 To return to the regular display cancel playback zoom from enlarged status toggle the button until the normal screen is display on the LCD monitor Displa...

Page 30: ...sing the buttons 3 Press the OK button 4 Set the playback interval using the buttons and press the OK button The slideshow starts displaying your images on the LCD monitor one by one at the set interv...

Page 31: ...ct your camera to the television with the Video cable that came with your camera 1 Securely connect the Video cable to the Video In terminal on the television 2 Make sure the power is off 3 Securely c...

Page 32: ...delete message appears select Yes using the buttons and then press the OK button If you wish to cancel the deletion select No It returns to the preview screen To delete one image movie 1 Set the mode...

Page 33: ...he buttons and press the OK button 5 To confirm the deletion all images select Yes using the buttons and press the OK button The message No image appears on the LCD screen To delete images or videos s...

Page 34: ...g the buttons and press the OK button 4 Select Format using the buttons and press the OK button 5 To format the memory card internal memory select Yes using the buttons and press the OK button Formatt...

Page 35: ...ternal memory to SD memory card follow the steps below 1 Be sure the camera power is off and insert the SD memory card 2 Turn the camera on 3 Set the mode dial to 4 Press the MENU button 5 Select Copy...

Page 36: ...e steps below 1 Set the mode dial to 2 Display the still image you want to specify using the buttons 3 Press the MENU button 4 Select Save as logo using the buttons and press the OK button 5 Select Cu...

Page 37: ...ng the buttons 3 Press the MENU button 4 Select DPOF using the buttons and press the OK button 5 Select the Quantity Set image using the buttons and press the OK button Quantity Allow you to select th...

Page 38: ...ess the MENU button 4 Select Protect using the buttons and press the OK button 5 Select Single All using the buttons and press the OK button Single Protect one image movie All Protect all images movie...

Page 39: ...ial to 2 To start recording a video clip press the shutter button Shooting continues until you press the shutter button again 3 Pressing the shutter button again stops recording Flash self timer canno...

Page 40: ...itor Press the OK button again to stop the playback To pause resume press the button The zoom function cannot be activated during movie playback To play the video clip back on your computer you may us...

Page 41: ...Windows 98 and Mac OS 8 6 users only Step 2 Connecting the camera to your computer Step 3 Downloading image and video files System Requirements Windows Pentium 166 MHz or higher Windows 98 98SE Me 20...

Page 42: ...the on screen instructions to complete the installation After the USB driver has been installed restart your computer Macintosh OS 8 6 computers Mac OS 8 6 users must install a USB driver For Mac OS 9...

Page 43: ...emory or memory card in your camera Typically the camera will be assigned drive letter e or higher 6 Double click on the removable disk and locate the DCIM folder 7 Double click on the DCIM folder to...

Page 44: ...movable disk and subsequent folders by double clicking on them Your images are inside these folder s Select the images that you want then choose Copy from the Edit menu Open the destination location f...

Page 45: ...d explore this amazing program To install PhotoSuite 1 Insert the CD ROM that came with the camera into your CD ROM drive The welcome screen appears 2 Click INSTALL PHOTOSUITE Follow the on screen ins...

Page 46: ...en instructions to complete the installation To use PhotoVista to create spectacular 3600 panoramic images please refer to the on line help for this software For Windows 2000 XP users please make sure...

Page 47: ...Step 2 2 Press the MENU button The menu appears To select an item 1 Press the buttons to select the desired item 2 Press the OK button to enter the field menu To select a setting value 1 Press the bu...

Page 48: ...r further details Your camera adjusts the exposure of each scene automatically However if the subject is very dark or very bright you may override the camera s automatic exposure determination to make...

Page 49: ...types Under some lighting conditions the image may appear in strange shades If that occurs you may change the white balance setting by specifying a lighting condition temperature most appropriate for...

Page 50: ...Movie Menu Setting Description Option White balance Refer to section in this manual titled Auto White balance in the Record Menu for Daylight further details Cloudy Sunset Tungsten Fluorescent White...

Page 51: ...r to section in this manual titled Slideshow Display for further details Refer to section in this manual titled Setting the DPOF for further details Refer to section in this manual titled Changing the...

Page 52: ...ecorded images on a television Refer to section in this manual titled Setting the Date and Time for further details If there is no camera activity no buttons are pressed for a defined period of time 1...

Page 53: ...User s Manual E 53 CONNECTING THE CAMERA TO OTHER DEVICES...

Page 54: ...nfinity WIDE TELE Macro 0 05m to 0 8m WIDE 0 3m to 0 8m TELE Exposure and Automatic exposure with manual EV compensation Compensation 2 0EV in 0 5EV steps White balance Auto Cloudy Daylight Tungsten F...

Reviews: