background image

Playing Videos on the HDD

Titles stored on the HDD can be played back using Playback
Navigation.
You can select a video to play from “Title”, “Group”, or
“Playlist”.

Memo:

v

For details on the button operations during playback, refer
to “Video Playback Operation” (

A

 page 54) .

Playing titles stored on the HDD

1

Press the [NAVIGATION] button

v

The Playback Navigation screen appears.

2

Select the titles to playback, and press the [

I

]

button

v

Playback of the selected title starts.

Memo:

v

If the current playback location is “BD/DVD” or “SD CARD”,
press the [HDD] button on the remote control unit to switch
it to “HDD”.

v

To play back specific titles within a group, select the group,
press the [OK] button, and select the titles accordingly.

v

Videos can also be played back without starting up
Playback Navigation.
Pressing the [

I

] button starts playback of the most recently

played title.
If there are no recently played titles, playback starts from
the title with the most recent recording date.

Playing Videos on a SD

Card

Titles stored on an SD card can be played back using
Playback Navigation.
You can select a video to play from “Title”.

1

Insert the SD card into the [SD SLOT]

v

Switch the playback location to “SD CARD” after the SD
card is detected by the unit.
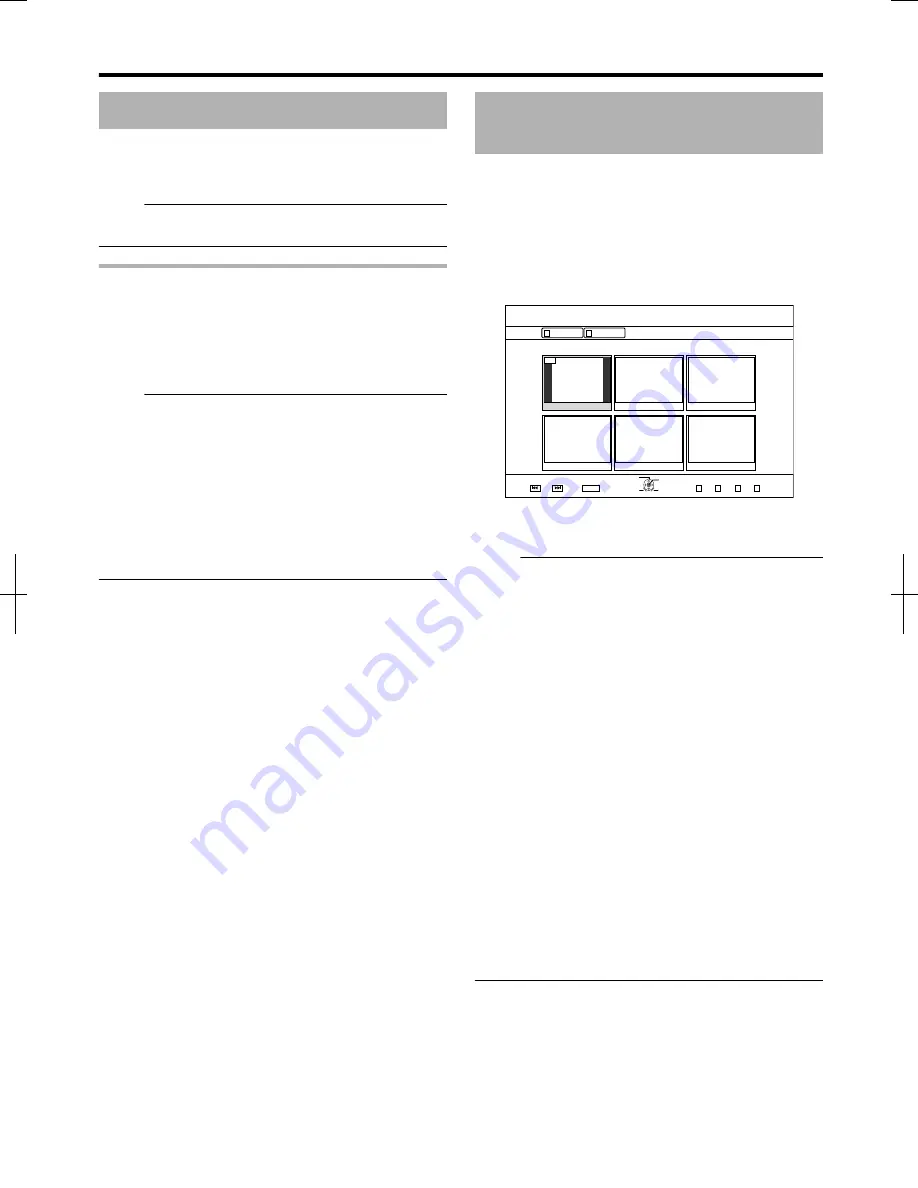
2

Press the [NAVIGATION] button

v

The Playback Navigation screen appears.

.

001

0#8+)#6+10

0#8+)#6+10

6+6.' 6*7/$0#+.

8+&'1

2+%674'

24'82)

0':62)

':+6

5'.'%6

126+10

'06'4

$#%-

)4172

8+&'1

2+%674'

3

Select a title, and press the [OK] button

v

Playback of the selected title starts.

Memo:

v

Playback navigation displays AVCHD files stored on the SD
card in titles, not in scenes (chapters). Titles are grouped
such as according to the date, recording mode, or number
of scenes. Make use of thumbnail display to display titles.
List display is not supported.

v

The formats that can be played back are AVCHD and SD-
VIDEO. If AVCHD files are displayed in thumbnails, black
bars may appear on the left and right borders depending on
the video resolution.

v

When there are files of different formats (AVCHD, SD-
VIDEO, MOV*) in the SD card, press the [RED] button to
select the format you want to display.
MOV* : MOV files that are taken in SP mode and HQ

mode using the JVC ProHD Camcorder GY-
HM700/100

v

Videos can also be played back without starting up
Playback Navigation.
Pressing the [

I

] button starts playback from the stop

position (resume point).
If the stop position (resume point) is not memorized,
playback starts from the beginning of the playable content.
If the setting for “QUICK STARTUP” is set to “OFF”, the
resume point will not be memorized when the power is
turned OFF.

For details on the button operations during playback, refer to
“Video Playback Operation” (

A

 page 54) .

Playing Back

57

2012/3/8


13:53:0

Summary of Contents for SR-HD2500US

Page 1: ...E STANDBY ON HDV DV IN REC REC C E R D D H BD DIRECT MONITOR REC MODE RESET INPUT SELECT HDD MIDIA SELECT BD SD For Customer Use Enter below the Model No and Serial No which are located on the rear of cabinet Retain this information for future reference Model No Serial No LST1302 001A ...

Page 2: ...RS AND DO NOT REPAIR YOURSELF REFER SERVICING TO QUALIFIED PERSONNEL CAUTION AVIS 4 5 1 64 5 1 1 016 12 0 This Class A digital apparatus complies with Canadian ICES 003 Cet appareil numérique de la classe A est conforme à la norme NMB 003 du Canada 4 537 1 64 37 0 2 5 1784 4 WARNING TO PREVENT FIRE OR SHOCK HAZARD DO NOT EXPOSE THIS UNIT TO RAIN OR MOISTURE CAUTION This unit should be used with AC...

Page 3: ... water or liquids such as cosmetics or medicines flower vases potted plants cups etc on top of this unit 7 DO NOT place any naked flame sources such as lighted candles on the apparatus 8 AVOID violent shocks to the unit during transport When the equipment is installed in a cabinet or a shelf make sure that it has sufficient space on all sides to allow for ventilation 10cm or more on both sides on ...

Page 4: ...nded after 10000 hours of use if use in a 25 C environment For information on maintenance planning and costs consult your nearest JVC dealer The fan motor is a consumable item Replacement is recommended after 30000 hours of use if use in a 25 C environment For information on maintenance planning and costs consult your nearest JVC dealer HOW TO USE THIS INSTRUCTION MANUAL All major sections and sub...

Page 5: ...9 Playing Back About Playing Back 51 Using Playback Navigation 51 Option menu list 53 Video Playback Operation 54 Playing Videos on a BD DVD 56 Playing Videos on the HDD 57 Playing Videos on a SD Card 57 Playing Still Images JPEG 58 Changing Playback Settings 59 Playback Settings Menu 59 Audio subtitle settings 59 Playback settings 59 Video settings 60 Editing Editing 61 Entering Characters 62 Cha...

Page 6: ...demonstrations Disc authoring can be used to create discs for industrial use such as discs that repeat playback automatically Equipped with external control RS 232C terminal This unit is equipped with a RS 232C terminal that allows for external control using a PC Equipped with SDI output terminal You can connect this unit directly to an SDI system without using any converter or peripheral device S...

Page 7: ... damaged Disclaimer of compensation for loss or damage of stored video content Please note that our company will not be liable for compensation of the content or any incidental damages in the event that dubbing or playback cannot be performed properly for some reasons The same applies during repair of this unit Handling precautions m Do not use the plug or power point with dust or metallic objects...

Page 8: ... be liable for any damage or loss of the stored data due to accidents Be sure to back up the data v Use the card according to the prescribed conditions Do not use it at the following locations v Places that are exposed to direct sunlight v Places near heat generating equipment v Inside a car that is under the sun with the windows tightly shut v Places that are subject to high humidity and corrosio...

Page 9: ...eases the remaining space on the disc except for the case of DVD R discs m VIDEO MODE v Format the disc in this mode if you want to play the disc on a different DVD player Formatting of discs Formatting is required for some disc types Perform formatting if this is necessary m When using BD RE or BD R discs Formatting is required Format the disc using this unit m When using DVD R discs Formatting i...

Page 10: ...disc cannot be used for recording or editing v 8 cm discs can be used without adapters v DVD RAM cartridges and BD RE are not supported Take the DVD RAM out of the cartridge before using it Discs that are not supported v DVD RAM 2 6 GB 5 2 GB v DVD R for authoring v CD ROM R RW PhotoCD CD G VCD etc v DDCD 1 3 GB Double Density CD v HDCD High Density CD Memo v To playback a BD or DVD that was creat...

Page 11: ...layback lens is dirty Dust or dirt may be attached to the recording playback lens after using this unit for a prolonged period of time and recording or playback may not be properly performed as a result Although the performance of this unit varies according to the frequency of use and installation environment it is recommended that cleaning of the lens be performed once every half a year using com...

Page 12: ...s the OPTION button on the remote control unit Select ON SCREEN DISPLAY and press the OK button on the remote control unit Event display An on screen event display appears on the display window as well as the monitor when there is a misoperation v The event display appears for an interval of about three seconds Memo v The same event display may appear several times Alarm display When an operation ...

Page 13: ...The REC lamp lights up while recording dubbing K MEDIA SELECT button Switches between HDD and BD SD L DIRECT MONITOR lamp Lights up in the MONITOR OUT mode M DIRECT MONITOR selection button Switches the output of the rear SDI output terminal to DIRECT OUT or MONITOR OUT N Playback control buttons v I button Plays back the data v o button Stops playback recording v O button Fast reverses playback v...

Page 14: ... A AC inlet For connecting the power supply B Cooling fan C SDI IN OUT THROUGH OUT terminal For connecting using a BNC cable D DIGITAL AUDIO OUT OPTICAL terminal For connecting to the amplifier using an optical audio cable E AUDIO OUT IN terminals For connecting using an audio cable F VIDEO OUT IN terminals For connecting using a video cable G SERIAL COM RS 232C terminal For connecting to a comput...

Page 15: ...maining O ON SCREEN Displays information on the screen P PROGRESSIVE SCAN Switches the resolution of the image output Q AUDIO Switches the playback audio R EDIT Displays the editing menu screen S MEDIA MANAGE Displays the media management menu screen T A For turning On Off the power U INPUT SELECT Switches the external input signals SDI HDV DV L 1 V BD SD For operating BD DVD or SD W PAGE PRV PAGE...

Page 16: ...ies Battery life Approximately 6 months depending on the frequency of use Remote control codes By setting a remote control code for the unit and remote control you can prevent two recorders from operating simultaneously using the remote control for this unit the setting for the unit and remote control at time of purchase is REMOTE CONTROL 3 Memo v Changing the remote control code for the remote co...

Page 17: ...details refer to VIDEO PRIORITY MODE A page 83 Connecting using a component video cable Connecting using a component video cable sold separately delivers playback images that are clearer than those by an S video cable Memo v After connecting a component video cable change the unit setting to COMPONENT OUTPUT For more details refer to COMPONENT OUTPUT A page 85 Connecting using an S video cable Con...

Page 18: ...Deck or Other Equipment Connecting a video camera m Connecting via the i LINK terminal HDV DV IN REC HDD REC BV REC MODE INPUT DIRECT MONITOR SELECT HDD MIDIA SELECT BD SD m Connecting via the USB terminal HDV DV IN REC HDD REC BV REC MODE INPUT SELECT HDD MIDIA SELECT BD SD DIRECT MONITOR Memo v Some video camera models may require an AC adapter instead of batteries to run For details refer to th...

Page 19: ...on is enabled by connecting a RS 232C cable to a PC or similar device For details on external operation refer to RS 232C Interface A page 88 Connecting the Power Supply Connect the supplied power cable to this unit as follows 1 Connect the supplied power cable to the AC IN terminal of this unit 2 Connect the other end of the power cable to a power point 3 Press the A button on the remote control o...

Page 20: ...ress the OK button v CLOCK SET DISPLAY menu screen appears 1 4 6740 5 672 5 6 6 7 6 5 66 0 7 4 176276 37 56 4672 2 0 52 4 60 55 1 5 6 52 4 16 10641 4 16 10641 1 1 1 761 219 4 1 5 672 4 Select CLOCK SET and press the OK button v The Clock Set menu screen appears 1 4 6740 5 672 5 6 6 6 52 1 106 4 6 52 1 5 6 1 5 6 52 5 672 5 Set the time and date v Repeat the steps below to specify the time and date ...

Page 21: ...Settings menu screen appears 1 4 6740 5 672 5 6 6 7 6 5 66 0 7 4 176276 1 1 37 56 4672 2 0 52 4 60 55 1 5 6 52 4 16 10641 4 16 10641 1 761 219 4 1 5 672 3 Select CLOCK SET DISPLAY and press the OK button v The Clock Set Display menu screen appears 1 4 6740 5 672 5 6 6 7 6 5 66 0 7 4 176276 37 56 4672 2 0 52 4 60 55 1 5 6 52 4 16 10641 4 16 10641 1 1 1 761 219 4 1 5 672 4 Select DATE DISPLAY and pr...

Page 22: ... The Clock Set Display menu screen appears 1 4 6740 5 672 5 6 6 7 6 5 66 0 7 4 176276 37 56 4672 2 0 52 4 60 55 1 5 6 52 4 16 10641 4 16 10641 1 1 1 761 219 4 1 5 672 4 Select TIME DISPLAY CHOICE and press the OK button v The Time Display menu screen appears 1 4 6740 5 672 5 6 6 6 52 1 106 4 6 52 1 5 6 1 5 6 52 5 672 5 Select the time display style 1 4 6740 5 672 5 6 6 6 52 1 106 4 6 52 1 5 6 1 5 ...

Page 23: ... 6740 5 672 5 6 6 06 4 6 1 52 215 6 10 6 6 4 1 6 1 0276 5 66 0 108 45 10 5 7 1 176276 5 66 0 10 10 5 7 1 0276 5 66 0 5 100 6 10 4 Select TIME CODE or DATE TIME 1 4 6740 5 672 6 6 5 6 6 06 4 6 1 52 215 6 10 4 1 6 1 0276 5 66 0 108 45 10 5 7 1 176276 5 66 0 10 10 5 7 1 0276 5 66 0 5 100 6 10 6 6 6 1 1 TIME CODE When there are multiple time code inputs from the SDI device such information will be sup...

Page 24: ... position 1 4 6740 5 672 5 6 6 06 4 6 1 52 215 6 10 6 6 10 10 4 1 108 45 10 5 7 1 176276 5 66 0 6 1 0276 5 66 0 5 7 1 0276 5 66 0 5 100 6 10 06 4 722 4 4 6 722 4 6 19 4 4 6 19 4 6 LOWER LEFT Sets the time code display position to the bottom left LOWER RIGHT Sets the time code display position to the bottom right UPPER LEFT Sets the time code display position to the top left UPPER RIGHT Sets the ti...

Page 25: ...VD DVD video Discs that are not finalized cannot be imported EverioBackup Data disc containing high definition videos that are recorded in the MPEG2 format using a DVD writer for Everio m Importing data from a SDHC SD to the HDD Videos captured using a video camera can be imported to the HDD by inserting the SDHC SD card that the videos are saved on m Importing data from a video camera to the HDD ...

Page 26: ...mode title To perform high speed dubbing of a EP mode title to a DVD VIDEO format disc set HIGH SPEED DUBBING A page 80 in the settings menu to 4 3 before recording or importing Only re encoding will be performed when dubbing a title that is recorded or imported with a setting other than 4 3 MOV MOV files that are taken in SP mode and HQ mode using the JVC ProHD Camcorder GY HM700 100 m Dubbing th...

Page 27: ...he disc and load it again m DVD format chart Format VR Format Video Format DVD RW Single sided single layer 4 7 GB V V DVD R Single sided single layer 4 7 GB V V Single sided dual layer 8 5 GB V V V Format supported Formatting not required m BD format chart Format BD RE Single sided single layer 25 GB V Single sided dual layer 50 GB V BD R Single sided single layer 25 GB V Single sided dual layer ...

Page 28: ...wer or unplug the power cable when the FORMATTING DISC message is displayed v Note that formatting a disc with copyright protected titles erases all the titles from the disc m Cancel formatting 1 Press the OPTION button while formatting 126 105 5612 14 6 17 0 6 41 6 126 10 5 4 0 2 Select STOP and press the OK button v A confirmation screen to stop formatting appears 3 Select YES on the confirmatio...

Page 29: ... button 10 4 6 4 5 106 06 9 4 5 1 17 9 06 61 56 46 14 66 5 01 v Formatting starts v After formatting is complete a THE SD CARD HAS BEEN FORMATTED message appears on the monitor and the normal screen is displayed Memo v To return to the initial screen without formatting the disc select NO and press the OK button Alternatively you can press the RETURN button to return to the initial screen without f...

Page 30: ... Recommended for recording images with fast motion such as sports videos v The AF AN mode record images at the high quality HD level v The XP SP modes record images at the high quality SD level v AL AE LP mode Recommended for recording images with slow motion and little contrast such as dramas v AL AE mode records images at the low quality HD level v LP mode records images at the low quality SD le...

Page 31: ... taken in SP mode and HQ mode using the JVC ProHD Camcorder GY HM700 100 FR mode FR mode is displayed as the recording mode in the following cases v FR mode during import into HDD During import of SD VIDEO JVC Everio MPEG2 PS titles via high speed dubbing During import of data via high speed dubbing from DVD VR discs recorded using other units v FR mode during dubbing from HDD When selecting the m...

Page 32: ...te control unit v The importing screen appears 75 5 5 8 8 5 5 5 5 5 126 10 1 4 6740 6 5 6 7 0 56 2 5 6 2146 7 0 61 61 8 5 12 0 0 6 7 0 8 1 2 674 3 Select DISChHDD in the importing screen and press the OK button v A check mark is added to the DISChHDD item 4 Select NEXT and press the OK button v The import selection screen appears Memo v A recording mode selection appears instead of the import sele...

Page 33: ...ears 5 52 126 10 1 4 6740 7 0 56 2 5 6 6 4 14 0 1 0 6 5 6 7 0 0 6 4 14 0 1 4 Select the RECORDING MODE option For more details refer to Recording Modes A page 30 5 Select NEXT and press the OK button v A screen for creating the import title list appears 6 Create an import title list v Follow the steps below to create an import title list Select ADD TITLE LIST FOR DUBBING and press the OK button Th...

Page 34: ...ct the RECORDING MODE option 5 52 7 0 56 2 5 6 6 4 14 0 1 0 6 5 6 126 10 1 4 6740 56 46 4 14 0 1 7 0 For more details refer to Recording Modes A page 30 2 Select START and press the OK button v Importing of the titles starts v After titles are successfully imported a DUBBING IS COMPLETED message appears on the monitor 10 4 7 0 5 1 2 6 1 Memo v If the first play setting of the DVD video has been se...

Page 35: ...zed Use the following methods to solve this v If the internal device is not recognized Copy the data from the camera s internal memory or HDD onto the SD card v If using a JVC camcorder that has two memory card slots Put the memory card that has the required data in slot A v If the target device is not recognized using the USB connection use the camcorder s burner or a similar device to dub the di...

Page 36: ... title from the dubbing title list and pressing the OK button v Delete the selected title from the list v Thumbnails will not be displayed when a title is selected 4 Select START and press the OK button 75 126 10 1 4 6740 2 2 2 7 0 56 2 2 5 4 6 6 6 56 14 2146 6 6 56 14 7 0 0 6 5 6 7 0 56 46 v Importing of titles starts according to the sequence in the created title list v After titles are successf...

Page 37: ...s in MOV format SP mode and HQ mode taken using JVC ProHD camcorder GY HM700 100 are compatible There is no guarantee for importing videos taken on devices by other company v Only titles that are not copyright protected can be imported m Preparations 1 Insert the SD SDHC card into the SD SLOT Memo v SD RDY appears on the display window of the unit when an SD card is recognized 2 Press the DUBBING ...

Page 38: ...y MOV MOV files that are taken in SP mode and HQ mode using the JVC ProHD Camcorder GY HM700 100 4 Select START and press the OK button 5 126 10 1 4 6740 2 2 2 7 0 56 2 2 5 4 6 6 6 56 14 2146 6 6 56 14 7 0 0 6 5 6 7 0 56 46 v Importing of titles starts according to the sequence in the created title list v After titles are successfully imported a DUBBING IS COMPLETED message appears on the monitor ...

Page 39: ... ensure that the lamp that is lit corresponds to the setting in 1 and 2 When importing from a tape that contains data captured in the HDV recording and DV recording modes change the video camera setting according to each recording mode check to ensure that the corresponding lamp in 3 is lit and choose to start import from the current position m Preparations 1 Connect the device camera etc to this ...

Page 40: ...06 215 6 10 0 7 0 0 6 v A recording mode selection screen appears 3 Select RECORDING MODE and press the OK button to display the pop up menu v Select XP SP LP or EP from the RECORDING MODE option 8 8 52 126 10 1 4 6740 7 0 56 2 5 6 6 4 14 0 1 7 0 14 8 6 2 106 065 4 1 8 106 065 52 4 1 0 56 46 6 5 6 7 0 4 14 0 1 Memo v HDV contents will be imported in DR mode For more details refer to Recording Mode...

Page 41: ... mode or perform dubbing by specifying a recording mode Dubbing from the HDD to a BD DVD m Preparation 1 Set a BD or DVD on the disc tray Memo v A message appears on the monitor in the following cases where a disc cannot be written to Take the necessary actions according to the message v When an incompatible disc type is set v When there is insufficient space on the set disc v When a finalized dis...

Page 42: ...heck mark can be added to the list at the same time v You can perform the following editing operations by selecting a title from the dubbing title list and pressing the OK button v Delete the selected title from the list v Change the list arrangement v Change the name of the selected title Select RENAME TITLE and press the OK button to change the title of the dubbing source Dubbing of the new titl...

Page 43: ...cally when it is inserted into another device Memo v NONE cannot be selected for FIRST PLAY for BD MV Select REPEAT and choose either OFF or ON v OFF The disc will stop and the menu will be displayed after all the titles are played back v ON Repeat playback from the first title will start automatically after all the titles are played back Select RENAME DISC and press the OK button v Change the dis...

Page 44: ... When this occurs replace the disc or SD card with one that is usable v When an incompatible disc or SD card is set v When there is insufficient space on the set disc or SD card v When an unformatted disc or SD card is set For details refer to Formatting a disc A page 27 or Formatting an SD Card A page 29 5 Select the still images to dub and press the MARK button 2CIG 126 10 1 4 6740 2CIG 7 0 56 2...

Page 45: ...from the Playback Navigation screen 1 Select the still images to dub and press the OPTION button 126 10 1 4 6740 0 8 6 10 8 1 2 674 4172 24 8 2 0 6 2 6 5 6 4172 8 1 2 674 6 6 6 7 0 0 8 6 10 126 105 2 6 7 1 0 6 6 0 1 16 45 2 Select DUB and press the OK button 3 Follow steps 3 to 5 of Dubbing still images Memo v Check marks of still images that appear on the Playback navigation screen will remain ad...

Page 46: ... cancel the finalizing operation select NO and press the OK button 5 Setting the top menu items 8 49 8KFGQ 0 0 5 07 4170 5 6 41 7 6 4170 5 6 41 56 2 674 5 456 2 4 2 6 1 6 0 5 6 126 10 1 4 6740 6 5 9 0 61 0 2 10 16 4 8 8 5 612 07 1 016 0 0 v Before finalizing set FIRST PLAY REPEAT and CHANGE DISC MENU BACKGROUND accordingly Set according to the steps below Select FIRST PLAY and select an appropriat...

Page 47: ...AS BEEN FINALIZED message appears on the monitor 10 4 6 5 5 0 0 1 Unfinalizing a disc Only DVD RW discs that are finalized on this unit can be unfinalized After a disc is unfinalized addition of new titles and editing are possible Note v All discs except DVD RW VR mode cannot be unfinalized m To unfinalize a disc 1 Set a DVD RW disc that is finalized by this unit on the disc tray 2 Press the MEDIA...

Page 48: ... v During copy of the entire disc data is temporarily copied to the internal HDD v Only discs that are not copyright protected can be copied 3 Set the number of discs to copy using the J K buttons v You can specify up to a maximum of 10 discs 2 126 10 1 4 6740 6 5 6 7 0 52 6 07 4 1 12 5 0 5 6 76 07 4 1 12 5 0 0 6 7 0 24 8 2 0 6 2 4 Select NEXT and press the OK button v The disc tray will open auto...

Page 49: ...s together to start the recording process v Recording can also be start by pressing the R button on this unit 5 Operate the external device using i LINK HDV DV or the video S video input or SDI input to output the videos to be recorded 6 Press the o button on either this unit or the remote control to display the pop up screen choose STOP and press the OK button v End the recording Memo v When reco...

Page 50: ... SDI L 1 LP SD SD SDI DV L 1 SD SDI DV L 1 SD SDI L 1 EP SD SD SDI DV L 1 SD SDI DV L 1 SD SDI L 1 DR1 HD HD SDI HD SDI DR2 HD HD SDI HD SDI DR3 HD HD SDI HD SDI DR4 HD HD SDI HD SDI m Recordable Imageable SDI Signals Pixel Structure INPUT OUTPUT HD SDI SD SDI HD SDI SD SDI 720x480 59 94i U U 1280x720 23 98p U 1280x720 59 94p U U 1920x1080 23 98p U 1920x1080 23 98psf U 1920x1080 59 94i U U Dubbing...

Page 51: ... preset Not Viewed Mark Indicates titles that have not been viewed or groups containing titles that have not been viewed Scene Delete Mark Indicates titles for which scene delete or chapter delete has been applied Group Mark Indicates a group Playlist Mark Indicates a playlist Not Playable Mark Indicates titles that cannot be played Question Mark Indicates titles of which the thumbnails cannot be ...

Page 52: ...een m Switching between video and still image displays You can switch the display between the video thumbnail list screen and still image thumbnail screen v When the video thumbnail list screen is displayed 001 002 003 004 006 005 007 008 2CIG 126 10 1 4 6740 5 6 VKVNG 0 8 6 10 6 6 6 7 0 8 1 2 674 4 0 6 4172 2 674 4172 0 8 6 10 56 24 8 2 0 6 2 Press the GREEN button to display the still image thum...

Page 53: ...ected title For details refer to Editing a Chapter A page 70 v PLAYLIST EDIT Switches to the playlist edit screen of the selected title For details refer to Creating a Playlist A page 68 v DELETE SCENE Switches to the delete scene screen of the selected title For details refer to Delete Scenes A page 73 v DIVIDE Switches to the dividing screen of the selected title For details refer to Dividing A ...

Page 54: ...earching and slow motion is an approximate amount v Pressing the button in the Still mode forwards the video frame by frame v Pressing and holding down the button in the Still mode starts playback in slow motion Pressing the button during playback in slow motion switches the playback speed The speed changes each time the button is pressed 1 24xh1 16xh1 8xh1 2x m O button v During normal playback 1...

Page 55: ...in the normal mode depending on the type of disc or content v Pressing the button in the Still mode moves the current paused position back by about seven seconds while maintaining the Still mode m HDD button v During playback of videos on a BD DVD or SD pressing the button stops the current playback and switches to the HDD mode Pressing the button during display of the Playback Navigation screen s...

Page 56: ...EG2 format using a DVD writer for Everio 1 Set the disc on the disc tray 2 Press the NAVIGATION button v The Playback Navigation screen appears 3 Select a title and press the OK button v Playback of the selected title starts Memo v If the current playback location is HDD or SD press the BD SD button on the remote control unit to switch it to BD DVD v Videos can also be played back without starting...

Page 57: ...nit 2 Press the NAVIGATION button v The Playback Navigation screen appears 001 0 8 6 10 0 8 6 10 6 6 6 7 0 8 1 2 674 24 8 2 0 6 2 6 5 6 126 10 06 4 4172 8 1 2 674 3 Select a title and press the OK button v Playback of the selected title starts Memo v Playback navigation displays AVCHD files stored on the SD card in titles not in scenes chapters Titles are grouped such as according to the date reco...

Page 58: ...A page 59 SLIDESHOW INTERVAL A page 59 and SLIDESHOW EFFECTS A page 59 items under Playback Settings Enabled button operations during still image playback m I button v Pressing the button when a title group is selected starts playback of the still images in the title group in a slideshow m o button v Pressing the button stops the slideshow and displays the Playback Navigation screen m W button v P...

Page 59: ...eat TITLE Repeats playback of the currently played title CHAPTER Repeats playback of the currently played chapter TRACK Repeats playback of the currently played track FOLDER Repeats playback within the currently played folder ALL Repeats playback of the entire disc A B Repeats playback of the section between the specified starting and ending points Pressing the OK button specifies the displayed sc...

Page 60: ...GHTNESS A value between 0 and 15 can be set SHARPNESS A value between 6 and 6 can be set COLOR A value between 7 and 7 can be set GAMMA A value between 0 and 5 can be set m DIGITAL NOISE REDUCTION The following items can be set Setting Values Description OFF Turns off DNR Digital Noise Reduction ON Reduces noise that is prominent in images of lengthy videos m PROGRESSIVE OUTPUT The following items...

Page 61: ...itable vary according to the type of media on which the video data is stored For details refer to the media chart below m Media chart Editing option HDD BD R BDAV BD RE BDAV DVD RW DVD R SD HDD BD RE SD picture Grouping V Changing the Title Group Name V V V V Deleting a Title Group V V V V V Turning On Title Group Protection V V V 1 V Turning Off Title Group Protection V V V 1 Creating a Playlist ...

Page 62: ...creen to cancel character input To cancel character input and return to the initial screen select YES and press the OK button To return to the character input screen select NO and press the OK button v Up to about 20 alphanumeric characters can be displayed on the disc menu of BDMV and DVD VIDEO The number of characters that can be displayed varies with the character Note v If you switch the scree...

Page 63: ...ect GROUP and press the OK button v The selected titles and groups are now grouped together 2CIG 126 10 1 4 6740 24 8 2 0 6 2 6 5 6 0 8 6 10 6 6 6 7 0 8 1 2 674 4 0 4172 4172 2 674 0 8 6 10 56 4172 6 5 6 6 6 5 9 4172 61 6 4 17 0 1 6 4172 0 41 6 0 1 70 4 6 126 10 07 4172 Memo v To cancel grouping select BACK and press the OK button v Alternatively you can press the RETURN button to cancel grouping ...

Page 64: ...utton v Pressing the MARK button adds a check mark to the selected titles groups All titles with the check mark will be excluded from the group 126 10 1 4 6740 24 8 2 0 6 2 6 5 6 4172 0 8 6 10 6 6 6 7 0 8 1 2 674 4172 2 674 0 8 6 10 56 3 Press the OPTION button on the remote control unit v A pop up option list appears 4 Select DO NOT GROUP and press the OK button v A confirmation screen for group ...

Page 65: ...e method of character input refer to Entering Characters A page 62 Deleting a Title Group Titles groups can be deleted When you delete a group all titles contained within the group are deleted Memo v When a title group is deleted from the HDD BD RE or DVD RW the remaining space on the media increases according to the size of the deleted title group Deleting a title group from a BD R or DVD R does ...

Page 66: ... 6740 24 8 2 0 6 2 5 6 VKVNG 0 8 6 10 6 6 6 7 0 8 1 2 674 4 0 4172 6 4172 0 8 6 10 2 674 56 0 14 6 10 144 6 1 6 6 0 1 6 7 0 2416 6 0 5 116 0 6 6 4 Select PROTECT and press the OK button v If only a single title was selected in step 2 a confirmation screen for title protection will appear 2CIG 126 10 1 4 6740 0 8 6 10 6 6 6 7 0 8 1 2 674 4 0 4172 24 8 2 0 6 2 6 5 6 56 4172 0 8 6 10 2 674 2416 6 6 5...

Page 67: ...40 24 8 2 0 6 2 5 6 VKVNG 0 8 6 10 6 6 6 7 0 8 1 2 674 4 0 4172 6 4172 0 8 6 10 2 674 56 0 14 6 10 144 6 1 6 6 0 1 6 7 0 702416 6 0 5 116 0 6 6 4 Select UNPROTECT and press the OK button v If only a single title was selected in step 2 a confirmation screen for turning off protection will appear 2CIG 24 8 2 0 6 2 6 5 6 1 4 6740 0 8 6 10 6 6 6 7 0 8 1 2 674 4 52 4172 0 8 6 10 126 10 4172 56 2 674 70...

Page 68: ...2 674 4 0 4172 6 4172 0 8 6 10 2 674 56 6 2 56 6 6 5 0 8 26 4 6 5 Edit the playlist accordingly by selecting chapters from the source title according to your preference v Edit the playlist For details refer to Editing the playlist 2CIG 2CIG 126 10 1 4 6740 2 56 6 5 8 2 56 6 2 56 5174 6 6 6 4 6 2 56 24 8 2 0 6 2 6 6 5 6 5 8 6 Press the YELLOW button on the remote control unit v A playlist is create...

Page 69: ...w to play videos refer to Video Playback Operation A page 54 4 Select CHANGE and press the OK button v The displayed still image now becomes the thumbnail image 5 Select CONFIRM and press the OK button v Doing so ends the editing of thumbnails Memo v You can also display the thumbnail modification screen from the Playback Navigation screen Select the title for which the thumbnail is to be changed ...

Page 70: ...er Editing a chapter 1 Press the EDIT button on the remote control unit v The Edit menu screen appears 2 Select CHAPTER EDIT and press the OK button v The title screen appears 6 2 56 6 6 5 0 8 26 4 6 3 Select a title and press the OK button Memo v The chapter edit screen can also be called up from the Playback Navigation screen Select the title to perform chapter edit and press the OPTION button S...

Page 71: ...ing a video chapter 1 Select the chapter for which you want to delete the video from the chapter edit screen 2 Press the DELETE button on the remote control unit v A confirmation screen for deleting the chapter appears 001 0 00 00 126 10 1 4 6740 26 4 6 17 0 6 6 6 6 61 8 9 26 45 6 2CIG 6 26 4 6 17 0 6 6 6 6 61 8 9 26 45 24 8 2 0 6 2 6 5 6 6 52 26 4 9 6 6 6 0016 4 5614 6 0 26 4 6 3 Select DELETE an...

Page 72: ... perform dividing 5 Select DIVIDING POINT and press the OK button 001 0 00 00 126 10 1 4 6740 17 0 6 6 6 6 61 8 9 26 45 8 17 0 8 6 6 6 8 0 21 06 8 0 21 06 76 14 0 6 6 5 6 Memo v For details on how to play videos refer to Video Playback Operation A page 54 v Frame movement on the Chapter Edit screen can only be performed one frame at a time regardless of the STILL MODE A page 80 setting 6 Select EX...

Page 73: ...elete Scenes Unwanted scenes of a saved title can be deleted Doing so helps to increase the free space on the disc Memo v Deleting scenes can only be applied to titles stored on the HDD v Titles that are protected cannot be deleted To enable scene delete of a title turn off the protection For details on turning off the title protection refer to Turning Off Title Group Protection A page 67 v HD con...

Page 74: ...6 56 46 0 6 Repeat Steps 1 to 4 to specify the sections to delete Memo v For details on how to play videos refer to Video Playback Operation A page 54 v Frame movement on the Chapter Edit screen can only be performed one frame at a time regardless of the STILL MODE A page 80 setting 5 Select EXECUTE and press the OK button v A confirmation screen for performing scene delete appears 6 Select EXECUT...

Page 75: ...he shooting date time of videos stored on the HDD can be changed 1 Press the INFORMATION CORRECT button on the remote control unit v An information correct screen appears 0 14 6 10 144 6 1 6 6 0 1 6 7 0 2416 6 0 5 116 0 6 6 2 Select CHANGE SHOOTING DATE TIME and press the OK button v A thumbnail screen appears 3 Select the title for which the shooting date time is to be changed and press the OK bu...

Page 76: ...n can be performed to enable smooth playback of joined scenes after dubbing to a BD Titles recorded in the DR recording mode h seamless Recording mode conversion Enables conversion of recording mode Titles recorded in the DR AVC AF AN AL or AE mode hAF AN AL AE XP SP LP EP Memo v As seamless conversion does not re encode video and audio there is no deterioration in the image quality v Re encoding ...

Page 77: ... 79 MENU LANGUAGE A page 79 RESUME A page 80 STILL MODE A page 80 SEAMLESS PLAYBACK A page 80 RECORD A page 80 XP MODE RECORDING AUDIO A page 80 HIGH SPEED DUBBING A page 80 VIDEO MODE RECORDING ASPECT A page 80 DISC RECORDING AUDIO A page 81 AUTO MARKING A page 81 AUDIO A page 81 DYNAMIC RANGE CONTROL A page 81 DOWN MIX A page 81 DIGITAL OUT A page 82 PCM DOWN SAMPLING A page 82 Dolby Digital A p...

Page 78: ...display format on the screen can be specified using the CLOCK SET DATE DISPLAY and TIME DISPLAY CHOICE items v CLOCK SET Sets the current date and time Memo v For details on the setting procedures refer to Setting the date time A page 20 v DATE DISPLAY For setting the date year month and day display format Setting Values Description YEAR MONTH DAY Displays the date in the year month day order MONT...

Page 79: ...10 5 6 5 55 2 761 56 1 4 57 8 8 1 2 5 66 0 2 5 66 0 m BD DVD VIDEO PB SETTING BD Video and DVD Video playback settings can be specified using the BD VIDEO RATINGS COUNTRY CODE AUDIO LANGUAGE SUBTITLE LANGUAGE and MENU LANGUAGE items v BD VIDEO RATINGS For setting the lower age limit for BD Video ratings Setting Values Description NO LIMIT All BD Videos can be viewed 254YEAR S 0YEAR S BD Videos tha...

Page 80: ...gh accuracy ON Plays back smoothly Memo v SD picture quality is retained during re encode dubbing v For joints of scenes that are 15 seconds or shorter seamless playback may fail even when it is set to ON The same applies during re encode dubbing in the SD picture quality RECORD 1 4 6740 5 672 5 6 6 52 7 0 2 1 4 14 0 7 1 4 14 QND KIKVCN m XP MODE RECORDING AUDIO For changing the settings of audio ...

Page 81: ...m manual marking using the Mark button on the remote control During manual marking an on screen message is displayed regardless of the ON SCREEN GUIDE setting under DISPLAY AUDIO 1 4 6740 5 672 5 6 6 5170 56 4 1 8 0 7 1 5 66 0 6 176 56 4 1 190 10 10 0 4 0 10641 7 1 m DYNAMIC RANGE CONTROL For setting the dynamic range compression ratio ratio between the maximum and minimum volume during Dolby Digi...

Page 82: ...se this setting when connecting a device that is unable to decode DTS v DTS HD For setting audio output to BITSTREAM or PCM Setting Values Description BITSTREAM Use this setting when connecting a device that is able to decode DTS HD PCM Audio input will be changed and output as PCM Use this setting when connecting a device that is unable to decode DTS HD v AAC For setting audio output to BITSTREAM...

Page 83: ...d to display images without the black borders 4 3 PAN SCAN Set to this value when connecting to monitors with an aspect ratio of 4 3 Plays back videos with the left and right edges trimmed off 4 3 LETTERBOX Set to this value when connecting to monitors with an aspect ratio of 4 3 Plays back videos with a black band at the upper and lower ends m HDMI CONNECTION v VIDEO PRIORITY MODE Setting Values ...

Page 84: ...than 24p ones are output at 60p v No video images will be output from the video S video and component outputs when the HDMI output resolution is at 1080 24p v x v Color Setting Values Description AUTO Outputs x v Color information with HDMI when video images that include x v Color information are played back OFF This is applicable when an x v Color compatible monitor is connected Memo v This is ap...

Page 85: ...tting Values Description VIDEO Use this setting when connecting via the video BNC terminal S VIDEO Use this setting when connecting via the S video black terminal SDI CONNECTION 1 4 6740 5 672 5 6 6 06 4 6 1 52 215 6 10 6 6 10 10 4 1 108 45 10 5 7 1 176276 5 66 0 6 1 0276 5 66 0 5 7 1 0276 5 66 0 5 100 6 10 For specifying settings related to the SDI output terminal m SDI AUDIO INPUT SETTING Set th...

Page 86: ... 98p 1920x1080 23 98psf 1280x720 23 98p and 720x480 59 94i SD v RECLOCK Setting to ON helps to further stabilize the THROUGH OUT output To output signals as they are set to OFF Setting Values Description OFF Use this setting if you do not want to use the Reclock feature ON Use this setting if you want to use the Reclock feature v TIME CODE INPUT SETTING You can select whether to add a time code wh...

Page 87: ... a button that is disabled is pressed a LOCKED message will appear on the display window of the unit for three seconds Turning on the mode lock 1 Press the Z button on the remote control for five seconds or longer when in the Normal Recording Stop or Normal Playback mode v A LOCKED message appears on the display window of the unit indicating that the mode lock is turned on Press the button for fiv...

Page 88: ...ignal 2 TxD Transmit data This unit h PC 3 RxD Receive data This unit i PC 5 GND Signal grounding Mode Non synchronous Character length 8 bits Parity check Odd Start bit 1 Stop bit 1 Data rate 9600 bps v Bit configuration D6 D7 D4 D5 D2 D3 D0 D1 Starting bit Stopping bit Parity check Memo v When using the Serial Command Connector the cable to be used should be a RS 232C interface cable straight ty...

Page 89: ...s like the T button on the remote control 9E Returns to the previous title Functions like the S button on the remote control 9F Issues the same codes as the wired remote control via RS 232C A0 Power On A1 Power Off A3 Eject Opens Closes tray BD Deck AB FF Functions only during playback Activates forward search AC REW Functions only during playback Activates reverse search AD Functions as a key for...

Page 90: ...earch PLAY LIST 38 Hundreds Tens Ones ASCII codes 30 39 38 3 3 3 E g 028 38 30 32 38 E g When searching the 28th play list as indicated by the play list number on the top right corner of the index in the PLAY LIST 8E Date Preset 1st Byte 2nd Byte 3rd Byte 4th Byte 5th Byte 6th Byte Date Preset Mth Tens Mth Ones Day Tens Day Ones Yr Tens Yr Ones ASCII code 30 39 3 3 3 3 3 3 E g 09 14 2012 30 39 31 ...

Page 91: ... DVD DECK 34 DUBBING 37 SET UP 3C OK ENTER 3E ON SCREEN 44 HDD DECK 48 MEDIA MANAGEMENT 80 CUSOR 0 Moves the arrow in the index list to the right I 81 MENU BD DVD Deck only 82 CUSOR 90 Moves the arrow in the index list to the up J 84 CUSOR 180 Moves the arrow in the index list to the left H 86 CUSOR 270 Moves the arrow in the index list to the down K 87 OPEN CLOSE BD DVD Deck only 8E PROGRESSIVE H...

Page 92: ...ck only E3 PLAYBACK SETTING E4 DELETE E5 INFORMATION CORRECT ED FWD FRAME F2 MODE LOCK B8 B8 Input Output Selection 1st Byte 2nd Byte External input selection L 1 VIDEO 30 31 External input selection L 1 S VIDEO 30 39 External input selection DV 30 34 External input selection SDI 30 35 B8 Recording Mode Selection 1st Byte 2nd Byte XP 34 30 SP 34 31 LP 34 32 EP 34 33 DR1 34 40 DR2 34 41 DR3 34 42 D...

Page 93: ...83 AA 3C 1C GU 3C 3D MY 3C 62 TG 3C 84 AB 3C 1D HA 3C 3E NA 3C 63 TH 3C 85 AF 3C 1E HI 3C 3F NE 3C 64 TI 3C 86 AM 3C 1F HR 3C 40 OC 3C 65 TK 3C 87 AR 3C 20 HU 3C 41 OM 3C 66 TL 3C 88 AS 3C 21 HY 3C 42 OR 3C 67 TN 3C 89 AY 3C 22 IA 3C 43 PA 3C 68 TO 3C 8A AZ 3C 23 IE 3C 44 PL 3C 69 TR 3C 8B BA 3C 24 IK 3C 45 PS 3C 6A TS 3C 8C BE 3C 25 IS 3C 47 PT 3C 6B TT 3C 8D BG 3C 26 KA 3C 4B QU 3C 6C TW 3C 8E B...

Page 94: ... 62 TG 39 84 AB 39 1D HA 39 3E NA 39 63 TH 39 85 AF 39 1E HI 39 3F NE 39 64 TI 39 86 AM 39 1F HR 39 40 OC 39 65 TK 39 87 AR 39 20 HU 39 41 OM 39 66 TL 39 88 AS 39 21 HY 39 42 OR 39 67 TN 39 89 AY 39 22 IA 39 43 PA 39 68 TO 39 8A AZ 39 23 IE 39 44 PL 39 69 TR 39 8B BA 39 24 IK 39 45 PS 39 6A TS 39 8C BE 39 25 IS 39 47 PT 39 6B TT 39 8D BG 39 26 KA 39 4B QU 39 6C TW 39 8E BH 39 27 KK 39 4C RM 39 6D ...

Page 95: ...mation such as deck status Command Description 60 Chapter Sense For acquiring the current chapter number 61 Title Track Sense For acquiring the current title number under ORIGINAL or in the PLAY LIST B9 Select Sense For acquiring the status of the inputs outputs recording mode audio language selection and subtitle selection BE Date Sense For acquiring the currently configured year month and day BF...

Page 96: ... VIDEO Output selection h Common output Frame is fixed at 0 Recording mode selection h SP Audio language selection h ENGLISH Subtitle selection h GERMAN For response data for B9 see data format for B8 Select Preset A page 92 94 When the current status cannot be acquired the value is fixed as 0x2D v Date Data Sense For acquiring the currently configured year month and day in ASCII codes 1st Byte 2n...

Page 97: ...d Disc Not Inserted Disc Not Inserted Occurrence of abnormality in VTR 0 Fixed During STANDBY Unit Power Off Refer to the SEARCH SPEED table bit2 0 Fixed 0 Fixed 0 Fixed 0 Fixed During Repeat Playback Including PAUSE 0 Fixed Refer to the SEARCH SPEED table bit1 0 Fixed 0 Fixed 0 Fixed 0 Fixed 0 Fixed During REC Refer to the SEARCH SPEED table bit0 RS 232C command error status Clear using 56 Clear ...

Page 98: ...HDD BD SD HDD BD SD bit7 1 Fixed 0 Fixed 1 Fixed 1 Fixed bit6 0 Fixed 0 Fixed 0 Fixed 1 Fixed bit5 0 Fixed 1 Fixed 0 Fixed 0 Fixed bit4 0 Fixed 0 Fixed 0 Fixed 0 Fixed bit3 0 Fixed Refer to the DISC TYPE table below 0 Fixed During dubbing Including PAUSE bit2 0 Fixed Refer to the DISC TYPE table below 0 Fixed 0 Fixed bit1 0 Fixed Refer to the DISC TYPE table below 0 Fixed 0 Fixed bit0 1 Fixed Refe...

Page 99: ...ese SA Sanskrit BA Bashkir JA Japanese SR Serbia BM Bambara KL Kalaallisut HR Croatian EU Basque KN Kannada SI Sinhala BE Belarusian KS Kashmiri SK Slovak BN Bengali KR Kanuri SL Slovenian BH Bihari KK Kazakh SE Northern Sami BI Bislama KM Khmer SM Samoan BS Bosnian KI Kikuyu SN Shona BR Breton RW Kinyarwanda SD Sindhi BG Bulgarian KY Kirghiz SO Somali MY Burmese KV Komi ST Southern Sotho CA Catal...

Page 100: ...MO Moldavian UG Uighur FY Western Frisian MN Mongolian UK Ukrainian FF Fulah NA Nauruan UR Urdu KA Georgian NV Navajo UZ Uzbek DE German NR South Ndebele VE Venda GD Scottish Gaelic ND North Ndebele VI Vietnamese GA Irish NG Ndonga VO Volapük GL Galician NE Nepali CY Welsh GV Manx NN Norwegian Nynorsk WA Walloon EL Greek NB Norwegian Bokmål WO Wolof GN Guaraní NO Norwegian XH Xhosa GU Gujarati NY ...

Page 101: ...os IE Ireland RE Reunon Island BD Bangladesh IL Israel RO Romania BE Belgium IN India RU Russian Federation BF Burkina Faso IO British Indian Ocean Territory RW Rwanda BG Bulgaria IQ Iraq SA Saudi Arabia BH Bahrain IR Iran SB Solomon Islands BI Burundi IS Iceland SC Seychelles BJ Benin IT Italy SD Sudan BM Bermuda JM Jamaica SE Sweden BN Brunei JO Jordan SG Singapore BO Bolivia JP Japan SH Saint H...

Page 102: ...stonia MP Northern Mariana Islands US United States EG Egypt MQ Martinique UY Uruguay EH Western Sahara MR Mauritania UZ Uzbekistan ER Eritrea MS Montserrat VA Vatican ES Spain MT Malta VC Saint Vincent and the Grenadine ET Ethiopia MU Mauritius VE Venezuela FI Finland MV Maldives VG British Virgin Islands FJ Fiji MW Malawi VI Virgin Islands of the United States FK Falkland Islands Malvinas MX Mex...

Page 103: ...mless playback may not be possible at the joints of scenes In this case perform dubbing after executing SEAMLESS under the MODE CHANGE setting menu For details refer to Mode conversion A page 76 Creating a seamless BD that uses MODE CONVERSION seamless conversion recording mode conversion m Procedures to create a seamless BDMV File to import If you do not want to perform scene delete chapter delet...

Page 104: ...ay be distorted during reencoding dubbing when the monitor TV is connected to this unit using a HDMI cable or when the screen resolution is set to 1080p This is not a malfunction Change the HDMI OUTPUT RESOLUTION to a value other than 1080p e g 1080i if you find it annoying A page 84 Screen is distorted Video images may be distorted during reencoding dubbing when the monitor TV is connected to thi...

Page 105: ...does not disappear from the unit s display window and the disc tray does not open when the M button is pressed Pressing the M button at the front of the unit for five seconds or longer opens the disc tray To close the disc tray after removing the disc press the A button and wait until the tray is closed and power is turned off If the disc tray does not open after pressing the M button for five sec...

Page 106: ...eo input 1 0 Vp p 75 K BNC Video output 1 0 Vp p 75 K BNC Audio input Max 2 Vrms 10 kK pin jack Audio output 2 Vrms 10 kK terminated pin jack S video input Y 1 0 Vp p 75 K C 0 286 Vp p 75 K S video output Y 1 0 Vp p 75 K C 0 286 Vp p 75 K DV 4 pin for HDV DV IN Remote Input φ3 5 mm Jack Serial Command D SUB 9 PIN Component video output Y 1 0 Vp p 75 K CB CR PB PR 0 7 Vp p 75 K Memo v Corresponding...

Page 107: ...hich is not subject to GPL LGPL and those developed or created independently by JVC KENWOOD shall not be subject to the requirement for provision of the source code The software component distributed under GPL LGPL shall be licensed to users without charge and therefore no warranty is given for such software component either express or implied within the scope of the applicable laws and regulation...

Page 108: ...irectly or indirectly through you then the only way you could satisfy both it and this License would be to refrain entirely from distribution of the Program If any portion of this section is held invalid or unenforceable under any particular circumstance the balance of the section is intended to apply and the section as a whole is intended to apply in other circumstances Important Notice Concernin...

Page 109: ... achieve this non free programs must be allowed to use the library A more frequent case is that a free library does the same job as widely used non free libraries In this case there is little to gain by limiting the free library to free software only so we use the Lesser General Public License In other cases permission to use a particular library in non free programs enables a greater number of pe...

Page 110: ...istribute link with or modify the Library subject to these terms and conditions You may not impose any further restrictions on the recipients exercise of the rights granted herein You are not responsible for enforcing compliance by third parties with this License 11 If as a consequence of a court judgment or allegation of patent infringement or for any other reason not limited to patent issues con...

Page 111: ...34 79 F FINALIZE 10 43 46 61 H HDMI 14 83 84 HDMI AUDIO OUTPUT 84 HDMI CABLE 14 17 103 HDMI OUTPUT RESOLUTION 84 HDMI CEC 85 103 HIGH SPEED DUBBING 10 25 26 41 80 I i LINK 13 18 25 39 J JPEG 26 35 37 44 58 L LANGUAGE CODE 79 99 LOCKING THE DISC TRAY 87 M MENU LANGUAGE 79 MODE LOCK 87 MPEG2 9 O ON SCREEN 12 83 OPTICAL 14 18 82 OSD LANGUAGE 83 P PICTURE QUALITY 25 30 42 60 PLAYBACK NAVIGATION 15 45 ...

Page 112: ...SR HD2500US BLU RAY DISC HDD RECORDER LST1302 001A 2012 JVC KENWOOD Corporation ...

Reviews: