Setting DVD preferences
37
: Picture menu (PICTURE)
7
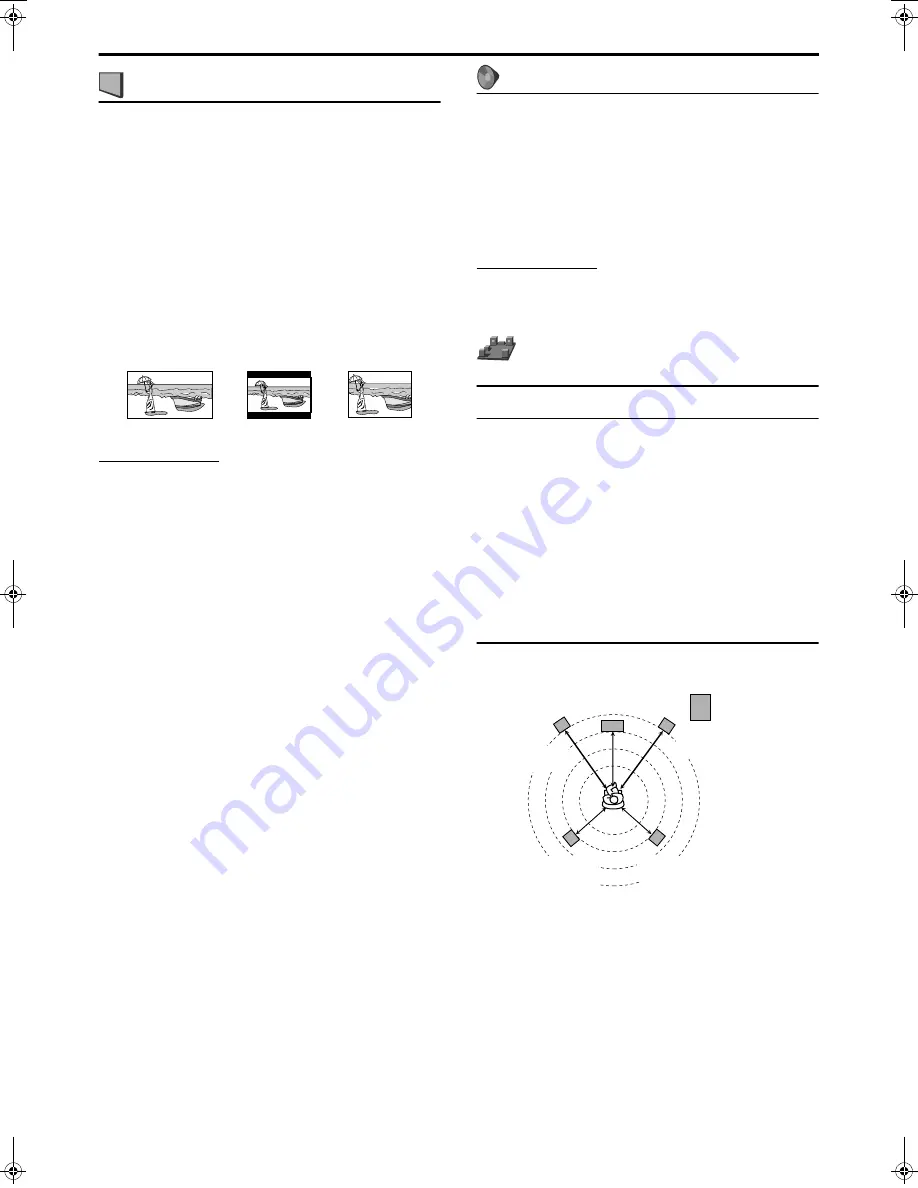
MONITOR TYPE
You can select the monitor type to match your TV when you play
DVDs recorded in the picture’s height/width ratio of 16:9.
• 16:9 (Wide television conversion)
Select this when the aspect ratio of your TV is fixed on 16:9
(wide TV).
When you play DVDs recorded in the picture’s height/width
ratio of 4:3, the system adjust the ratio of output signal
automatically.
• 4:3 LB (Letter Box conversion)
Select this when the aspect ratio of your TV is 4:3
(conventional TV). While viewing a wide screen picture, the
black bars appear on the top and the bottom of the screen.
• 4:3 PS (Pan Scan conversion)
Select this when the aspect ratio of your TV is 4:3
(conventional TV). While viewing a wide screen picture, the
black bars do not appear, however, the left and right edges of
the pictures will not be shown on the screen.
NOTE
• Even if “4:3 PS” is selected, the screen size may become “4:3 LB”
with some DVDs. This depends on how DVDs are recorded.
7
PICTURE SOURCE
When you set the scan mode to “PROGRESS” (
A
pg. 18), you can
obtain optimal picture quality by selecting whether the content on
the disc is processed by frame (film source) or by field (video
source) .
Normally set to “AUTO”.
• AUTO
Used to play a disc containing both video and film source
materials.
This system recognizes the source type (video or film) of the
current disc according to the disc information.
• If the playback picture is unclear or noisy, or the oblique
lines of the picture are rough, try to change to other modes.
• FILM
Suitable for playing back a film source disc.
• VIDEO
Suitable for playing back a video source disc.
7
SCREEN SAVER (
A
pg. 22)
You can activate or deactivate Screen Saver function.
7
FILE TYPE
When several types of files are recorded on a disc, you can select
which files to play.
• AUDIO
Select this to play MP3/WMA files.
• STILL PICTURE
Select this to play JPEG files.
• VIDEO
Select this to play MPEG-4/DivX files.
: Audio menu (AUDIO)
7
D. RANGE COMPRESSION
(Dynamic range compression)
You can enjoy low level recorded sound clearly at night even at a
low volume when listening to the sound with Dolby Digital.
• AUTO
Select this when you want to enjoy surround sound with its
full dynamic range (no effect applied).
• ON
Select this when you want to fully apply the compression
effect (useful at midnight).
NOTE
• When you play a multichannel Dolby Digital source with the
surround mode is off, the setting of D. RANGE COMPRESSION is
set to ON automatically.
: Speaker setting menu
(SPK. SETTING)
7
Level menu (LEVEL)
FRONT LEFT SPEAKER/FRONT RIGHT SPEAKER/
CENTER SPEAKER/SURROUND RIGHT SPEAKER/
SURROUND LEFT SPEAKER
While monitoring the test tone, adjust the center and surround
speakers volume as much as that of the front speakers.
TEST TONE
*
Outputs the test tone.
* The test tone comes out of all of the activated speakers in the
following sequence:
s
Front left speaker
s
Center speaker
s
Front right
speaker
s
Surround right speaker
s
Surround left
speaker
s
(back to the beginning)
7
Delay menu (DELAY)
Example:
In this case, set the delay time of each speaker as follows;
• Delay time of front speakers: 0 ms
• Delay time of center speaker: 1 ms
• Delay time of surround speakers: 2 ms
FRONT LEFT SPEAKER/FRONT RIGHT SPEAKER/
CENTER SPEAKER/SURROUND RIGHT SPEAKER/
SURROUND LEFT SPEAKER
Adjust the distance from the listening position to the speakers.
Within the range from 0 ms to 15 ms. (by 1 ms)
Ex.: 16:9
Ex.: 4:3 LB
Ex.: 4:3 PS
Subwoofer
Front left
0 ms
Center
speaker
1 ms
Front right
0 ms
Surround left
2 ms
Surround right
2 ms
TH-S66-S55[B].book Page 37 Friday, January 14, 2005 10:40 PM


