background image

Basic operations

22

When you play a disc (or software) encoded with Dolby Digital or 
DTS Digital Surround, the following symptoms may occur;
• Sound does not come out at the beginning of playback.
• Noise comes out while searching for or skipping chapters or 

tracks.

In these cases, change the decode mode to “DOLBY D” (for Dolby 
Digital) or “DTS” (for DTS Digital Surround).

%

When DVD or DBS is selected as the source

On the remote control:

Press DECODE to select the decode mode.

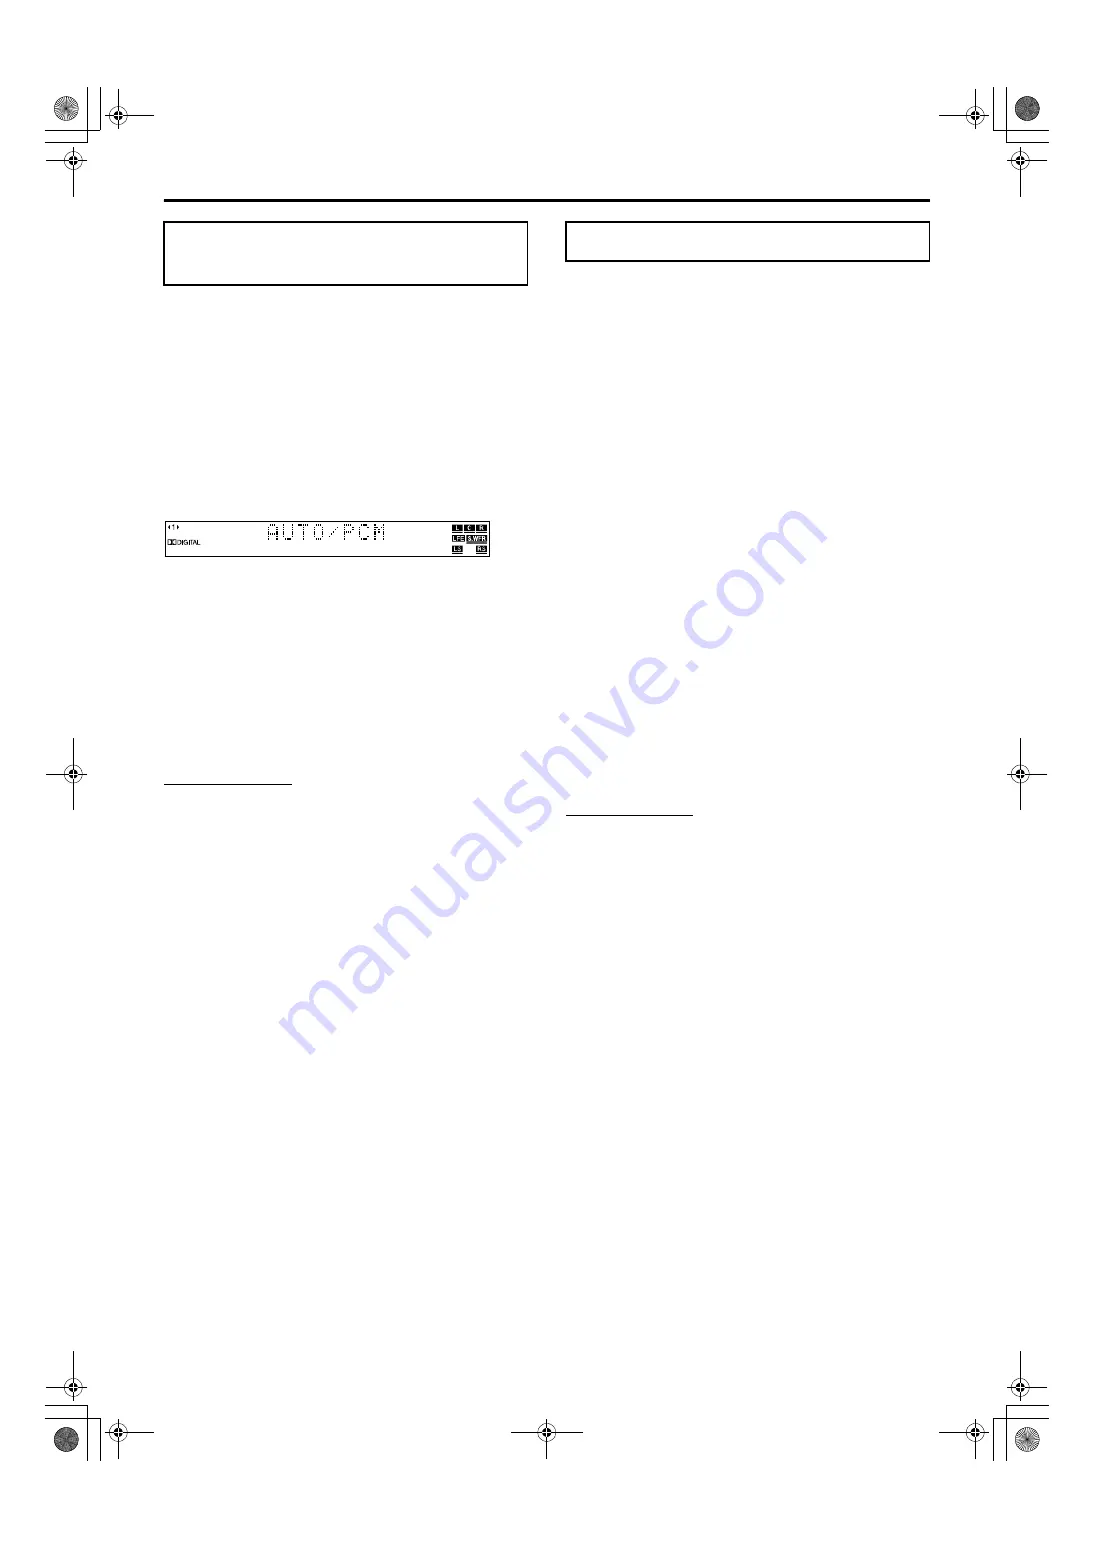
The current decode mode appears on the display window.

Example: When “AUTO/PCM” is selected.

Each time you press the button, the decode mode changes as 
follows;

]

 AUTO/PCM 

]

 DOLBY D 

]

 DTS 

]

 (back to the 

beginning)

• AUTO/PCM: Normally select this. The system automatically 

detects the incoming signals.

• DOLBY D:

Select this if the symptoms above occur when 
playing a disc (or software) encoded with Dolby 
Digital.

• DTS:

Select this if the symptoms above occur when 
playing a disc (or software) encoded with DTS 
Digital Surround.

NOTE

• When “DOLBY D” or “DTS” is selected, if a signal encoded with 

another digital format comes in, you cannot listen to the sound. (The 

/

DIGITAL or 

+

 indicator flashes.)

• Changing the source returns the decode mode to “AUTO/PCM” 

automatically.

This system supports the progressive scan system (480p*) as well 
as the conventional interlaced scan system (480i*).
If your TV equipped with component jacks supports the 
progressive video input, you can enjoy a high quality picture by 
setting the progressive scan mode to active.
• Refer also to the instruction manuals supplied with your TV.
• If your TV equipped with component jacks does not support the 

progressive video input, do not change the scan mode to the 
progressive scan mode.

* 480p and 480i indicate the number of scanning lines and 

scanning format of an image signal.

480p indicates 480 scanning lines with progressive format.

480i indicates 480 scanning lines with interlaced format.

%

When DVD is selected as the source

On the remote control:

1

Press DVD.

2

Press and hold PROGRESSIVE for 
3 seconds.

Each time you perform this operation, the scan mode changes 
as follows;

INTERLACE 

O

 PROGRESSIVE

• INTERLACE:

Select this if your TV equipped with 
component jacks supports the interlaced 
video input only.

• PROGRESSIVE:Select this if your TV equipped with 

component jacks supports the progressive 
video input.

When “PROGRESSIVE” is selected, the PROGRESSIVE 
indicator lights.

NOTE

• There are some progressive TVs and High-Definition TVs that are not 

fully compatible with this system, resulting in an unnatural picture 
when playing back a DVD in the progressive scan mode. In such a 
case, change the scan mode to “INTERLACE”.
To check the compatibility of your TV, contact your local JVC 
customer service center.

• All JVC progressive TVs and High-Definition TVs are fully 

compatible with this system.

Changing the decode 
mode

Changing the scan mode

TH-M65-55-45[J]-05Basic.fm  Page 22  Friday, March 14, 2003  9:53 PM

Summary of Contents for sp-pwm45

Page 1: ...s information for future reference Model No Serial No LVT1024 001B J TH M55 DVD DIGITAL THEATER SYSTEM INSTRUCTIONS Consists of XV THM65 SP PWM65 SP THM65C and SP THM65F Consists of XV THM55 SP PWM55 SP THM55C and SP THM55F Consists of XV THM45 SP PWM45 SP THM45C SP THM45F and SP THM45S TH M65 55 45 J 01Cov1 fm Page 1 Tuesday April 22 2003 3 16 PM ...

Page 2: ...ff The power can be remote controlled 1 CLASS 1 LASER PRODUCT 2 DANGER Visible and invisible laser radiation when open and interlock failed or defeated Avoid direct exposure to beam 3 CAUTION Do not open the top cover There are no user serviceable parts inside the Unit leave all servicing to qualified service personnel CAUTION To reduce the risk of electrical shocks fire etc 1 Do not remove screws...

Page 3: ...ES LIMITES DE BRUITS RADIOELECTRIQUES APPLICABLES AUX APPAREILS NUMIRIQUES DE CLASSE B PRESCRITES DANS LA NORME SUR LE MATERIEL BROUILLEUR APPAREILS NUMERIQUES NMB 003 EDICTEE PAR LE MINISTRE DES COMMUNICATIONS Note to CATV system installer This reminder is provided to call the CATV system installer s attention to Section 820 40 of the NEC which provides guidelines for proper grounding and in part...

Page 4: ...ack 23 Playback features 25 Tuner operations 27 Manual tuning 27 Preset tuning 27 Selecting the FM reception mode 28 Reducing the noise of AM broadcast 28 Creating realistic sound fields 29 Using the surround mode 31 Adjusting the sound 32 Advanced operations 33 Using the on screen bar 33 Playing from a specified position on a disc 34 Using the MP3 control display 36 Using the JPEG control display...

Page 5: ... away on travel or for other reasons for an extended period of time disconnect the power cord plug from the wall outlet Do not block the vents Blocking the vents may damage the system Care of the cabinet When cleaning the system use a soft cloth and follow the relevant instructions on the use of chemically coated cloths Do not use benzene thinner or other organic solvents including disinfectants T...

Page 6: ... than that of regular CDs About MP3 discs MP3 is an abbreviation for Motion Picture Experts Group 1 or MPEG 1 Audio Layer 3 MP3 is simply a compressed data file format By using MP3 format one CD R or CD RW can contain 10 times as much data as one regular CD About JPEG discs A still picture data compression system proposed by the Joint Photographic Expert Group which features small decrease in imag...

Page 7: ... those files are also counted in the total number of 150 The Playback Control function allows you to enjoy menu driven operation and high resolution still images which have a resolution four times greater than moving pictures High resolution still image display You can display high quality images which are four times clearer than moving pictures Menu driven playback A selection menu is displayed w...

Page 8: ...tion lamp A pg 20 M Remote sensor A pg 16 N Display window A pg 6 24 O Open close buttons 0 A pg 23 P Disc buttons DISC 1 5 A pg 23 Q Disc lamps TH M65 only A pg 25 Rear panel center unit A System cord connector A pg 10 B Audio input jacks AUDIO IN VCR A pg 14 C Digital input output jacks DIGITAL IN OUT TH M65 A pg 14 Digital input jack DIGITAL IN TH M55 TH M45 A pg 14 D Antenna terminals ANTENNA ...

Page 9: ...cator LPCM A pg 30 Digital signal format indicators A pg 30 Dolby Digital DIGITAL DTS J Surround indicator SURROUND A pg 31 K DSP indicator A pg 29 31 L Progressive mode indicator PROGRESSIVE A pg 22 M Resume indicator RESUME A pg 24 N Repeat mode indicators A pg 44 Powered subwoofer A System cord connector A pg 10 B Front speaker terminals FRONT SPEAKERS A pg 12 13 C Center speaker terminals CENT...

Page 10: ... 35 O Repeat button REPEAT A pg 44 P A B repeat button A B REPEAT A pg 45 Q Sleep button SLEEP A pg 21 R Dimmer button DIMMER A pg 20 S Surround buttons SURROUND Mode MODE On Off ON OFF A pg 31 T Effect button EFFECT A pg 32 U Test tone button TEST A pg 32 V Subwoofer adjustment buttons S WFR A pg 21 W Center speaker adjustment buttons CENTER A pg 32 X Standby on button F AUDIO A pg 19 Y Standby o...

Page 11: ...B PR to PR correctly If your TV supports progressive video input you can enjoy a high quality picture by setting the progressive scan mode to active A pg 22 NOTE If the component video input jacks of your TV are of the BNC type use a plug adapter not supplied to convert the pin plugs to BNC plugs The component video signals can be output only when you select DVD as the source to play A pg 20 To co...

Page 12: ...tenna with standard type 75 C coaxial connector NOTE Disconnect the supplied FM antenna before attaching a 75 C coaxial connector the kind with a round wire going to an outdoor antenna We recommend that you use coaxial cable for the FM antenna as it is well shielded against interference If the antenna cord is covered with the insulation coat twist and pull the insulation coat off and remove Press ...

Page 13: ...ed In this case keep the distance between them to the TV to over 10 cm 4 inches For safety reasons always ensure that there is sufficient space behind the powered subwoofer When you position the satellite speakers in a relatively high place such as the top of your bookshelf place them on a flat and level surface Speaker grilles are not removable except SP THM55C and SP THM55F Trying to remove them...

Page 14: ...lf 1 Connect the speaker connectors to the stand connectors Be sure to connect the speaker connectors by matching their sizes 2 Join the stand to the speaker section 3 Fix the stand to the speaker section Be sure to tighten the screws firmly Repeat the procedure from step 1 to assemble the other satellite speakers NOTE Use the speaker after assembly is fully and correctly done It is recommended to...

Page 15: ...P THM65F Center speaker SP THM65C Front speakers SP THM65F White Black Black White Red Black Black Red Powered subwoofer Press and hold the clamp Insert the bare end of the speaker cord into the terminal Release the clamp Connect the white cords to the red ª terminals and black cords to the black terminals Route the speaker cord as shown at right Be sure to remove all slack from the cord so that t...

Page 16: ...fied personnel DO NOT install the satellite speakers on the wall by yourself to avoid unexpected damage from their falling off the wall due to incorrect installation or weakness in wall structure Care must be taken in selecting a location for speaker installation on a wall Injury to personnel or damage to equipment may result if the speakers installed interfere with daily activities Center speaker...

Page 17: ...is system can send digital audio signals to digital component such as MD recorder or AV receiver NOTE Only digital audio signals can be input when selecting DBS as the source to play A pg 20 When connecting a video component such as a DBS tuner operate this system to listen to the sound RCA pin plug cord not supplied Center unit VCR Composite video cord not supplied A To composite video output B T...

Page 18: ...ations and surround mode adjustment may be erased in a few days in the following cases If you unplug the power cord of the center unit If a power failure occurs The speakers will not produce any sound if the power cord of the powered subwoofer is removed from the AC outlet while the center unit is turned on In this case press FAUDIO on the remote control or F STANDBY ON on the center unit to turn ...

Page 19: ...creases replace the batteries Use two R6P SUM 3 AA 15F type dry cell batteries CAUTION Follow these precautions to avoid leaking or cracking batteries Use the correct type of batteries Batteries that look similar may differ in voltage Always replace both batteries at the same time Do not expose batteries to heat or flame Operating the system from the remote control Aim the remote control directly ...

Page 20: ...ter replacing the batteries of the remote control Operation IMPORTANT Before using the remote control to operate a TV Set the remote control mode selector to TV The following buttons are available TV Turns TV on and off TV VOL Adjusts the volume TV VIDEO Selects the input mode either TV or VIDEO CHANNEL Changes the channels 1 10 0 10 100 Selects the channel TV RETURN Alternates between the previou...

Page 21: ...ry operating your VCR by pressing VCR DBS When your VCR turns on or off you have entered the correct code If there is more than one cord listed for your brand try each one until you enter the correct one NOTE Manufacturers codes are subject to change without notice If they are changed this remote control cannot operate the equipment Set the codes again after replacing the batteries of the remote c...

Page 22: ...ack NO DISC Appears when no disc is loaded to the selected disc tray To turn the power off On the remote control Press AUDIO again On the center unit Press STANDBY ON again The STANDBY lamp lights NOTE The power supply to the subwoofer is linked to the center unit The POWER ON lamp on the subwoofer lights green when the power is turned on A small amount of the power is consumed even when the power...

Page 23: ... be suddenly output from the speakers Connect a pair of headphones to the PHONES jack on the center unit This cancels the surround mode A pg 31 currently selected deactivates the speakers turn the subwoofer s power off and activates the headphone mode HEADPHONE appears on the display window Disconnecting a pair of headphones from the PHONES jack cancels the headphone mode and activates the speaker...

Page 24: ...ier than the one set by the Sleep Timer the Auto Standby function controls shut off time You can adjust the output level within the range from 10 to 10 On the remote control Press S WFR NOTE You can also make adjustments using the choice menu shown on the TV screen A pg 50 The adjustments on a source take effect for the other sources You can adjust each enhancement level from the front speakers wi...

Page 25: ...acks supports the progressive video input you can enjoy a high quality picture by setting the progressive scan mode to active Refer also to the instruction manuals supplied with your TV If your TV equipped with component jacks does not support the progressive video input do not change the scan mode to the progressive scan mode 480p and 480i indicate the number of scanning lines and scanning format...

Page 26: ... button in step 3 When all tracks in a group have been played the system starts playback of tracks in the next group When loading a JPEG disc The slide show playback starts from the first file in the first group after pressing the DISC button in step 3 When stopping playback of a JPEG disc the JPEG control display A pg 37 appears on the TV screen Slide show Each file still picture is shown on the ...

Page 27: ...n out with the screen saver A TV screen may burn out if a static picture is displayed for a long time To prevent this the system automatically dims the screen if a static picture is displayed for over 5 minutes the screen saver function Pressing any button will cancel the screen saver function If you do not want to use the screen saver function see page 49 On screen guide icons During DVD playback...

Page 28: ...ile the system is turned off Press and hold then press for DISC 1 The system turns on and LOCKED appears on the display window If you try to eject discs LOCKED appears and indicates that trays are locked To unlock trays When the system is turned off press and hold then press for DISC 1 The system turns on and UNLOCKED appears on the display window IMPORTANT Before using the remote control for the ...

Page 29: ...les backward Press 4 as many times as required NOTE This function may not work for some DVDs When playing a Video CD or SVCD with the PBC function and 4may be used for the operations of menu driven playback A pg 4 35 When playing back an MP3 JPEG disc you can make operations using the MP3 JPEG control display A pg 36 37 Locating a desired selection using number buttons You can locate the desired t...

Page 30: ...l strength is tuned in to TUNING ª Increases frequency TUNING Decreases frequency NOTE When a station of sufficient signal strength is tuned in the TUNED indicator lights on the display window When an FM stereo program is received the ST indicator lights on the display window Once a station is assigned to a channel number the station can be quickly tuned in You can preset 30 FM and 15 AM stations ...

Page 31: ... currently tuned in is noisy you can change the FM reception mode to improve the reception You can store the FM reception mode for each preset station See Preset tuning A pg 27 While listening to an FM station On the remote control Press FM MODE The FM reception mode appears on the display window Each time you press the button the FM reception mode alternates between AUTO MUTING and MONO AUTO MUTI...

Page 32: ...ed into two categories multichannel up to 5 1 channel and 2 channel software To enjoy surround sounds while playing Dolby Digital 2 ch software you can use Dolby Pro Logic II DTS Digital Surround Used to reproduce multichannel soundtracks of the software encoded with DTS Digital Surround DTS Digital Surround DTS is another discrete multichannel digital audio format available on CD LD and DVD softw...

Page 33: ...when the surround left channel signal comes in i Lights when the surround right channel signal comes in h Lights when the monaural surround channel signal or 2 channel Dolby Surround signal comes in f Always lights The channel with shows that the corresponding speakers are reproducing the channels sound If the channels sound decoded into 5 1 channel is reproduced only lights Normal stereo sound Al...

Page 34: ...e button the surround mode changes as follows PL II MOVIE PL II MUSIC LIVE CLUB DANCE CLUB HALL PAVILION ALL CH ST back to the beginning For details on each mode see pages 29 and 30 To turn off the surround mode Press SURROUND ON OFF Each time you press the button the surround mode turns on and off alternately SURR OFF surround off O current selected mode surround on NOTE When selecting PL II MUSI...

Page 35: ...or the surround right speaker 3 Press TEST again to stop the test tone For DAP modes A pg 29 only 4 Press EFFECT to select the effect level 1 to 5 you want Each time you press the button the effect level changes as follows DSP EFFECT 1 DSP EFFECT 2 DSP EFFECT 3 DSP EFFECT 4 DSP EFFECT 5 back to the beginning As the number increases the selected mode will be more effective Normally set the level to...

Page 36: ...ts of the on screen bar during playback DVD Video CD SVCD CD MP3 disc A Shows disc type B Shows current transfer rate Megabits per second C Shows disc number D Shows current title for DVD or group for MP3 number E Shows current chapter number for DVD or track number for other type of discs F Shows time information A pg 34 G Shows playback status appears during playback appears during fast forward ...

Page 37: ...t chapter track TOTAL Elapsed time of disc T REM Remaining time of disc To turn off the on screen bar Press ON SCREEN NOTE While playing a Video CD SVCD or Audio CD the hour digit indication does not appear You can start playing a title chapter or track you specify You can also play a disc from specified time Locating a desired scene from the DVD menu DVDs generally have their own menus which show...

Page 38: ...rform any of the following Press TOP MENU or MENU Press 7 twice to stop playback then press 3 play button Locating a desired chapter using the on screen bar When playing back a DVD you can locate the chapter number to be played using the on screen bar 7 During playback 1 Press ON SCREEN twice The on screen bar appears on the TV screen 2 Press Cursor 3 2 to move H to 3 Press ENTER The following pop...

Page 39: ...play back from a point 2 hours 34 minutes 08 seconds elapsed To correct a misentry Press Cursor repeatedly until the wrong number is erased then press number buttons to enter the correct numbers 5 Press ENTER The system starts playback from the specified time To turn off the on screen bar Press ON SCREEN NOTE You can also use the 10 button to enter 0 The 10 button is not used by this function You ...

Page 40: ...ursor 3 to select the file list 3 Press Cursor 5 to select the desired file 4 Press 3 play button to start the slide show playback from the selected file To show only the selected file Press ENTER When a still picture is completely shown on the TV screen you can zoom in on areas in the still picture A pg 41 To select the other group Press Cursor 2 to return to the group list then press Cursor 5 to...

Page 41: ...to the beginning The pop up window disappears if no operation is done for about 5 seconds When using the on screen bar 1 Press ON SCREEN twice The on screen bar appears on the TV screen 2 Press Cursor 3 2 to move H to 3 Press ENTER The following pop up window appears under the selected item Example The first view angle is selected out of 3 view angles recorded 4 Press Cursor 5 repeatedly to select...

Page 42: ...N twice The on screen bar appears on the TV screen 2 Press Cursor 3 2 to move H to 3 Press ENTER The following pop up window appears under the selected item Example DVD ENGLISH is selected out of 3 subtitle languages recorded 4 Press Cursor 5 repeatedly to select the desired subtitle language Each time you press the button the subtitle language changes 5 Press ENTER The pop up window disappears To...

Page 43: ...el changes Example for Video CD ST L R back to the beginning ST To listen to normal stereo playback L To listen to L left audio channel only R To listen to R right audio channel only Example for SVCD ST 1 ST 2 L 1 R 1 L 2 R 2 back to the beginning ST 1 ST 2 To listen to normal stereo playback of ST 1 or 2 channel L 1 L 2 To listen to L left 1 or 2 audio channel R 1 R 2 To listen to R right 1 or 2 ...

Page 44: ... reverse slow motion press 1 Each time you press the button the playback speed become faster and on screen guide icon changes as follows Forward Reverse To pause slow motion playback Press 8 To return to normal playback Press 3 play button NOTE Sound cannot be heard during slow motion playback Zooming in 7 During playback or while paused 1 Press ZOOM Each time you press ZOOM scene magnification ch...

Page 45: ...INEMA Press VFP to return to normal screen 7 To adjust picture appearance manually 3 Press Cursor 3 2 repeatedly to select USER 1 or USER 2 4 Press Cursor 5 repeatedly to select a parameter you want to adjust Adjust gradually and confirm picture appearance results are as preferred GAMMA 4 to 4 Controls brightness of neutral tints while maintaining brightness of dark and bright portions BRIGHTNESS ...

Page 46: ...tart Program Playback When all of the programmed titles tracks have been played back playback stops and the program menu appears again Note that program setting remains When playing back an Audio CD The program menu remains on the TV screen during Program Playback To check the program contents During playback press 7 Playback stops and the program menu appears To bring up the menu without stopping...

Page 47: ...REPEAT ALL do not appear on the TV screen To stop Repeat Playback Press 7 When a disc except DVD is selected the system stops playback but does not quit the Repeat mode When a DVD is set the system stops playback and quits the Repeat mode To quit the Repeat mode Press REPEAT until the Repeat mode indicator goes off from the display window You can also clear the Repeat mode by changing the current ...

Page 48: ...ss A B REPEAT again at the end of the part you want to repeat point B The repeat mode indicator on the display window changes to and A B Repeat Playback starts The selected part of the disc between point A and B is played repeatedly To cancel A B Repeat Playback Press A B REPEAT during A B Repeat Playback When using the on screen bar 1 Press ON SCREEN twice The on screen bar appears on the TV scre...

Page 49: ...t the initial languages for the disc menu audio and subtitles You can also select the language used on the TV screen while operating this system Picture menu PICTURE A A A A pg 49 You can select the desired options concerning a picture or monitor screen Audio menu AUDIO A A A A pg 49 You can adjust sound settings Speaker setting menu SPK SETTING A A A A pg 49 You can make speaker settings accordin...

Page 50: ... Example When PICTURE SOURCE is selected 4 Press ENTER The pop up window listing the selectable options appears on the choice menu 5 Press Cursor 5 repeatedly to select the desired option Example When FILM is selected 6 Press ENTER Your choice is stored To set other items on the same choice menu Repeat steps 3 to 6 To move to another choice menu Press Cursor 3 2 repeatedly to select a choice menu ...

Page 51: ...arian AZ Azerbaijani HY Armenian BA Bashkir IA Interlingua BE Byelorussian IE Interlingue BG Bulgarian IK Inupiak BH Bihari IN Indonesian BI Bislama IS Icelandic BN Bengali Bangla IW Hebrew BO Tibetan JI Yiddish BR Breton JW Javanese CA Catalan KA Georgian CO Corsican KK Kazakh CS Czech KL Greenlandic CY Welsh KM Cambodian DA Danish KN Kannada DZ Bhutani KO Korean KOR EL Greek KS Kashmiri EO Esper...

Page 52: ...a disc you can select which files to play MP3 Select this to play MP3 files JPEG Select this to play JPEG files Audio menu AUDIO 7 L R BALANCE You can adjust the balance between the front left and front right speakers L 21 to L 1 O CENTER O R 1 to R 21 by 1 step CENTER The levels of the front left and right speakers are identical L 21 to L 1 and R 1 to R 21 As the number increases the level from o...

Page 53: ...ct this when the cone speaker unit in the speaker is larger than 12 cm in diameter 4 3 4 inches SMALL Select this when using the supplied speakers Select this when the cone speaker unit in the speaker is smaller than 12 cm in diameter 4 3 4 inches SUB WOOFER USE This item is fixed to USE RETURN Returns to the SPK SETTING menu 7 Level menu LEVEL CENTER SPEAKER SURROUND LEFT SPEAKER SURROUND RIGHT S...

Page 54: ...ontrols shut off time 7 PARENTAL LOCK You can restrict playback of a DVD containing violent scenes that is not suitable for your other family members Accesses the PARENTAL LOCK sub menu See following Parental Lock Using this function you can restrict playback of a DVD containing violent scenes or scenes not suitable for your other family members Nobody can play such a disc unless this function is ...

Page 55: ... set the Parental Lock before you set your password If you go out of the PARENTAL LOCK sub menu before setting your password in step 6 the new country code and parental lock level will not become effective The old country code and parental level will remain in effect When you enter wrong passwords more than three times the H moves to EXIT automatically and Cursor 5 do not work Press ENTER to exit ...

Page 56: ...BR Brazil GW Guinea Bissau MW Malawi TN Tunisia BS Bahamas GY Guyana MX Mexico TO Tonga BT Bhutan HK Hong Kong MY Malaysia TP East Timor BV Bouvet Island HM Heard Island and McDonald Islands MZ Mozambique TR Turkey BW Botswana NA Namibia TT Trinidad and Tobago BY Belarus HN Honduras NC New Caledonia TV Tuvalu BZ Belize HR Croatia NE Niger TW Taiwan CA Canada HT Haiti NF Norfolk Island TZ Tanzania ...

Page 57: ...gital or DTS Digital Surround A pg 49 BAL You can adjust the balance between the front left and front right speakers A pg 49 D COMP Dynamic Range Compression You can enjoy low level recorded sound clearly at night even at a low volume level when listening to the sound with Dolby Digital A pg 49 AUDIO POS Audio Position Set the audio position of subwoofer so that the subwoofer level can be automati...

Page 58: ... the functions listed following One touch video play Simply by inserting a video cassette without its safety tab into the VCR you can enjoy video playback without manually setting other switches This system automatically turns on and changes the source to VCR The TV automatically turns on and changes the input mode to the appropriate position so that you can view the playback picture When you inse...

Page 59: ...A pg 16 The remote control is not set to operate the DVD player or tuner FM AM For the DVD player press DVD before you perform the operations A pg 23 For the tuner press FM AM before you perform the operations A pg 27 Sunlight is falling directly on the remote sensor Hide the remote sensor from direct sunlight The remote control signals are not set correctly Enter the correct manufacturer s code A...

Page 60: ...nter unit is connected to the TV which does not support the progressive video input such as a conventional TV Change the scan mode to INTERLACE A pg 22 A disc cannot be played The center unit s and disc s Region Code numbers are incompatible Replace the disc A pg 3 Parental Lock is in use Enter password to change the Parental Lock level A pg 51 A disc cannot be played and 0 00 is displayed on the ...

Page 61: ...correct file extension jpg jpeg JPG JPEG or any uppercase and lowercase combination such as Jpg to their file names A pg 3 JPEG files are not recorded in a format compliant with ISO 9660 Level 1 or 2 Replace the disc Record JPEG files using a compliant application Not JPEG files but MP3 files are played The MP3 JPEG setting is set to MP3 When both MP3 files and JPEG files are recorded to a disc se...

Page 62: ... time in a single title the user can select view angles This feature is called the multiangle function Multichannel DVD is specified to have each sound track constitute one sound field Multichannel refers to a structure of sound tracks having three or more channels Multilanguage When a title is created to cope with multiple languages it is generally called a multilanguage title Parental Lock A fea...

Page 63: ...deo DVD 3 4 Dynamic range compression D RANGE COMPRESSION 49 54 F Frame by frame playback 41 G Group 4 I Interlace mode INTERLACE 22 J JPEG 3 4 37 L Left Right speaker balance L R BALANCE 49 54 Low frequency effect attenuater LFE ATT 49 54 M Menu language MENU LANGUAGE 48 Monitor type MONITOR TYPE 49 16 9 AUTO 49 16 9 NORMAL 49 4 3 LB 49 4 3 PS 49 MP3 3 4 36 Muting 20 O On screen bar 33 On screen ...

Page 64: ...total harmonic distortion Speaker section Speaker unit 20 cm 8 inches Bass reflex Magnetically Shielded Frequency Range 25 Hz to 200 Hz General Power Requirements AC 120 V Ó 60 Hz Power Consumption 150 W at operation 0 W in standby mode Dimensions W M H M D 235 mm M 355 mm M 492 mm 9 5 16 inches M 14 inches M 19 3 8 inches Mass 13 0 kg 28 7 lbs Subwoofer SP PWM55 Amplifier section Front Center Sur...

Page 65: ...ss 2 4 kg 5 3 lbs Satellite Speakers Front speakers SP THM45F Speakers 8 0 cm 3 3 16 inches Bass reflex Magnetically Shielded Power Handling Capacity 120 W Impedance 4 C Frequency Range 90 Hz to 20 kHz Dimensions W M H M D 103 mm M 115 mm M 100 mm 4 1 16 inches M 4 9 16 inches M 3 15 16 inches Mass 0 64 kg 1 5 lbs Surround speakers SP THM45S Speakers 8 0 cm 3 3 16 inches Bass reflex Magnetically S...

Page 66: ...537 5722 for your nearest authorized servicer or visit our website at www JVC com Remember to retain your Bill of Sale for Warranty Service Do not service the television yourself Caution To prevent electrical shock do not open the cabinet There are no user serviceable parts inside Please refer to qualified service personnel for repairs Accessories To purchase accessories for your JVC product pleas...

Page 67: ...64 TH M65 55 45 J book Page 64 Friday March 14 2003 6 52 PM ...

Page 68: ...EN 0303SKMIDEJEM 2003 VICTOR COMPANY OF JAPAN LIMITED TH M65 TH M55 TH M45 DVD DIGITAL THEATER SYSTEM TH M65 55 45 J book Page 68 Friday March 14 2003 6 52 PM ...
Page 69: ...P THM65C and SP THM65F Se compose de XV THM65 SP PWM65 SP THM65C et SP THM65F Consists of XV THM55 SP PWM55 SP THM55C and SP THM55F Se compose de XV THM55 SP PWM55 SP THM55C et SP THM55F Consists of XV THM45 SP PWM45 SP THM45C SP THM45F and SP THM45S Se compose de XV THM45 SP PWM45 SP THM45C SP THM45F et SP THM45S TH M65 55 45 C 01Cov1 fm Page 1 Tuesday April 22 2003 5 19 PM ...

Page 70: ...TANDARD ENTITLED DIGITAL APPARATUS ICES 003 OF THE DEPARTMENT OF COMMUNICATIONS CET APPAREIL NUMERIQUE RESPECTE LES LIMITES DE BRUITS RADIOELECTRIQUES APPLICABLES AUX APPAREILS NUMIRIQUES DE CLASSE B PRESCRITES DANS LA NORME SUR LE MATERIEL BROUILLEUR APPAREILS NUMERIQUES NMB 003 EDICTEE PAR LE MINISTRE DES COMMUNICATIONS CAUTION To reduce the risk of electrical shocks fire etc 1 Do not remove scr...

Page 71: ...id direct exposure to beam 3 CAUTION Do not open the top cover There are no user serviceable parts inside the Unit leave all servicing to qualified service personnel 1 PRODUIT LASER CLASSE 1 2 DANGER Radiations laser visibles et invisibles lorsque le boîtier de l appareil est ouvert et que le verrouillage est défaillant ou a été annulé 3 ATTENTION Ne pas ouvrir le couvercle du dessus Il n y a aucu...

Page 72: ...layback 23 Playback features 25 Tuner operations 27 Manual tuning 27 Preset tuning 27 Selecting the FM reception mode 28 Reducing the noise of AM broadcast 28 Creating realistic sound fields 29 Using the surround mode 31 Adjusting the sound 32 Advanced operations 33 Using the on screen bar 33 Playing from a specified position on a disc 34 Using the MP3 control display 36 Using the JPEG control dis...

Page 73: ...e away When away on travel or for other reasons for an extended period of time disconnect the power cord plug from the wall outlet Do not block the vents Blocking the vents may damage the system Care of the cabinet When cleaning the system use a soft cloth and follow the relevant instructions on the use of chemically coated cloths Do not use benzene thinner or other organic solvents including disi...

Page 74: ...s lower than that of regular CDs About MP3 discs MP3 is an abbreviation for Motion Picture Experts Group 1 or MPEG 1 Audio Layer 3 MP3 is simply a compressed data file format By using MP3 format one CD R or CD RW can contain 10 times as much data as one regular CD About JPEG discs A still picture data compression system proposed by the Joint Photographic Expert Group which features small decrease ...

Page 75: ...folder those files are also counted in the total number of 150 The Playback Control function allows you to enjoy menu driven operation and high resolution still images which have a resolution four times greater than moving pictures High resolution still image display You can display high quality images which are four times clearer than moving pictures Menu driven playback A selection menu is displ...

Page 76: ...lumination lamp A pg 20 M Remote sensor A pg 16 N Display window A pg 6 24 O Open close buttons 0 A pg 23 P Disc buttons DISC 1 5 A pg 23 Q Disc lamps TH M65 only A pg 25 Rear panel center unit A System cord connector A pg 10 B Audio input jacks AUDIO IN VCR A pg 14 C Digital input output jacks DIGITAL IN OUT TH M65 A pg 14 Digital input jack DIGITAL IN TH M55 TH M45 A pg 14 D Antenna terminals AN...

Page 77: ...r PCM indicator LPCM A pg 30 Digital signal format indicators A pg 30 Dolby Digital GDIGITAL DTS C J Surround indicator SURROUND A pg 31 K DSP indicator A pg 29 31 L Progressive mode indicator PROGRESSIVE A pg 22 M Resume indicator RESUME A pg 24 N Repeat mode indicators A pg 44 Powered subwoofer A System cord connector A pg 10 B Front speaker terminals FRONT SPEAKERS A pg 12 13 C Center speaker t...

Page 78: ...P A pg 35 O Repeat button REPEAT A pg 44 P A B repeat button A B REPEAT A pg 45 Q Sleep button SLEEP A pg 21 R Dimmer button DIMMER A pg 20 S Surround buttons SURROUND Mode MODE On Off ON OFF A pg 31 T Effect button EFFECT A pg 32 U Test tone button TEST A pg 32 V Subwoofer adjustment buttons S WFR A pg 21 W Center speaker adjustment buttons CENTER A pg 32 X Standby on button F AUDIO A pg 19 Y Sta...

Page 79: ...B to PB PR to PR correctly If your TV supports progressive video input you can enjoy a high quality picture by setting the progressive scan mode to active A pg 22 NOTE If the component video input jacks of your TV are of the BNC type use a plug adapter not supplied to convert the pin plugs to BNC plugs The component video signals can be output only when you select DVD as the source to play A pg 20...

Page 80: ...or FM antenna with standard type 75 C coaxial connector NOTE Disconnect the supplied FM antenna before attaching a 75 C coaxial connector the kind with a round wire going to an outdoor antenna We recommend that you use coaxial cable for the FM antenna as it is well shielded against interference If the antenna cord is covered with the insulation coat twist and pull the insulation coat off and remov...

Page 81: ...ear mottled In this case keep the distance between them to the TV to over 10 cm For safety reasons always ensure that there is sufficient space behind the powered subwoofer When you position the satellite speakers in a relatively high place such as the top of your bookshelf place them on a flat and level surface Speaker grilles are not removable except SP THM55C and SP THM55F Trying to remove them...

Page 82: ...er itself 1 Connect the speaker connectors to the stand connectors Be sure to connect the speaker connectors by matching their sizes 2 Join the stand to the speaker section 3 Fix the stand to the speaker section Be sure to tighten the screws firmly Repeat the procedure from step 1 to assemble the other satellite speakers NOTE Use the speaker after assembly is fully and correctly done It is recomme...

Page 83: ...akers SP THM65F Center speaker SP THM65C Front speakers SP THM65F White Black Black White Red Black Black Red Powered subwoofer Press and hold the clamp Insert the bare end of the speaker cord into the terminal Release the clamp Connect the white cords to the red ª terminals and black cords to the black terminals Route the speaker cord as shown at right Be sure to remove all slack from the cord so...

Page 84: ...a qualified personnel DO NOT install the satellite speakers on the wall by yourself to avoid unexpected damage from their falling off the wall due to incorrect installation or weakness in wall structure Care must be taken in selecting a location for speaker installation on a wall Injury to personnel or damage to equipment may result if the speakers installed interfere with daily activities Center ...

Page 85: ... only This system can send digital audio signals to digital component such as MD recorder or AV receiver NOTE Only digital audio signals can be input when selecting DBS as the source to play A pg 20 When connecting a video component such as a DBS tuner operate this system to listen to the sound RCA pin plug cord not supplied Center unit VCR Composite video cord not supplied A To composite video ou...

Page 86: ...set stations and surround mode adjustment may be erased in a few days in the following cases If you unplug the power cord of the center unit If a power failure occurs The speakers will not produce any sound if the power cord of the powered subwoofer is removed from the AC outlet while the center unit is turned on In this case press F AUDIO on the remote control or F STANDBY ON on the center unit t...

Page 87: ... decreases replace the batteries Use two R6P SUM 3 AA 15F type dry cell batteries CAUTION Follow these precautions to avoid leaking or cracking batteries Use the correct type of batteries Batteries that look similar may differ in voltage Always replace both batteries at the same time Do not expose batteries to heat or flame Operating the system from the remote control Aim the remote control direct...

Page 88: ...in after replacing the batteries of the remote control 7 Operation IMPORTANT Before using the remote control to operate a TV Set the remote control mode selector to TV The following buttons are available F TV Turns TV on and off TV VOL Adjusts the volume TV VIDEO Selects the input mode either TV or VIDEO CHANNEL Changes the channels 1 10 0 10 100 Selects the channel TV RETURN Alternates between th...

Page 89: ...R 6 Try operating your VCR by pressing F VCR DBS When your VCR turns on or off you have entered the correct code If there is more than one cord listed for your brand try each one until you enter the correct one NOTE Manufacturers codes are subject to change without notice If they are changed this remote control cannot operate the equipment Set the codes again after replacing the batteries of the r...

Page 90: ... back NO DISC Appears when no disc is loaded to the selected disc tray 7 To turn the power off On the remote control Press F AUDIO again On the center unit Press F STANDBY ON again The STANDBY lamp lights NOTE The power supply to the subwoofer is linked to the center unit The POWER ON lamp on the subwoofer lights green when the power is turned on A small amount of the power is consumed even when t...

Page 91: ... may be suddenly output from the speakers Connect a pair of headphones to the PHONES jack on the center unit This cancels the surround mode A pg 31 currently selected deactivates the speakers turn the subwoofer s power off and activates the headphone mode HEADPHONE appears on the display window Disconnecting a pair of headphones from the PHONES jack cancels the headphone mode and activates the spe...

Page 92: ...arlier than the one set by the Sleep Timer the Auto Standby function controls shut off time You can adjust the output level within the range from 10 to 10 On the remote control Press S WFR NOTE You can also make adjustments using the choice menu shown on the TV screen A pg 50 The adjustments on a source take effect for the other sources You can adjust each enhancement level from the front speakers...

Page 93: ...ponent jacks supports the progressive video input you can enjoy a high quality picture by setting the progressive scan mode to active Refer also to the instruction manuals supplied with your TV If your TV equipped with component jacks does not support the progressive video input do not change the scan mode to the progressive scan mode 480p and 480i indicate the number of scanning lines and scannin...

Page 94: ... DISC button in step 3 When all tracks in a group have been played the system starts playback of tracks in the next group When loading a JPEG disc The slide show playback starts from the first file in the first group after pressing the DISC button in step 3 When stopping playback of a JPEG disc the JPEG control display A pg 37 appears on the TV screen Slide show Each file still picture is shown on...

Page 95: ...een burn out with the screen saver A TV screen may burn out if a static picture is displayed for a long time To prevent this the system automatically dims the screen if a static picture is displayed for over 5 minutes the screen saver function Pressing any button will cancel the screen saver function If you do not want to use the screen saver function see page 49 7 On screen guide icons During DVD...

Page 96: ...hile the system is turned off Press and hold 7 then press 0 for DISC 1 The system turns on and LOCKED appears on the display window If you try to eject discs LOCKED appears and indicates that trays are locked To unlock trays When the system is turned off press and hold 7 then press 0 for DISC 1 The system turns on and UNLOCKED appears on the display window IMPORTANT Before using the remote control...

Page 97: ...r files backward Press 4 as many times as required NOTE This function may not work for some DVDs When playing a Video CD or SVCD with the PBC function and 4 may be used for the operations of menu driven playback A pg 4 35 When playing back an MP3 JPEG disc you can make operations using the MP3 JPEG control display A pg 36 37 Locating a desired selection using number buttons You can locate the desi...

Page 98: ...ignal strength is tuned in to TUNING ª Increases frequency TUNING Decreases frequency NOTE When a station of sufficient signal strength is tuned in the TUNED indicator lights on the display window When an FM stereo program is received the ST indicator lights on the display window Once a station is assigned to a channel number the station can be quickly tuned in You can preset 30 FM and 15 AM stati...

Page 99: ...ram currently tuned in is noisy you can change the FM reception mode to improve the reception You can store the FM reception mode for each preset station See Preset tuning A pg 27 7 While listening to an FM station On the remote control Press FM MODE The FM reception mode appears on the display window Each time you press the button the FM reception mode alternates between AUTO MUTING and MONO AUTO...

Page 100: ... grouped into two categories multichannel up to 5 1 channel and 2 channel software To enjoy surround sounds while playing Dolby Digital 2 ch software you can use Dolby Pro Logic II 7 DTS Digital Surround Used to reproduce multichannel soundtracks of the software encoded with DTS Digital Surround DTS Digital Surround DTS is another discrete multichannel digital audio format available on CD LD and D...

Page 101: ...in d Lights when the LFE channel signal comes in g Lights when the surround left channel signal comes in i Lights when the surround right channel signal comes in h Lights when the monaural surround channel signal or 2 channel Dolby Surround signal comes in f Always lights The channel with shows that the corresponding speakers are reproducing the channels sound If the channels sound decoded into 5 ...

Page 102: ...ress the button the surround mode changes as follows PL II MOVIE PL II MUSIC LIVE CLUB DANCE CLUB HALL PAVILION ALL CH ST back to the beginning For details on each mode see pages 29 and 30 To turn off the surround mode Press SURROUND ON OFF Each time you press the button the surround mode turns on and off alternately SURR OFF surround off O current selected mode surround on NOTE When selecting PL ...

Page 103: ...R for the surround right speaker 3 Press TEST again to stop the test tone 7 For DAP modes A pg 29 only 4 Press EFFECT to select the effect level 1 to 5 you want Each time you press the button the effect level changes as follows DSP EFFECT 1 DSP EFFECT 2 DSP EFFECT 3 DSP EFFECT 4 DSP EFFECT 5 back to the beginning As the number increases the selected mode will be more effective Normally set the lev...

Page 104: ...tents of the on screen bar during playback DVD Video CD SVCD CD MP3 disc A Shows disc type B Shows current transfer rate Megabits per second C Shows disc number D Shows current title for DVD or group for MP3 number E Shows current chapter number for DVD or track number for other type of discs F Shows time information A pg 34 G Shows playback status appears during playback appears during fast forwa...

Page 105: ...rent chapter track TOTAL Elapsed time of disc T REM Remaining time of disc To turn off the on screen bar Press ON SCREEN NOTE While playing a Video CD SVCD or Audio CD the hour digit indication does not appear You can start playing a title chapter or track you specify You can also play a disc from specified time Locating a desired scene from the DVD menu DVDs generally have their own menus which s...

Page 106: ...n perform any of the following Press TOP MENU or MENU Press 7 twice to stop playback then press 3 play button Locating a desired chapter using the on screen bar When playing back a DVD you can locate the chapter number to be played using the on screen bar 7 During playback 1 Press ON SCREEN twice The on screen bar appears on the TV screen 2 Press Cursor 3 2 to move H to 3 Press ENTER The following...

Page 107: ...e To play back from a point 2 hours 34 minutes 08 seconds elapsed To correct a misentry Press Cursor 2 repeatedly until the wrong number is erased then press number buttons to enter the correct numbers 5 Press ENTER The system starts playback from the specified time To turn off the on screen bar Press ON SCREEN NOTE You can also use the 10 button to enter 0 The 10 button is not used by this functi...

Page 108: ... Press Cursor 3 to select the file list 3 Press Cursor 5 to select the desired file 4 Press 3 play button to start the slide show playback from the selected file To show only the selected file Press ENTER When a still picture is completely shown on the TV screen you can zoom in on areas in the still picture A pg 41 To select the other group Press Cursor 2 to return to the group list then press Cur...

Page 109: ...ck to the beginning The pop up window disappears if no operation is done for about 5 seconds When using the on screen bar 1 Press ON SCREEN twice The on screen bar appears on the TV screen 2 Press Cursor 3 2 to move H to 3 Press ENTER The following pop up window appears under the selected item Example The first view angle is selected out of 3 view angles recorded 4 Press Cursor 5 repeatedly to sel...

Page 110: ...REEN twice The on screen bar appears on the TV screen 2 Press Cursor 3 2 to move H to 3 Press ENTER The following pop up window appears under the selected item Example DVD ENGLISH is selected out of 3 subtitle languages recorded 4 Press Cursor 5 repeatedly to select the desired subtitle language Each time you press the button the subtitle language changes 5 Press ENTER The pop up window disappears...

Page 111: ...annel changes Example for Video CD ST L R back to the beginning ST To listen to normal stereo playback L To listen to L left audio channel only R To listen to R right audio channel only Example for SVCD ST 1 ST 2 L 1 R 1 L 2 R 2 back to the beginning ST 1 ST 2 To listen to normal stereo playback of ST 1 or 2 channel L 1 L 2 To listen to L left 1 or 2 audio channel R 1 R 2 To listen to R right 1 or...

Page 112: ... in reverse slow motion press 1 Each time you press the button the playback speed become faster and on screen guide icon changes as follows Forward Reverse To pause slow motion playback Press 8 To return to normal playback Press 3 play button NOTE Sound cannot be heard during slow motion playback Zooming in 7 During playback or while paused 1 Press ZOOM Each time you press ZOOM scene magnification...

Page 113: ...AL and CINEMA Press VFP to return to normal screen 7 To adjust picture appearance manually 3 Press Cursor 3 2 repeatedly to select USER 1 or USER 2 4 Press Cursor 5 repeatedly to select a parameter you want to adjust Adjust gradually and confirm picture appearance results are as preferred GAMMA 4 to 4 Controls brightness of neutral tints while maintaining brightness of dark and bright portions BRI...

Page 114: ...button to start Program Playback When all of the programmed titles tracks have been played back playback stops and the program menu appears again Note that program setting remains When playing back an Audio CD The program menu remains on the TV screen during Program Playback To check the program contents During playback press 7 Playback stops and the program menu appears To bring up the menu witho...

Page 115: ...C and REPEAT ALL do not appear on the TV screen To stop Repeat Playback Press 7 When a disc except DVD is selected the system stops playback but does not quit the Repeat mode When a DVD is set the system stops playback and quits the Repeat mode To quit the Repeat mode Press REPEAT until the Repeat mode indicator goes off from the display window You can also clear the Repeat mode by changing the cu...

Page 116: ...2 Press A B REPEAT again at the end of the part you want to repeat point B The repeat mode indicator on the display window changes to and A B Repeat Playback starts The selected part of the disc between point A and B is played repeatedly To cancel A B Repeat Playback Press A B REPEAT during A B Repeat Playback When using the on screen bar 1 Press ON SCREEN twice The on screen bar appears on the TV...

Page 117: ... 48 You can select the initial languages for the disc menu audio and subtitles You can also select the language used on the TV screen while operating this system Picture menu PICTURE A pg 49 You can select the desired options concerning a picture or monitor screen Audio menu AUDIO A pg 49 You can adjust sound settings Speaker setting menu SPK SETTING A pg 49 You can make speaker settings according...

Page 118: ...t up Example When PICTURE SOURCE is selected 4 Press ENTER The pop up window listing the selectable options appears on the choice menu 5 Press Cursor 5 repeatedly to select the desired option Example When FILM is selected 6 Press ENTER Your choice is stored To set other items on the same choice menu Repeat steps 3 to 6 To move to another choice menu Press Cursor 3 2 repeatedly to select a choice m...

Page 119: ...Hungarian AZ Azerbaijani HY Armenian BA Bashkir IA Interlingua BE Byelorussian IE Interlingue BG Bulgarian IK Inupiak BH Bihari IN Indonesian BI Bislama IS Icelandic BN Bengali Bangla IW Hebrew BO Tibetan JI Yiddish BR Breton JW Javanese CA Catalan KA Georgian CO Corsican KK Kazakh CS Czech KL Greenlandic CY Welsh KM Cambodian DA Danish KN Kannada DZ Bhutani KO Korean KOR EL Greek KS Kashmiri EO E...

Page 120: ... on a disc you can select which files to play MP3 Select this to play MP3 files JPEG Select this to play JPEG files Audio menu AUDIO 7 L R BALANCE You can adjust the balance between the front left and front right speakers L 21 to L 1 O CENTER O R 1 to R 21 by 1 step CENTER The levels of the front left and right speakers are identical L 21 to L 1 and R 1 to R 21 As the number increases the level fr...

Page 121: ...elect this when the cone speaker unit in the speaker is larger than 12 cm in diameter SMALL Select this when using the supplied speakers Select this when the cone speaker unit in the speaker is smaller than 12 cm in diameter SUB WOOFER USE This item is fixed to USE RETURN Returns to the SPK SETTING menu 7 Level menu LEVEL CENTER SPEAKER SURROUND LEFT SPEAKER SURROUND RIGHT SPEAKER SUB WOOFER Adjus...

Page 122: ...mer controls shut off time 7 PARENTAL LOCK You can restrict playback of a DVD containing violent scenes that is not suitable for your other family members Accesses the PARENTAL LOCK sub menu See following Parental Lock Using this function you can restrict playback of a DVD containing violent scenes or scenes not suitable for your other family members Nobody can play such a disc unless this functio...

Page 123: ...annot set the Parental Lock before you set your password If you go out of the PARENTAL LOCK sub menu before setting your password in step 6 the new country code and parental lock level will not become effective The old country code and parental level will remain in effect When you enter wrong passwords more than three times the H moves to EXIT automatically and Cursor 5 do not work Press ENTER to ...

Page 124: ...an BR Brazil GW Guinea Bissau MW Malawi TN Tunisia BS Bahamas GY Guyana MX Mexico TO Tonga BT Bhutan HK Hong Kong MY Malaysia TP East Timor BV Bouvet Island HM Heard Island and McDonald Islands MZ Mozambique TR Turkey BW Botswana NA Namibia TT Trinidad and Tobago BY Belarus HN Honduras NC New Caledonia TV Tuvalu BZ Belize HR Croatia NE Niger TW Taiwan CA Canada HT Haiti NF Norfolk Island TZ Tanzan...

Page 125: ... or DTS Digital Surround A pg 49 BAL You can adjust the balance between the front left and front right speakers A pg 49 D COMP Dynamic Range Compression You can enjoy low level recorded sound clearly at night even at a low volume level when listening to the sound with Dolby Digital A pg 49 AUDIO POS Audio Position Set the audio position of subwoofer so that the subwoofer level can be automatically...

Page 126: ...use the functions listed following One touch video play Simply by inserting a video cassette without its safety tab into the VCR you can enjoy video playback without manually setting other switches This system automatically turns on and changes the source to VCR The TV automatically turns on and changes the input mode to the appropriate position so that you can view the playback picture When you i...

Page 127: ...y A pg 16 The remote control is not set to operate the DVD player or tuner FM AM For the DVD player press DVD before you perform the operations A pg 23 For the tuner press FM AM before you perform the operations A pg 27 Sunlight is falling directly on the remote sensor Hide the remote sensor from direct sunlight The remote control signals are not set correctly Enter the correct manufacturer s code...

Page 128: ...h the center unit is connected to the TV which does not support the progressive video input such as a conventional TV Change the scan mode to INTERLACE A pg 22 A disc cannot be played The center unit s and disc s Region Code numbers are incompatible Replace the disc A pg 3 Parental Lock is in use Enter password to change the Parental Lock level A pg 51 A disc cannot be played and 0 00 is displayed...

Page 129: ...Add correct file extension jpg jpeg JPG JPEG or any uppercase and lowercase combination such as Jpg to their file names A pg 3 JPEG files are not recorded in a format compliant with ISO 9660 Level 1 or 2 Replace the disc Record JPEG files using a compliant application Not JPEG files but MP3 files are played The MP3 JPEG setting is set to MP3 When both MP3 files and JPEG files are recorded to a dis...

Page 130: ...the same time in a single title the user can select view angles This feature is called the multiangle function Multichannel DVD is specified to have each sound track constitute one sound field Multichannel refers to a structure of sound tracks having three or more channels Multilanguage When a title is created to cope with multiple languages it is generally called a multilanguage title Parental Lo...

Page 131: ...VD Video DVD 3 4 Dynamic range compression D RANGE COMPRESSION 49 54 F Frame by frame playback 41 G Group 4 I Interlace mode INTERLACE 22 J JPEG 3 4 37 L Left Right speaker balance L R BALANCE 49 54 Low frequency effect attenuater LFE ATT 49 54 M Menu language MENU LANGUAGE 48 Monitor type MONITOR TYPE 49 16 9 AUTO 49 16 9 NORMAL 49 4 3 LB 49 4 3 PS 49 MP3 3 4 36 Muting 20 O On screen bar 33 On sc...

Page 132: ...with 10 total harmonic distortion Subwoofer 120 W RMS at 4 C at 100 Hz with 10 total harmonic distortion Speaker section Speaker unit 20 cm Bass reflex Magnetically Shielded Frequency Range 25 Hz to 200 Hz General Power Requirements AC 120 V Ó 60 Hz Power Consumption 150 W at operation 0 W in standby mode Dimensions W M H M D 235 mm M 355 mm M 492 mm Mass 13 0 kg 7 Subwoofer SP PWM55 Amplifier sec...

Page 133: ...llite Speakers Front speakers SP THM45F Speakers 8 0 cm Bass reflex Magnetically Shielded Power Handling Capacity 120 W Impedance 4 C Frequency Range 90 Hz to 20 kHz Dimensions W M H M D 103 mm M 115 mm M 100 mm Mass 0 64 kg Surround speakers SP THM45S Speakers 8 0 cm Bass reflex Magnetically Shielded Power Handling Capacity 80 W Impedance 6 C Frequency Range 90 Hz to 20 kHz Dimensions W M H M D 1...

Page 134: ...EN FR 0403SKMIDEJEM 2003 VICTOR COMPANY OF JAPAN LIMITED TH M65 55 45 C book Page 68 Tuesday April 1 2003 10 11 AM ...

Reviews: