background image

60

English

7

Changing the Parental Lock setting

1

Press CHOICE, then press cursor 

3

 (or 

2

)

to display the OTHERS menu.

2

Press cursor 

 (or 

5

) repeatedly to move 

to “PARENTAL LOCK,” then press ENTER.

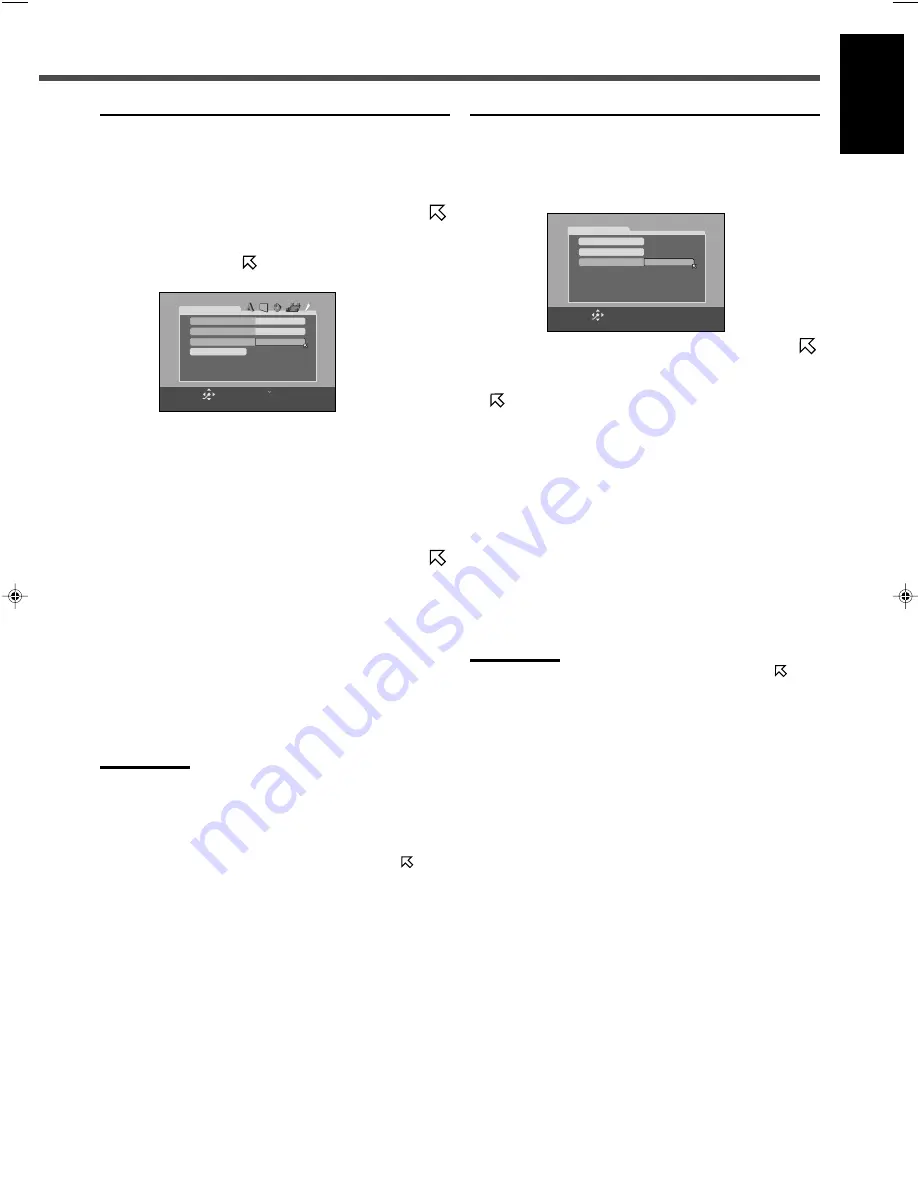
The PARENTAL LOCK submenu appears on the TV.
• You can only move 

 to “PASSWORD” or to “EXIT”

before you enter your password.

3

Press the number buttons (0 – 9) to enter
your password, then press ENTER.

• If you enter a wrong password, “WRONG! RETRY•••

PRESS 0~9KEY” appears on the PARENTAL LOCK
submenu.
You cannot go to next steps before you enter the
correct password.

4

Press cursor 

 (or 

5

) repeatedly to move 

to the item you want to change, then press
ENTER.

5

Press cursor 

 (or 

5

) repeatedly to change

the setting, then press ENTER.

6

Press the number buttons (0 – 9) to enter
your password, then press ENTER.

The new setting is stored.

Notes:

• You cannot change the Parental Lock before you enter your

password.

• If you go out of the PARENTAL LOCK submenu before setting your

password in step 

6

, the new country code and parental level will

not become effective, and the old country code and parental level
remain effective.

• When you enter wrong passwords more than three times, 

 moves

to “EXIT” automatically and cursor 

 (or 

5

) does not work. Press

ENTER to exit from the PARENTAL LOCK submenu, then start
from step


1

 again.

• If you forget your password, enter “8888.”

7

Releasing Parental Lock temporarily

When you set a strict parental level, some discs may not be
played back at all. When you load such a disc and try to play
it, the following display appears on the TV. You can release
Parental Lock temporarily.

1

Press cursor 

 (or 

5

) repeatedly to move 

to “TEMPORARY RELEASE,” then press
ENTER.

 moves to “PASSWORD.”

• If you do not want to release Parental Lock temporarily,

select “NOT RELEASE” by pressing cursor 

 (or 

5

),

then press ENTER. To eject the disc, press
OPEN/CLOSE (or 

0

 on the front panel).

2

Press number buttons (0 – 9) to enter your
password, then press ENTER.

Playback starts.
• If you enter a wrong password, “WRONG! RETRY•••

PRESS 0~9KEY” appears on the PARENTAL LOCK
submenu.
You cannot play the disc before you enter the correct
password.

Note:

• When you enter a wrong password more than three times, 

moves to “NOT RELEASE” automatically and cursor 

 (or 

5

) does

not work. Press OPEN/CLOSE (or 

0

 on the front panel) to remove

the disc.

PARENTAL LOCK

PASSWORD

_ _ _ _

TEMPORARY RELEASE

PASSWORD?  ••• PRESS 0 ~ 9 KEY

ENTER

SELECT

NOT RELEASE

PASSWORD? PRESS 0   9KEY.
TO EXIT, PRESS CHOICE.

ENTER

SELECT

AR

PARENTAL LOCK

COUNTRY CODE

LEVEL

PASSWORD

4

_ _ _ _

EXIT

53-62_RX-DV31SL[UW]f.p65

03.4.22, 18:57

60

Summary of Contents for RX-DV31

Page 1: ...ated either on the rear bottom or side of the cabinet Retain this information for future reference Model No Serial No HOME CINEMA DVD AUDIO VIDEO CONTROL CENTER CENTRO DE CONTROL DE CINE EN CASA CON REPRODUCTOR DE DVD AUDIO VIDEO CENTRO DE CONTROLE DE AUDIO E VIDEO DO DVD HOME CINEMA DVD SUPER VCD VCD CD COMPACT SUPER VIDEO RX DV31 HOME THEATER DVD AUDIO VIDEO RECEIVER ...

Page 2: ...a distancia Precaução Botão STANDBY ON Desconectar o cabo de alimentação para desligar a alimentação por completo Qualquer que seja a posição de ajuste do botão STANDBY ON a alimentação não é completamente cortada A alimentação pode ser controlada remotamente CAUTION To reduce the risk of electrical shocks fire etc 1 Do not remove screws covers or cabinet 2 Do not expose this appliance to rain or ...

Page 3: ...al descubierto como velas encendidas Cuando tenga que descartar las pilas tenga en cuenta los problemas ambientales y observe estrictamente los reglamentos o las leyes locales sobre disposición de las pilas No exponga este aparato a la lluvia humedad goteos o salpicaduras Tampoco ponga recipientes conteniendo líquidos como floreros encima del aparato PRECAUÇÃO Não obstrua as aberturas e orifícios ...

Page 4: ...direct exposure to beam 3 CAUTION Do not open the top cover There are no user serviceable parts inside the Unit leave all serv icing to qualified service personnel 1 PRODUCT LASER CLASE 1 2 PRECAUCIÓN Radiación láser visible e invisible al abrir o al fallar o ignorar los cierres de seguridad Evite la exposición directa a los haces 3 PRECAUCIÓN No abra la tapa superior En el interior de la unidad n...

Page 5: ...rte trasera 15 cm sin obstrucciones en la parte trasera Fondo Sin obstrucciones colóquelo sobre una superficie nivelada Además mantenga la mejor circulación de aire posible como se ilustra Precaução ventilação apropriada Para prevenir o risco de choque elétrico ou incêndio e para proteger o aparelho contra danos Localize o da seguinte maneira Frente Espaço aberto sem obstruções Lados Espaço de 10 ...

Page 6: ...nplug the power cord the preset settings such as preset FM or AM channels and sound adjustments may be erased in a few days Before Installation Checking the Supplied Accessories Check to be sure you have all of the following supplied accessories The number in the parentheses indicates the quantity of the pieces supplied Remote control 1 Batteries 2 AM loop antenna 1 FM antenna 1 Composite video co...

Page 7: ...ating Realistic Sound Fields 30 Activating Surround Mode 32 Selecting Surround Modes 32 Adjusting Surround Mode Using Remote Control 33 DVD Player Operations 34 Disc Information 34 About the On screen Bar 36 Basic Operation through the On screen Bar 37 Changing the Time Indication 37 Locating a Desired Scene from the Disc Menu 38 Selecting a View Angle 39 Selecting the Subtitle Language 39 Selecti...

Page 8: ... LFE Low Frequency Effect LS S RS RESUME indicator 18 DVD AUDIO indicators 17 B S P Browsable Still Picture BONUS Main display Frequency unit indicators kHz for AM station MHz for FM station Volume indication A POSITION audio position indicator 29 9 INPUT ANALOG DIGITAL button 14 15 INPUT ATT attenuator button 15 p SURROUND ON OFF button 32 q SURROUND MODE button 32 REC recording MODE button 16 w ...

Page 9: ...ton 21 7 Menu operation buttons TOP MENU button 38 MENU button 38 ENTER button Cursor 5 3 2 buttons 8 CHOICE button 53 54 9 standby on buttons 12 66 69 AUDIO VCR DBS TV p MUTING button 14 q VOLUME button 12 17 w ON SCREEN button 36 37 39 43 45 48 To open the cover of the remote control push here then slide downward For buttons inside the cover see Remote control inside the cover on page 5 Remote C...

Page 10: ...16 8 VFP button 45 9 Sound adjustment buttons 29 33 65 BASS and buttons TREBLE and buttons TEST button EFFECT button SUBWFR subwoofer and buttons CENTER and buttons SURR L surround left and buttons SURR R surround right and buttons 0 TITLE GROUP button 41 50 51 RETURN button 38 Number buttons For selecting preset channels 21 22 For operating audio video components 66 69 TV RETURN button 66 67 SLEE...

Page 11: ...loop antenna connected FM antenna connection Connect the FM antenna supplied to the FM 75 Ω COAXIAL terminal as temporary measure Extend the supplied FM antenna horizontally If the reception is poor connect an outdoor FM antenna not supplied Before attaching a 75 Ω coaxial cable with a connector IEC or DIN45325 disconnect the supplied FM antenna Note Make sure the antenna conductors do not touch a...

Page 12: ...B WOOFER OUT jack on the rear panel using a cable with RCA pin plugs not supplied Refer also to the manual supplied with your subwoofer Note You can place a subwoofer wherever you like since bass sound is non directional Normally place it in front of you To obtain the best possible sound from this system place all the speakers except the subwoofer at the same distance from the listening position w...

Page 13: ...canning mode correctly see Changing the Scanning Mode on page 16 You can enjoy the progressive scanning mode only when the color system of your TV is NTSC see Setting the color system below Red Blue Red White Notes for digital connection When the unit is shipped from the factory the DIGITAL IN terminals are set for use with the following components DIGITAL 1 coaxial For DBS tuner DIGITAL 2 optical...

Page 14: ...T REC IN PLAY OUT REC IN PLAY LEFT RIGHT AUDIO OUT B A C C Turn off all the components and the unit before connection Illustrations of the input output terminals below are typical examples When you connect other components refer also to their manuals since the terminal names actually printed on their rear vary among the components 7 TV connection DO NOT use a TV through a VCR or a TV with a built ...

Page 15: ...TION SPEAKER IMPEDANCE 8 16 1 AND 2 VOLTAGE SELECTOR DBS IN DBS IN MONITOR OUT MONITOR OUT VCR OUT REC IN PLAY VCR OUT REC IN PLAY TV TAPE CDR DBS VCR AUDIO RIGHT LEFT IN IN OUT REC IN PLAY OUT REC IN PLAY LEFT RIGHT AUDIO OUT IN B B A C C 7 VCR connection Connect using one of the video terminals VCR 7 Cassette deck CD recorder connection Cassette deck CD recorder Red White Red White Red White Red...

Page 16: ...mote control put two supplied batteries first 1 Press and slide the battery cover on the back of the remote control 2 Insert batteries Make sure to match the polarity to and to 3 Replace the cover If the range or effectiveness of the remote control decreases replace the batteries Use two R6P SUM 3 AA 15F type dry cell batteries Note Supplied batteries are for the initial setup Replace for continue...

Page 17: ...tte deck remote control ONLY CDR Select the CD recorder remote control ONLY FM AM Select an FM or AM broadcast Notes When you have connected some digital components using the digital terminals see page 11 register the digital input terminal setting see Digital input DIGITAL IN terminals on page 27 and digital input mode setting correctly see Selecting the Analog or Digital Input Mode on page 14 So...

Page 18: ...ect which to use On the front panel ONLY To use the speakers connected to the FRONT SPEAKERS 1 terminals Press SPEAKERS 1 so that the SPK 1 indicator lights up on the display Make sure that SPK 2 is not lit on the display To use the speakers connected to the FRONT SPEAKERS 2 terminals Press SPEAKERS 2 so that the SPK 2 indicator lights up on the display Make sure that SPK 1 is not lit on the displ...

Page 19: ...eck or change the remaining time until the shut off time Press SLEEP once The remaining time in minutes until the shut off time appears To change the shut off time Press SLEEP repeatedly To cancel the Sleep Timer Press SLEEP repeatedly until SLEEP 0 appears on the display The SLEEP indicator goes off Turning off the unit also cancels the Sleep Timer Note If Auto Standby see page 58 and Sleep Timer...

Page 20: ... back software encoded with DTS The indicator lights up These indicators flash when no signal or a signal without the proper format is played back You can also change the digital input mode by pressing DECODE repeatedly on the remote control Notes When DGTL AUTO cannot recognize the incoming signals no sound signal indicators light up on the display When you turn off the unit or select another sou...

Page 21: ...hen you play back the multi channel sources Recording mode enables you to record the sounds without missing surround elements by down mixing the center and surround channel signals into the front channel signals When multi channel software is played back with Recording mode activated the sounds are down mixed and come out through the front speakers only For DVD AUDIO ONLY When down mixing is prohi...

Page 22: ...rom the remote control To activate and select Surround mode see page 32 About the indication on the display while playing back a disc While you are playing back a disc the playback information appears on the display as follows Ex When playing back a DVD VIDEO 1 Chapter number 2 Elapsed playing time Ex When playing back a DVD AUDIO 1 B S P Browsable Still Picture indicator lights up when you play b...

Page 23: ...ress 3 during DVD VIDEO playback The unit moves the playback position about 10 seconds before the current position then resumes playback To advance or reverse playback rapidly Press or 1 during playback remote control ONLY Each time you press or 1 the unit advances or reverses playback rapidly changing the playback speed as follows For DVD VIDEO x2 x5 x10 x20 x60 For DVD AUDIO VCD SVCD CD x2 x5 x1...

Page 24: ...ocedures Pressing 7 during play Pressing 3 starts Resume play Changing the source Pressing DVD or 3 starts Resume play Turning off the unit including Sleep Timer Pressing 3 starts Resume play Once you start Resume play the RESUME indicator goes off the unit clears the memorized point The unit also clears the memorized point when you operate the following procedures Pressing 7 while the RESUME indi...

Page 25: ...ceived station of the selected band is tuned in 2 Press repeatedly or hold TUNING 9 or until you find the frequency you want Pressing or holding TUNING 9 increases the frequency Pressing or holding TUNING decreases the frequency Notes When you hold and release CONTROL 3 or TUNING 9 on the remote control or CONTROL 2 or TUNING on the remote control the frequency keeps changing until a specific stat...

Page 26: ...ng a new station on a used channel number erases the previously stored one From the remote control After tuning in to the station you want to store 1 Press MEMORY The channel number position flashes on the display for about 5 seconds 2 Press the number buttons to select a preset channel number while the channel number position is flashing For channel number 5 press 5 For channel number 15 press 10...

Page 27: ...utton FM reception mode alternates between AUTO MUTING and MONO AUTO MUTING Normally select this initial setting When a program is broadcasted in stereo you will hear stereo sound when in monaural you will hear monaural sounds This mode is also useful to suppress static noise between stations The AUTO MUTING indicator lights up on the display MONO Select to improve the reception but stereo effect ...

Page 28: ...he speaker size and distance easily for the connected speakers Quick Setup To set the speaker size and distance manually see Speaker information and Speaker distance on page 25 On the front panel ONLY Before you start remember There is a time limit in doing the following steps If the setting is canceled before you finish start from step 1 again 1 Press SETTING The CONTROL buttons now work for basi...

Page 29: ...n set the basic items listed on page 23 7 Operation buttons On the front panel ONLY Button To do SETTING Show the setting items on the display 1 CONTROL 5 Select an item on the display Each time you press the button the items change see Configuration of the items on the display below CONTROL 3 2 Adjust the selected item When no operation is done for about 5 seconds the indications on the display w...

Page 30: ...r than 12 cm NO Select when you have not connected a speaker not selectable for the front speakers Notes LRG large is the initial setting for the front speakers and SML small for the center and surround speakers If you have selected SML small for the front speakers you cannot select LRG large for the center and surround speakers 7 Speaker distance For front distance FRNT D For center distance CNTR...

Page 31: ...r LFE If the bass sound is distorted while playing back software encoded with Dolby Digital or DTS set the LFE level to eliminate distortion This function takes effect only when LFE signals come in Select one of the following settings 0dB Normally select this initial setting 10dB Select when the bass sound is distorted 7 Dynamic range compression D COMP You can compress the dynamic range differenc...

Page 32: ...als without surround signals come in STEREO will be selected If the other signals come in nothing will change OFF Select to deactivate Auto Surround MPEG 2AAC TA NEWS INFO ANALOG S DIGITAL AUTO DSPSLEEP REPEAT RANDOM RDS INPUT ATT SPK 1 2 AUTO MODE A POSITION PROGRESSIVE 1A B DIGITAL LPCM LFE PPCM AUTO SURROUND GROUP TITLE TRACK CHAP RESUME kHz MHz VOL BONUS B S P TUNED STEREO AUTO MUTING PL SUBWF...

Page 33: ... Press CONTROL or 5 repeatedly until BAL Balance with the current setting appears on the display 3 Press CONTROL 3 or 2 to adjust the front speaker balance Each time you press the button the indication changes as follows 4 Repeat steps 2 and 3 to set other items if necessary For details about each item see below 7 Front speaker output balance BAL balance If the sounds you hear from the front right...

Page 34: ...can be stored for each source Analog digital input mode see page 14 Input attenuator mode see page 15 Front speaker output balance see page 28 Tone adjustment see the left column Speaker output level see the left column DAP effect level see the left column Surround mode selection see page 32 Note If the source is FM or AM you can assign a different setting for each band MPEG 2AAC TA NEWS INFO ANAL...

Page 35: ...t channel right front channel center channel left surround channel right surround channel and LFE channel signals Since each channel is completely independent from the other channel signals to avoid interference you can obtain much better sound quality with many stereo and surround effects Subwoofer Left front speaker Right surround speaker Left surround speaker Center speaker Right front speaker ...

Page 36: ...ls are mixed and output through the center speaker All Channel Stereo can be used while reproducing 2 channel stereo software either analog or Linear PCM digital signal When All Channel Stereo is selected the DSP indicator lights up on the display All Channel Stereo reproduction 䡬 Possible Impossible Available Surround modes for each input signal Modes STEREO DOLBY DTS PLII PL II LIVE DANCE HALL P...

Page 37: ...ers connected to the FRONT SPEAKERS 1 and 2 terminals the speakers connected to the FRONT SPEAKERS 2 terminals are deactivated On the front panel From the remote control MPEG 2AAC ANALOG S DIGITAL AUTO DSPSLEEP DIGITAL LPCM LFE PPCM AUTO SURROUND GROUP TITLE TRAC PL SUBWFR L C R LS RS PRO MPEG 2AAC ANALOG S DIGITAL AUTO DSPSLEEP DIGITAL LPCM LFE PPCM AUTO SURROUND GROUP TITLE TRAC PL SUBWFR L C R ...

Page 38: ...CENTER SURR L SURR R SUBWOOFER EFFECT Dolby Digital 䡬 䡬 䡬 䡬 䡬 DTS Digital Surround 䡬 䡬 䡬 䡬 䡬 Dolby Pro Logic II 䡬 䡬 䡬 䡬 䡬 DAP 䡬 䡬 䡬 䡬 䡬 All Channel Stereo 䡬 䡬 䡬 䡬 䡬 Note You cannot adjust the speakers which are not used by the selected Surround mode 䡬 Possible Impossible For using test tone 1 Press TEST The playback sound stops during play TEST L starts flashing on the display and a test tone come...

Page 39: ...ure of the following Check the connection with the TV Turn on the TV and select the correct input mode on the TV to view the pictures or on screen indications on the TV screen For disc playback you can change the initial setting to your preference See pages 53 to 61 If appears on the TV screen when you press a button the disc cannot accept an operation you have tried to do or data required for tha...

Page 40: ...may have its own title number and it may be further divided into some chapters In a DVD VIDEO Karaoke each song may have its own title number but it may not be further divided into chapters DVD AUDIO consists of groups and each group may be divided into some tracks Some DVD AUDIOs also contain a bonus group that can be played back by entering the key number a kind of password Usually the contents ...

Page 41: ...8 5Mbps DVD VIDEO TITLE 14 TOTAL1 25 58 CHAP 23 8 5Mbps DVD VIDEO TITLE 14 TOTAL1 25 58 CHAP 23 8 5Mbps TITLE 14 TOTAL1 25 58 CHAP 23 OFF 1 3 1 3 1 3 TIME CHAP DVD VIDEO 2 3 4 1 This section explains advanced operations of the built in DVD player by using the remote control For MP3 playback see pages 49 and 50 and for JPEG playback see pages 51 and 52 See also Basic DVD Player Operations on pages ...

Page 42: ...gh the On screen Bar Ex When selecting the repeat mode for DVD VIDEO During playback or while stopped 1 Press ON SCREEN twice The on screen bar with pull down menu appears on the TV 2 Press cursor 3 or 2 repeatedly to move to OFF on the pull down menu 3 Press ENTER The pop up window appears under the pull down menu 4 Press cursor or 5 to select the desired option in the pop up window Each time you...

Page 43: ... disc PBC appears on the display You can locate the specific track by using the menu see also page 35 When the menu appears on the TV during playback with PBC Press number buttons 1 10 10 to select the number of the desired item The unit starts playback from the selected item Ex To select 3 press 3 To select 11 press 10 then 1 Ex To return to the menu Press RETURN When NEXT or PREVIOUS is shown on...

Page 44: ...playback 1 Press ANGLE The following pop up window appears on the TV Ex The first view angle is selected out of 3 view angles recorded 2 Press ANGLE repeatedly to select the desired view angle Each time you press the button the angle of the scene changes Ex 1 3 2 3 3 3 back to the beginning The pop up window goes off if no operation is done for about 5 seconds 8 5Mbps DVD VIDEO TITLE 14 TOTAL1 25 ...

Page 45: ...The following pop up window appears on the TV Ex ENGLISH is selected from the 3 audio languages recorded ST ST ST ST 2 Press AUDIO repeatedly to select the desired audio language Each time you press the button the audio language changes The pop up window goes off if no operation is done for about 5 seconds Using the on screen bar 1 Press ON SCREEN repeatedly until the on screen bar with pull down ...

Page 46: ...the beginning ST To listen to normal stereo playback L To listen to the L left audio channel R To listen to the R right audio channel For SVCD Ex ST 1 ST 2 L 1 R 1 L 2 R 2 back to the beginning ST 1 ST 2 To listen to normal stereo playback of ST 1 or ST 2 channel L 1 L 2 To listen to the L left 1 or 2 audio channel R 1 R 2 To listen to the R right 1 or 2 audio channel The pop up window goes off if...

Page 47: ...AGE 1 3 7 Locating a desired position You can start playing at your desired position by specifying the elapsed playing time from the beginning of the current title up to 9 59 59 for DVD VIDEO DVD AUDIO or from the beginning of the disc up to 99 59 for VCD SVCD CD For DVD VIDEO During playback For VCD SVCD While stopped or during playback without PBC For DVD AUDIO CD While stopped or during playbac...

Page 48: ... 1 2 Reverse for DVD VIDEO only 1 32 1 16 1 8 1 4 1 2 DVD Player Operations To pause slow motion playback still picture playback Press 8 To return to normal playback Press 3 Note You cannot listen to the sound during slow motion playback 7 Selecting browsable still pictures recorded on DVD AUDIO Most DVD AUDIOs include browsable still pictures B S P which usually appear in turn automatically durin...

Page 49: ...1 Select a bonus group For how to select the group see Locating a desired title group on page 41 The key number entry indication appears as follows On the TV On the display 2 Enter the key number using the number buttons 0 9 then press ENTER When you enter the correct key number the unit starts playing back the bonus group and the BONUS indicator goes off If you enter the wrong number enter the nu...

Page 50: ...ess VFP then press cursor 3 or 2 repeatedly to select USER1 or USER2 2 Press cursor or 5 repeatedly to select a parameter you want to adjust Adjust the parameters so that the picture you are viewing appears as you prefer GAMMA Adjust if the neutral color is bright or dark The brightness of dark and bright portions is maintained Available range 4 darkest to 4 brightest BRIGHTNESS Adjust if the pict...

Page 51: ...on the on screen bar 3 Press 7 You can also clear the program by ejecting the disc or turning off the unit To turn off the on screen bar Press ON SCREEN Note When all the programmed tracks have been played the program playback stops 4 Press cursor or 5 repeatedly to change the setting then press ENTER Your adjustment is stored and the current VFP parameter list appears again 5 Repeat steps 2 to 4 ...

Page 52: ...but cannot skip back to the tracks that have been played During random playback pressing ENTER with RND selected in the on screen bar cancels random playback and continues playback in the normal order Repeat Playback You can repeat playback of the current title or chapter for DVD VIDEO group or track for DVD AUDIO or track for VCD SVCD CD You can also repeat playback of a desired portion Before us...

Page 53: ...in step 3 then press ENTER You can directly change the repeat mode except A B by pressing REPEAT on the remote control Repeating a desired portion You can repeat playback of a desired portion by specifying the beginning point A and the ending point B During playback 1 Press ON SCREEN repeatedly until the on screen bar with pull down menu appears on the TV 2 Press cursor 3 or 2 repeatedly to move t...

Page 54: ... TV If appears on the TV when you press a button the disc cannot accept an operation you have tried to do 7 Notes for MP3 discs MP3 discs either CD R or CD RW require a longer readout time than normal discs It depends on the complexity of the folder file configuration When making an MP3 disc select ISO 9660 Level 1 or Level 2 as the disc format This unit supports multi session discs up to 5 sessio...

Page 55: ...ons through the MP3 CONTROL Screen You can search for and play the desired groups and tracks through the MP3 CONTROL screen shown on TV MP3 CONTROL screen To start playback by specifying a group number 1 Press TITLE GROUP The number buttons now work for group selection for about 5 seconds The current group number on the display changes to _ _ 2 Press the number buttons 1 10 10 to enter the group n...

Page 56: ...rmat An old type and rarely used now Some JPEG discs may not be played back because of their disc characteristics or recording conditions JPEG Disc Playback Starting slide show playback Load a JPEG disc then press 3 Slide show playback starts Each file still picture is shown on the TV for about 3 seconds then changed to the next file one after another When all files in a group have been played bac...

Page 57: ... a long time to select another file Some files on a JPEG disc may be distorted during playback Operations through the JPEG CONTROL Screen You can search for and show the desired groups and files through the JPEG CONTROL screen JPEG CONTROL screen Current group number Total group number Current group Current file Current file number Total number of files in the current group Total number of files o...

Page 58: ...e menu has the following menus LANGUAGE menu see page 55 You can select the initial language for the disc menu audio and subtitle You can also select the language used on the TV screen while operating this unit PICTURE menu see page 55 You can select the desired options concerning a picture or monitor screen AUDIO menu see page 56 You can adjust the sound settings of this unit through this menu SP...

Page 59: ...the selected item appear on the TV You can set the items using cursor 5 and ENTER as explained in steps 5 and 6 above ENGLISH ENGLISH ENGLISH OFF LANGUAGE MENU LANGUAGE ON SCREEN LANGUAGE AUDIO LANGUAGE SUBTITLE USE TO SELECT USE ENTER TO CONFIRM TO EXIT PRESS CHOICE ENTER SELECT 4 3 LB PICTURE MONITOR TYPE PICTURE SOURCE SCREEN SAVER AUTO ON USE TO SELECT USE ENTER TO CONFIRM TO EXIT PRESS CHOICE...

Page 60: ... playing back a picture whose aspect ratio is 4 3 16 9 AUTO 16 9 MULTI AUTO Wide television conversion Select when the aspect ratio of your TV is 16 9 wide TV 4 3 LB 4 3 MULTI LB Letter Box conversion Select when the aspect ratio of your TV is 4 3 conventional TV While viewing a wide screen picture the black bars appear on the top and the bottom of the screen 4 3 PS 4 3 MULTI PS Pan Scan conversio...

Page 61: ... CA Catalan CO Corsican CS Czech CY Welsh DA Danish DZ Bhutani EL Greek EO Esperanto ET Estonian EU Basque OM Afan Oromo OR Oriya PA Panjabi PL Polish PS Pashto Pushto PT Portuguese QU Quechua RM Rhaeto Romance RN Kirundi RO Rumanian RU Russian RW Kinyarwanda SA Sanskrit SD Sindhi SG Sangho SH Serbo Croatian SI Singhalese SK Slovak SL Slovenian SM Samoan SN Shona SO Somali SQ Albanian SR Serbian S...

Page 62: ...this to return to SPK SETTING menu Notes When NONE is selected for the center speaker surround speakers and or subwoofer on the SIZE menu appears instead of the current setting In this case you cannot adjust the output level of those speakers You can adjust the output level for center speaker and or surround speakers only when one of the proper Surround modes is activated see page 32 When NONE is ...

Page 63: ... screen guide icons appear on the TV at the beginning of the playback with this function turned on When recording the picture on a VCR select OFF to avoid recording the indications above on your video tape The choice menu and on screen bar will be recorded even though this function is set to OFF Select one of the following settings ON Select to activate this function OFF Select to deactivate it Su...

Page 64: ... Operations 4 Press cursor or 5 repeatedly to select the country code then press ENTER moves to SET LEVEL 5 Press ENTER The pop up window for setting level appears 6 Press cursor or 5 repeatedly to select the level of restriction then press ENTER moves to PASSWORD The smaller the value of level is the more restrictive the Parental Lock level is Select NONE to cancel this function 7 Press the numbe...

Page 65: ...moves to EXIT automatically and cursor or 5 does not work Press ENTER to exit from the PARENTAL LOCK submenu then start from step 1 again If you forget your password enter 8888 7 Releasing Parental Lock temporarily When you set a strict parental level some discs may not be played back at all When you load such a disc and try to play it the following display appears on the TV You can release Parent...

Page 66: ...Nevis KP Korea Democratic People s Republic of KR Korea Republic of KW Kuwait KY Cayman Islands KZ Kazakhstan LA Lao People s Democratic Republic LB Lebanon LC Saint Lucia LI Liechtenstein LK Sri Lanka LR Liberia LS Lesotho LT Lithuania LU Luxembourg LV Latvia LY Libyan Arab Jamahiriya MA Morocco MC Monaco MD Moldova Republic of MG Madagascar MH Marshall Islands ML Mali MM Myanmar MN Mongolia MO M...

Page 67: ... in a single title the user can select view angles This feature is called the multi angle function Multi channel DVD VIDEO has been designed to have each soundtrack constitute one sound field Multi channel refers to a structure of sound tracks having three or more channels Multi language When a title is created to cope with multiple languages it is generally called a multilanguage title Packed PCM...

Page 68: ...y to this unit connect it directly to the unit using cables with monaural mini plugs CONNECTIONS 2 Video Cable Connection This unit is equipped with three types of the video terminals composite video S video and component video and the signals coming into this unit through one type of video terminals can output only through the terminal of the same type So you need to connect the VCR and TV to thi...

Page 69: ...ture When you insert a video cassette with its safety tab press the play 3 button on the VCR or on the remote control You can get the same result One touch DVD play Simply by starting playback on the built in DVD player you can enjoy the playback without setting other switches manually The TV automatically turns on and changes the input mode to the appropriate position so that you can view the pla...

Page 70: ... to the manuals supplied with your components 7 Sound control section Amplifier You can perform the following operations BASS or Adjusts the bass sound TREBLE or Adjusts the treble sound AUDIO POSITION Adjusts the subwoofer audio position SURROUND ON OFF Turns on or off the Surround modes Dolby Digital DTS Digital Surround and Dolby Pro Logic II SURROUND MODE Selects the Surround modes TEST Turns ...

Page 71: ...nents using this remote control You need to connect JVC s video components through the AV COMPU LINK jacks see page 63 in addition to the audio video connections see pages 9 to 11 Some JVC s VCRs can accept two types of the control signals remote codes A and B Before using this remote control make sure that the remote control code of the connected VCR is set to code A To operate the video componen...

Page 72: ...ate other manufacturers components using this remote control Aim the remote control directly at the remote sensor on each equipment To operate a source with the remote control the source must be selected using source selecting buttons on the remote control Refer also to the manuals supplied with your equipment To change the transmittable signals for operating other manufacturers TV 1 Press and hol...

Page 73: ...umber buttons 1 9 0 See the table on the right to find the code 4 Release DBS You can always perform the following operation DBS Turns on or off the DBS tuner After pressing DBS you can perform the following operations on the DBS tuner CHANNEL Changes the channels 1 9 0 100 Selects the channels For channel number 5 press 5 For channel number 10 press 1 then 0 For channel number 23 press 2 then 3 F...

Page 74: ... a tape 7 Stops playing 8 Pauses playing To release press 3 Note Refer also to the manual supplied for your VCR 5 Try to operate your VCR by pressing VCR When your VCR turns on or off you have entered the correct code If there is more than one code listed for your brand of VCR try each one until the correct one is entered Manufactures codes for VCR Manufacturer Codes JVC 01 04 Aiwa 05 Akai 06 08 B...

Page 75: ...th thinner or benzine DO NOT apply any volatile substances such as insecticides to it DO NOT allow any rubber or plastic to remain in contact with it for a long time General Notes In general you will have the best performance by keeping your discs and mechanism clean Store discs in their cases and keep them in cabinets or on shelves Handling Discs Remove the disc from its case by holding it at the...

Page 76: ...ntact your dealer Press STANDBY ON on the front panel to turn off the unit After unplugging the power cord consult your dealer Press a source selecting button first then press the buttons you want to use Come closer to the unit Operate the remote control within 7 m from the unit Remove the obstruction Aim the remote control at the remote sensor on each component you want to operate Insert the batt...

Page 77: ...play The picture does not fit the TV screen properly One touch DVD playback does not work though you have connected AV COMPU LINK cord correctly No subtitle appears on the TV screen though you have selected your initial subtitle language Audio language is different from the one you have selected as your initial audio language SOLUTION Connect the cord correctly see pages 9 and 10 Select the correc...

Page 78: ...t the MP3 JPEG setting to MP3 see page 56 POSSIBLE CAUSE No MP3 files are recorded on the disc The disc is unplayable such as CD ROM MP3 files do not have the correct file extension mp3 Mp3 mP3 or MP3 in their file names MP3 files are made at bit rate under 64 kbps MP3 files are not recorded in a format compliant with ISO 9660 Level 1 or 2 The MP3 JPEG setting is set to JPEG PROBLEM A disc cannot ...

Page 79: ...VCR 87 dB 67 dB Frequency Response 8 Ω TV TAPE CDR DBS VCR 20 Hz to 20 kHz 1 dB Tone Control Bass 100 Hz 10 dB 2 dB Treble 10 kHz 10 dB 2 dB Video Measured on AC 110 V 120 V 220 V 240 V Video Input Sensitivity Impedance 1 kHz Composite video DBS IN VCR IN 1 V p p 75 Ω S video DBS IN VCR IN Y luminance 1 V p p 75Ω C chrominance 0 286 V p p 75 Ω Video Output Level Impedance 1 kHz Composite video VCR...

Page 80: ...responds with the position of the voltage selector switch provided on the outside of this equipment and if different reset the voltage selector switch to prevent from a damage or risk of fire electric shock PRECAUCIÓN para la línea de la red CA ANTES DE ENCHUFAR EL EQUIPO compruebe si la tensión de la línea de la red CA corresponde con la posición del selector de tensión situado en la parte exteri...

Reviews: