


51
Entering the Disc Information
For the CD Player with the disc memory function:
You can use the disc memory function through this receiver.
The disc information (its performer, disc title, and music genre) of
normal audio CDs will be stored into the memory built in the CD
player.
For the disc memory function, refer to the manual supplied with your
CD player.
• The performer, disc title, and music genre information are usually
recorded on a CD Text. However, if a CD Text has no genre
information recorded on the disc itself, you can input its music
genre by yourself.
Note:
You can enter the TITLE INPUT screens for a CD Text and input its
titles. However, you cannot store the titles you have input for a CD
Text.
Example: Entering the following information for Disc 1
Performer: “MICHAEL”
Disc title: “MY FAVORITE”
1. Press TEXT DISPLAY while “CD” is selected as
the source.
The Disc Information screen appears on the TV.
2. Press
%
/
fi
to move
to “TITLE INPUT,”
then press SET.
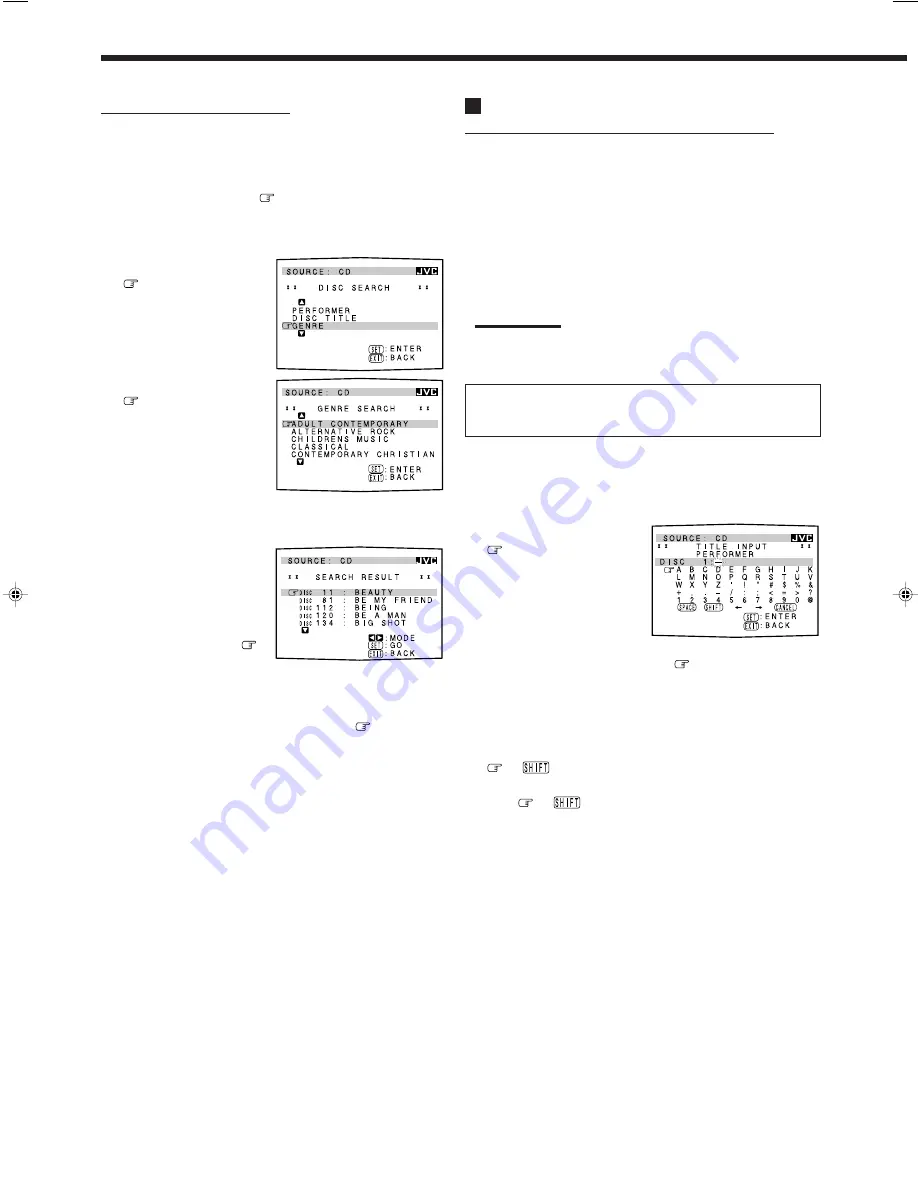
The TITLE INPUT:
PERFORMER screen appears.
3. Press
%
/
fi
/
@
/
#
to move
in front of a
character you want, then press SET to enter the
character.
• If the current CD is a CD Text, go to step 5 without entering the
performer.
To use the lower-case letters, press
%
/
fi
/
@
/
#
to move
to
, then press SET.
To use the upper-case letters again, press
%
/
fi
/
@
/
#
to
move
to
, then press SET.
Search for a disc by its genre:
1. Press TEXT DISPLAY while “CD” is selected as
the source.
The Disc Information screen appears on the TV.
2. Press
%
/
fi
to move
to “SEARCH,” then
press SET.
The DISC SEARCH screen appears.
3. Press
%
/
fi
to move
to “GENRE,” then
press SET.
The GENRE SEARCH
screen appears.
4. Press
%
/
fi
to move
to the genre you
want to search for,
then press SET.
To show the unseen genres,
press
%
/
fi
until they appear.
Disc search starts, then the
SEARCH RESULT screen,
showing the disc titles, appears.
5. On the SEARCH
RESULT screen, you
can do the following:
• Changing the indication
of the disc information:
Press
%
/
fi
to move
to
a searched for disc, then
press
@
/
#
. Each time you press
@
/
#
, the disc
information alternates between its disc title and its performer.
• Starting a disc play and going to the Disc Information
screen (see page 49): Press
%
/
fi
to move
to a searched
for disc, then press SET.
• Showing unseen disc information (if more than 5 discs are
listed as a result of the search): Press
%
/
fi
until they
appear.
• Going back to the GENRE SEARCH screen: Press EXIT.
EN47-52_RX-DP9VBK[J]_f
01.6.14, 10:04 AM
51


