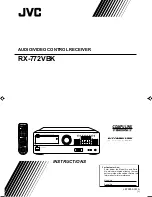
background image

Page 1

Table of Contents

Getting Started ........................................................................................................................... 2

Before Installation .................................................................................................................... 2
Checking the Supplied Accessories ......................................................................................... 2
Switches, Buttons and Controls ............................................................................................... 3
Connecting the FM and AM Antennas .................................................................................... 5
Connecting the Speakers .......................................................................................................... 6
Connecting Audio/Video Components .................................................................................... 8
Connecting the Power Cord ................................................................................................... 10
Putting Batteries in the Remote Control ................................................................................ 10

Basic Operations ...................................................................................................................... 11

Turning the Power On and Off .............................................................................................. 11
Selecting the Source to Play ................................................................................................... 11
Adjusting the Volume ............................................................................................................ 12
Selecting the Front Speakers .................................................................................................. 12
Muting the Sound ................................................................................................................... 13
Recording a Source ................................................................................................................ 13

Basic Settings ........................................................................................................................... 14

Adjusting the Front Speaker Output Balance ........................................................................ 14
Listening at Low Volume (Loudness) ................................................................................... 14
Using the Sleep Timer ............................................................................................................ 15
Selecting the Center Speaker Size ......................................................................................... 16
Using Visual Confirmation .................................................................................................... 17

One Touch Operation .............................................................................................................. 18

About the One Touch Operation ............................................................................................ 18
Using the One Touch Operation ............................................................................................ 18

Receiving Radio Broadcasts ................................................................................................... 19

Tuning in Stations Manually .................................................................................................. 19
Using Preset Tuning ............................................................................................................... 19
Selecting the FM Reception Mode ......................................................................................... 20
Assigning Names to Preset Stations ....................................................................................... 21

Using the SEA Modes .............................................................................................................. 22

Selecting Your Favorite SEA Mode ...................................................................................... 22
Creating Your Own SEA Mode ............................................................................................. 23

Using the Surround Processor ................................................................................................ 24

Using JVC’s Hall Surround ................................................................................................... 24
Speaker arrangements for Dolby Surround ............................................................................ 26
Preparing for Dolby Surround ................................................................................................ 27
Using Dolby Surround ........................................................................................................... 30

Using the On-Screen Display to Control the Receiver ......................................................... 31

COMPU LINK Remote Control System ............................................................................... 35

AV COMPU LINK Remote Control System ........................................................................ 36

Using the Remote Control for Operating JVC’s Audio/Video Components ..................... 38

Operating Other Manufactures’ VCR, TV, CATV Converter, and Satellite Tuners ...... 40

Troubleshooting ....................................................................................................................... 46

Specifications ............................................................................................................................ 47

MENU

This mark indicates that you can also use the menu function to do the
same operations.
Actual operations using the menu function are explained on the pages
indicated next to the marks.

RX-772VBK[J]_0052-001A.En.01-23

97.4.8, 3:23 PM

1

Summary of Contents for RX-772VBK

Page 1: ...IO POWER SLEEP VIDEO TAPE VCR TVSOUND TEST REAR SEA MODE SURR MODE FM AM PHONO CD 5 4 6 2 1 3 8 7 P 9 0 10 AUDIO TV VCR MENU EXIT MENU TAPE VCR CONTROL VOLUME CHANNEL MU TE FF PLAY STOP REC TV VIDEO TV VOLUME PAUSE 4 REW TV CATV CNTR DELAY CATV SAT FM MODE MUTE 100 RETURN 10 ONE TOUCH OPERATION RX 772V AUDIO VIDEO CONTROL RECEIVER STANDBY POWER MASTER VOLUME SEA MODE PHONES SPEAKERS MEMORY TUNER S...

Page 2: ...within the product s enclosure that may be of sufficient magnitude to constitute a risk of electric shock to persons The exclamation point within an equilateral triangle is intended to alert the user to the presence of important operating and maintenance servicing instructions in the literature accompanying the appliance CAUTION WARNING TO REDUCE THE RISK OF FIRE OR ELECTRIC SHOCK DO NOT EXPOSE TH...

Page 3: ...s until you change them For actual setting procedures see pages 24 to 30 Surround Mode Hall Surround Dolby Pro Logic Dolby 3ch Logic Center Mode WIDE WIDE NORMAL NORMAL PHANTOM OFF OFF Delay Time DELAY 1 DELAY 1 DELAY 2 DELAY 2 DELAY 3 DELAY 3 DELAY 4 DELAY 4 Center Speaker Level Rear Speaker Level Center Tone SOFT2 SOFT2 SOFT1 SOFT1 FLAT FLAT SHARP1 SHARP1 SHARP2 SHARP2 ...

Page 4: ...ng the One Touch Operation 18 Receiving Radio Broadcasts 19 Tuning in Stations Manually 19 Using Preset Tuning 19 Selecting the FM Reception Mode 20 Assigning Names to Preset Stations 21 Using the SEA Modes 22 Selecting Your Favorite SEA Mode 22 Creating Your Own SEA Mode 23 Using the Surround Processor 24 Using JVC s Hall Surround 24 Speaker arrangements for Dolby Surround 26 Preparing for Dolby ...

Page 5: ...and 95 F 5 and 35 C Make sure there is good ventilation around the receiver Poor ventilation could cause overheating and damage the receiver Handling the receiver Do not insert any metal object into the receiver Do not disassemble the receiver or remove screws covers or cabinet Do not expose the receiver to rain or moisture Checking the Supplied Accessories Check to be sure you have all of the fol...

Page 6: ...i fi fi fi fi buttons w on the front panel What these buttons actually do depends on which function you are trying to adjust Before using these buttons select the function by pressing one of the function selecting buttons 5 6 7 p q r u and being sure its lamp is lit However pressingMENU contheremotecontrol overrides the selected function and causes Control fi fi fi fi fi button to act like fi fi f...

Page 7: ... remote control Check to see if its remote control mode selector f is set to the correct position To operate an audio system TV and VCR set it to the AUDIO TV VCR position To operate a CATV converter and satellite tuner set it to the CATV SAT position About fi fi fi fi fi buttons v v v v v of the ON SCREEN CONTROL section on the remote control If you press these buttons the menu function starts op...

Page 8: ...s poor connect the outside antenna Beforeattachinga75 ohmcoaxialcable thekind with a round wire going to an outside antenna disconnect the supplied FM antenna Extend the FM wire antenna horizontally AM Antenna Connections Note Make sure the antenna conductors do not touch any other terminals connecting cords and power cord This could cause poor reception Snap the tabs on the loop into the slots of...

Page 9: ...aker terminals Connecting the front speakers Cut twist and remove the insulation at the end of each speaker signal cable first and then connect the front speakers to the FRONT SPEAKERS terminals by using the cables You can connect two pairs of front speakers one pair to the FRONT SPEAKERS 1 terminals and another pair to the FRONT SPEAKERS 2 terminals Right Speaker Left Speaker 1 Turn the knob coun...

Page 10: ... set the center speaker mode when setting the surround mode If you do not use a center speaker register that information See page 16 When you connect rear speakers make sure that both left and right speakers are connected otherwise no sound will come out of the rear speakers Connecting the subwoofer speaker You can enhance the bass by connecting a subwoofer Connecttheinputjackofapoweredsubwooferto...

Page 11: ...yer If your audio components have a COMPU LINK 3 terminal The COMPU LINK remote control system allows you to control other JVC audio components from the receiver or vice versa Connect your audio components and the receiver with the cable monaural mini plug supplied with those components as well as the connection above For detailed information about the connection and the COMPU LINK 3 remote contro...

Page 12: ...he AV COMPU LINK remote control system see page 36 Notes The AV COMPU LINK remote control system cannot control the video components connected to the VIDEO jacks on the receiver but can control only the VCR connected to the VCR jacks Some VCRs use the AV COMPU LINK jacks for the SWAP editing However you cannot use both the AV COMPU LINK remote control and the SWAP editing at the same time For the ...

Page 13: ...ot pull on the power cord to unplug the cord When unplugging the cord always grasp the plug so as not to damage the cord Putting Batteries in the Remote Control Before using the remote control put two supplied batteries first When using the remote control aim the remote control directly at the remote sensor on the receiver 1 On the back of the remote control remove the cover as illustrated 2 Inser...

Page 14: ...rol To turn on the power press AUDIO POWER The STANDBY lamp goes off The name of the current source appears on the display To turn off the power press AUDIO POWER again The STANDBY lamp lights up Selecting the Source to Play You need to select the source before you start playing any source On the front panel 1 Press SOURCE so that the Control fi fi fi fi fi buttons work for selecting the source 2 ...

Page 15: ...me level to the minimum before starting any source If the volume level is left turned up the sudden blast of sound energy can permanently damage your hearing and or ruin your speakers Selecting the Front Speakers On the front panel only When you have connected two pairs of the front speakers you can select which to use Pressing SPEAKERS 1 or SPEAKERS 2 to set it in the _ON position activates the r...

Page 16: ...akers and headphones connected press MUTE so that MUTE appears on the display and the volume turns off To cancel the mute press MUTE again so that OFF appears on the display Turning MASTER VOLUME or pressing VOLUME also restores the sound at the previous volume level Recording a Source You can record any source playing through the receiver to the cassette deck connected to the TAPE jacks and the V...

Page 17: ...l decreases the right channel output Pressing Control decreases the left channel output Listening at Low Volume Loudness Human ears are not sensitive to bass at low volume To compensate for this the loudness function automatically boosts the bass level as you lower the volume Note The loudness function affects the front speaker sounds only On the front panel only 1 Press SETTING so that the Contro...

Page 18: ...the display 3 Press Control once The remaining time until the shut off time appears in minutes To change the shut off time press Control repeatedly To cancel the Sleep Timer Press Control repeatedly in step 3 above until 0 appears on the display The SLEEP indicator goes off Turning off the power also cancels the Sleep Timer From the remote control Press SLEEP repeatedly The SLEEP indicator lights ...

Page 19: ... the button lights up 4 Press Control fi fi fi fi fi until CNTR SPK Center Speaker appears on the display 5 Press Control to select the appropriate item about your center speaker Each time you press the button the display changes to show the following LARGE Select this mode when the size of the center speaker is the same as that of the front speakers SMALL Select this mode when the size of the cen...

Page 20: ...ing Visual Confirmation The lamp next to the button lights up 2 Press Control fi fi fi fi fi until VCONFIRM appears on the display 3 Press Control to set Visual Confirmation to ON or OFF Select ON to activate Visual Confirmation The VISUAL CONFIRMATION indicator lights up on the display Select OFF to cancel it The indicator goes off EXAMPLES When changing the source When adjusting the front speake...

Page 21: ...y when the preset channels from 1 20 are tuned in You can assign a different setting for each preset channel Using the One Touch Operation To store the sound settings 1 Press ONE TOUCH OPERATION The ONE TOUCH OPERATION lamp lights up then the previously memorized settings are recalled and appear on the display in turn 2 Adjust the sound using the functions listed above The newly adjusted settings ...

Page 22: ...ion can be quickly tuned You can preset up to 40 stations at random To store the preset stations On the front panel only 1 Tune in the station you want to preset see above If you want to store the FM reception mode for this station select the FM reception mode you want See page 20 for details 2 Press MEMORY next to the TUNER button CH appears and the channel number position starts flashing on the ...

Page 23: ... reception mode while listening an FM broadcast You can also store the FM reception mode for each preset station See page 19 On the front panel 1 Press TUNER so that the Control fi fi fi fi fi buttons work for tuner settings The lamp next to the button lights up 2 Press Control fi fi fi fi fi until FM MODE appears on the display 3 Press Control to select either AUTO or MONO Normally select AUTO Wh...

Page 24: ...i fi fi fi fi to select a character You can use the characters listed below 5 When a character you want appears press Control or The next or previous character position starts flashing 6 Repeat steps 4 and 5 to enter up to five characters 7 Press MEMORY next to the TUNER button again while the last selected character is flashing after you have assigned a name To erase the input characters Insert b...

Page 25: ...requency range so that instruments such the violin and banjo are emphasized JAZZ Gives a feeling of a live atmosphere Good for acoustic music USERMODE Your original SEA adjustment see page 23 SEA OFF No SEA mode is applied see below To cancel the SEA mode press Control fi until SEA OFF appears in step 2 above The SEA indicator goes off from the display From the remote control 1 Press the SOUND CON...

Page 26: ...for the SEA adjustment The lamp next to the button lights up 2 Adjust the SEA frequency and its level Press Control to select the frequency range to adjust Press Control fi to adjust the level 3 Press MEMORY next to the SEA ADJUST button Your adjustment is stored into USERMODE To recall your own SEA adjustment See page 22 To erase a stored adjustment Storing a new adjustment into USERMODE erases t...

Page 27: ... Logic and Dolby 3ch Logic Dolby Pro Logic Select this mode when the optional rear speakers are connected as well as a center speaker Dolby 3ch Logic Select this mode when a center speaker is connected without rear speakers Notes The surround processor has no effect on monaural sources The surround processor cannot be used for recording Using JVC s Hall Surround You need to connect one set of rear...

Page 28: ... from you to your rear speakers is much less than that to the front speakers To cancel the Hall surround press Control fi until SURR OFF appears in step 2 The HALL and SURROUND indicators go off From the remote control 1 Press SOUND CONTROL The remote control is activated for adjusting the sound 2 Press SURR MODE until HALL appears on the display The HALL and SURROUND indicators also light up on t...

Page 29: ...er speaker CASE 3 When you have added a center speaker without rear speakers In this case 1 Select PROLOGIC 2 Select PHANTOM for center mode See pages 27 to 29 for more details In this case 1 Select PROLOGIC 2 Select NORMAL or WIDE forcentermode See pages 27 to 29 for more details In this case 1 Select 3CHLOGIC 2 Select NORMAL or WIDE forcentermode See pages 27 to 29 for more details Front Speaker...

Page 30: ...ess SURROUND ADJUST so that the Control fi fi fi fi fi buttons work for adjusting the selected surround mode The lamp next to the button lights up 4 Press Control fi fi fi fi fi until CNT MODE Center Mode appears on the display 5 Press Control to select the center mode Each time you press the button the center modes change as follows WIDE Select this mode when the center speaker can reproduce the ...

Page 31: ...you have selected 3CHLOGIC No test tone comes out of the center speaker when you select PHANTOM or OFF for the center mode 9 If necessary adjust the speaker output balance as follows To adjust the rear speaker output level press Control fi until REAR appears on the display then press Control To adjust the center speaker output level press Control fi until CENTER appears on the display then press C...

Page 32: ...play and a test tone comes out from the speakers in the following order Notes No test tone comes out of the rear speakers when you have selected 3CHLOGIC No test tone comes out of the center speaker when you select PHANTOM or OFF for the center mode 5 If necessary adjust the speaker output balance as follows To adjust the rear speaker output level press REAR To adjust the center speaker output lev...

Page 33: ...DOLBY SURROUND mark To cancel Dolby Surround press Control fi until SURR OFF appears in step 2 above The indicator of the selected mode and the SURROUND indicator go off From the remote control 1 Press SOUND CONTROL The remote control is activated for adjusting the sound 2 If necessary press SURR MODE until PROLOGIC or 3CHLOGIC whichever you want appears on the display The PRO LOGIC or 3CH LOGIC i...

Page 34: ...hat you have selected it If the item is not highlighted press to highlight it 4 When you finish press MENU EXIT The menu disappears from the TV To go back to the MAIN MENU any time during the process Press MENU again Selecting the Source to Play Also see page 11 1 Press MENU The MAIN MENU appears on the TV 2 Press fi fi fi fi fi to move to SOURCE then press The SOURCE menu appears 3 Press fi fi fi...

Page 35: ...ting the Center Speaker Size Also see page 16 Note When the surround mode is Hall or off you cannot select the center speaker size 1 Press MENU The MAIN MENU appears on the TV 2 Press fi fi fi fi fi to move to SETTING then press The SETTING menu appears 3 Press fi fi fi fi fi to move to CENTER SPK Center Speaker 4 Press repeatedly until the appropriate center speaker size is selected 5 When you fi...

Page 36: ... Favorite SEA Mode Also see page 22 1 Press MENU The MAIN MENU appears on the TV 2 Press fi fi fi fi fi to move to SEA then press The SEA MODE menu appears 3 Press fi fi fi fi fi to move to the SEA mode you want 4 When you finish press MENU EXIT The menu disappears from the TV Creating Your Own SEA Mode Also see page 23 1 Press MENU The MAIN MENU appears on the TV 2 Press fi fi fi fi fi to move to...

Page 37: ... or adjust then press On these adjustment menus you can do the following For HALL REAR Adjust the rear speaker output level DELAY Adjust the delay time of the rear speaker sound For Dolby Pro Logic CENTER MODE Select the center mode TEST Output a test tone CENTER Adjust the center speaker output level REAR Adjust the rear speaker output level DELAY Adjust the delay time of the rear speaker sound C...

Page 38: ...few seconds 7 7 7 7 7 Automatic Power On Off only possible with the COMPU LINK 3 connection Both the CD player and cassette deck turn on and off along with the receiver When you turn on the receiver the CD player or cassette deck will turn on automatically depending on which component has been previously selected When you turn off the receiver both the CD player and cassette deck will turn off 7 7...

Page 39: ...cks 1 Connect your VCR and TV as follows using the cables with the monaural mini plugs not supplied 2 Connect the VCR and TV as follows VCR TV When using an S VHS VCR connect it as follows See also page 9 3 When turning on the TV for the first time after the AV COMPU LINK connection turn the TV volume to the minimum using the TV volume control on the TV S VHS VCR TV To video input 1 S video jack u...

Page 40: ...cture you can then show the on screen displays after changing the TV input mode to the position Video input 2 the receiver is connected to 7 7 7 7 7 Automatic Selection of TV s Input Mode Whenyouselect TVSOUND asthesourcetoplayonthereceiver theTVautomaticallychangestheinput mode to the TV tuner so that you can watch TV When you select VIDEO as the source to play on the receiver the TV automaticall...

Page 41: ...ote Afteradjustingsounds pressthecorrespondingsourceselectingbutton FM AM CD CDTRACK CDDISC VCR or TV SOUND to operate your target source by using 10 keys otherwise 10 keys cannot be used for operating your target source CD player After pressing CD or CD TRACK with the remote control mode selector set to the AUDIO TV VCR position you can perform the following operations on a CD player PLAY Starts ...

Page 42: ...rolmodeselectorsettothe AUDIO TV VCR position you can perform the following operations on the VCR PLAY Starts playing REW Rewinds a tape FF Fast winds a tape STOP Stops operations PAUSE Pauses playing or recording temporarily To release it press the PLAY button REC Press this button with the PLAY button to start recording Press this button with the PAUSE button to enter recording pause standby CHA...

Page 43: ...s code three digits using buttons 1 9 and 0 See the lists on page 42 to find the code 5 Release TV CATV SAT POWER The following buttons can be used for operating the TV with the remote control mode selector set to the AUDIO TV VCR position TV CATV SAT POWER Turns on and off TV After pressing TV SOUND you can perform the following operations on the TV CHANNEL Changes the channels TV VOLUME Adjusts ...

Page 44: ...ff VCR After pressing VCR or VCR CONTROL with the remote control mode selector set to the AUDIO TV VCR position you can perform the following operations on the VCR CHANNEL Changes the channels on the VCR 1 10 0 10 Selects the channels on the VCR 10 button will function as the ENTER button if your VCR requires pressing ENTER after selecting a channel number PLAY Starts playback STOP Stops operation...

Page 45: ...16 Luxman 056 LXI 047 054 154 156 178 Magnavox 020 030 054 187 Majestic 016 Marantz 030 054 Matsushita 250 Megatron 145 178 Memorex 016 056 150 154 178 MGA 019 030 150 178 Midland 017 039 047 051 135 Minutz 021 Mitsubishi 019 093 150 178 Motorola 055 093 MTC 019 030 056 060 Multitech 180 NAD 156 166 178 NEC 019 030 056 Nikko 030 092 178 Noshi 018 NTC 092 Onwa 180 Optimus 154 166 250 Optonica 093 1...

Page 46: ... 020 259 273 Rembrandt 011 Runco 000 Samsung 040 144 Scientific Atlanta 008 017 277 Signal 015 040 Signature 011 SL Marx 040 Sprucer 021 Starcom 003 015 Stargate 015 040 770 Starquest 015 Teleview 040 Tocom 012 013 Toshiba 000 Tusa 015 Unika 153 United Artists 007 United Cable 003 Universal 153 Zenith 000 Zentek 400 Starlite 180 Supre Macy 046 Supreme 000 Sylvania 020 030 054 Symphonic 171 Tandy 0...

Page 47: ... 042 054 240 Pentax 042 105 Philco 035 Philips 035 062 081 Pilot 037 Pioneer 067 Portland 020 Profitronic 240 Protec 072 Pulsar 039 Quarter 046 Quartz 046 Quasar 035 162 Radio Shack 000 037 Radix 037 Randex 037 RCA 042 060 105 149 Realistic 000 035 037 046 047 048 062 104 Ricoh 034 Runco 039 Samsung 045 240 Manufacturers codes for VCR Admiral 048 Adventura 000 Aiko 278 Aiwa 000 Akai 041 American H...

Page 48: ... 000 Tatung 041 Teac 000 041 Technics 035 162 Teknika 000 035 037 TMK 240 Toshiba 043 045 212 Totevision 037 240 Unitech 240 Vector 045 Vector Research 038 Video Concepts 045 Videosonic 240 Wards 000 035 042 047 048 060 062 072 149 212 240 XR 1000 000 035 072 Yamaha 038 Zenith 033 034 039 Manufacturers codes listed on page 42 to 45 are subject to change without notice If they are changed this remo...

Page 49: ...ct antenna is used Antennas are not connected properly Ignition noise from automobiles The color system of the connected TV is not NTSC Your turntable is too close to speakers The remote control mode selector is not set correctly There is an obstruction in front of the remote control sensor on the receiver Batteries are weak SOLUTION Plug the power cord into an AC outlet Check speaker wiring and r...

Page 50: ...s output 8 ohms 1 kHz Measured by JVC Audio Analysis System Audio Input Sensitivity PHONO MM 2 5 mV 47 k ohms Impedance 1 kHz CD TAPE TV SOUND VCR 230 mV 47 k ohms VIDEO Audio Output Level TAPE VCR 230 mV Signal to Noise Ratio PHONO 70 dB 78 dB at REC OUT 66 IHF 78 IHF CD TAPE TV SOUND VCR 87 dB 80 dB VIDEO Frequency Response 8 ohms PHONO 20 Hz to 20 kHz 1 dB CD TAPE TV SOUND VCR 20 Hz to 20 kHz 1...

Page 51: ...reo Separation at REC OUT 40 dB at 1 kHz Capture Ratio 1 5 dB 10 mV Alternate Channel Selectivity 60 dB 400 kHz Frequency Response 30 Hz to 15 kHz 0 5 dB 3 dB AM tuner Tuning Range 530 kHz to 1 710 kHz Usable Sensitivity Loop antenna 300 µV m External antenna 30 µV Signal to Noise Ratio 50 dB 100 mV m General Power Requirements AC 120V 60 Hz Power Consumption 300 watts 400 VA 2 watts in standby mo...

Page 52: ...ORIES To purchase accessories for your JVC product you may contact your local JVC Dealer Or from the 48 Continental United States call toll free 800 882 2345 QUALITY SERVICE HOW TO LOCATE YOUR JVC SERVICE CENTER TOLL FREE 1 800 537 5722 Dear customer In order to receive the most satisfaction from your purchase read the instruction booklet before operating the unit In the event that repairisnecessa...

Page 53: ...rvice or if affixed to any attachment not provided with the products or if the model or serial number has been altered tampered with defaced or removed 2 Initial installation and installation and removal for repair 3 Operational adjustments covered in the Owner s Manual normal maintenance video and audio head cleaning 4 Damage that occurs in shipment due to act of God and cosmetic damage 5 Signal ...

Page 54: ...VICTOR COMPANY OF JAPAN LIMITED J VC 0497OFYOTKJEM EN ...

Reviews: