background image

27

SETTINGS

Category Indication

Item

(       : Initial)

Setting, [reference page]

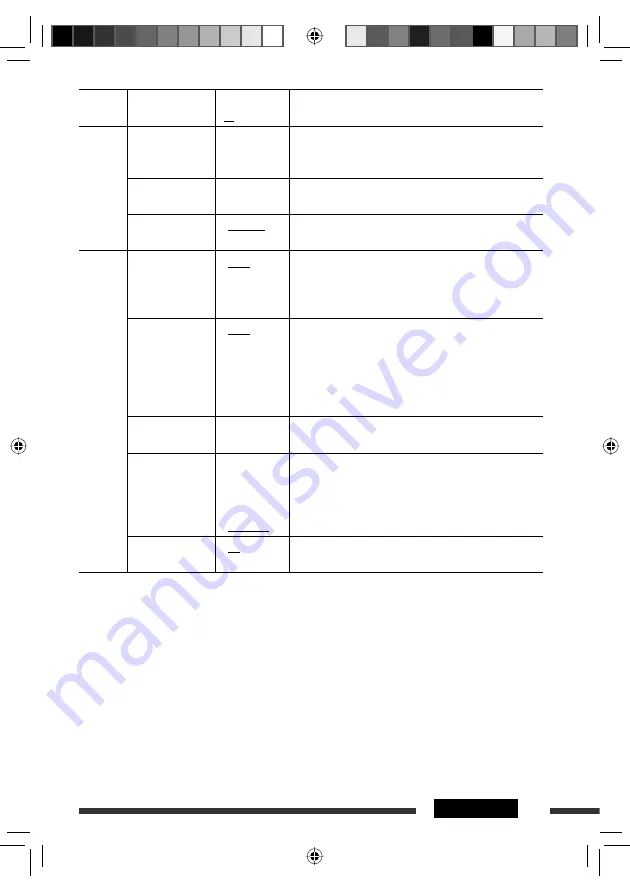
CLOCK

Clock Hr

Hour adjustment

1 – 12AM/
1 – 12PM 
(0 – 23)

:  Initial: 1 (1:00AM), [5].

Clock Min

Minute adjustment

00 – 59

:  Initial: 00 (1:00AM), [5].

24H/12H

Time display mode

• 

12Hours

• 

24Hours

:  See also page 5 for setting.

DISP

 (display)

Scroll 

*

2

Scroll

• 

Once

• 

Auto

• 

Off

:  Scrolls the track information once.
:  Repeats scrolling (at 5-second intervals).
:  Cancels. (Holding DISP can scroll the display regardless of 

the setting.)

Dimmer

Dimmer


From – To 

*

3

• 

Auto

• 

Off

• 

On

• 

Time Set

:  Dims the display when you turn on the headlights.
: Cancels.
:  Dims the display and button illumination.
:  Set the timer for dimmer, [29].
  Any hour – Any hour
:  Initial: 6PM – 7AM.

Contrast

Contrast

1 – 8

Initial: 5

:  Adjust the display contrast to make the display indications 

clear and legible.

LCD Type

Display type

• 

Auto

• 

Positive

• 

Negative

:  Positive pattern will be selected during the day time 

*

4

while negative pattern will be used during the night 
time 

*

4

.

:  Positive pattern of the display.
:  Negative pattern of the display.

Tag

Tag display

• 

On

• 

Off

:  Shows the tag while playing MP3/WMA/AAC/WAV tracks.
: Cancels.

*

2

  Some characters or symbols will not be shown correctly (or will be blanked) on the display.

*

3

  Adjustable only when “Dimmer” is set to “Time Set.”

*

4

  Depends on the “Dimmer” setting.

Continued on the next page

EN24-29_KD-BT22MP[U]_f.indd   27

EN24-29_KD-BT22MP[U]_f.indd   27

21/5/09   12:26:26 PM

21/5/09   12:26:26 PM

Summary of Contents for KD-BT22MP

Page 1: ...STRUCTIONS GET0631 001A U EN 0509DTSMDTJEIN 2009 Victor Company of Japan Limited Having TROUBLE with operation Please reset your unit Refer to page of How to reset your unit CoverRear_KD BT22MP U _f indd 1 CoverRear_KD BT22MP U _f indd 1 21 5 09 12 27 40 PM 21 5 09 12 27 40 PM ...

Page 2: ...inside the car is below 0 C the movement of animation and text scroll will be halted on the display to prevent the display from being blurred appears on the display When the temperature increases and the operating temperature is resumed these functions will start working again Caution on volume setting Digital devices CD USB produce very little noise compared with other sources Lower the volume be...

Page 3: ...ic operations 6 Using the control panel 6 Remote controller RM RK50 7 Listening to the radio 8 Disc operations 10 Listening to the USB device 12 Using the Bluetooth devices 13 Using the Bluetooth cellular phone 15 Using the Bluetooth audio player 18 EXTERNAL DEVICES Listening to the CD changer 19 Listening to the iPod 20 Listening to the other external components 22 SETTINGS Selecting a preset sou...

Page 4: ...control mode Ex When you press number button 1 after pressing M MODE to operate the FM tuner To use these controls for original functions press M MODE again However pressing SEL makes the unit enters a different mode Waiting for about 15 seconds without pressing any of these buttons will automatically cancels the control Avoid touching the connectors EN02 07_KD BT22MP U _f indd 4 EN02 07_KD BT22MP...

Page 5: ...lect 24H 12H then 24Hours or 12Hours 4 Finish the procedure Changing the display information and pattern When the power is turned off Check the current clock time Ex When tuner is selected as the source Source operation display If a station has been assigned a title station title appears after about 5 seconds To assign a title to a station see pages 31 and 32 Audio level meter display see LevelMet...

Page 6: ...ct folder USB iPod Enter the main menu Hold iPod Enter the main menu Pause playback Confirm selection 2 Turn on the power Turn off the power Hold Attenuate the sound if the power is on Bluetooth Switch the conversation media during a phone call conversation 3 Display window 4 Enter exit Bluetooth menu Display the dialed list Hold 5 Flip down the control panel To eject the disc flip down the contro...

Page 7: ...en throwing away or saving it Remote controller RM RK50 Remote sensor 1 Turns the power on if pressed briefly or attenuates the sound when the power is on Turns the power off if pressed and held Switches the conversation media during a phone call conversation 2 Changes the FM AM bands with 5 U Changes the preset stations with D Changes the folder of the MP3 WMA AAC WAV While playing an MP3 disc on...

Page 8: ...iefly While listening to an iPod in menu selecting mode Connected to KS PD100 Selects an item if pressed briefly Then press D to confirm the selection Skips 10 items at a time if pressed and held 3 Exit from the setting Connected to the USB cable By holding F 3 you can start play back the selected item directly By holding R 2 you can go back to the main display Reverse skip forward skip for Blueto...

Page 9: ...set Station list When is shown on the display you can move back to the previous screen by pressing number button 3 1 Follow steps 1 and 2 of Using the number buttons on the left column By holding 5 the Preset Station List will also appear go to step 4 2 3 Display the Preset Station List 4 Select the preset number you want to store into You can move to the lists of the other FM bands by pressing nu...

Page 10: ...sc Press SOURCE to listen to another playback source Pressing or holding the following buttons allows you to Press Select track Hold Reverse fast forward track MP3 WMA AAC Select folder Number buttons 2 Locate particular folder 3 for MP3 WMA AAC or track directly 1 Byholdingeitheroneofthebuttons youcandisplay theFolderList seepage11 2 Presstoselectnumber1to6 holdtoselectnumber 7to12 3 Itisrequired...

Page 11: ...ress the following buttons to Skip 10 tracks MP3 WMA AAC Within the same folder Repeat Track Repeat current track Repeat Folder MP3 WMA AAC Repeat current folder Random Folder MP3 WMA AAC Randomly play all tracks of current folder then tracks of next folders Random Disc Randomly play all tracks You can also cancel the playback mode by selecting Off or press number button 4 Selecting a folder track...

Page 12: ...rear of the unit Make sure all important data has been backed up to avoid losing the data Do not leave a USB device in the car expose to direct sunlight or high temperature to avoid deformation or cause damages to the device Some USB devices may not work immediately after you turn on the power For more details about USB operations see pages 34 and 35 Listening to the USB device You can connect a U...

Page 13: ...o to the instructions supplied with the Bluetooth device Connecting a Bluetooth device for the first time Pairing and PIN code When you connect a Bluetooth device to the unit for the first time make pairing between the unit and the device Pairing allows Bluetooth devices to communicate with each other To make pairing you may need to enter the PIN Personal Identification Number code of your Bluetoo...

Page 14: ...ppears on the display when the connection is established Now you can use the device through the unit appears when the connection is established The device remains registered even after you disconnect the device Use Cnnct Phone or Cnnct Audio or activate Auto Cnnct to connect the same device from next time on See the following and pages 30 and 31 Deleting a registered device Perform steps 1 and 2 o...

Page 15: ... Go to the following step Phonebook Shows the name phone number of the phone book of the unit Go to the following step To copy the phone book memory see page 17 Preset Shows the list of preset numbers Go to the following step To preset numbers see page 17 Dial Number Shows the phone number entry screen See How to enter phone number on page 16 Voice Dial Only accessible when the connected cellular ...

Page 16: ...cept control dial To restore the on hold call press any button except control dial again When you end one call you can connect to the other When a text message comes in If the cellular phone is compatible with Text Message and MSG Notice is set to On see pages 30 and 31 the unit rings and Received Message appears on the display to inform you of the message arrival You cannot edit or send a message...

Page 17: ...an preset up to six phone numbers When is shown on the display you can move back to the previous screen by pressing number button 3 1 Display the phone number you want to preset by using one of the Call items 2 Select a phone number You can also enter a new phone number see also How to enter phone number on page 16 to store 3 Select a preset number to store To call a preset number While in Bluetoo...

Page 18: ...sconnecting deleting a registered device Bluetooth Information If you wish to receive more information about Bluetooth visit the following JVC web site http www jvc co jp english car English website only After pressing M MODE press the following buttons to Repeat Track Repeat current track Repeat All Repeat all tracks Repeat Group Repeat all tracks of current group Random All Randomly play all tra...

Page 19: ...select a disc folder track on the list See Selecting a folder track on the list only for MP3 WMA AAC file on page 11 Select Disc in step 3 to display the Disc List of the CD changer After pressing M MODE press the following buttons to Skip 10 tracks MP3 Within the same folder Repeat Track Repeat current track Repeat Folder MP3 Repeat all tracks of current folder Repeat Disc Repeat all tracks of th...

Page 20: ...ack starts automatically from where it had been paused previously If an iPod has been connected press SOURCE to select USB iPod or iPod as the playback source 2 Select a track 3 Adjust the volume and sound as you want See pages 23 25 Playback control from the unit Button For iPod connected through KS PD100 For iPod connected to the USB cable Press Go to the next or previous track Hold Fast forward...

Page 21: ...n menu If a track is selected playback starts automatically If the selected item has another layer you will enter the layer Repeat steps 2 and 3 until the desired track is played The menu selecting mode will be canceled If no operations are performed for about 5 seconds for iPod connected through KS PD100 15 seconds for iPod connected to the USB cable When you confirm the selection of a track Afte...

Page 22: ...d for the external input setting see page 28 AUX auxiliary input jack on the control panel 1 Select EXT IN or AUX IN 2 Turn on the connected component and start playing the source 3 Adjust the volume 4 Adjust the sound as you want see pages 23 25 Connecting an external component to the AUX input jack 3 5 mm stereo mini plug not supplied Portable audio player etc EN18 23_KD BT22MP U _f indd 22 EN18...

Page 23: ...o the original sound mode recorded lights up on the display 4 Select a preset sound mode Preset value setting for each sound mode Sound mode Preset value Band 1 100 Hz Band 2 320 Hz Band 3 1 kHz Band 4 3 2 kHz Band 5 10 kHz USER 0 0 0 0 0 ROCK 3 2 0 1 1 CLASSIC 2 2 0 1 0 POPS 0 1 0 1 2 HIP HOP 4 1 2 0 1 JAZZ 3 2 1 2 2 EN18 23_KD BT22MP U _f indd 23 EN18 23_KD BT22MP U _f indd 23 21 5 09 12 27 21 P...

Page 24: ...or On Turn the control dial to select Off or On When On is selected low and high frequencies sound are boosted to produce a well balanced sound at low volume level 4 Exit from the setting Adjusting the sound You can adjust the sound characteristics to your preference When is shown on the display you can move back to the previous screen by pressing number button 3 or 6 1 2 For EQ setting see page 2...

Page 25: ...l to select the frequency 3 Press number button 5 then turn the control dial to select the quality slope Q 6 Repeat steps 3 and 4 to adjust the other frequency bands 7 Store the adjustments Adjustable sound elements Sound elements Range selectable items Band 1 100 Hz Band 2 320 Hz Band 3 1 kHz Band 4 3 2 kHz Band 5 10 kHz Frequency 68 Hz 100 Hz 150 Hz 210 Hz 320 Hz 460 Hz 680 Hz 1 kHz 1 5 kHz 2 1 ...

Page 26: ...ion On Off Display demonstration will be activated automatically if no operation is done for about 20 seconds 5 Cancels LevelMeter Audio level meter Meter 1 Meter 2 Select the different level meter patterns Press DISP to show the selected level meter CLOCK Clock Disp 1 Clock display On Off Clock time is shown on the display when the power is turned off Cancels pressing DISP will show the clock tim...

Page 27: ...utton illumination Set the timer for dimmer 29 Any hour Any hour Initial 6PM 7AM Contrast Contrast 1 8 Initial 5 Adjust the display contrast to make the display indications clear and legible LCD Type Display type Auto Positive Negative Positive pattern will be selected during the day time 4 while negative pattern will be used during the night time 4 Positive pattern of the display Negative pattern...

Page 28: ...d setting Amp Gain Amplifier gain control High PWR Low PWR Volume 00 Volume 50 Volume 00 Volume 30 Select if the maximum power of each speaker is less than 50 W to prevent damaging the speaker COLOR Color Sel Color selection Initial All Source Color Pale Select your favorite display color for each source or for all sources 29 Color Set Color setting Red Green Blue Day Color NightColor 00 11 00 11 ...

Page 29: ...6 Exit from the setting Setting the time for dimmer When is shown on the display you can move back to the previous screen by pressing number button 3 1 Follow steps 1 to 3 on page 26 In step 2 select DISP In step 3 select Dimmer 2 Select Time Set 3 Adjust the dimmer start time 1 Turn the control dial to set the dimmer start time 2 Press to select To Then turn the control dial to set the dimmer end...

Page 30: ...e When is shown on the display you can move back to the previous screen by pressing number button 3 1 2 Select Settings 3 Select a setting item Auto Cnnct Ô Auto Answer Ô MSG Notice 1 Ô MIC Ô PhoneBook Ô Initialize Ô Name Ô Address Ô Version Ô Phone Device 2 Ô Audio Device 2 Ô back to the beginning 4 Change the setting accordingly If PhoneBook is selected in step 3 see page 17 for details Setting ...

Page 31: ...e Phone Device 2 Name of the connected Bluetooth phone Audio Device 2 Name of the connected Bluetooth audio player 1 IftheconnectedBluetoothphonedoesnotsupport textmessagenotification viaBluetooth theunitwill notreceiveanynotificationuponthearrivalofatext message 2 AppearsonlywhenaBluetoothphone audioplayeris connected Title assignment You can assign titles to station frequencies and external comp...

Page 32: ...ime you turn on the power General If you change the source while listening to a disc playback stops Next time you select CD as the playback source playback will start from where it had been stopped previously After ejecting a disc or removing a USB device No Disc or No USB appears and you cannot operate some of the buttons Insert another disc reattach a USB device or press SOURCE to select another...

Page 33: ...are dirty or scratched Moisture condensation has occurred on the lens inside the unit The pickup lens inside the unit is dirty The files on the CD R CD RW are written using the Packet Write method There are improper recording conditions missing data etc or media conditions stained scratched warped etc CD RWs may require a longer readout time since the reflectance of CD RWs is lower than that of re...

Page 34: ...ices or some files due to their characteristics or recording conditions Depending on the shape of the USB devices and connection ports some USB devices may not be attached properly or the connection might be loose When connecting a USB mass storage class device refer also to its instructions Connect one USB mass storage class device to the unit at a time Do not use a USB hub You can connect two ty...

Page 35: ...ssages for Bluetooth operations Connection Error The device is registered but the connection has failed Use Connect to connect the device again See page 14 Error Try the operation again If Error appears again check if the device supports the function you have tried Continuedonthenextpage Please Wait The unit is preparing to use the Bluetooth function If the message does not disappear turn off and ...

Page 36: ...y This unit can display up to 128 characters Notice When operating an iPod some operations may not be performed correctly or as intended In this case visit the following JVC web site http www jvc co jp english car English website only Title assignment If you try to assign titles to more than 30 station frequencies Name Full appears Delete unwanted titles before assignment General settings PSM Auto...

Page 37: ...isc playback Disc cannot be played back Insert the disc correctly CD R CD RW cannot be played back Tracks on the CD R CD RW cannot be skipped Insert a finalized CD R CD RW Finalize the CD R CD RW with the component which you used for recording Disc can neither be played back nor ejected Unlock the disc see page 10 Eject the disc forcibly see page 3 Disc sound is sometimes interrupted Stop playback...

Page 38: ... on the display and track skips Skip to the next track encoded in an appropriate format or to the next non copy protected WMA track Correct characters are not displayed e g album name This unit can only display letters capital A Z small a z numbers and a limited number of symbols see page 32 USB device Noise is generated The track played back is not a playable file format MP3 WMA AAC WAV Skip to a...

Page 39: ...ck of a USB device Turn off then turn on the unit Connect the device again when the sound is not yet restored Bluetooth The unit cannot be detected by the Bluetooth device Search from the Bluetooth device again Reset the unit When Open appears on the display search from the Bluetooth device again The unit does not make pairing with the Bluetooth device Enter the same PIN code for both the unit and...

Page 40: ... page 3 iPod The iPod does not turn on or does not work Check the connecting cable and its connection Update the firmware version Charge the battery The sound is distorted Deactivate the equalizer either on this unit or the iPod Disconnect appears on the display Check the connecting cable and its connection Charge the battery Playback stops The headphones are disconnected during playback Restart t...

Page 41: ...by the edges Do not touch its recording surface When storing a disc in its case gently insert the disc around the center holder with the printed surface facing up Make sure to store discs in cases after use Connectors Center holder To keep discs clean A dirty disc may not play correctly If a disc does become dirty wipe it with a soft cloth in a straight line from center to edge Do not use any solv...

Page 42: ...to Noise Ratio 80 dB Line Out Level Impedance 2 5 V 20 kΩ load full scale Subwoofer Out Level Impedance 4 0 V 20 kΩ load full scale Output Impedance 1 kΩ Other Terminal CD changer jack AUX auxiliary input jack USB cable Antenna input Steering wheel remote input TUNER SECTION Frequency Range FM 87 5 MHz to 108 0 MHz AM 531 kHz to 1 602 kHz FM Tuner Usable Sensitivity 11 3 dBf 1 0 μV 75 Ω 50 dB Quie...

Page 43: ...mum 12 Mbps Low Speed Maximum 1 5 Mbps Compatible Device Mass storage class Compatible File System FAT 32 16 12 Playable Audio Format MP3 WMA AAC WAV Max Current 500 mA 5 V BLUETOOTH Version Bluetooth 1 2 certified Power Class Class 2 Radio possible distance 10 m Service Area 10 m Profile HFP 1 5 OPP 1 1 A2DP 1 2 AVRCP 1 3 GENERAL Power Requirement Operating Voltage DC 14 4 V 11 V to 16 V allowanc...

Reviews: