14
EN
3
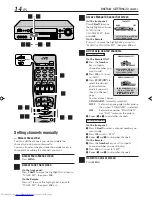
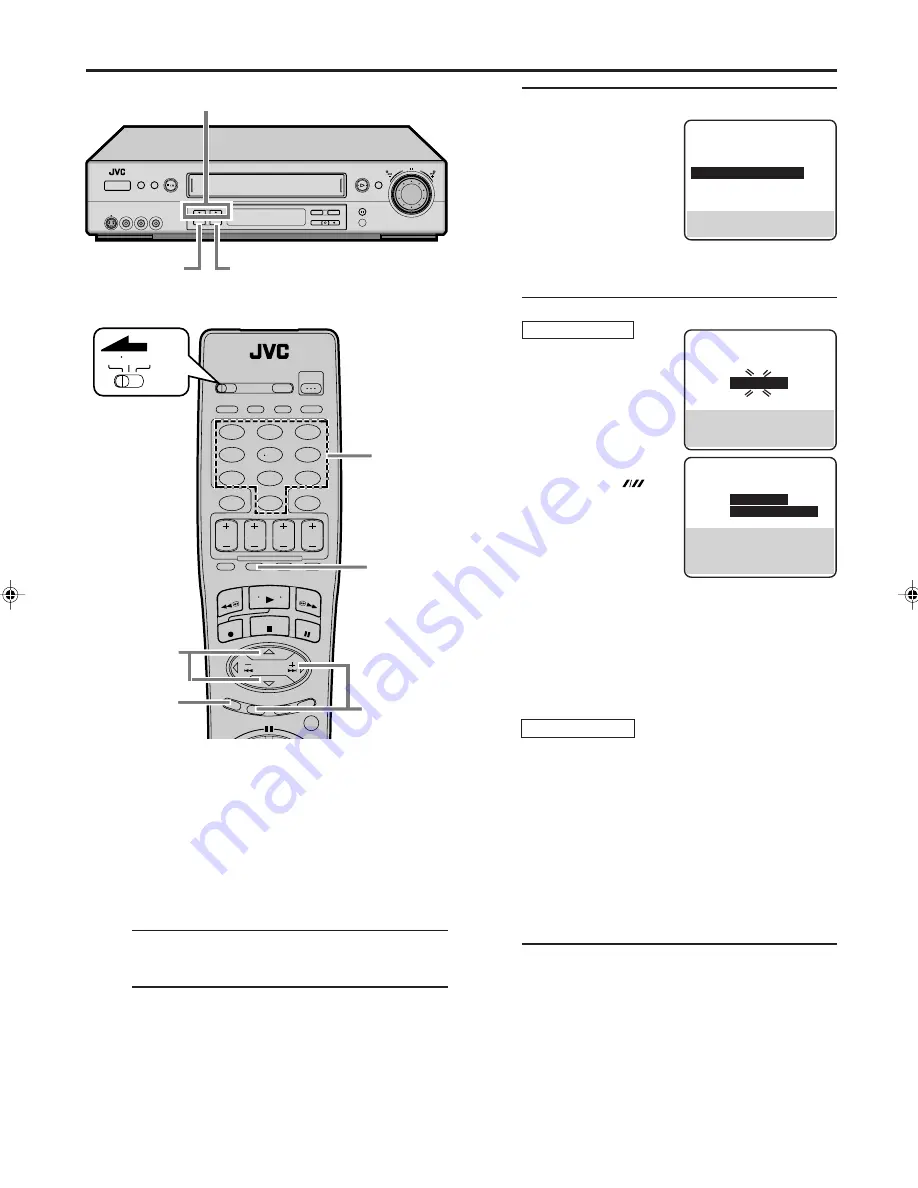
Access Manual Channel Set screen
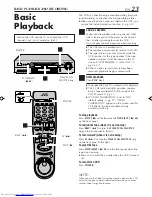
On the front panel:
Press
CH
5∞
to move
the highlight bar (arrow)
to “MANUAL
CHANNEL SET”, then
press
OK
.
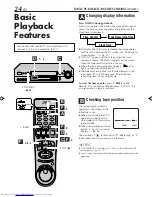
On the Remote:
Press
%fi
to move the highlight bar (arrow) to
“MANUAL CHANNEL SET”, then press
OK
or
#
.
4
Add or skip desired channels
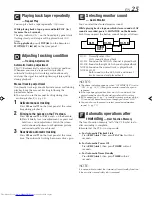
To add channels
On the Remote ONLY:
1
Press the
Number
keys to input a
channel number you
want to add.
2
Press
OK
or
#
to set
to “ADD”.
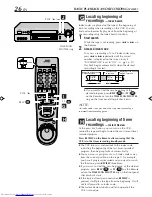
3
Press
SP/EP (
)
to
select the desired
ghost reduction
mode if you want.
(See also the next
page.)
You have three choices:
STANDARD
– Normally select this.
SOFT
–
Select when you prefer softer picture
than when “STANDARD” is selected.
OFF
–
Select when neither “STANDARD”
nor “SOFT” improves the picture.
4
Repeat
1
to
3
to add other channels.
To skip channels
On the front panel:
1
Press
CH
5∞
to select a channel number you
want to skip.
2
Press
OK
to set to “SKIP”.
3
Repeat
1
and
2
to skip other channels.
On the Remote:
1
Press the
Number
keys or
%fi
to input a
channel number you want to skip.
2
Press
OK
or
#
to set to “SKIP”.
3
Repeat
1
and
2
to skip other channels.
5
Return to normal screen
Press
MENU
.
INITIAL SETTINGS (cont.)
TUNER SET
BAND
CATV
AUTO CHANNEL SET
=
MANUAL CHANNEL SET
GHOST REDUCTION (GR) ON
SELECT WITH (
5
,
∞
) AND (OK)
PRESS (MENU) TO END
1 5
2
–
4
2
–
4
MANUAL CHANNEL SET
(CATV)
CH
45
ADD
GR
STANDARD
PRESS NUMBER KEY (0–9)
OR (
5
,
∞
), THEN (OK)
PRESS (MENU) TO END
MANUAL CHANNEL SET
(CATV)
CH
45 ADD
GR
STANDARD
PRESS NUMBER KEY (0–9)
OR (
5
,
∞
), THEN (OK)
GR MODE: PRESS (SP/EP)
PRESS (MENU) TO END
Setting channels manually
— Manual Channel Set
You can add the channels you want or delete the
channels you do not want manually.
You can also select the ghost reduction mode for each
channel while adding the channels you want.
1
Access Main Menu screen
Press
MENU
.
2
Access Tuner Set screen
On the front panel:
Press
CH
5∞
to move the highlight bar (arrow) to
“TUNER SET”, then press
OK
.
On the Remote:
Press
%fi
to move the highlight bar (arrow) to
“TUNER SET”, then press
OK
or
#
.
1
2
3
4
5
6
7
8
9
0
VCR TV CABLE/DBS
1 5
2
–
4
4
2
–
4
4
HR-S9800U-EN01-22
00.3.29, 7:26 PM
14
Summary of Contents for HR-S9800U
Page 85: ...EN 85 MEMO ...
Page 86: ...86 EN MEMO cont ...
Page 87: ...EN 87 ...
Page 88: ...HR S9800U COPYRIGHT 2000 VICTOR COMPANY OF JAPAN LTD Printed in Malaysia 0400 IYV MW PJ U ...


