EN
9
Clock
Turn on the TV and select the VCR channel 3 or 4 (or AV
mode).
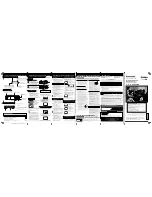
TURN ON THE VCR
1
Press
POWER
.
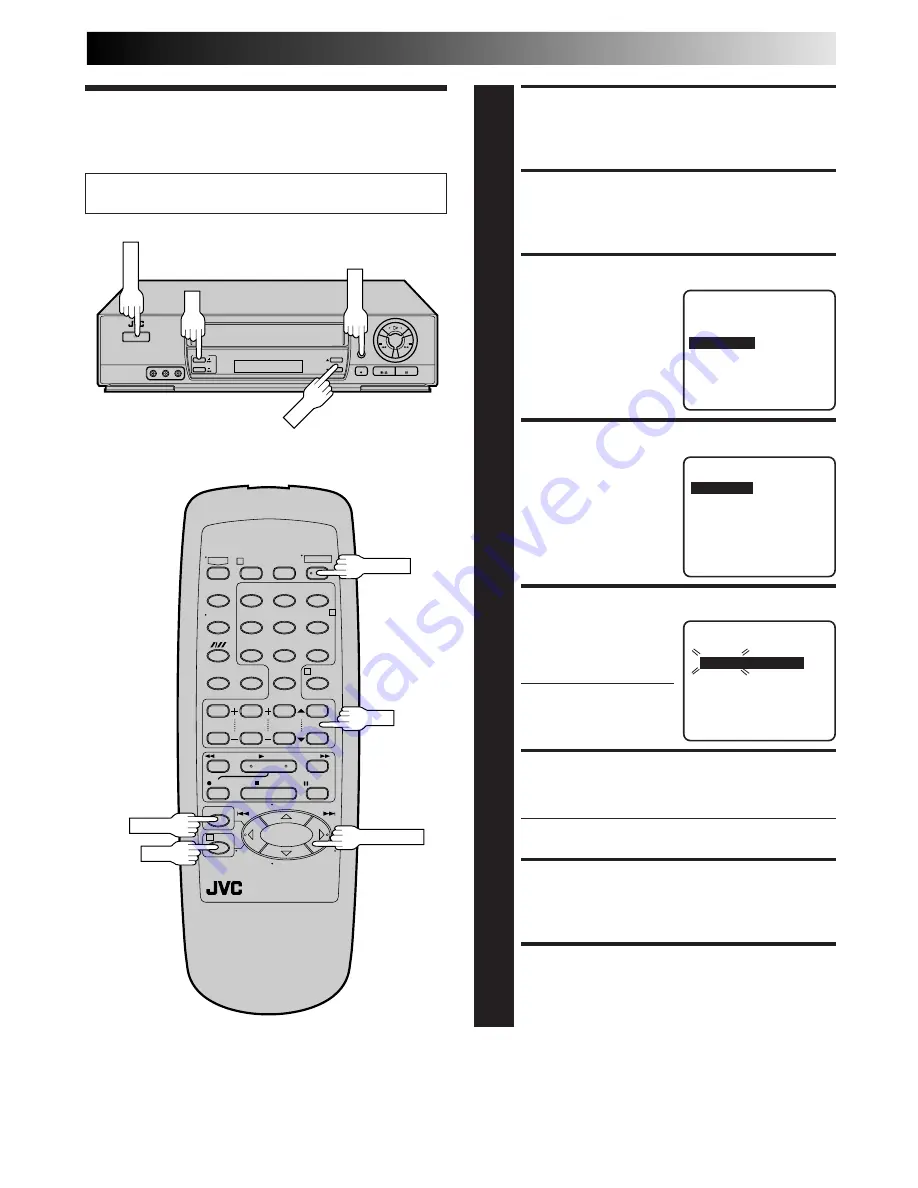
ACCESS MAIN MENU SCREEN
2
Press
MENU
.
ACCESS INITIAL SET SCREEN
3
At the Main Menu screen,
move the highlight bar
(arrow) to “INITIAL SET”
by pressing
CH
5∞
or
PUSH JOG
%fi
, then press
OK
or
PUSH JOG
.
ACCESS CLOCK SET SCREEN
4
Move the highlight bar
(arrow) at the Initial Set
screen to “CLOCK SET” by
pressing
CH
5∞
or
PUSH
JOG
%fi
, then press
OK
or
PUSH JOG
.
SET TIME
5
Press
CH
5∞
or
PUSH
JOG
%fi
until the desired
time appears, then press
OK
or
PUSH JOG
.
●
Press and hold
CH
5∞
or
PUSH JOG
%fi
to
change the time by 30
minutes.
SET DATE
6
Press
CH
5∞
or
PUSH JOG
%fi
until the desired date
appears, then press
OK
or
PUSH JOG
.
●
Press and hold
CH
5∞
or
PUSH JOG
%fi
to change
the date by 15 days.
SET YEAR
7
Press
CH
5∞
or
PUSH JOG
%fi
until the desired year
appears.
START CLOCK
8
Press
MENU
and normal screen appears.
%
%
%
To Make Corrections
Press
OK
or
PUSH JOG
until the item you want to change
blinks, then press
CH
5∞
or
PUSH JOG
%fi
.
%
1
2
3
4
5
0
6
7
8
9
••
••
1
2
4
3
POWER
MENU
POWER
MENU
OK
PUSH JOG
OK
CH
CH
CLOCK SET
TIME
DATE YEAR
– –:– –AM 1/ 1
98
PRESS (
5
,
∞
), THEN (OK)
PRESS (MENU) TO END
INITIAL SET
=
CLOCK SET
LANGUAGE
ENGLISH
SELECT WITH (
5
,
∞
) AND (OK)
PRESS (MENU) TO END
MAIN MENU
FUNCTION SET
TUNER SET
=
INITIAL SET
PRESS (
5
,
∞
), THEN (OK)
PRESS (MENU) TO END
%
Summary of Contents for HR-J4005UM
Page 37: ...MEMO ...
Page 38: ...MEMO ...