


Recording
Accidental erasure prevention
To prevent accidental recording on a
recorded cassette, remove its record
safety tab. To record on it later, cover
the hole with adhesive tape.
Basic Recording
A
Loada cassette
Make sure the record safety tab is intact. If not, cover the hole
with adhesive tape before inserting the cassette.
●
The recorder turns on, and the counter is reset, automatically.
●
Select the appropriate colour system with “PAL/MESECAM” and
“NTSC” in Function settings.
B
Select recording channel
On the remote control
Press
PR+/–
or the
Number keys
.
On the recorder
Press
PAUSE[PR]
. The channel display on the
display panel starts blinking. While the display is
blinking, press
FF[PR+]
or
REW[PR–]
to select
channel. After about 5 seconds, the channel display
stops blinking.
NOTES:
●
You can select channel in the stop mode, recording pause mode
or during rewind/fast-forward high-speed search.
●
If no cassette is loaded, or during recording pause mode, you
can select channel only by pressing
FF[CH+]
or
REW[CH–]
.
●
If you connect the TV and the recorder only using the RF
connection, press
TV/VCR
on the remote control so that the
VCR mode indicator lights on the display panel, to view the
program to be recorded.
C
Set tape speed
Press
SP/LP/EP
(
p
).
D
Start recording
On the recorder, press
REC
(
7
). Or on the remote control, while
holding
REC
(
7
), press
PLAY
(
4
)
NOTE:
●
If the tape reaches its end during recording, the recording stops
and “
䡬
” and “
$
” on the front display panel blink
.
Recording Features
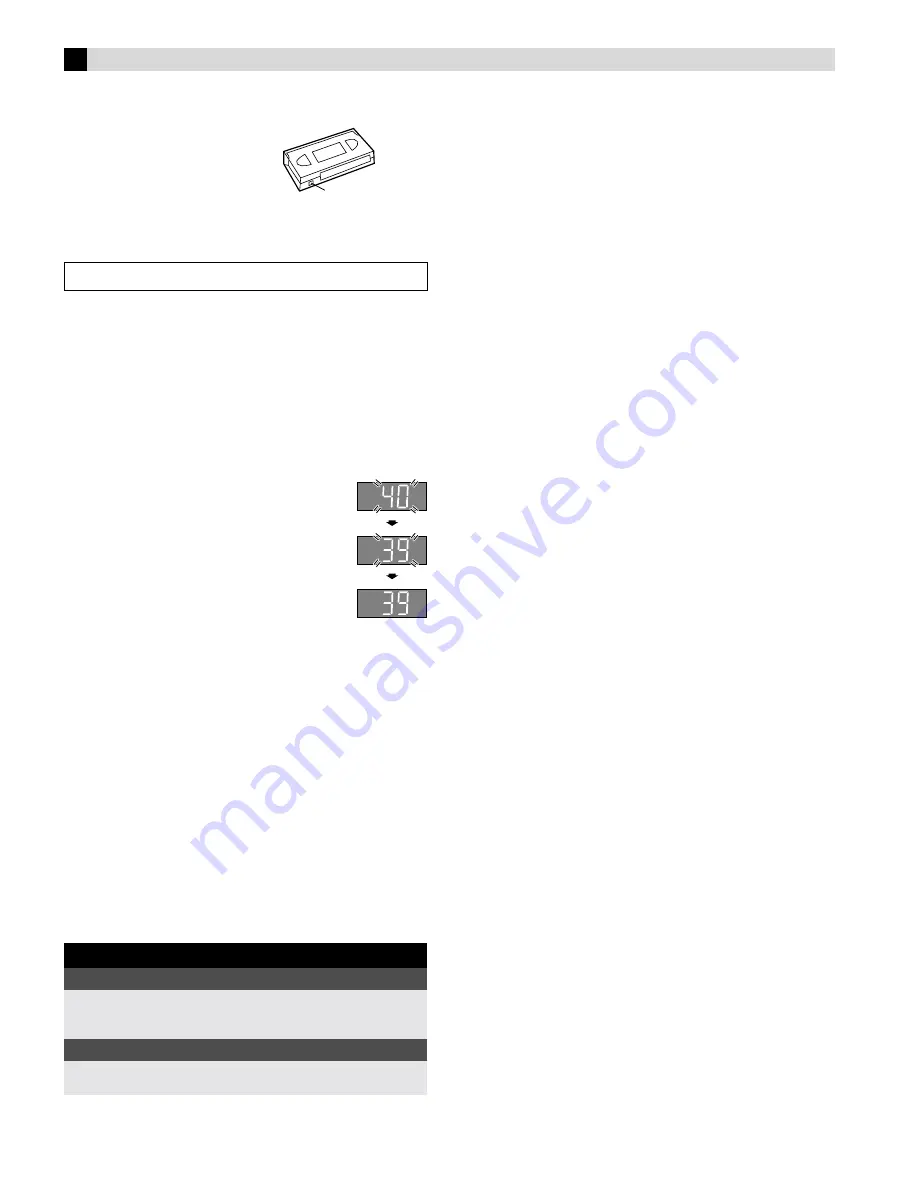
Specifying recording length
— Instant Timer Recording (ITR)
During recording, press
REC
(
7
) on the recorder repeatedly until
the recording length you want appears on the display panel. The
record indicator (
䡬
) on the display panel starts blinking.
●
Each time you press the button, recording length increases in
30-minute intervals (up to 6 hours).
●
The recorder shuts off after recording is finished.
●
To cancel an ITR, press
STOP
(
8
) on the remote control or
STOP/EJECT
(
0
) on the recorder.
Watching one program while recording another
Once recording is in progress, all you need to do is to set the
channel controls on the TV for the station you wish to view.
The programme selected with the TV’s channel controls appears
on the TV screen while the one selected with the
PR +/–
buttons is
recorded on the tape.
Recording Resume Function
If there is a power outage during recording (or Instant Timer
Recording, or timer recording), the recording will resume
automatically when the power is restored to the recorder. (No
setting is required for this function.)
Turn on the TV and select the video channel or AV mode.
During recording
Pause recording
Press
PAUSE
(
9
).
●
Press
PLAY
(
4
) to resume recording.
●
You can select channel in the recording pause mode.
Stop recording
Press
STOP
(
8
) on the
remote control.
OR
Press
STOP/EJECT
(
0
) on
the recorder.
Record safety tab


