background image

Page 2

December 7, 2000 2:19 pm

IMPORTANT PRODUCT 
SAFETY INSTRUCTIONS

Electrical energy can perform many useful functions. But 
improper use can result in potential electrical shock or fire 
hazards. This product has been engineered and manufactured to 
assure your personal safety. In order not to defeat the built-in 
safeguards, observe the following basic rules for its installation, 
use and servicing.

ATTENTION:

Follow and obey all warnings and instructions marked on your 
product and its operating instructions. For your safety, please read 
all the safety and operating instructions before you operate this 
product and keep this booklet for future reference.

INSTALLATION

1. Grounding or Polarization

(A) Your product may be equipped with a polarized alternating-

current line plug (a plug having one blade wider than the 
other). This plug will fit into the power outlet only one way. 
This is a safety feature.
If you are unable to insert the plug fully into the outlet, try 
reversing the plug. If the plug should still fail to fit, contact 
your electrician to replace your obsolete outlet. Do not defeat 
the safety purpose of the polarized plug.

(B) Your product may be equipped with a 3-wire grounding-type 

plug, a plug having a third (grounding) pin. This plug will only 
fit into a grounding-type power outlet. This is a safety feature.
If you are unable to insert the plug into the outlet, contact your 
electrician to replace your obsolete outlet. Do not defeat the 
safety purpose of the grounding-type plug.

2. Power Sources

Operate your product only from the type of power source 
indicated on the marking label. If you are not sure of the type of 
power supply to your home, consult your product dealer or local 
power company. If your product is intended to operate from 
battery power, or other sources, refer to the operating instructions.

3. Overloading

Do not overload wall outlets, extension cords, or integral 
convenience receptacles as this can result in a risk of fire or 
electric shock.

4. Power Cord Protection

Power supply cords should be routed so that they are not likely to 
be walked on or pinched by items placed upon or against them, 
paying particular attention to cords at plugs, convenience 
receptacles, and the point where they exit from the product.

5. Ventilation

Slots and openings in the cabinet are provided for ventilation. To 
ensure reliable operation of the product and to protect it from 
overheating, these openings must not be blocked or covered.

Do not block the openings by placing the product on a bed, 
sofa, rug or other similar surface.

Do not place the product in a built-in installation such as a 
bookcase or rack unless proper ventilation is provided or the 
manufacturer’s instructions have been adhered to.

6. Wall or Ceiling Mounting

The product should be mounted to a wall or ceiling only as 
recommended by the manufacturer.

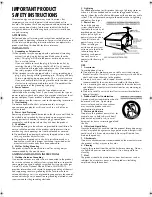
ANTENNA INSTALLATION INSTRUCTIONS

1. Outdoor Antenna Grounding

If an outside antenna or cable system is connected to the product, 
be sure the antenna or cable system is grounded so as to provide 
some protection against voltage surges and built-up static charges. 
Article 810 of the National Electrical Code, ANSI/NFPA 70, 
provides information with regard to proper grounding of the mast 
and supporting structure, grounding of the lead-in wire to an 
antenna discharge unit, size of grounding connectors, location of 
antenna discharge unit, connection to grounding electrodes, and 
requirements for the grounding electrode.

2. Lightning

For added protection for this product during a lightning storm, or 
when it is left unattended and unused for long periods of time, 
unplug it from the wall outlet and disconnect the antenna or cable 
system. This will prevent damage to the product due to lightning 
and power-line surges.

3. Power Lines

An outside antenna 
system should not be 
located in the vicinity of 
overhead power lines or 
other electric light or 
power circuits, or where 
it can fall into such 
power lines or circuits. 
When installing an 
outside antenna system, 
extreme care should be 
taken to keep from 
touching such power 
lines or circuits as 
contact with them might 
be fatal.

USE

1. Accessories

To avoid personal injury:

Do not place this product on an unstable cart, stand, tripod, 
bracket, or table. It may fall, causing serious injury to a child or 
adult, and serious damage to the product.

Use only with a cart, stand, tripod, bracket, or table 
recommended by the manufacturer or sold with the product.

Use a mounting accessory recommended by the manufacturer 
and follow the manufacturer’s instructions for any mounting of 
the product.

Do not try to roll a cart with small casters across thresholds or 
deep-pile carpets.

2. Product and Cart Combination

A product and cart combination should 
be moved with care. Quick stops, 
excessive force, and uneven surfaces 
may cause the product and cart 
combination to overturn.

3. Water and Moisture

Do not use this product near water—for 
example, near a bath tub, wash bowl, 
kitchen sink or laundry tub, in a wet 
basement, or near a swimming pool and 
the like.

4. Object and Liquid Entry

Never push objects of any kind into this product through openings 
as they may touch dangerous voltage points or short-out parts that 
could result in a fire or electric shock. Never spill liquid of any 
kind on the product.

5. Attachments

Do not use attachments not recommended by the manufacturer of 
this product as they may cause hazards.

6. Cleaning

Unplug this product from the wall outlet before cleaning. Do not 
use liquid cleaners or aerosol cleaners. Use a damp cloth for 
cleaning.

7. Heat

The product should be situated away from heat sources such as 
radiators, heat registers, stoves, or other products (including 
amplifiers) that produce heat.

HR-FS1U-EN.fm  Page 2  Thursday, December 7, 2000  2:19 PM

Summary of Contents for HR-FS1U

Page 1: ...th AC 120Vd 60Hz only To prevent electric shocks and fire hazards DO NOT use any other power source CAUTION TO PREVENT ELECTRIC SHOCK MATCH WIDE BLADE OF PLUG TO WIDE SLOT FULLY INSERT ATTENTION POUR ÉVITER LES CHOCS ÉLECTRIQUES INTRODUIRE LA LAME LA PLUS LARGE DE LA FICHE DANS LA BORNE CORRESPONDANTE DE LA PRISE ET POUSSER JUSQU AU FOND Note to CATV system installer This reminder is provided to c...

Page 2: ...hould be mounted to a wall or ceiling only as recommended by the manufacturer ANTENNA INSTALLATION INSTRUCTIONS 1 Outdoor Antenna Grounding If an outside antenna or cable system is connected to the product be sure the antenna or cable system is grounded so as to provide some protection against voltage surges and built up static charges Article 810 of the National Electrical Code ANSI NFPA 70 provi...

Page 3: ...airs to this product ask the service technician to perform safety checks to determine that the product is in safe operating condition How to use the Remote Before use insert two AA size batteries into the Remote with the polarity and matched correctly as indicated on the battery compartment or on the lid The Remote can operate most of your VCR s functions as well as basic functions of TV sets cabl...

Page 4: ... the TV antenna from the TV B Connect the TV antenna cable to the ANT IN terminal on the rear of the VCR C Connect the supplied RF cable between the TV OUT terminal on the rear of the VCR and the TV s antenna input terminal AV Connection improves picture quality during tape playback If your TV is equipped with audio video input connectors A Connect the antenna VCR and TV as shown in the illustrati...

Page 5: ...emote Press rt to move the highlight bar arrow to INITIAL SET then press OK or e B Select language This VCR offers you the language choice to view menus and some messages in English Spanish or French Press rt to move the highlight bar arrow to LANGUAGE then press OK or e repeatedly until the desired language is selected Press MENU to return to normal screen Clock Setting Perform clock setting only...

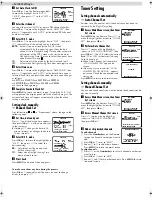
Page 6: ...ner Setting Setting channels automatically Auto Channel Set Perform Auto Channel Set only if channels have not been set correctly by the Plug Play setting A Access Main Menu screen then Tuner Set screen Press MENU on the Remote Press rt to move the highlight bar arrow to TUNER SET then press OK or e B Perform Auto Channel Set Press rt to move the highlight bar arrow to AUTO CHANNEL SET then press ...

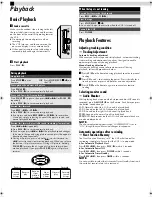
Page 7: ...tion Memory The Next Function Memory tells the VCR what to do after rewinding is complete Ensure that the VCR is in stop mode For Automatic Playback Start Press REW 3 then press PLAY 4 within 2 seconds For Automatic Power Off Press REW 3 then press POWER within 2 seconds For Automatic Timer Standby Press REW 3 then press TIMER within 2 seconds NOTE It is not possible to select the Automatic Timer ...

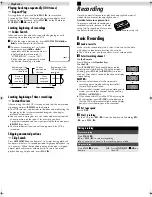
Page 8: ...al playback during Skip Search press PLAY 4 Recording It may be unlawful to record or play back copyrighted material without the consent of the copyright owner Accidental erasure prevention To prevent accidental recording on a recorded cassette remove its record safety tab To record on it later cover the hole with adhesive tape Basic Recording A Load a cassette Make sure the record safety tab is i...

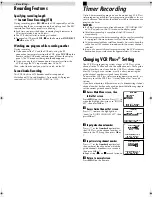
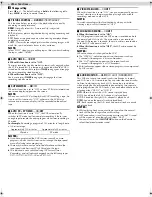
Page 9: ...p the cable box or DBS receiver turned on with the correct channel selected In case of a power failure after programming the VCR s memory backup keeps your selections for approximately 10 minutes Changing VCR Plus Setting The VCR Plus programing system assigns a VCR Plus guide channel to the TV channels and the cable channels These guide channel numbers are also called the VCR Plus channel codes M...

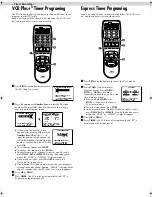
Page 10: ...pears C Press OK or PROG D Press TIMER The VCR turns off automatically and is displayed on the display panel Express Timer Programing Load a cassette with the record safety tab intact The VCR turns on and the counter is reset automatically A Press PROG on the Remote to access the PlusCode No screen B Press START once to access Program screen Press START STOP DATE or CH repeatedly to enter the star...

Page 11: ...ion mode from the stop mode to fast forward or rewind mode or when you perform an Index Search or Instant Review the tape position indicator appears The position of q in relation to B Beginning or E End shows you where you are on the tape Set SUPERIMPOSE to ON Resetting time counter When SUPERIMPOSE is set to ON and DISPLAY on the Remote is pressed the on screen display will appear for about 5 sec...

Page 12: ...n is not available during ITR Instant Timer Recording and will not work properly on the following tapes T ST 30 T ST 60 T ST 90 and T ST 120 䡵 VIDEO STABILIZER ON OFF When this function is set to ON you can automatically correct vertical vibrations in the picture when playing back unstable recordings made on another VCR NOTE To watch recordings with close caption or when you finish viewing a tape ...

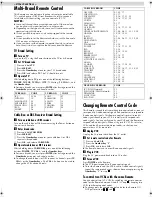
Page 13: ...f transmitting two control codes one set to respond to A code control signals and another set to respond to B code control signals This Remote control is preset to send A code signals because your VCR is initially set to respond to A code signals You can easily modify your VCR and the Remote to respond to B code signals When using two JVC VCRs set two VCRs and their Remotes to different codes so t...

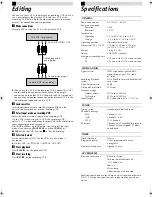
Page 14: ...ng VCR Specifications Specifications shown are for SP mode unless specified otherwise E O E Design and specifications subject to change without notice To audio video input This VCR for playback Another VCR for recording Audio video cable not supplied To AUDIO VIDEO OUT GENERAL Power requirement AC 120 Vd 60 Hz Power consumption Power on 19 W Power off 1 8 W Temperature Operating 5 C to 40 C 41 F t...

Page 15: ...OF JVC AMERICAS CORP Sophisticated electronic products may require occasional service Just as quality is a keyword in the engineering and production of the wide array of JVC products service is the key to maintaining the high level performance for which JVC is world famous The JVC service and engineering organization stands behind our products NATIONAL HEADQUARTERS JVC SERVICE ENGINEERING COMPANY ...

Page 16: ... to abuse accident alteration modification tampering negligence misuse faulty installation lack of reasonable care or if repaired or serviced by anyone other than a service facility authorized by JVC to render such service or if affixed to any attachment not provided with the products or if the model or serial number has been altered tampered with defaced or removed 2 Initial installation and inst...

Reviews: