


Attaching the Audio Unit
The audio unit (with handle) is not attached to the camcorder
unit when purchased.
Attach the audio unit according to the following procedure.
.
Screw
Audio Unit
Clamp
Shoe
Cable
Cable
Open the cover.
1
Attach the audio unit by sliding it all the way into
the shoe on the top of the camcorder.
0
Take care not to slide in too much as it will be
impossible to tighten the screws.
2
Turn the screw on the audio unit clockwise to
fasten it fully and securely to the camcorder.
0
To fully secure the audio unit, use a coin or the like
to fasten the screw completely.
0
If the audio unit is not fully and securely tightened, it
will be loose and may drop off from the camcorder
during use.
3
Connect the audio unit cable to the microphone
connector of the camcorder.
Memo :
0
The clamp on the audio unit is for fixing the microphone
cable and cannot be used to fix the audio unit cable.
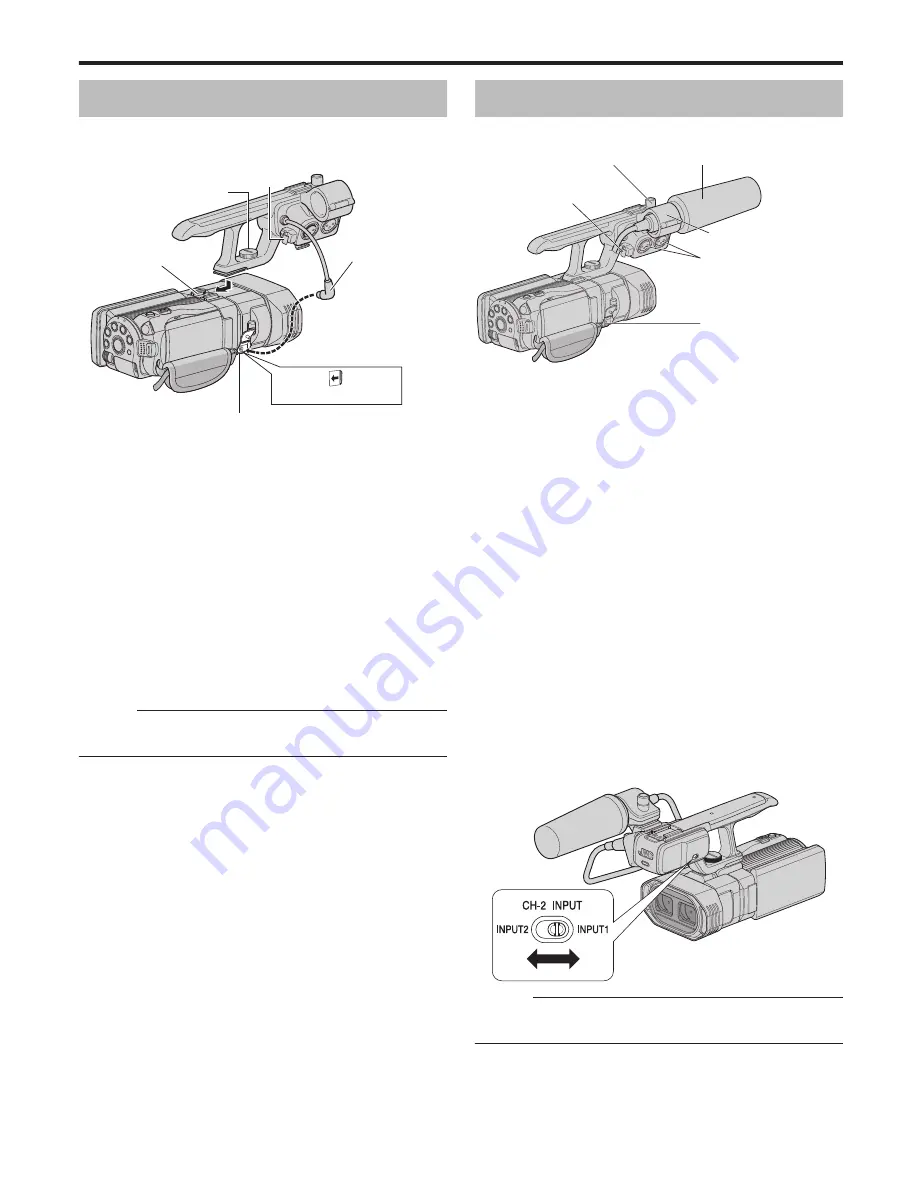
Attaching an External Microphone
You can attach a microphone (optional) to the microphone
holder.
.
Microphone Connector
Clamp
Microphone Holder
Knob
INPUT1/INPUT2 Connector
Microphone
1
Turn the knob on the microphone holder
anticlockwise to loosen it and open the
microphone holder.
2
Place the microphone in the microphone
holder.
3
Turn the knob on the microphone holder
clockwise to secure the microphone.
4
Connect the microphone to the INPUT1/
INPUT2 audio input connector, or the
microphone connector according to the type of
microphone cable terminal you are using.
0
INPUT1/INPUT2 Connector: XLR Connector
0
Microphone Connector: Mini-jack Connector
(stereo)
5
Attach the microphone cable to the clamp.
6
Set the CH-2 INPUT switch.
0
INPUT1: Inputs audio from the INPUT1 connector to
CH-2.
0
INPUT2: Inputs audio from the INPUT2 connector to
CH-2.
.
Memo :
0
Audio from the INPUT1 connector is also input to “CH-1”
regardless of the setting.
Getting Started
7