background image

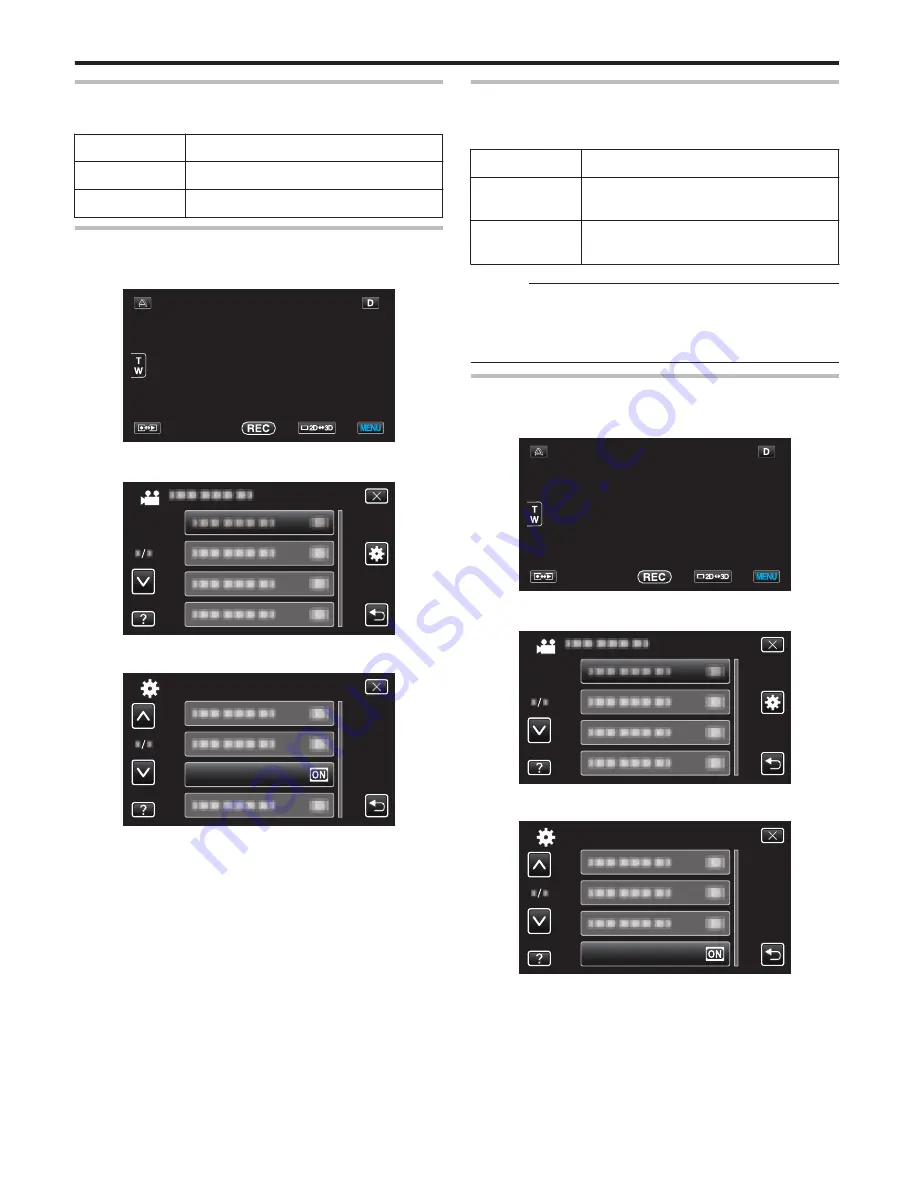
OPERATION SOUND

Turns on or off the operation sound.

Setting

Details

OFF

Turns off the operation sound.

ON

Turns on the operation sound.

Displaying the Item

1

Tap “MENU”.

.

2

Tap “

Q

”.

.

3

Tap “OPERATION SOUND”.

.

OPERATION SOUND

COMMON

AUTO POWER OFF

Prevents the situation of forgetting to turn off the power when

this is set.

Setting

Details

OFF

Power is not turned off even if this unit is

not operated for 5 minutes.

ON

Turns off the power automatically if this

unit is not operated for 5 minutes.

Memo : 

0

When using battery, power is turned off automatically if this

unit is not operated for 5 minutes.

0

When using the AC adapter, this unit goes into standby

mode.

Displaying the Item

1

Tap “MENU”.

.

2

Tap “

Q

”.

.

3

Tap “AUTO POWER OFF”.

.

AUTO POWER OFF

COMMON

Menu Settings

112

Summary of Contents for GY-HMZ1E

Page 1: ...3D MEMORY CARD CAMERA RECORDER LYT2384 002A Detailed User Guide GY HMZ1U GY HMZ1E ...

Page 2: ...bjects Clearly TOUCH PRIORITY AE AF 47 Capturing Smiles Automatically SMILE SHOT 48 Recording at Intervals TIME LAPSE RECORDING 50 Taking Group Shots Self timer 52 Remaining Recording Time Battery Power 54 Playback Playing Back Videos 57 Playing a Video with Defective Management Information 59 Playing Back Still Images 60 Adjusting Parallax During Playback 62 Slideshow Playback 63 Searching for a ...

Page 3: ...PROTECT CANCEL 105 COPY 105 MOVE 105 PLAYBACK OTHER FILE 105 Playback Menu Still Image 106 SEARCH DATE 106 PROTECT CANCEL 106 COPY 106 MOVE 106 Common Menu 107 CLOCK ADJUST 109 DATE DISPLAY STYLE 109 LANGUAGE 109 MONITOR BRIGHTNESS 110 REC MEDIA FOR VIDEO 111 REC MEDIA FOR IMAGE 111 OPERATION SOUND 112 AUTO POWER OFF 112 QUICK RESTART 113 REMOTE 113 TOUCH SCREEN ADJUST 114 3D DISPLAY WARNING 3D mo...

Page 4: ...one T e l e p h o t o O p t i m a l Z o n e W i d e A n g l e O p t i m a l Z o n e 50 m 5 m 10 m 1 m Memo 0 Make sure that you have stable footing during recording 0 Do not swing the camera horizontally or vertically during recording 0 If the subject is not recorded within the recommended shooting distance 3D effect may be weak 0 When recording night scenes or landscapes 3D effect of some subject...

Page 5: ...ed such as while riding in a vehicle or during walking may result in fatigue or discomfort 0 If you experience fatigue or discomfort while recording or viewing of the 3D images on the LCD monitor set the display to 2D Continual recording and viewing of the 3D images may result in health problems 0 Rest well after recording or viewing of the 3D images After recording or viewing of the 3D images che...

Page 6: ...D E X Remote Control RM V760U 0 Operates certain functions from a distance HDMI Mini Cable 0 Connects this unit to a TV to play back recorded images on the TV in a better quality AV Cable 0 Connects this unit to a TV to play back recorded images on the TV USB Cable Type A Mini Type B 0 Connects this unit to a computer CD ROM 0 For installing the provided software on a computer Audio Unit 0 Enables...

Page 7: ...ng the microphone cable and cannot be used to fix the audio unit cable Attaching an External Microphone You can attach a microphone optional to the microphone holder Microphone Connector Clamp Microphone Holder Knob INPUT1 INPUT2 Connector Microphone 1 Turn the knob on the microphone holder anticlockwise to loosen it and open the microphone holder 2 Place the microphone in the microphone holder 3 ...

Page 8: ...ding it in the direction of the arrow 0 When battery charging starts the indicating lamp blinks 0 When charging is complete the indicating lamp lights up 3 Remove the battery by sliding it in the opposite direction after charging is complete Approximate Battery Charging Time o Using AC Adapter Battery Pack Charging Time BN VF815U BN VF815E 2 h 40 m BN VF823U BN VF823E Supplied 3 h 40 m o Using Bat...

Page 9: ...he belt Caution 0 Be sure to fasten the grip belt properly If the belt is loose this unit may drop and result in injuries or damages Using the Touch Screen Icon operation buttons thumbnails and menu items are displayed on the touch screen according to the mode in use 0 To operate tap the icon operation buttons thumbnails or menu items on the touch screen lightly 0 There are two ways to operate the...

Page 10: ...wrong direction It may cause damage to the unit and card 0 Turn off the power of this unit before inserting or removing a card 0 Do not touch the metal contact area when inserting the card Memo 0 To record to the card it is necessary to perform media settings When no card is available set media settings to BUILT IN MEMORY for recording REC MEDIA FOR VIDEO A p 111 REC MEDIA FOR IMAGE A p 111 0 To u...

Page 11: ... also use a Class 10 compliant SDHC SDXC card 0 To protect the data do not touch the terminals of the SD card 0 Both videos and still images can be recorded on one SD card When your computer cannot recognize the SDXC card Confirm and update the OS of your computer Windows XP Windows XP SP1 Necessary to update to SP2 or higher Windows XP SP2 Windows XP SP3 Necessary to download the update software ...

Page 12: ...nitor is set to 2D 6 Menu Button Operating the Menu A p 85 7 Display Button Some displays disappear after approximately 3 seconds Use the n button to change the displays as shown below 0 Tap n button Displays appear for approximately 3 seconds with every tap 0 Tap and hold n button Displays are fixed such that they do not disappear After setting the display button changes from n to m Tap m to rele...

Page 13: ...nu A p 85 8 Operation Buttons Operation Buttons for Still Image Playback A p 61 Index Screen 2011 2011 1 2 3 4 5 6 7 1 Date Button Operation Buttons for Video Playback A p 58 Operation Buttons for Still Image Playback A p 61 2 Recording Playback Mode Button 0 Switches between recording and playback modes 3 Index Screen Switching Button Still image only 0 Switches between the group or full index sc...

Page 14: ...onth day hour and minute 4 After setting the date and time tap SET 2011 1 1 10 00 SET TIME DATE CLOCK SETTING 5 Select the region where you live and tap SAVE GMT SAVE CLOCK AREA SETTING 0 The city name and time difference are displayed 0 Tap or to select the city name Memo 0 The clock can be reset again later Resetting the Clock A p 15 0 When using this unit overseas you can set it to the local ti...

Page 15: ...d time 2011 1 1 10 00 SET TIME DATE CLOCK SETTING 0 When the year month day hour or minute item is tapped and will be displayed 0 Tap or to adjust the year month day hour and minute 6 After setting the date and time tap SET 2011 1 1 10 00 SET TIME DATE CLOCK SETTING 7 Select the region where you live and tap SAVE GMT SAVE CLOCK AREA SETTING 0 The city name and time difference are displayed 0 Tap o...

Page 16: ...holding this unit keep your elbows close to your sides to prevent camera shake 0 Hold the LCD monitor with your left hand and adjust the angle accordingly Holding the LCD monitor with your left hand helps to stabilize the camera for recording Caution 0 Be careful not to drop this unit during transportation 0 Guardians should pay close attention when this unit is being used by children Memo 0 If ca...

Page 17: ...d to be used and make sure that it is securely attached Memo 0 It is recommended to use a tripod or monopod when recording in conditions prone to camera shake such as in dark places or when zoomed to the telephoto end 0 Set the digital image stabilizer to Z OFF when using a tripod for recording Reducing Camera Shake A p 46 Attaching Headphones You can attach optional headphones to this unit 1 Open...

Page 18: ...upward Operation Buttons on Remote Control Unit INFO SNAP SHOT START STOP INDEX 4 5 6 1 2 3 1 Recording Start Stop Button 0 Starts stops video recording 2 Still Image Button 0 Takes a still image 3 Zoom Button 0 T Zooms in 0 W Zooms out 4 Basic Playback Operations Operation Buttons Description Playback Pause Button d e 0 Starts pauses playback of videos or slideshows Left Button j 0 Moves the curs...

Page 19: ... States Canada Mexico A A A India Indonesia Singapore Sri Lanka Thailand South Korea China Japan Nepal Pakistan Bangladesh Philippines Vietnam Hong Kong Special Administrative Region Macau Special Administrative Region Malaysia B C B F C B B F B C B F A BF C A C A B BF C O A C B C C A BF O A C B BF B C B BF C Europe Iceland Ireland United Kingdom Italy Austria Netherlands Canary Islands Greece Swi...

Page 20: ...N 0 Tap or to move upward or downward for more selection 4 Tap AREA SETTING CLOCK ADJUST AREA SETTING 5 Select the area you are traveling to and tap SAVE GMT SAVE AREA SETTING 0 The city name and time difference are displayed 0 Tap or to select the city name Memo 0 Setting AREA SETTING changes the clock time such that time difference is accounted for After returning to your country re select the r...

Page 21: ...or more selection 4 Tap DST SETTING CLOCK ADJUST DST SETTING 5 Tap ON DAYLIGHT SAVING TIME DST DST SETTING OFF ON CURRENT SETTING ON Memo 0 What is daylight saving time Daylight saving time is the system of setting the clock 1 hour ahead for a fixed period in summer It is used mainly in the Western countries 0 Restore the daylight saving time settings after you returned from the trip Getting Start...

Page 22: ...VF815E 55 m 1 h 1 h 45 m 2 h BN VF823U BN VF823E Supplied 1 h 20 m 1 h 35 m 2 h 40 m 3 h 5 m o 2D Display on LCD Monitor Battery Pack Actual Recording Time 3D Recording MP4 MVC 3D Recording AVCHD 2D Recording BN VF815U BN VF815E 55 m 1 h 5 m 1 h 20 m BN VF823U BN VF823E Supplied 1 h 25 m 1 h 40 m 1 h 55 m Battery Pack Continuous Recording Time 3D Recording MP4 MVC 3D Recording AVCHD 2D Recording B...

Page 23: ...mages A p 4 0 If the left and right images of an object close to the camera do not appear to be in alignment or the 3D effect of a distant object is weak adjust the parallax Adjusting Parallax During Recording A p 32 0 When PARALLAX ADJUSTMENT is assigned to the ADJ button parallax can be adjusted manually using the ADJ button and control dial Using the Control Dial for Recording A p 45 0 You can ...

Page 24: ...ality 1920 1080 Display Example Frame Sequential During Recording LR Independent MP4 MVC The 2 channel full HD 60i or full HD 50i picture is recorded as the picture signals for left and right eyes 1920 1080 60i Full HD 2ch 1920 1080 50i Full HD 2ch Memo 0 Videos recorded in MP4 MVC format are saved in full high definition and can only be played back on this unit 0 To record 3D images to a disc wit...

Page 25: ...hen a still image is being captured Memo 0 When 3D recording is performed still images will be saved in both 3D and 2D formats 0 3D still images are saved as MP files mpo 0 3D still images cannot be printed To print make use of the 2D still image that is captured at the same time 0 To record 3D images refer also to Precautions on Recording and Playing Back 3D Images A p 4 0 If the left and right i...

Page 26: ...justment manually Adjusting Parallax During Recording A p 32 2 3D VIDEO REC FORMAT 3D mode only Displays the recording format for 3D video recording 3 VIDEO QUALITY Displays the icon of the VIDEO QUALITY setting selected in the recording menu VIDEO QUALITY A p 93 0 is displayed when recording in the 24p mode SYSTEM SELECT A p 92 4 3D 2D Mode Displays the current recording mode of 3D or 2D 3D is di...

Page 27: ...r object even in a dark environment Memo 0 Scenes can be detected according to the shooting conditions and automatically adjusted in Intelligent Auto mode 0 Some functions may not work properly depending on the shooting conditions Operation Buttons for Video Recording Operation Buttons Description 1 Parallax Adjustment Adjusts the effect when 3D or LR MIX images are displayed on the LCD monitor Ad...

Page 28: ...nt scene it is recommended to conduct a trial recording 0 Check the remaining recording time in the media before you start shooting If there is not enough space move copy the data to a computer or disc 0 Do not forget to make copies after recording 0 Recording stops automatically as it cannot be performed for 12 or more consecutive hours according to specifications It may take some time to resume ...

Page 29: ...still image icon B appears 3 Check if the recording mode is P Intelligent Auto 0 If the mode is H Manual press the H T button to switch to P Intelligent Auto The mode changes between Intelligent Auto and Manual with every press 4 Set the focus on the subject Press halfway 0 When focused the focus icon lights up in green 5 Take a still image Press fully 0 PHOTO lights up when a still image is being...

Page 30: ...media where still images are recorded to The recording media can be changed REC MEDIA FOR IMAGE A p 111 0 3D 2D Mode Displays the current recording mode of 3D or 2D 3D is displayed during 3D recording while 2D is displayed during 2D recording Operation Buttons for Still Image Recording 6630 Operation Buttons Description 1 Parallax Adjustment Adjusts the effect when 3D or LR MIX images are displaye...

Page 31: ...ain snow or places with high humidity like the bathroom 0 Do not use this unit in places subject to excessive humidity or dust as well as places exposed to steam or smoke directly 0 Do not remove the battery pack AC adapter or SD card when the access lamp is lighted The recorded data may become unreadable Memo 0 Before recording an important scene it is recommended to conduct a trial recording 0 T...

Page 32: ...splay 0 To reduce the amount of correction tap Doing so decreases the value of the parallax display 4 Tap SET to confirm SET Caution 0 Too much parallax may cause the 3D effect to be lost 0 If you see double images even after parallax adjustment set the display on the LCD monitor to 2D immediately Memo 0 While this unit is equipped with the function to adjust parallax automatically it may not work...

Page 33: ...e 0 The video A or still image B icon appears 3 Select the Manual recording mode 0 If the mode is P Intelligent Auto press the H T button to switch to H Manual The mode changes between Intelligent Auto and Manual with every press 4 Tap MENU 5 Tap the item to set manually SCENE SELECT VIDEO 0 For details on the various manual settings refer to Manual Recording Menu Memo 0 The manual settings are di...

Page 34: ...when shooting a fast moving subject or to emphasize the subject s movement Setting Shutter Speed A p 39 APERTURE PRIORITY 0 You can adjust the aperture to capture an image with only the subject in focus while blurring the surroundings Setting Aperture A p 40 Name Description WHITE BALANCE 0 Overall color on the screen can be adjusted 0 Use this when the color on the screen appears differently from...

Page 35: ... downward for more scene selection 0 Tap L to exit the menu Memo 0 When CINEMA is set Scene Select cannot be used CINEMA A p 90 The image is only an impression Setting Effect b NIGHTALIVE Increases gain and brightens the scene automatically using a slow shutter when the surrounding is dark To prevent camera shake use a tripod c NIGHT Captures night scenes naturally w PORTRAIT Blurs the background ...

Page 36: ...0 Tap E to focus on a distant subject 0 Tap p to focus on a near subject 5 Tap SET to confirm MENU 0 When focus is confirmed the focusing frame disappears and E and p are displayed The icons may appear blinking Memo 0 A subject that is focused at the telephoto T end remains in focus when it is zoomed out to the wide angle W end 0 Focus cannot be achieved on a distant or near object beyond limit or...

Page 37: ... screen 3 Adjust the focus MENU SET 0 Tap E to focus on a distant subject 0 Tap p to focus on a near subject 4 Tap SET to confirm MENU Memo 0 The image becomes black and white while the outline of the focused object is displayed in the selected color Change outline color if it becomes difficult to see FOCUS ASSIST COLOR A p 100 0 You can also use the control dial to adjust the focus Using the Cont...

Page 38: ...UAL MANUAL AUTO BRIGHTNESS ADJUST 4 Adjust the brightness value MENU SET 0 Compensation range during video recording 6 to 6 0 Compensation range during still image recording 2 0 to 2 0 0 Tap to increase the brightness 0 Tap to decrease the brightness 5 Tap SET to confirm MENU Memo 0 Settings can be adjusted separately for videos and still images 0 You can also use the control dial to adjust the br...

Page 39: ... image 0 Tap to increase the shutter speed 0 Tap to decrease the shutter speed 5 Tap SET to confirm MENU 1 30 0 After confirmation the display for adjusting shutter speed disappears Memo 0 Settings can be adjusted separately for videos and still images 0 While fast moving subjects can be captured clearly by increasing SHUTTER SPEED the screen appears darker When recording in dark places such as in...

Page 40: ...background to appear blurry smaller aperture value tap 5 Tap SET to confirm MENU F1 8 0 After confirmation the display for adjusting aperture disappears Memo 0 Settings can be adjusted separately for videos and still images 0 When zoomed to the telephoto end setting the aperture to the minimum value F1 2 does not stop it down all the way In this case the aperture value is set according to the zoom...

Page 41: ...day or inside a shade 3200K Set this when shooting under illumination such as a video light MARINE BLUE Set this when shooting the sea at deep water area water appears blue MARINE GREEN Set this when shooting the sea at shallow water area water appears green Using MWB 1 Hold a sheet of plain white paper in front of the lens so that the white paper fills the screen 2 Tap MWB and keep touching while...

Page 42: ...only at areas with the specified luminance levels Zebra Pattern 1 Tap MENU 2 Tap ZEBRA VIDEO ZEBRA 0 Tap or to move upward or downward for more selection 0 Tap L to exit the menu 0 Tap J to return to the previous screen 3 Tap 70 80 or OVER100 OVER100 ZEBRA OFF 70 80 Display Setting OFF Deactivates the function 70 80 Sections that are close to be over exposed are displayed in striped pattern OVER10...

Page 43: ...rn to the previous screen 3 Tap ON ON OFF TELE MACRO 0 After setting the tele macro icon o appears Setting Details OFF Enables close up shots up to 1 m at the telephoto T end Enables close up shots up to 5 cm at the wide angle W end ON Enables close up shots up to 40 cm at the telephoto T end Enables close up shots up to 5 cm at the wide angle W end Caution 0 When you are not taking close up shots...

Page 44: ...P WHITE BALANCE FOCUS ASSIST DIS 0 Still image mode NIGHTALIVE TOUCH PRIORITY AE AF FOCUS BRIGHTNESS ADJUST SHUTTER SPEED APERTURE PRIORITY BACKLIGHT COMP WHITE BALANCE FOCUS ASSIST SELF TIMER Making Adjustments with the USER Button Operate as follows 0 In the case of functions that are turned on or off NIGHTALIVE BRIGHTNESS ADJUST SHUTTER SPEED APERTURE PRIORITY BACKLIGHT COMP DIS FOCUS ASSIST SE...

Page 45: ...d function appears 4 Adjust the assigned function and record 0 Change the setting using the control dial 0 Press the ADJ button to set to AUTO or activate an assigned function 0 To change the setting of a different function press the ADJ button for about 3 seconds The control menu appears Go back to step 2 and select a different function Memo 0 By assigning BRIGHTNESS ADJUST FOCUS SHUTTER SPEED or...

Page 46: ...effectively when shooting bright scenes on the wide angle end Optical zoom during 3D recording approx 5x during 2D recording approx 10x Memo 0 It is recommended to set the image stabilizer to OFF when shooting a subject of little movement with the unit on a tripod 0 Complete stabilization may not be possible if camera shake is excessive 0 This setting is effective for video recording only Setting ...

Page 47: ...ion FACE TRACKING e appears on the screen Recording is performed while tracking and automatically adjusting the tapped face subject with appropriate focus and brightness In addition a blue frame appears around the tapped face subject COLOR TRACKING f appears on the screen Recording is performed while tracking and automatically adjusting the tapped color subject with appropriate focus and brightnes...

Page 48: ...u 0 Tap J to return to the previous screen 4 Tap ON OFF ON SMILE SHOT 5 Point the camera toward the human subject 0 A still image is automatically captured when smiles are detected MENU 0 PHOTO lights up when a still image is being captured 0 You can display the smile level together with the frame by setting SMILE LEVEL in the menu to ON before recording Setting SMILE LEVEL Display Still image onl...

Page 49: ...o FACE TRACKING 1 Open the LCD monitor and select the still image mode 2 Tap MENU 3 Tap SMILE LEVEL SMILE LEVEL IMAGE 4 Tap ON OFF ON SMILE LEVEL Setting Details OFF Displays only the frames when faces are detected ON Displays the frames and smile levels when faces are detected 0 Frame Appears around detected faces Smile level Appears in value 0 100 for detected smiles Recording 49 ...

Page 50: ...urn to the previous screen 4 Tap to select a recording interval 1 to 80 seconds 1SEC INTERVAL OFF TIME LAPSE RECORDING 80SEC INTERVAL 10SEC INTERVAL 0 The greater the number of seconds the longer the recording interval 0 Tap or to move upward or downward for more selection 0 Tap L to exit the menu 0 Tap J to return to the previous screen 5 Start recording 0 A frame is taken at intervals of the sel...

Page 51: ... Takes a frame at 10 second intervals Recorded videos will be played back at 300 times speed 80SEC INTERVAL Takes a frame at 80 second intervals Recorded videos will be played back at 2400 times speed Caution 0 Audio cannot be recorded during time lapse recording 0 Zooming simultaneous still image recording and image stabilizer are not available in time lapse recording 0 When recording is stopped ...

Page 52: ...2 10 second Self timer 1 Select still image mode 0 The still image icon B appears 2 Tap MENU 3 Tap SELF TIMER SELF TIMER IMAGE 0 Tap or to move upward or downward for more selection 0 Tap L to exit the menu 0 Tap J to return to the previous screen 4 Tap 2SEC or 10SEC OFF FACE DETECTION 10SEC 2SEC SELF TIMER 5 Set the focus on the subject Press halfway 0 When focused the focus icon lights up in gre...

Page 53: ... screen 4 Tap FACE DETECTION OFF FACE DETECTION 10SEC 2SEC SELF TIMER 5 After making sure that everyone is facing the camera press the SNAPSHOT button 0 Frames appear around the faces of the subjects 0 Pressing the SNAPSHOT button again starts the 10 second self timer 6 The photographer enters the frame Photographer 0 The frames around the faces disappear when the photographer is detected and a co...

Page 54: ...he video recording mode 0 Press the INFO button to check the remaining recording time of each recording media 0 To display the remaining battery power tap l 0 Tap J to return to the recording mode 0 To exit the display tap L 4 Display the remaining battery power min MAX TIME REMAINING BATTERY 0 For video recording tap J to return to the remaining recording time display For still image recording ta...

Page 55: ...h 40 m 40 m 1 h 20 m 2 h 50 m 5 h 50 m 8 h 40 m 11 h 50 m EP 29 h 10 m 1 h 40 m 3 h 40 m 7 h 10 m 14 h 50 m 21 h 50 m 29 h 50 m 0 The actual recording time may shorten depending on the shooting environment Approximate Number of Still Images Unit Number of Shots o 3D Mode Image Size SDHC Card Built in Memory 64 GB 4 GB 8 GB 16 GB 32 GB 1920X1080 2M 16 9 1000 2200 4400 4999 4999 o 2D Mode Image Size...

Page 56: ... BN VF823U BN VF823E Supplied 1 h 25 m 1 h 40 m 1 h 55 m Battery Pack Continuous Recording Time 3D Recording MP4 MVC 3D Recording AVCHD 2D Recording BN VF815U BN VF815E 1 h 50 m 2 h 10 m 2 h 35 m BN VF823U BN VF823E Supplied 2 h 45 m 3 h 15 m 3 h 50 m 0 The above are values when MONITOR BRIGHTNESS is set to STANDARD 0 The actual recording time may be shorter if zooming is used or if recording is s...

Page 57: ... e to pause 0 Tap u to return to the index screen Memo 0 Images recorded in 2D mode cannot be displayed as 3D images 0 3D images may be played back when the 3D button lights up 0 Images recorded in 3D mode and 2D mode are displayed on the index screen separately Press the 3D button to switch to the desired mode for playback 0 3D images recorded in MP4 MVC format and AVCHD format are displayed on t...

Page 58: ...uring 3D playback while 2D is displayed during 2D playback 2 Pointer Displays the current estimated playback position within the scene 3 k Enables manual parallax adjustment 4 h Returns to the beginning of the scene 5 j Reverse search 6 d e Playback pause 7 i Forward search 8 g Advances to the next video 9 Recording Playback Mode q Switches between recording and playback modes 0 u Stop returns to ...

Page 59: ...with defective management information 1 Select video mode 2 Tap q to select the playback mode 3 Tap MENU 2011 4 Tap PLAYBACK OTHER FILE VIDEO PLAYBACK OTHER FILE 5 Tap on the file to start playback 2011 PLAYBACK OTHER FILE Playing Back Videos A p 58 Memo 0 An MTS file is created in the EXTMOV folder when management information is corrupted 0 The thumbnails of the 3D files in the EXTMOV folder will...

Page 60: ...on the LCD monitor 4 Tap on the file to start playback 2011 0 Tap I J to select the media for playback and change the index screen thumbnail display 0 Tap u to return to the index screen 0 Tap W to show all the thumbnails that are displayed in a group Tap again to restore the group Memo 0 Only 3D images are displayed during the 3D mode Similarly only 2D images are displayed during the 2D mode 0 3D...

Page 61: ... 2D Mode Displays the current playback mode of 3D or 2D 3D is displayed during 3D playback while 2D is displayed during 2D playback 2 T Continuous playback of grouped files such as still images captured by continuous shooting 3 k Enables manual parallax adjustment 4 h Returns to the previous still image 5 Recording Playback Mode q Switches between recording and playback modes 6 u Returns to index ...

Page 62: ...allax display 4 Tap SET to confirm SET Caution 0 Too much parallax may cause the 3D effect to be lost 0 If you see double images even after parallax adjustment set the display on the TV to 2D immediately In addition set the LCD monitor to 2D display accordingly Memo 0 While this unit is equipped with the function to adjust parallax automatically it may not work properly for the following subjects ...

Page 63: ... or 2D mode 0 Images recorded in 3D mode and 2D mode are displayed on the index screen separately Press the 3D button to switch to the desired mode for playback 0 During 3D mode 3D is displayed on the LCD monitor 0 During 2D mode 2D is displayed on the LCD monitor 4 Tap on the thumbnail and tap d 2011 Operation Buttons for Still Image Playback A p 61 Playback 63 ...

Page 64: ... or REC MEDIA FOR IMAGE are searched 1 Tap MENU 2011 0 Searching can be performed in both the video and still image modes The image shows the video mode 2 Tap SEARCH DATE VIDEO SEARCH DATE 3 Select a recording date and tap NEXT 10 10 2011 10 10 2011 NEXT SEARCH DATE 0 Tap again to cancel the selected date 4 Tap on the file to start playback MENU 2011 SEARCH DATE 0 You can select videos in the vide...

Page 65: ...en if they are HDMI CEC compliant Therefore the HDMI CEC functions of this unit cannot be guaranteed to operate in combination with all the TVs In such cases set HDMI CONTROL to OFF HDMI CONTROL A p 117 The language on the display changed 0 It may occur when you connect this unit to a TV with different language setting using an HDMI mini cable 3D images are not displayed in 3D 0 Set HDMI OUTPUT in...

Page 66: ...ion 0 To play back 3D images refer also to Precautions on Recording and Playing Back 3D Images Precautions on Recording and Playing Back 3D Images A p 4 0 If you experience fatigue or discomfort while viewing 3D images set HDMI OUTPUT in the COMMON menu to 2D OUTPUT In addition set the TV to 2D display accordingly HDMI OUTPUT A p 116 Memo 0 When connected to the TV via the provided HDMI mini cable...

Page 67: ...able 0 TV turns on automatically and switches to HDMI input mode when this unit is turned on Operation Method 2 1 Turn off the TV 0 This unit turns off automatically Memo 0 Depending on the TV connected the display language of this unit will automatically switch to the language that is selected for the TV when this unit is turned on This is applicable only if this unit supports the language select...

Page 68: ...LCD monitor is opened 4 Press the external input button on the TV to switch to the input from this unit via the connected connector HDMI 5 Play back a file 2011 Playing Back Videos A p 57 Playing Back Still Images A p 60 Memo 0 Change the settings in HDMI OUTPUT according to the connection HDMI OUTPUT A p 116 0 When connected to the TV via the HDMI mini cable images and sounds may not be output pr...

Page 69: ... R Audio Input L Video Input TV To AV Connector AV Cable Provided Video Input A Connect using the provided AV cable B Connect the AC adapter to this unit 0 This unit powers on automatically when the AC adapter is connected 3 Press the external input button on the TV to switch to the input from this unit via the connected connector External Input 4 Play back a file 2011 Playing Back Videos A p 57 P...

Page 70: ...h as turning off the power while accessing files 0 Be sure to use the supplied JVC AC adapter 0 If the data on the recording medium becomes corrupted format the recording medium to use the medium again FORMAT SD CARD A p 120 Deleting the Currently Displayed File Deletes the currently displayed file Caution 0 Deleted files cannot be restored 1 Tap A MENU 0 01 23 0 12 34 0 While the video mode is sh...

Page 71: ...to release all selections 0 Still images that are recorded continuously within 2 seconds or with the continuous shooting mode will be grouped together Only the first recorded file is shown and the group is displayed with a green frame When this is tapped an index screen of the grouped files appears Tap on the files to delete then tap J 5 Tap SET REL ALL SEL ALL DELETE 2011 SET 6 Tap EXECUTE to con...

Page 72: ...ected Files A p 73 Caution 0 When the recording media is formatted even the protected files will be deleted Protecting Releasing Protection of the Currently Displayed File Protects or releases protection of the currently displayed file 1 Tap MENU MENU 0 01 23 0 12 34 2 Tap PROTECT CANCEL VIDEO PROTECT CANCEL 3 Tap YES NO YES PROTECT 0 Tap h g to select the previous or next file 0 After setting tap...

Page 73: ...emoved 0 P appears on the selected files To remove P from a file tap on the file again 0 Tap SEL ALL to select all files 0 Tap REL ALL to release all selections 0 Still images that are recorded continuously within 2 seconds or with the continuous shooting mode will be grouped together Only the first recorded file is shown and the group is displayed with a green frame When this is tapped an index s...

Page 74: ...ause e at the desired scene during playback MENU 0 01 23 0 12 34 0 After pausing the video you can fine tune the point to capture by tapping forward slow motion k and reverse slow motion l 5 Press the SNAPSHOT button Memo 0 Still images are captured with a size of 1920 1080 0 Captured still images are stored in the media where the video is being played back from 0 Still images cannot be captured f...

Page 75: ...is unit powers on automatically when the AC adapter is connected 0 Be sure to use the supplied JVC AC adapter 0 The SELECT DEVICE screen appears 2 Tap CONNECT TO OTHER CONNECT TO OTHER TYPE TO CONNECT SELECT DEVICE SELECT DEVICE 3 Tap the desired media SD CARD BUILT IN MEMORY SELECT MEDIA TO OPEN CONNECT TO OTHER 4 Perform dubbing on the Blu ray recorder 0 Refer also to the instruction manual of t...

Page 76: ...A p 57 0 After playback is complete stop the recording Caution 0 3D videos cannot be dubbed Dubbing Files to a VHS Tape Using a VCR You can dub videos in standard quality by connecting to a VCR 0 Refer also to the instruction manuals of the TV and VCR Caution 0 3D images cannot be copied to a VHS tape Images recorded in 3D mode cannot be copied as 2D images 1 Open the LCD monitor then press and ho...

Page 77: ...t 3D or 2D mode 2 Select video or still image mode 3 Tap q to select the playback mode 4 Tap MENU 2011 5 Tap COPY COPY VIDEO 6 Tap on the files to copy SET 2011 REL ALL SEL ALL QUANTITY 0000 QUIT 0 P appears on the selected files To remove P from a file tap on the file again 0 Tap SEL ALL to select all files 0 Tap REL ALL to release all selections 0 SET is deactivated when no file is selected 7 Ta...

Page 78: ...d to the built in memory 1 Select 3D or 2D mode 2 Select video or still image mode 3 Tap q to select the playback mode 4 Tap MENU 2011 5 Tap MOVE MOVE VIDEO 6 Tap on the files to move 2011 REL ALL SEL ALL QUANTITY 0000 QUIT SET 0 P appears on the selected files To remove P from a file tap on the file again 0 Tap SEL ALL to select all files 0 Tap REL ALL to release all selections 0 SET is deactivat...

Page 79: ...p J to return to the previous screen 0 The subsequent operations are to be performed on the computer 4 Windows Select Computer Windows Vista My Computer Windows XP Computer Windows 7 from the Start menu then click on the JVCCAM_MEM or JVCCAM_SD icon Mac Computer Double click on the No Name icon then click on the JVCCAM_MEM or JVCCAM_SD icon 0 Open the folder with the desired files List of Files an...

Page 80: ...hen necessary JVCCAM_MEM JVCCAM_SD DCIM AVCHD AVCHD BDMV STREAM BACKUP CLIPINF PLAYLIST INDEX BDM MOVIEOBJ BDM EXTMOV PRIVATE MOV_0001 MTS MOV_0002 MTS MOV_0003 MTS XXX MTS JVC __0002 MP4 __0003 MPO __0004 JPG 100JVCSO 101JVCSO 102JVCSO Video files with defective management information 2D 3D Video File in AVCHD Format mts 3D Video File in MP4 MVC Format mp4 3D Still Image File mpo 2D Still Image F...

Page 81: ...ions are not guaranteed in virtual OS environments such as Virtual PC VMWare etc Mac OS X 10 6 7 or later Additional support required for Mac OS X 10 7 Lion HDD At least 20MB of space required for installation At least 20MB of space required for installation Graphic Direct 3D 9 0c or later Display resolution of 1280 800 or above ATI or NVIDIA graphics processor 128MBVRAM Operations on an integrate...

Page 82: ...s and icons are created on the desktop 3D to LR Converter R L 0 For the operating details of 3D to LR Converter refer to the help file Mac Computer A Load the provided CD ROM into your computer B Make a new copy of the 3D to LR Converter disk image to the applications folder 3D to LR Converter R L Trouble with Using the Provided Software Consult the customer service center below 0 Pixela User Supp...

Page 83: ...in materials and workmanship for a period of thirty 30 days from the date of Your purchasing any our products accompanying the Program JVC s entire liability and your exclusive remedy in connection with the Program shall be replacement of such defective media EXCEPT FOR THE EXPRESS WARRANTIES STATED HEREIN AND TO THE EXTENT PERMITTED BY APPLICABLE LAW JVC AND ITS LICENSORS DISCLAIM ANY OTHER WARRA...

Page 84: ...ment shall be governed by and interpreted under the laws of Japan The Tokyo District Court has jurisdiction over all disputes which may arise with respect to the execution interpretation and performance of this Agreement Victor Company of Japan Limited Memo 0 If You acquired the Program in Germany the provisions of Sections 4 Limited Warranty and 5 Limited Liability provided above will be replaced...

Page 85: ...rd or downward for more selection 3 Tap the desired setting NIGHTALIVE OFF SCENE SELECT PORTRAIT NIGHT Memo 0 To exit the screen Tap L quit 0 To return to the previous screen Tap J return 0 To display the help file Tap K help and tap the item 0 Help file may not be available for some items Operating the Common Menu You can configure common setting items regardless of the mode using the common menu...

Page 86: ...on can be selected Scene Selection A p 35 Displayed only in the manual recording mode FOCUS Focus can be adjusted manually Adjusting Focus Manually A p 36 Displayed only in the manual recording mode FOCUS ASSIST Focused subject is outlined in color for more precise focus Using Focus Assist A p 37 Displayed only in the manual recording mode FOCUS ASSIST COLOR Sets the color of the outline of a focu...

Page 87: ... Displayed only in the manual recording mode TELE MACRO Enables close up shots when using the telephoto T end of the zoom Taking Close up Shots A p 43 Displayed only in the 2D manual recording mode CINEMA Adds a movie like effect to images CINEMA A p 90 TOUCH PRIORITY AE AF Automatically adjusts focus and brightness based on the subjects faces or selected area Capturing Subjects Clearly TOUCH PRIO...

Page 88: ... v Color compatible TV for playback x v Color 2D mode only A p 95 Displayed only in the 2D recording mode USER BUTTON SETTING Assigns a frequently used function to the USER button Setting the USER Button A p 44 3D SOUND Records realistic audio sounds You can enjoy more realistic audio sounds during playback of a video by recording it with 3D SOUND set to ON 3D SOUND A p 95 MIC LEVEL Make the adjus...

Page 89: ...re precise focus Operating Details Using Focus Assist A p 37 FOCUS ASSIST COLOR Sets the color of the outline of a focused object when Focus Assist is used Setting Details RED Outlines the focused object in red GREEN Outlines the focused object in green BLUE Outlines the focused object in blue Displaying the Item 1 Select video mode 2 Tap q to select the recording mode 2011 3 Tap MENU 4 Tap FOCUS ...

Page 90: ...43 CINEMA Adds a movie like effect to images Setting Details OFF Does not add any cinema effect ON Adds a movie like effect to images TOUCH PRIORITY AE AF Automatically adjusts focus and brightness based on the subjects faces or selected area Operating Details Capturing Subjects Clearly TOUCH PRIORITY AE AF A p 47 DIS Camera shake during recording can be effectively reduced Operating Details Reduc...

Page 91: ...lanted Setting Details OFF Turns off grid display ON Turns on grid display Displaying the Item 1 Select video mode 2 Tap q to select the recording mode 2011 3 Tap MENU 4 Tap GRID VIDEO GRID TIME LAPSE RECORDING Enables the changes of a scene that occur slowly over a long period to be shown within a short time by taking frames of it at a certain interval This is useful for making observations such ...

Page 92: ...witched to still image 0 Images are output in 60i or 50i from the AV connector 0 During the 2D mode images are output in 480p or 576p from the HDMI connector 0 SYSTEM SELECT cannot be changed in the 2D mode or when the 3D video format is set to AVCHD fixed at 60i 3D VIDEO REC FORMAT 3D mode only You can select a recording format for 3D video recording Setting Details AVCHD Records in AVCHD format ...

Page 93: ...high definition quality cannot be saved to DVDs XP Enables recording in high picture quality SP Enables recording in standard quality EP Enables long recordings Memo 0 To avoid noise when recording fast moving scenes or scenes with extreme changes of brightness set to THR or TXP during 3D mode or UXP or XP during 2D mode 0 You can change to the desired video quality by tapping on it from the remai...

Page 94: ...TAL Enables recording with 1 10x optical zoom and 11 40x digital zoom 200x DIGITAL Enables recording with 1 10x optical zoom and 11 200x digital zoom Memo 0 When digital zoom is used the image becomes grainy as it is digitally enlarged Displaying the Item 1 Select video mode 2 Tap q to select the recording mode 2011 3 Tap MENU 4 Tap ZOOM ZOOM VIDEO Menu Settings 94 ...

Page 95: ...ap q to select the recording mode 2011 3 Tap MENU 4 Tap x v Color x v Color VIDEO USER BUTTON SETTING Assigns a frequently used function to the USER button Operating Details Setting the USER Button A p 44 3D SOUND Records realistic audio sounds Setting Details OFF Does not record with 3D sound effects ON Records with 3D sound effects Displaying the Item 1 Select video mode 2 Tap q to select the re...

Page 96: ...lect video mode 2 Tap q to select the recording mode 2011 3 Tap MENU 4 Tap MIC LEVEL VIDEO MIC LEVEL MIC LEVEL SETTING Sets the microphone level Make the adjustments such that MIC LEVEL does not turn red Setting Details 2 Increases the microphone input level 1 Increases the microphone input level slightly 0 The microphone input level is not changed 1 Decreases the microphone input level slightly 2...

Page 97: ...ars 5 Adjust the volume level of the headphones 0 To turn up the volume tap on the touch screen 0 To turn down the volume tap on the touch screen 0 Tap L to exit the volume adjustment screen Adjusting the Volume Level of Headphones During Playback 1 Select video mode 2 Tap q to select the playback mode 2011 3 Adjust the volume level of the headphones 0 To turn up the volume set the zoom lever to t...

Page 98: ...e manual recording mode FOCUS Focus can be adjusted manually Adjusting Focus Manually A p 36 Displayed only in the manual recording mode FOCUS ASSIST Focused subject is outlined in color for more precise focus Using Focus Assist A p 37 Displayed only in the manual recording mode FOCUS ASSIST COLOR Sets the color of the outline of a focused object when Focus Assist is used FOCUS ASSIST COLOR A p 10...

Page 99: ...lected area Capturing Subjects Clearly TOUCH PRIORITY AE AF A p 47 SMILE SHOT Automatically captures a still image upon detection of a smile Capturing Smiles Automatically SMILE SHOT A p 48 SMILE LEVEL Sets the items to display when faces are detected Setting SMILE LEVEL Display Still image only A p 49 SELF TIMER Use this when taking a group photo Taking Group Shots Self timer A p 52 GAIN UP Makes...

Page 100: ...precise focus Operating Details Using Focus Assist A p 37 FOCUS ASSIST COLOR Sets the color of the outline of a focused object when Focus Assist is used Setting Details RED Outlines the focused object in red GREEN Outlines the focused object in green BLUE Outlines the focused object in blue Displaying the Item 1 Select still image mode 2 Tap q to select the recording mode 2011 3 Tap MENU 4 Tap FOC...

Page 101: ...djusts focus and brightness based on the subjects faces or selected area Operating Details Capturing Subjects Clearly TOUCH PRIORITY AE AF A p 47 SMILE SHOT Automaticallycapturesastillimageupondetectionofasmile Operating Details Capturing Smiles Automatically SMILE SHOT A p 48 SMILE LEVEL Sets the items to display when faces are detected Operating Details Setting SMILE LEVEL Display Still image on...

Page 102: ...ails RECORD ONE SHOT Records one still image CONTINUOUS SHOOTING Records still images continuously while the SNAPSHOT button is pressed Memo 0 You can change the continuous shooting speed with CONT SHOOTING SPEED in the COMMON menu CONT SHOOTING SPEED A p 103 0 Some SD cards may not support continuous shooting 0 The continuous shooting speed will drop if this function is used repeatedly Displaying...

Page 103: ...ill images continuously in the 2D still image mode at approximately 12 images second LOW SPEED Shoots continuously until the recording media is full Memo 0 Shooting speed slows down gradually as continuous shooting goes on in the LOW SPEED mode Displaying the Item 1 Select still image mode 2 Tap q to select the recording mode 2011 3 Tap MENU 4 Tap CONT SHOOTING SPEED IMAGE CONT SHOOTING SPEED Menu...

Page 104: ...s will be set to 1920X1080 2M 16 9 o 2D Mode Setting Details 2304X1296 2 9M 1920X1080 2M 16 9 Takes still images with aspect ratio 16 9 0 The sides of still images recorded in 16 9 aspect ratio may be cut off when printed 1728X1296 2 2M 640X480 0 3M 4 3 Takes still images with aspect ratio 4 3 Displaying the Item 1 Select still image mode 2 Tap q to select the recording mode 2011 3 Tap MENU 4 Tap ...

Page 105: ...os with defective management information Playing a Video with Defective Management Information A p 59 SEARCH DATE Narrows down the video index screen according to recording dates Operating Details Date Search A p 64 PROTECT CANCEL Protects files from being deleted accidently Operating Details Protecting Releasing Protection of the Currently Displayed File A p 72 Protecting Releasing Protection of ...

Page 106: ... the built in memory to the SD card COPY A p 106 MOVE Moves files from the built in memory to the SD card MOVE A p 106 SEARCH DATE Narrows down the still image index screen according to recording dates Operating Details Date Search A p 64 PROTECT CANCEL Protects files from being deleted accidently Operating Details Protecting Releasing Protection of the Currently Displayed File A p 72 Protecting R...

Page 107: ...Y STYLE A p 109 LANGUAGE The language on the display can be changed Changing the Display Language A p 16 MONITOR BRIGHTNESS Sets the brightness of the LCD monitor MONITOR BRIGHTNESS A p 110 REC MEDIA FOR VIDEO Sets the recording playback media of videos REC MEDIA FOR VIDEO A p 111 REC MEDIA FOR IMAGE Sets the recording playback media of still images REC MEDIA FOR IMAGE A p 111 OPERATION SOUND Turn...

Page 108: ...nition of the video output from the HDMI mini connector HDMI OUTPUT A p 116 HDMI CONTROL Sets the linked operations ON OFF when the TV and this unit are connected using the HDMI mini connector HDMI CONTROL A p 117 AUTO FINALIZE Finalizesthediscscreatedautomaticallysothattheycanbeplayedbackoncompatible devices AUTO FINALIZE A p 118 FACTORY PRESET Returns all the settings to their default values FAC...

Page 109: ...TIME then tap or to set the time display format 0 For date display set to any format from month day year year month day and day month year 0 For time display set to any format from 12h and 24h 0 After setting tap SET This confirms the setting of the order of year month day and the time display format 0 To cancel the setting tap L or J Clock Set Style The clock set style of this unit varies with th...

Page 110: ...he standard brightness 2 Darkens the backlight of the monitor regardless of the surrounding conditions 1 Sets to dim brightness Helps to save battery life when selected AUTO Sets the brightness automatically to 4 when using outdoors and to 3 when using indoors Displaying the Item 1 Tap MENU 2 Tap Q 3 Tap MONITOR BRIGHTNESS COMMON MONITOR BRIGHTNESS Menu Settings 110 ...

Page 111: ...g the Item 1 Tap MENU 2 Tap Q 3 Tap REC MEDIA FOR VIDEO REC MEDIA FOR VIDEO COMMON REC MEDIA FOR IMAGE Sets the recording playback media of still images Setting Details BUILT IN MEMORY Records still images to this unit s built in memory SD CARD Records still images to the SD card Displaying the Item 1 Tap MENU 2 Tap Q 3 Tap REC MEDIA FOR IMAGE REC MEDIA FOR IMAGE COMMON Menu Settings 111 ...

Page 112: ...ng to turn off the power when this is set Setting Details OFF Power is not turned off even if this unit is not operated for 5 minutes ON Turns off the power automatically if this unit is not operated for 5 minutes Memo 0 Whenusingbattery poweristurnedoffautomaticallyifthis unit is not operated for 5 minutes 0 When using the AC adapter this unit goes into standby mode Displaying the Item 1 Tap MENU...

Page 113: ... power consumption within 5 minutes after the LCD monitor is closed is reduced Displaying the Item 1 Tap MENU 2 Tap Q 3 Tap QUICK RESTART COMMON QUICK RESTART 0 The power consumption within 5 minutes after the LCD monitor is closed is reduced REMOTE Enables remote control operation Setting Details OFF Disables remote control operation ON Enables remote control operation Displaying the Item 1 Tap M...

Page 114: ...ESS MARK AGAIN CONFIRM THE ADJUSTMENT 0 Keep tapping as its position changes with every tap 0 If areas on the adjustment screen other than the mark are tapped errors will occur In this case try again from step 4 6 Tap OK COMPLETED OK 0 Setting ends and returns to the menu screen Caution 0 Do not tap areas other than the mark during touch screen adjustment steps 4 5 Doing so may cause the touch scr...

Page 115: ...3D warning icon y Displaying the Item 1 Tap MENU 2 Tap Q 3 Tap 3D DISPLAY WARNING 3D DISPLAY WARNING COMMON VIDEO OUTPUT 2D mode only Setstheaspectratio 16 9or4 3 accordingtotheconnecting TV Setting Details 4 3 Select this when connecting to a conventional TV 4 3 16 9 Select this when connecting to a widescreen TV 16 9 Displaying the Item 1 Tap MENU 2 Tap Q 3 Tap VIDEO OUTPUT COMMON VIDEO OUTPUT M...

Page 116: ...dless of the supported monitor output format Outputs images from the HDMI connector in 2D 1080i 576p or 576i regardless of the supported monitor output resolution Recorded 3D Video Format and Display on TV via HDMI Output o When HDMI OUTPUT is set to 2D OUTPUT 3D VIDEO REC FORMAT Video Output 2D TV 3D Compatible TV LCD Monitor of this Unit AVCHD 2D 2D 3D MP4 MVC 2D 2D 3D o When HDMI OUTPUT is set ...

Page 117: ...ON HDMI OUTPUT HDMI CONTROL Sets whether to link operations with an HDMI CEC compliant TV Setting Details OFF Turns off linked operations ON Turns on linked operations Displaying the Item 1 Tap MENU 2 Tap Q 3 Tap HDMI CONTROL COMMON HDMI CONTROL Menu Settings 117 ...

Page 118: ... FINALIZE AUTO FINALIZE COMMON FACTORY PRESET Returns all the settings to their default values 1 Tap MENU 2 Tap Q 3 Tap FACTORY PRESET COMMON FACTORY PRESET 4 Tap YES NO YES RESET TO THE FACTORY PRESET DO YOU WANT THE SETTINGS 0 All settings return to their default values UPDATE Updates the functions of this unit to the latest version For details refer to the JVC homepage When no program to update...

Page 119: ...lder and file numbers to 1 Caution 0 All data on the built in memory will be deleted when it is formatted Copy all files on the built in memory to a PC before formatting 0 Make sure that the battery pack is fully charged or connect the AC adapter as the formatting process may take some time Displaying the Item 1 Tap MENU 2 Tap Q 3 Tap FORMAT BUILT IN MEM COMMON FORMAT BUILT IN MEM Menu Settings 11...

Page 120: ... pack is fully charged or connect the AC adapter as the formatting process may take some time Displaying the Item 1 Tap MENU 2 Tap Q 3 Tap FORMAT SD CARD FORMAT SD CARD COMMON ERASE ALL DATA Execute this process when disposing of this unit or passing it to another person 1 Tap MENU 2 Tap Q 3 Tap ERASE ALL DATA ERASE ALL DATA COMMON 4 Tap YES NO YES ALL DATA WILL BE ERASED MEMORY DELETE DATA ON THE...

Page 121: ...ng 6 Remote Sensor Rear 1 Headphones Connector 0 Connects to optional headphones Attaching Headphones A p 17 2 ACCESS Access Lamp 0 Lights up blinks during recording or playback Do not remove the battery pack AC adapter or SD card 3 POWER CHARGE Power Charge Lamp 0 Lights up Power ON 0 Blinks Charging in progress 0 Goes out Charging finished 4 HDMI Connector 0 Connects to an HDMI TV 5 DC Connector...

Page 122: ...utton lights up goes out 6 Remote Sensor 7 INFO Information Button 0 Recording Displays the remaining time for video only and battery power 0 Playback Displays file information such as recording date 8 ADJ Adjustment Button 0 Enables adjustment of FOCUS BRIGHTNESS ADJUST etc 9 Control Dial Using the Control Dial for Recording A p 45 10M Power Button 0 Press and hold to turn the power on off while ...

Page 123: ...er A p 54 9 3D DISPLAY WARNING 3D mode only 3D DISPLAY WARNING 3D mode only A p 115 10Recording Mode Taking Videos in Intelligent Auto Mode A p 26 Manual Recording A p 33 11FOCUS ASSIST Using Focus Assist A p 37 12TOUCH PRIORITY AE AF Capturing Subjects Clearly TOUCH PRIORITY AE AF A p 47 13Zoom ZOOM 2D mode only A p 94 14Monitor Backlight MONITOR BRIGHTNESS A p 110 15FOCUS Adjusting Focus Manuall...

Page 124: ...WIND CUT A p 91 8 Time Lapse Recording Counter Recording at Intervals TIME LAPSE RECORDING A p 50 9 Remaining Recording Time Remaining Recording Time Battery Power A p 54 10Scene Counter 11MIC LEVEL MIC LEVEL A p 96 Snapshot 9999 1 2 3 4 5 6 7 1 Still Image Mode A B Video Still Image Button A p 122 2 IMAGE SIZE IMAGE SIZE A p 104 3 Continuous Shooting SHUTTER MODE A p 102 CONT SHOOTING SPEED A p 1...

Page 125: ...with an icon Time Lapse Setting A p 51 9 x v Color 2D mode only x v Color 2D mode only A p 95 10Output with 1080p HDMI OUTPUT A p 116 11Parallax Adjustment 3D mode only Adjusting Parallax During Playback A p 62 12Scene Counter Still Image Playback 2011 10 10 10 00 100 0001 1 23 4 5 6 8 7 9 1 Still Image Mode A B Video Still Image Button A p 122 2 Operation Indicator Playing Back Still Images A p 6...

Page 126: ... take some time to resume recording Turn off this unit wait for a while and turn it on again This unit stops automatically to protect the circuit when the temperature rises The continuous shooting speed of still images is slow The continuous shooting speed will drop if this function is used repeatedly Continuous shooting speed may drop depending on the SD card or under certain recording conditions...

Page 127: ...R FILE in the menu Video files that have damaged management information can be played back Playing a Video with Defective Management Information A p 59 No date time display Recording date and time will not be displayed when playing back a disc that contains videos recorded in 3D mode When playing back a disc created in DVD Video format no information such as date and time will be displayed Images ...

Page 128: ...backlight compensation when the background is bright and the subject is dark Setting Backlight Compensation A p 42 Use NIGHTALIVE in SCENE SELECT Scene Selection A p 35 Use GAIN UP in the menu GAIN UP A p 90 Set BRIGHTNESS ADJUST in the recording menu to the side Adjusting Brightness A p 38 The recorded subject is too bright Set the backlight compensation to OFF if it is being used Setting Backlig...

Page 129: ... work properly and the TV does not work in conjunction with this unit TVs may operate differently depending on the specifications even if they are HDMI CEC compliant Therefore the HDMI CEC functions of this unit cannot be guaranteed to operate in combination with all the TVs In such cases set HDMI CONTROL to OFF Operating in Conjunction with TV via HDMI A p 67 Error Message CHECK LENS COVER Open t...

Page 130: ...M or FORMAT SD CARD of the COMMON menu All data on the built in memory or SD card will be deleted NUMBER OF FOLDERS OVERFLOW A Move the files or folders to a PC or other device Back up your files B Select FILE MANAGEMENT NO in FORMAT BUILT IN MEM or FORMAT SD CARD of the COMMON menu All data on the built in memory or SD card will be deleted FILE QUANTITY LIMIT EXCEEDED A Move the files or folders ...

Page 131: ...he body with it and then use a clean cloth to remove the detergent Caution 0 Do not use benzene or thinner Doing so may cause damage to the unit 0 When using a chemical cloth or cleaner be sure to observe the warning labels and instructions of the product 0 Do not leave the device in contact with rubber or plastic products for a long time Lens LCD Monitor 0 Use a lens blower commercially available...

Page 132: ...it Approx 975 g 2 2 lbs including supplied battery pack Operating environment Allowable operating temperature 0 C to 40 C 32 F to 104 F Allowable storage temperature 20 C to 50 C 4 F to 122 F Allowable relative humidity 35 to 80 Image pickup device 1 4 1 3 320 000 pixels progressive CMOS x2 Recording area Video 0 3D Mode 2 360 000 pixels when DIS is set to OFF 2 070 000 pixels when DIS is set to O...

Page 133: ...s of Usable SD Card A p 11 Clock battery Rechargeable battery Connectors Item Details HDMI output HDMI Mini Connector x v Color compatible AV output connector Video output 1 0 V p p 75 Ω Audio output 300 mV rms 1 KΩ USB Connector Mini USB Type B USB 2 0 compliant Headphones output Φ3 5 mm minijack Stereo Analog output Microphone input Φ3 5 mm minijack Stereo Analog input Plug in power compliant Vi...

Page 134: ...d quality Audio 48 kHz 192 kbps Max 192 kbps Average 128 kbps o 2D Mode Item Details Recording Playback format AVCHD standard Video MPEG 4 AVC H 264 Audio Dolby Digital 2ch Extension MTS Signal system Digital high definition system 1080 60i x 2 or Digital high definition system 1080 50i x 2 Image quality Video UXP 1920 x 1080 pixels Average Approximate 24 Mbps XP 1920 x 1080 pixels Average Approxi...

Page 135: ... 240 V 50 Hz 60 Hz Output DC 11 V 1 0 A Allowable operating temperature 0 C to 40 C 32 F to 104 F 10 C to 35 C 50 F to 95 F during charging Dimensions mm 78 x 34 x 46 3 1 8 x 1 3 8 x 1 13 16 W x H x D excluding cord and AC plug Mass Approx 100 g 0 22 lbs AC Adapter AP V20M Item Details Power supply AC 110 V to 240 V 50 Hz 60 Hz Output DC 11 V 1 0 A Allowable operating temperature 0 C to 40 C 32 F ...

Page 136: ...x 1 1 4 x 3 15 16 W x H x D Mass Approx 120 g 0 27 lbs Remote Control RM V760U Item Details Power supply DC 3 V button battery CR2025 Battery life Approx 1 year depending on frequency of use Operating distance Approx 5 m facing up Allowable operating temperature 0 C to 40 C 32 F to 104 F Dimensions mm 32 5 x 15 6 x 68 1 5 16 x 5 8 x 2 3 4 W x H x D Mass Approx 16 g 0 04 lbs including battery pack ...

Page 137: ... SETTING 96 MONITOR BRIGHTNESS 110 Move 78 MP4 MVC 23 MPF Multi Picture Format 25 O Operation Buttons 9 OPERATION SOUND 112 Optical Zoom 28 P Playback Mode 57 Playback Other File 59 Power Button 122 Protect 72 Q QUICK RESTART 113 R REC MEDIA FOR IMAGE 111 REC MEDIA FOR VIDEO 111 Recordable Time Number of Images 54 Recording Mode 123 Recording Button 27 Recording Playback Mode Button 57 Remaining R...

Page 138: ...0711HOH SW VM C1KW 2011 Victor Company of Japan Limited ...

Reviews: