


EN
65
3
Click the Title bar in the JLIP VIDEO
PRODUCER window and activate the
window.
4
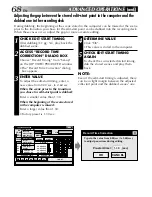
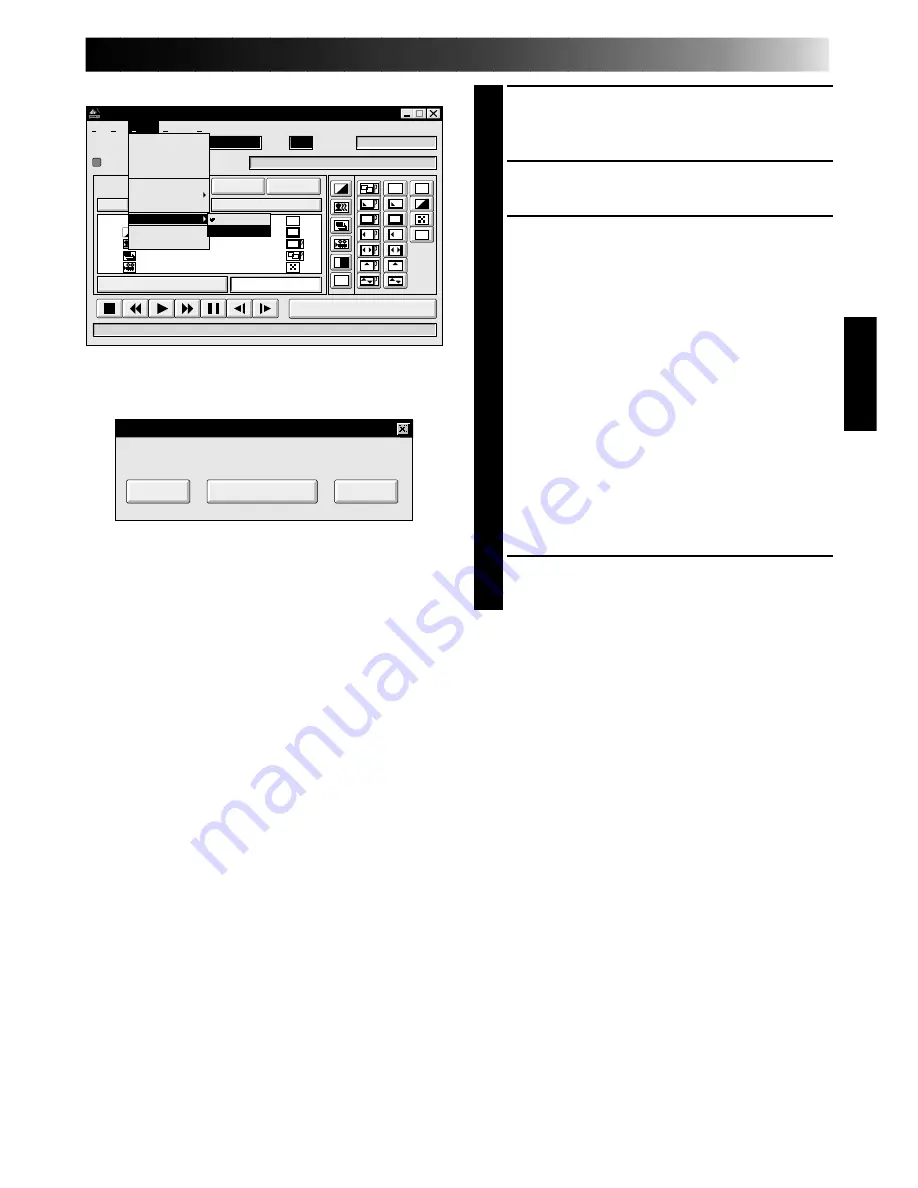
Select “Set-up” — “Function Set” —
“Auto Capture”.
5
Click “START”.
•The captured video data set first is
searched and stored in the video
printer.
•When the data has been stored, the
message “Image has been captured by
printer.” appears.
•If the number of scenes was set to
“OFF“, or “4 or 16” in step 2 and then
to “SAME”, you can start printing
simply by clicking “PRINT”.
•If the number of scenes was set to “4 or
16” in step 2 and then to “SELECTED”,
click “NEXT SCENE”. The next scene is
automatically searched and stored in
the video printer.
6
Click “PRINT” to start printing.
NOTES:
To print only the cut-in scene on the
edited tape
1
Perform editing (refer to pages 52 through
54).
2
Print (follow steps 1 through 5 above).
●
Select “Auto Capture” in step 4.
●
Click “START” in step 5. The cut-in
point of Scene No. 1 is automatically
searched and stored in the video printer.
●
You cannot start storing from Scene No.
2 or subsequent scenes.
●
Even if VCR is in Stop mode, clicking
“START” automatically starts playback
to search the cut-in point of Scene No.
1.
●
If you want to print a particular scene
only, click “SCENE” in step 5.
JLIP VIDEO PRODUCER
FILE
POWER
PROGRAM PLAYBACK
COUNTER
Drop
MEMO
ID
SCENE
CUT IN
CUT OUT
SCENE
ELAPSED TIME
00:04:57:17F
IN/OUT
OFF
ON
travel
06
File
Set-up
Help
Window
Edit
START
B
W
EC
TC
BF
WF
B
W
01
02
03
04
00:05:00:25
00:06:10:26
00:07:33:29
00:08:51:05
00:06:04:16
00:07:30:15
00:08:45:15
00:10:13:26
BF
Set-up
ID Change
Device Change
Name Change
Recorder Select
Record Timing
Pre-roll
Counter Reset
Function Set
Close Selial
Initialize
Edit Tape
Auto-Capture
Auto-Capture
Image has been captured by printer.
NEXT SCENE…
CANCEL
Summary of Contents for GV-DS2
Page 44: ...44EN MEMO ...
Page 74: ......


