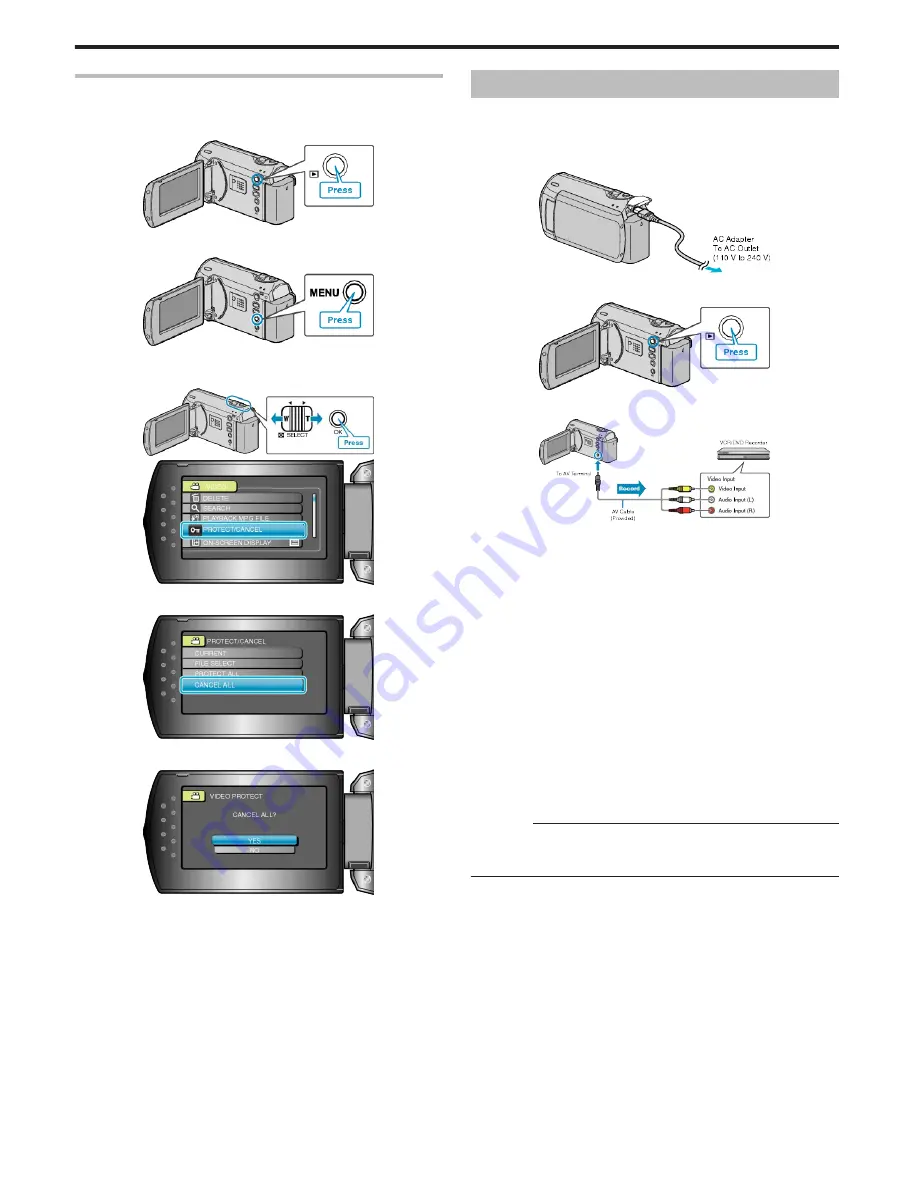
Releasing Protection of All Files
Releases protection of all files.
1
Select the playback mode.
.
2
Press MENU to display the menu.
.
3
Select “PROTECT/CANCEL” with the ZOOM/SELECT lever and press
OK.
.
.
4
Select “CANCEL ALL” and press OK.
.
5
Select “YES” and press OK.
.
●
After setting, press OK.
Dubbing Files to a DVD Recorder or VCR
You can dub videos by connecting to a DVD recorder or VCR.
●
Refer also to the instruction manuals of the TV, DVD recorder, VCR,
etc.
1
Connect the AC adapter to this unit.
.
2
Open the LCD monitor and select the playback mode.
.
3
Connect to a VCR/DVD recorder.
.
4
Prepare the TV/VCR for recording.
●
Switch to a compatible external input.
●
Insert a DVD-R or video tape.
5
Prepare this unit for playback.
●
Set “VIDEO OUTPUT” in the connection settings menu to the aspect
ratio (4:3 or 16:9) of the connecting TV.
"VIDEO OUTPUT"
(
A
P.60
)
●
To include the date during dubbing, set “DISPLAY ON TV” in the con-
nection settings menu to “ON”.
Set “ON-SCREEN DISPLAY” in the playback menu to “DISPLAY DATE
ONLY”.
"DISPLAY ON TV"
(
A
P.60
)
6
Start recording.
●
Start playback on this unit and press the record button on the VCR/
DVD recorder.
"Playing Back Videos"
(
A
P.31
)
●
After playback is complete, stop the recording.
CAUTION:
●
Dubbing cannot be performed by connecting this unit to a Blu-ray re-
corder with a USB cable.
Connect and dub using the supplied AV cable.
Editing
38


