


.
0
Tap ∧ or ∨ to move upward or downward for more selection.
0
Tap
L
to exit the menu.
0
Tap
J
to return to the previous screen.
3
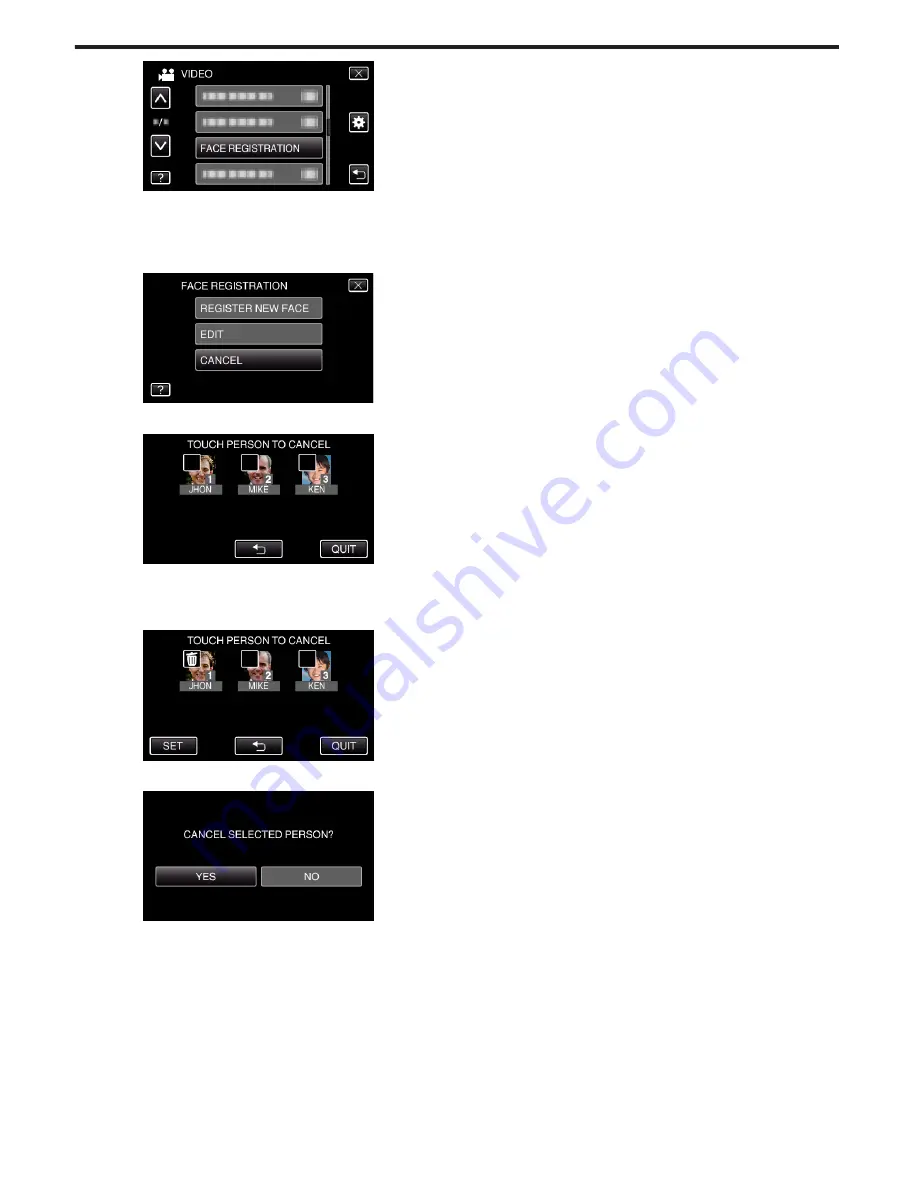
Tap “CANCEL”.
.
4
Tap the person to cancel registration of.
.
0
A
appears on the selected person.
0
To remove
A
from a person, tap on the person again.
5
Tap “SET”.
.
6
Tap “YES”.
.
0
Tap “YES” to delete the face information of the selected person.
0
Tap “NO” to return to the previous screen.
0
Tap “OK” when the deletion complete screen appears.
7
Tap “QUIT”.
Recording
38


