Press “INFO” to quit the calibration process at any time.
The monitor will not be calibrated until process reaches 100%.
FRONT USB port connection
13
Calibration time
*8 Auto Calibration
The monitor has 3DLUT calibration software built-in, and
support the following color sensor probe to directly plug into
front USB port.
When start calibration, the monitor will generate standard
colors and the color sensor will read the colors one by one
and upload result to the monitor by USB connection.
The monitor will comparing the generated colors and sensor
read colors, to work out 3DLUT cube and calibrate itself
automatically.
*10 Start Calibration
Steps:
(1) Place the monitor into a dark room. Switch on the monitor.
(2) Plug the color sensor (X-rite i1 or Jeti Specbos 1211) into
front USB port of the monitor.
(3) Enter Auto Calibration - Probe Select to select the corrent
used color sensor probe.
(4) Enter Auto Calibration - Type to select quick mode or
precise mode.
*11 Measure
The monitor has been calibrated in factory. And may need to
be re-calibrated after a period of time.
Before re-calibrated, the measure function can check the
current color to compare with the last time calibrated color,
to decide if the monitor need to be re-calibrated.
Connector with the sensor probe and place the sensor probe
onto the right position like calibration step.
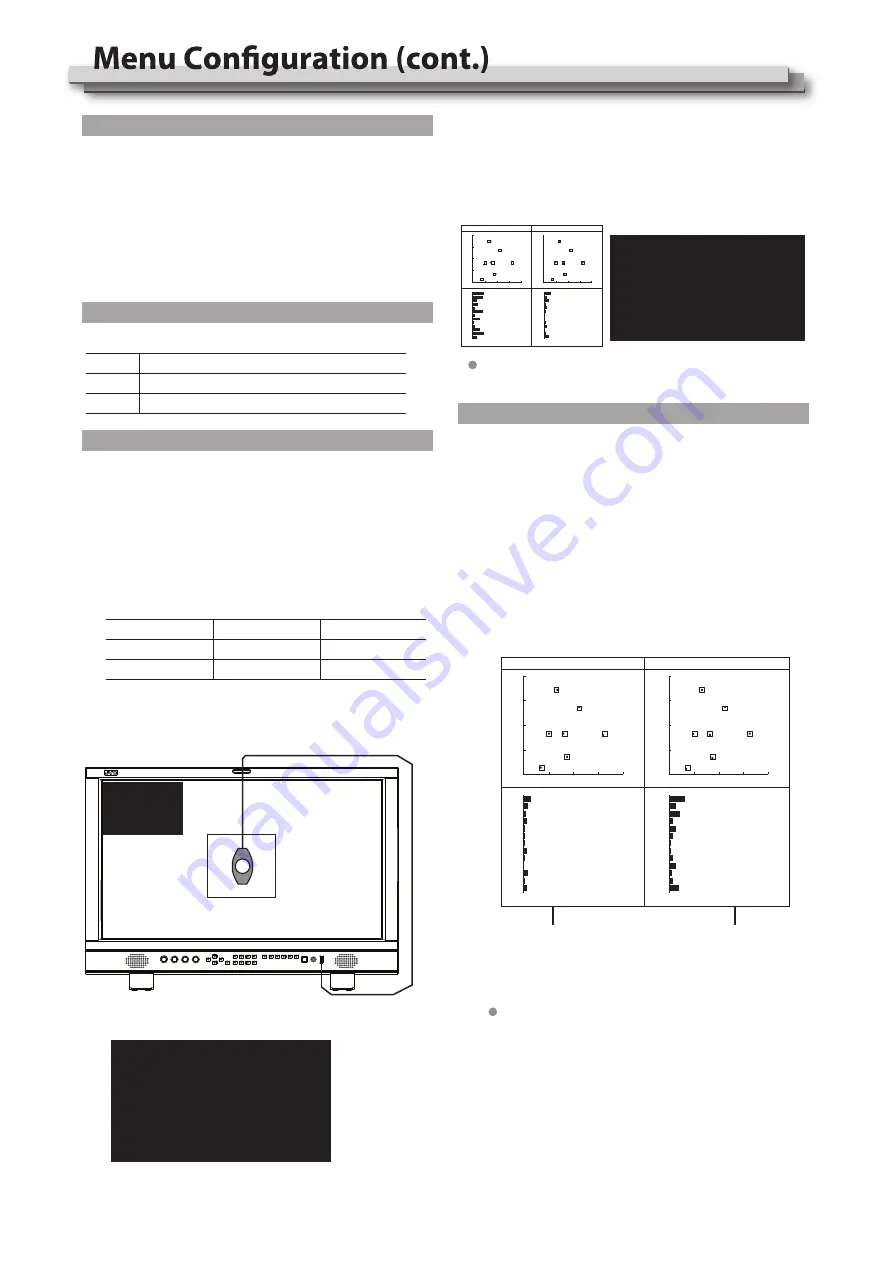
Enter Auto Calibration - Measure.
within 30 seconds. And display the result as:
(5) Enter Auto Calibration - Start Calibration, and the monitor
will display information and probe position mark.
(6) Select “YES”, the auto calibration will start. The monitor will
generate different color patterns one by one, and display the
calibration progress in percentage.
(7) After the calibration, the “Before Calibration” and “After
Calibration” chart pops up in the center of the screen.
i1 DISPLAY E0DIS3-DC0E (JVC dedicated version)
X-rite
Specbos 1211
JETI
Brand
Model
15 min
X-rite i1
45 min
30 min
90 min
JETI Specbos 1211
Sensor probe
Quick mode
Precise mode
*9 Probe Select
The monitor support the following probe models:
Auto Calibration
Please make sure the monitor is in
dark room, and the sensor probe is
put in the center marker and close
to the screen.
Select MENU to start!
MENU: OK INFO: Quit
Auto Calibration
Progress 37%
Please wait...
Select INFO to Cancel!
INFO:Quit
The color chart can be switched on/off at:
Menu - Tool & Information - Color Checker - ON/OFF.
R
R75
Mg
Mg75
B
B75
Cy
Cy75
G
G75
YI
YI75
W
Before Calibration
After Calibration
R
R75
Mg
Mg75
B
B75
Cy
Cy75
G
G75
YI
YI75
W
R
R75
Mg
Mg75
B
B75
Cy
Cy75
G
G75
YI
YI75
W
Last Calibration
New Measured
R
R75
Mg
Mg75
B
B75
Cy
Cy75
G
G75
YI
YI75
W
CIE and Delta E
result of last calibration
CIE and Delta E
result of new measured
The monitor will generate several colors and finish measure
Auto Calibration
Please make sure the monitor is in
dark room, and the sensor probe is
put in the center marker and close
to the screen.
Select MENU to start!
MENU:OK INFO:Quit


