26
Basic Operations
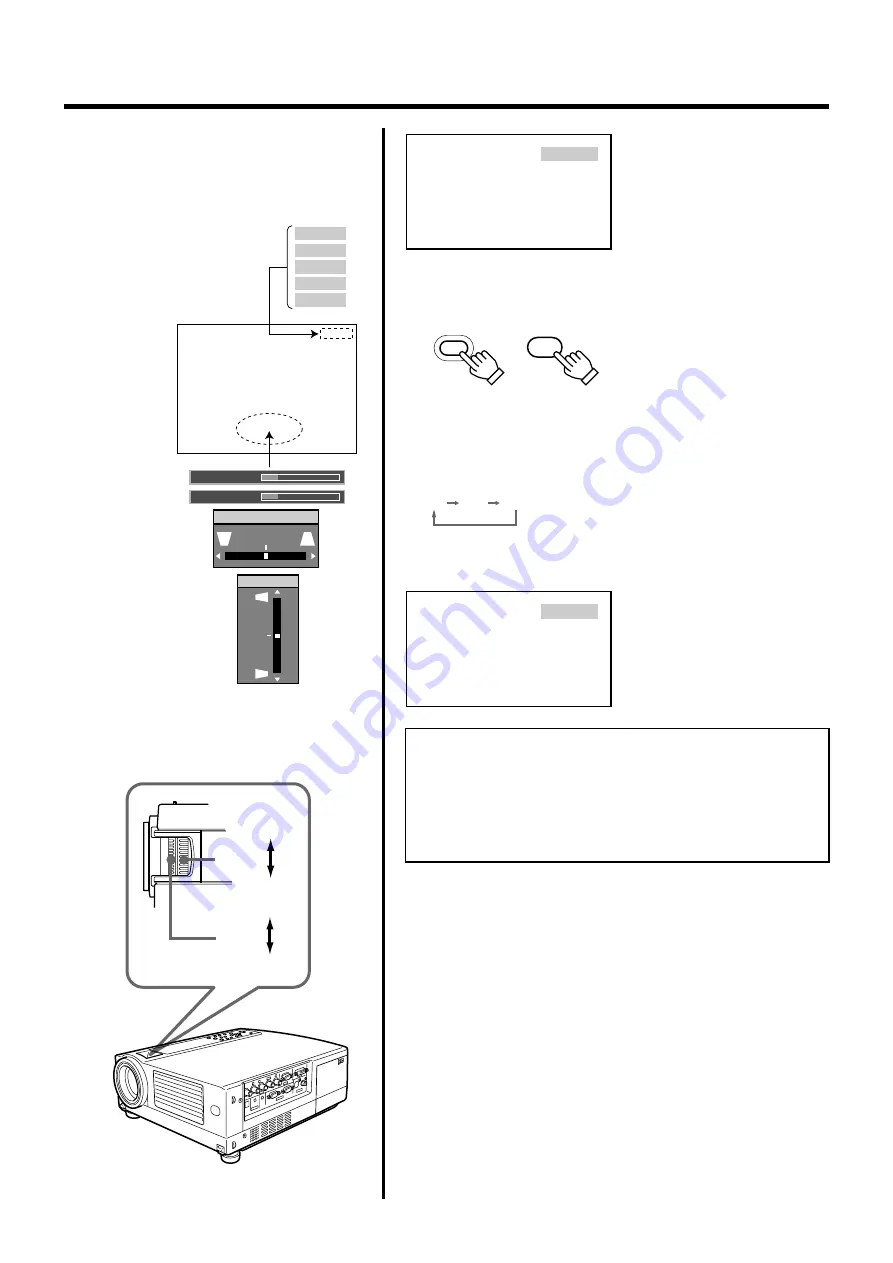
Display using the direct buttons
The direct buttons enable direct switching and op-
eration without having to go through the menu.
Input mode can be selected
by pressing the [PC] button or
the [VIDEO] button.
When the [DIGITAL ZOOM], [VOLUME], [V-KEY-
STONE] or [H-KEYSTONE] buttons are pressed,
the level bar of the function is displayed.
PC1
When “Line display” (
☞
page 39) is set
to “5sec” : After changing an input , the
new selection will appear on the screen
for about 5 seconds.
To select a computer or other devices connected to [PC1],
[PC2] or [PC3]: Press [PC]
• Upon pressing the button, the input mode changes as follows.
When “Line display” (
☞
page 39) is set
to “5sec”: After changing an input, the
new selection will appear on the screen
for about 5 seconds.
Notes
• Sound is formed from sound signals connected to the [AUDIO IN]
terminal.
• When no image is input to the selected input terminal, the mes-
sage “No Input” is displayed on the screen. (
☞
page 53)
• When the [PC2] input terminal is used, “PC2(BNC)” must be se-
lected from the “Options” item in the main menu. (
☞
page 39)
3.
Adjusting the Zoom Ring (the screen size)
To enlarge the screen size
: Turn the zoom ring towards the
‘Wide side’
To reduce the screen size
: Turn the zoom ring towards ‘Tele
side’
4.
Adjusting the Focus Ring (Focus)
To focus on nearer points
: Turn the focus ring towards the
‘Near side’
To focus on farther points
: Turn the focus ring towards the
‘Far side’
PC 1
PC 2
PC 3
Y/C
VIDEO
Audio-Vol
12
Digital zoom x1.2
Vert.keystone
0
Horiz.Keystone
0
3.
4.
VIDEO
PC
PC
PC1
PC2
PC3
[PC1]: Projects image from [PC1] input terminal on
the right hand side of the projector.
[PC2]: Projects image from [PC2] input terminal on
the right hand side of the projector
[PC3]: Projects image from [PC3] input terminal on
the right hand side of the projector.
Screen display
Screen display
‘Tele side’
‘Wide side’
‘Near side’
‘Far side’
Remote
control unit
Projector:
Control panel


