background image

42

English

6.

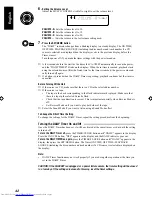
Setting the Volume Level.

Adjust the MULTI CONTROL stick left or right to set the volume level.

VOLUME - A:

 Sets the volume level to 10.

VOLUME - B:

 Sets the volume level to 15.

VOLUME - C:

 Sets the volume level to 20.

VOLUME - - :

 Sets the volume to the last volume setting used.

7.

Press the SET/DEMO button.

The “DAILY” indicator changes from a blinking display to a steady display. The ON TIME,
OFF TIME, PLAYBACK SOURCE (including the disc number and track number if a CD
source is selected) are displayed then the display reverts to the previous display, before the
Timer was set.
Turn the power off if you made the timer settings with the power turned on.

A few seconds before the start for the timer, the CA-V808T automatically turns on the power,
and the “DAILY TIMER” blinks on the display. When the set time is reached, playback starts
using the selected source. After the finish time for the timer is reached, the power is automati-
cally turned off again.

If a button is pressed when the DAILY Timer is operating, playback continues but the timer is
cancelled.

Before Turning Off the Unit

If the source is a CD, make sure that there is a CD in the selected disc number.

If the source is a tape:

The tape in the deck corresponding to the Deck indicator mark is played. Make sure that
there is a tape in the selected Cassette Deck.

Check that the tape direction is correct. This is important especially when Reverse Mode is
off.

Set Reverse Mode on if you want to play both sides of the tape.

Select the Sound Mode if you want to listen using a Sound Mode effect.

To Change the DAILY Timer Setting

To change the settings for the DAILY Timer, repeat the setting procedure from the beginning.

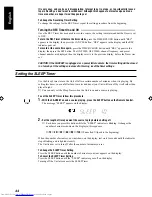
Turning the DAILY Timer On and Off —————————————————

Once the DAILY Timer has been set, it will be activated at the same time every day until the setting
is turned off.

To turn the DAILY Timer off,


press the TIMER/CLOCK button until “DAILY” appears in the display.

Press the CANCEL button, “OFF” appears in the display and the DAILY indicator goes out.

To turn the DAILY TIMER on again,

 press the TIMER/CLOCK button until “DAILY” appears in the

display, then press the SET/DEMO button. The Timer ON TIME, OFF TIME, PLAYBACK
SOURCE (including the disc number and track number if a CD source is selected) are displayed on
the display.

Note:

DAILY Timer function may not work properly if you are doing other operation at the time you
set in the DAILY Timer.

CAUTION: If the CA-V808T is unplugged, or a power failure occurs, the timer setting will be erased
in a few days. If the settings are erased in this way, reset the timer settings.

SET

/

DAILY

Summary of Contents for CA-V808T

Page 1: ...COMPONENT SYSTEM 8 MPX V REPLACE V MASKING For Customer Use Enter below the Model No and Serial No which are located either on the rear bottom or side of the cabinet Retain this information for future reference Model No Serial No INSTRUCTIONS ...

Page 2: ... remova parafusos e tampas ou desmonte a caixa 2 Não exponha este aparelho à chuva nem à umidade IMPORTANT for the U K DO NOT cut off the mains plug from this equipment If the plug fitted is not suitable for the power points in your home or the cable is too short to reach a power point then obtain an appropriate safety approved extension lead or consult your dealer BE SUREto replace the fuse only ...

Page 3: ...el interior hay radiación láser invisible Evite el contacto directo con el haz 3 PRECAUCIÓN No abra la tapa superior En el interior de la unidad no existen piezas reparables por el usuario deje todo servicio técnico en manos de personal calificado 1 PRODUTO LASER CLASSE 1 2 PERIGO Olaseremiteumarediaçãoinvisívelqueéperigosa caso o aparelho esteja aberto e a trava inoperante ou danificada Evite exp...

Page 4: ...No ponga nada delante deje el espacio libre 2 Laterales parte superior parte trasera No se debería colocar nada en las áreas y las distancias que se detallan a continuación 3 Parte inferior Coloque el aparato sobre una superficie recta Debe haber buena circulación de aire para ello coloque el aparato sobre una base a una altura mínima de 10 cm Precaução Ventilação adequada Para evitar riscos de ch...

Page 5: ... sing along not only with video CDs for Karaoke but also with conventional tapes and audio CDs by using the voice masking system With an optional microphone you can replace the lead singer s voice on your favorite songs with your own Digital Echo applied to your voice through the microphone gives you a professional sound How This Manual Is Organized In this manual we have incorporated some special...

Page 6: ... Basics of Using the Video CD Player Continuous Play 21 To Insert Discs 21 To Play a Disc 22 To Select a Disc Track or Passage within a Track 22 To Select a Track 23 To Select Passage within a Track 23 Locating a Track with the Remote Control Directly 23 Programming the Playing Order of the Tracks 23 To Check the Program 25 To Modify the Program 25 Random Play 25 Repeating a Track or the Discs 26 ...

Page 7: ...n Discs you can t play back Do not play back CD ROMs or DVD disc on this equipment Doing so may generate a noise which can damage your speakers Set the VOLTAGE SELECTOR Switch To avoid damaging the CA V808T set the voltage before plugging in the Unit Set the correct voltage for your area with the VOLTAGE SELECTOR switch on the back panel of the CA V808T Use a screwdriver to rotate the selector so ...

Page 8: ...ire Using an FM 75 Ohm Antenna Wire Not Supplied Before attaching a 75 ohm coaxial lead the kind with a round wire going to an outside antenna disconnect the supplied FM Wire Antenna CAUTION To avoid noise keep antennas away from metallic parts of the CA V808T connecting cord and the AC power cord Using the Remote Control The Remote Control makes it easy to use many of the functions of the CA V808...

Page 9: ... CA V808T Note Even when connecting an outside AM antenna keep the indoor AM loop connected AM Loop Antenna Turn the loop until you have the best reception Snap the tabs on the loop into the slots of the base to attach the AM Loop 1 2 3 If reception is poor connect the outside antenna AM antenna wire Not supplied CAUTION Make all connections before plugging the Unit into an AC power outlet Connect...

Page 10: ...o video input TV ANTENNA FM 75Ω AM LOOP FM GND GND AM EXT STEREO RECEIVER MODEL NO CA V808T AC 110 127 220 230 240V 50 60Hz 100W Connect the video input jack on the TV and the VIDEO OUT jack using the video cord optional Connecting a VCR Connect a VCR to the VCR terminal RIGHT LEFT VCR IN PLAY OUT REC AUDIO IN AUDIO OUT Now you can plug the AC power cord into the wall outlet and your CA V808T is a...

Page 11: ...laying CDs turns on the radio plays a tape etc with a single press of the play button for that function What One Touch Operation does for you is to turn the power on then start the function you have specified If the Unit is not ready such as no CD or tape in place the Unit still powers on so you can insert a CD or tape How One Touch Operation works in each case is explained in the section dealing ...

Page 12: ... turned off called Standby Mode To switch off the Unit completely unplug the AC power cord from the AC outlet When you unplug theAC power cord the clock will be reset to 0 00 immediately and preset Tuner stations will be erased after a few days STANDBY STANDBY When the CA V808T is being used the display shows other items as well However we have only shown the items described in this section Displa...

Page 13: ...vel Sound Modes The CA V808T has some preset sound effects that give you control of the way your music sounds so you can tailor it for your room and for the quality of the source We can give you some idea of how each one affects the music but the only way to really tell is to try them yourself You can also create up to three of your own customized S E A Sound Effect Amplifier settings and store th...

Page 14: ...ect a mode The display also displays the frequency for the selected mode Moving the MULTI CONTROL stick to the right Ô Ô Ô Ô ÔD CLUBÔ Ô Ô Ô ÔHALLÔ Ô Ô Ô ÔSTADIUMÔ Ô Ô Ô ÔROCKÔ Ô Ô Ô ÔPOPÔ Ô Ô Ô ÔCLASSICÔ Ô Ô Ô ÔMANUAL 1Ô Ô Ô Ô ÔMANUAL 2 Ô Ô Ô Ô Ô MANUAL 3Ô Ô Ô Ô ÔOFFÔ Ô Ô Ô Ô Moving the MULTI CONTROL stick to the left To cancel Sound mode select OFF Unless sound mode OFF is selected the red perime...

Page 15: ...ick Adjust the level by adjusting the MULTI CONTROL stick up and down The level can be set between 3 and 3 in seven steps Select the tone range by adjusting the MULTI CONTROL stick left and right You can select LOW MID or HIGH tone 4 Press the SET DEMO button MANUAL 1 appears on the display 5 Select the memory number by adjusting the MULTI CONTROL stick left and right You can choose from MANUAL 1 ...

Page 16: ...o the VCR s instruction manual for details on the recording procedure for your VCR You cannot record using SEA mode effects Reinforcing the Bass Sound The richness and fullness of the bass sound is maintained regardless of how low you set the volume You can use this effect only for playback To get the effect press the ACTIVE BASS EX Active Bass Extension button BASS ON appears in the display and t...

Page 17: ...C LEVEL control as you sing into the microphone Important Information on Karaoke Because a radio signal is not as reliable as signals coming from a tape or CD you may not always get satisfactory results using the radio as a source for Karaoke Some tapes and CDs are better sources for Karaoke than others Mono sources are not suitable for Karaoke The lead vocals may not be completely reduced for sou...

Page 18: ...ew the pictures from the Video CD player See how to select the output sounds on page 27 Playing a multiplex sound CD Microphone Mixing When using special Karaoke sources for karaoke use the following procedure 1 Set the MIC LEVEL control to MIN 2 Connect the microphone not supplied by plugging it into the MIC jack on the front panel 3 Start the source CD tape or other equipment 4 Adjust the VOLUME...

Page 19: ...ing the source selection or pressing the SOUND MODE button or SEA CONTROL button Key Control function works while the MPX V REPLACE V MASKING button is lit Vocal Masking You can mask the vocal of the song 1 Press the MPX V REPLACE V MASKING button until V MASKING appears on the display Channel modes are cycled as shown below MPX V REPLACE V MASKING NORMAL Lch MONO Rch MONO REPLACE V MASK left chan...

Page 20: ...NTROL stick to the right To change back to 9 kHz be sure that the Unit is in STANDBY mode Turn on by pressing the POWER button while moving the MULTI CONTROL stick to the left One Touch Radio Just press the FM AM button or the TUNER button on the Remote Control to turn on the Unit and start playing the most recent station tuned in You can switch from any other sound source to the radio by pressing...

Page 21: ... number in the number keys of the Remote Control Example for channel 5 press 5 For channel 15 press 10 then 5 For channel 20 press 10 then 10 For channel 32 press 10 three times then 2 Presetting Stations You can store up to 40 of your favorite radio stations FM and AM in memory giving you quick easy access to the stations Note In some cases test frequencies have been already memorized for the tun...

Page 22: ...d to receive or noisy press the FM MODE button on the Remote Control so that the AUTO indicator goes off in the display Reception improves but there are no stereo effects In this monaural mode noise comes out while tuning in stations since muting is also cancelled To restore the stereo effect press the FM MODE button on the Remote Control so that the AUTO indicator lights up In this stereo mode no...

Page 23: ...ys SLEEP CLOCK SOURCE ON OFF ALL 1 CD REPEAT AUTO SOUND MODE RANDOM PROGRAM TUNED STEREO DAILY REC 1 2 3 4 5 6 7 8 9 10 11 12 14 13 15 16 CH VOL MHz kHz SET CD TUNER Before Using the Video CD Player important Setting TV system The CD player of the CA V808T can play back video CDs or CD graphic discs CD G as well as audio CDs Before enjoying video CDs or CD graphic discs you must select NTSC PAL or...

Page 24: ...AL exclusive TV the image get distorted if the signal doesn t synchronize When you play a NTSC disc in PAL AUTO mode on a Multisystem TV the image may blink for a moment This symptom is caused by the player detecting the format of the disc and not caused by a malfunction of the player DISC DISC DISC Disc indicator Disc marker The CA V808T s Video CD Player has an Automatic Changer with 3 disc tray...

Page 25: ... Basics of Using the Video CD Player Continuous Play You can play the discs continuously in the DISC 1 to DISC 3 trays To Insert Discs 1 Press the 0 0 0 0 0 button on the right of the tray you want to insert the disc into The disc tray slides out automatically 2 Place a CD with its label side up onto the tray ATTENTION To avoid malfunctions when you play a CD please set the CD in the right place a...

Page 26: ... 3 DISC 1 When DISC 1 has finished the Video CD Player selects DISC 2 the disc marker is on and stops When playback starts from DISC 3 the playing order is DISC 3 DISC 1 DISC 2 When DISC 2 has finished the Video CD Player selects DISC 3 the disc marker is on and stops If any of the disc trays are empty the Video CD Player skips that disc tray and continues through the remaining disc trays in the o...

Page 27: ...es the passage you want to hear Note You cannot perform these fast forwards or fast backwards operation with the Remote Control Locating a Track with the Remote Control Directly Using the number keys on the Remote Control allows you to go directly to the beginning of any track 1 Press the DISC button 1 3 for the disc tray containing the track you want to play back Example for the third disc press ...

Page 28: ... order you have programmed them Using the Remote Control 1 Press the PROGRAM RANDOM button on the Unit The message PROGRAM appears in the display and the PROGRAM indicator comes on If you have already created a program the last step of the previous program is displayed The display changes with each press of the PROGRAM RANDOM button as shown below PROGRAM RANDOM Off Continuous Play back to the beg...

Page 29: ... press the 0 button for each disc in the program To exit Program Mode press the PROGRAM RANDOM button twice to change to Continuous Play mode To Check the Program While the Video CD Player is stopped use the 4 PREV or NEXT buttons on the Remote Control to check the contents of the program Each time you press the NEXT button the program contents are shown on the display in the programmed order Pres...

Page 30: ...ly select REPEAT ALL or REPEAT 1 To exit Repeat Mode press the REPEAT button until the Repeat mode indicator on the display goes out Tray Lock Function In order to safely keep the discs in the CD Player the three trays can be electronically locked in a single operation When the electronic lock is on the trays cannot be opened even if the 0 button is pressed This function can only be accessed by us...

Page 31: ...s See also Singing along with Multiplex Karaoke Video CDs or CD Gs on page 14 1 Press the MPX V REPLACE V MASKING button until your desired mode appears on the display Channel modes are cycled as shown below MPX V REPLACE V MASKING NORMAL Lch MONO Rch MONO REPLACE V MASK left channel right channel When playing a CD the modes are cycled as shown below on the television screen NORMAL LCH MONO RCH MO...

Page 32: ...the track Nine 9 different highlights are displayed for one 1 minute If no highlight is chosen in the one 1 minute period the next nine 9 segment highlights will begin While in V INTRO or HIGHLIGHT sometimes image is garbled partially This symptom is caused by noise in the disc itself or incorrect manufacturing it is not caused by a malfunction of the Player Display of Operations Status Holding do...

Page 33: ...pecific menu item from the television screen or monitor MULTI CONTROL stick left PREV right NEXT on the unit 4 PREV NEXT buttons on the Remote Control Move through menu 7 RETURN button on the unit and Remote Control Returns to the menu Operation 1 Press the DISC 1 through 3 or 3 3 3 3 3 SELECT button and then the Player starts up the PBC function PBC is shown in the Display window The main menu PB...

Page 34: ...he screen background automatically becomes dark to pre vent screen burn in while the setting is suspended A selection menu is displayed when you start playing a video CD disc with the Playback Control feature The selection menu shows a list of numbers for selection Some discs may show moving pictures or a divided screen 1 When a list of numbers is displayed selecting a number shows its contents 2 ...

Page 35: ...ing slowly and quickly repeatedly When the CA V808T is being used the display shows other items as well However we have only shown the items described in this section Cassette Deck control buttons The Cassette Deck allows you to play record and dub audio tapes Most tapes are now recorded with the Dolby NR system so first check which type of the Dolby NR system has been used on the tape Only Dolby ...

Page 36: ...the exposed part of the tape down toward the base of the CA V808T If the cassette holder does not open turn the Unit off then back on and press the 0 button again 3 Close the holder gently When both Deck A and Deck B contain a tape the last deck to have a tape inserted is selected To change the selected deck press the DECK A B button When using the Remote Control press the A or B button 4 Press th...

Page 37: ...the blank with noise Long very soft passages or pauses in a selection The scan will detect these as 4 second long blanks If this happens just scan again until you reach the selection you want Other Useful Features of the Cassette Deck Use Reverse Mode to make the tape automatically reverse at the end of a side and start playing the other side Press the REVERSE MODE button to change from Reverse Mo...

Page 38: ...ng made is automatically set correctly so it is not affected by the VOLUME control on the CA V808T Thus during recording you can adjust the sound you are actually listening to without affecting the recording level Two small tabs on the back of the cassette tape one for side A and one for side B can be removed to prevent accidental erasure or rerecording To record on a cassette with the tabs remove...

Page 39: ...er pressing the or button to set the tape direc tion When using Reverse Mode to record both sides of a tape check that the Tape Direction indicator is in the forwards 3 direction If the direction indicator is not in the forwards 3 direction press the button then press the7 button 4 Prepare the source by for example tuning in a radio station loading CDs or tur ning on connected equipment 5 Press th...

Page 40: ...ng earlier on this page 3 Press the CD REC START button CD REC is displayed on the display then the Unit plays the CD and starts recording At the end of the tape the CA V808T automatically goes back to the beginning of the last selection and rerecords it this time gently fading out at the end If you selected Reverse Mode TAPE SIDE B STANDBY scrolls through the display then the reverse side starts ...

Page 41: ...Press the SET DEMO button The selections to be recorded on side B of the tape appear on the display To display the selections that will be recorded on side A of the tape press the SET DEMO button again The Unit switches between side A and side B with each press of the SET DEMO button To check the selections that will be recorded press the 4or buttons on the Remote Control 5 Insert a cassette in De...

Page 42: ... dubbing You can dub tapes simply with just a single button When dubbing tapes make sure that the playback direction of Deck A and Deck B are the same When you want to record both sides of a tape press the REVERSE MODE button to turn Reverse mode on It is preferable that the type of tape Type I or Type II you record from be the same as the type you record onto How to Use the DUBBING Button 1 Inser...

Page 43: ...ck the clock must be right for the timers to work as you expect You can set the clock whether the Unit is on or off Note The clock must be set or the timers cannot be set 1 Press the TIMER CLOCK button The CLOCK indicator and the hour digits blink on the display 2 Set the hour by adjusting the MULTI CONTROL stick left or right Adjust the MULTI CONTROL stick to the right to advance the hour setting...

Page 44: ... to the beginning Note If the clock has not been set even if the TIMER CLOCK button is pressed you cannot select the DAILY Timer 2 Press the TIMER CLOCK button again The display changes to the On Time display 3 Set the time you want the Unit to turn on Set the time by adjusting the MULTI CONTROL stick left or right in the same way you set the time for the clock Press the SET DEMO button to set the...

Page 45: ...ecting a disc the last disc played by the CA V808T will be used 4 Adjust the MULTI CONTROL stick up or down to the select the starting track of the CD You can only select up to 20 tracks 5 Press the SET button If you press the SET DEMO button without selecting a track playback will start from the first track on the CD To use a Cassette Deck as the source 1 Adjust the MULTI CONTROL stick left or ri...

Page 46: ...ape in the deck corresponding to the Deck indicator mark is played Make sure that there is a tape in the selected Cassette Deck Check that the tape direction is correct This is important especially when Reverse Mode is off Set Reverse Mode on if you want to play both sides of the tape Select the Sound Mode if you want to listen using a Sound Mode effect To Change the DAILY Timer Setting To change ...

Page 47: ...he time you want the Unit to be turned off Set the time by adjusting the MULTI CONTROL stick left or right in the same way you set the time for the clock Press the SET DEMO button to set the off time 5 Select the radio station you want to record Set the radio station you want to record by adjusting the MULTI CONTROL stick up or down 6 Press the SET DEMO button The REC indicator changes from a blin...

Page 48: ...he settings are erased in this way reset the timer settings Setting the SLEEP Timer Use the Sleep Timer to turn the Unit off after a certain number of minutes when it is playing By setting this timer you can fall asleep to music and know your Unit will turn off by itself rather than play all night You can only set the Sleep Timer when the Unit is on and a source is playing To set the SLEEP Timer f...

Page 49: ...ut off 10 seconds before the REC Timer is set to turn on and the REC Timer will then take over The SLEEP Timer has the least priority This means that if the SLEEP Timer is set while DAILY Timer is operating the DAILY Timer settings are cancelled However if DAILY Timer is set to come while the SLEEP Timer is operating the SLEEP Timer setting will be cancelled and the Unit will use the settings from...

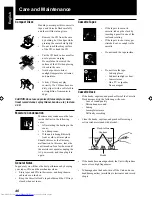
Page 50: ...urned on for a few hours until the moisture evaporates unplug the AC power cord and then plug it in again General Notes In general you will have the best performance by keeping your tapes CDs and the mechanism clean Store tapes and CDs in their cases and keep them in cabinets or on shelves Keep the Cassette Deck s tape holder and the CD trays closed when not in use Cassette Tapes If the tape is lo...

Page 51: ...properly extended and positioned When you pause or advance the pictures manually the pictures are distorted This is not a malfunction The CD is dirty or scratched The path between the Remote Control and the sensor on the Unit is blocked The batteries have lost their charge The main AC power cord is not plugged in The CD is upside down The built in microprocessor has malfunctioned due to external e...

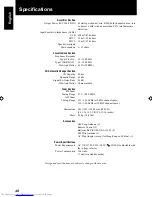
Page 52: ...ty 3 discs Dynamic Range 93 dB Signal To Noise Ratio 96 dB Wow And Flutter Unmeasurable Tuner Section FM Tuner Tuning Range 87 5 108 0 MHz AM Tuner Tuning Range 531 1 602 kHz at 9 kHz channel space 530 1 600 kHz at 10 kHz channel space Dimensions 245 345 350 2 mm W H D 9 11 16 13 5 8 13 13 16 inches Mass 8 5 kg 18 8 lbs Accessories AM Loop Antenna 1 Remote Control 1 Batteries R6P SUM 3 AA 15F 2 FM...

Page 53: ...FT IN PLAY OUT REC 230 240V 127V 220V LINE VOLTS 110V ANTENNA AM LOOP FM FM IMPORTANT for mains AC line BEFORE PLUGGING IN do check that your mains AC line voltage corresponds with the position of the voltage selector switch provided on the outside of this equipment and if different reset the voltage selector switch to prevent from a damage or risk of fire electric shock ...

Reviews: