E-34
RECORDING
–
Connection and setting
–
This chapter explains the connection, setting and operation methods required to use this unit
as a recorder.
This unit cannot be used as an editing system recorder.
Connection
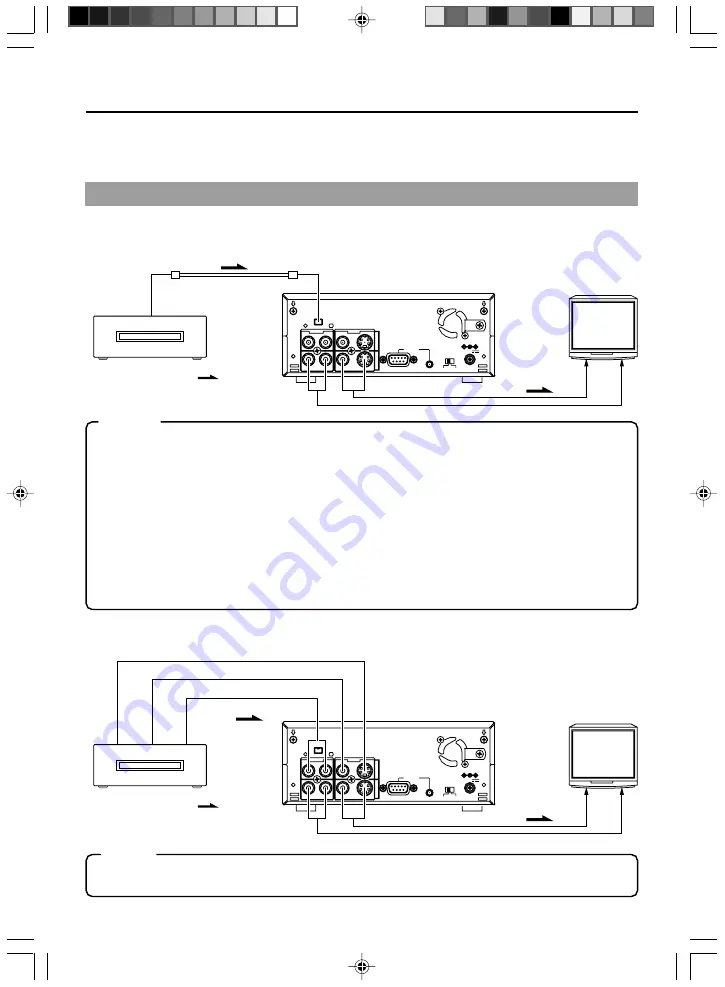
When connected to a video device equipped with a DV terminal
Images can be recorded with almost no deterioration of image quality.
DV IN/OUT
AUDIO
VIDEO
LINE
Y/C
CH 1/3
CH 2/4
IN
OUT
REMOTE
SERIAL
9PIN
NTSC/PAL
NTSC
PAL
DC12V
Player
DV terminal
Separately available
DV cable
Another VTR
Flow of
signal
DV terminal
Recorder
Monitor
This unit is connected to a video device with no DV terminal (analogue input):
Memo
• Turn the power of both devices OFF and connect the DV cable.
• Do not insert incorrectly (in reverse) the DV cable end to DV port of both devices.
• When signals are input from the DV terminal, the sound recording mode of the recorder is the same
as that of the player.
• The Date and time data from the DV terminal will be recorded.
• To record the time code data from the DV terminal, set the TC DUPLICATE item of the TIME CODE
menu to AUTO or NON DROP. (
☞
Page 62)
• For the BR-DV600 player, when the mode is changed from STILL to PLAY, the audio output will be
muted for a while shortly after coming on. Thereafter, it will resume as per normal. (This does not
occur with BR-DV600A.)
• When it is connected to D9VTR (equipped with SA-DV60), exchanging of the date/time information
is not possible.
DV IN/OUT
AUDIO
VIDEO
LINE
Y/C
CH 1/3
CH 2/4
IN
OUT
REMOTE
SERIAL
9PIN
NTSC/PAL
NTSC
PAL
DC12V
Y/C
IN
VIDEO OUT
VIDEO LINE IN
AUDIO
IN
AUDIO
OUT
Y/C
OUT
Player
Another VTR
Flow of
signal
Y/C(S) video cable
Monitor
Video cable
Audio cable
Recorder
Memo
When search pictures or low-quality video signals are input, video and sound output may be tempo-
rarily distorted. Please input stable signals via a TBC, etc.
BR-DV3000_E_p03-49
06.8.24, 1:38 PM
34


